FortiGate Next Generation Firewall
To configure the tunnel in the FortiGate Next Generation Firewall Management Portal:
-
Log in to the FortiGate Next Generation Firewall Management Portal.
-
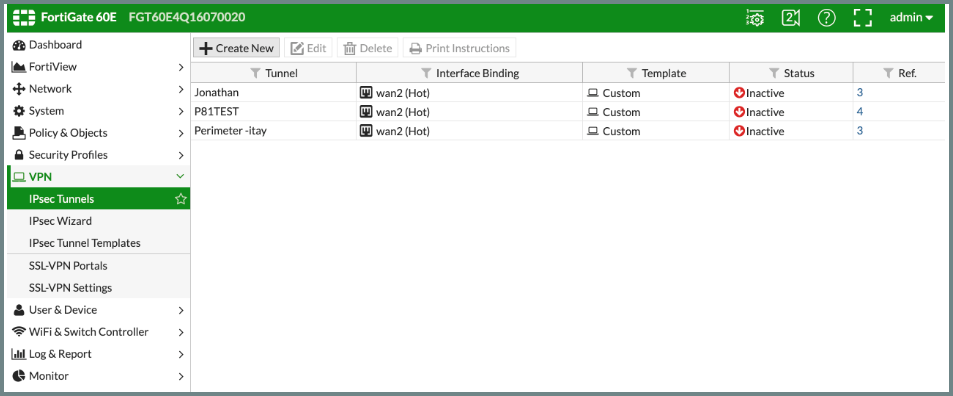
Go to VPN > IPSec Tunnels.
-
Click Create New.
The VPN Creation Wizard window appears.
-
In the Name field, enter a name for the tunnel.
-
Set Template Type to Custom.
-
Click Next.
-
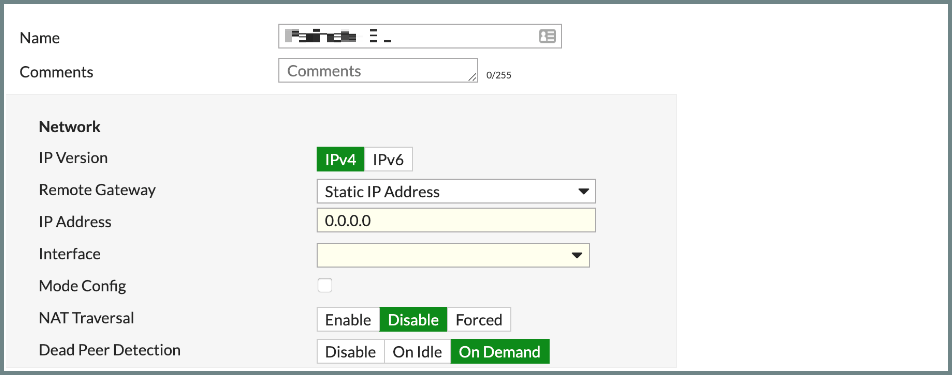
In the Network section:
Field
Enter
IP Version IPv4 Remote Gateway
Static IP Address IP Address Public IP address of the location server. Interface Your WAN interface. Mode Config Clear
NAT Traversal
Disable
Dead Peer Detection
On-Demand

Important - For Enhanced Networks (CV4), set NAT Traversal to Enable. The tunnel does not connect when NAT Traversal is disabled.

Note - For Standard Networks (CV3), enable NAT Traversal only when the device sits behind NAT.
-
In the Authentication section:
Field
Enter
Method Pre-shared key Pre-shared Key
Secret key specified in Configuring the Tunnel in the Check Point SASE Administrator Portal. IKE Version 2 Mode Main (ID Protection). -
In the Phase 1 Proposal section:
Field
Enter
Encryption AES256 Authentication
SHA256 Diffie-Hellman Group 21 Key Lifetime (seconds) 28800 Local ID
Blank
XAUTH
Blank
-
In the Phase 2 Selectors (+Advanced) section:
Field
Enter
Name Check Point SASE Local Address
Your local network subnet Remote Address Check Point SASE network subnet (10.255.0.0/255.255.0.0) Enable Replay Detection Unselect Enable Perfect Forward Secrecy (PFS)
Select
Diffie-Gellman Group
21
Encryption
AES256
Authentication
SHA256
Local Port
Select
remote Port
Select Protocol
Select Key Lifetime
Seconds
Seconds
3600
-
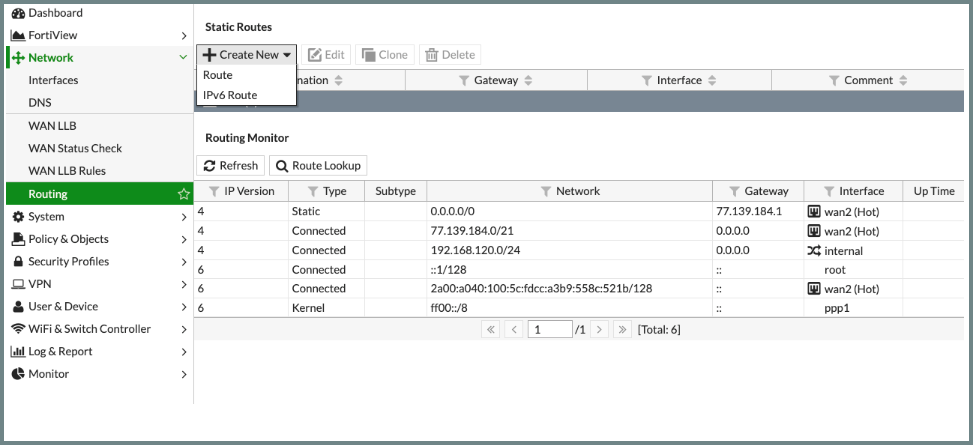
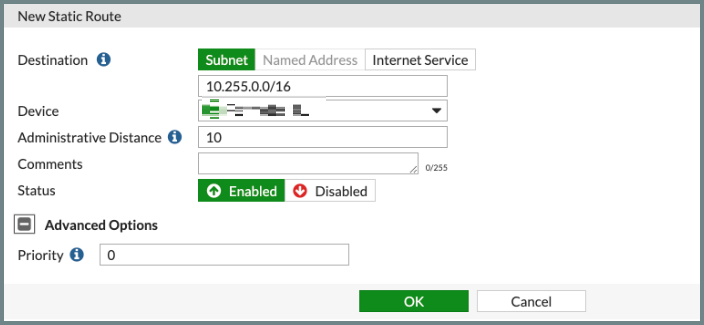
Add static routes from the Check Point SASE subnet (10.256.0.0/16) to the local network and vice versa through the VPN tunnel gateway:
-
Click Network > Routing.
-
Click Create new and select Route.
-
In the Destination field, enter 10.255.0.0/16.
-
From the Device list, select Check Point SASE.
-
Click OK.
-
-
Add firewall rules to allow traffic from the Check Point SASE subnet (10.255.0.0/16) to your local network or services:
-
Go to Policy & Objects > IPv4 Policy.
-
Click Create New and enter these:
Field
Enter
Name Check Point SASE Incoming Interface
Check Point SASE Outgoing Interface Your local network object. Source All Destination
All
Schedule
Always
Service
All
NAT
Disabled
Leave the rest of the fields to default settings.
-
Click OK.
-
-
To verify that the tunnel is up, go to VPN > IPSec Tunnels. If the tunnel is listed in the table, then the tunnel is up.