Barracuda Firewall
Use this procedure to configure a single IPsec Site-to-Site VPN tunnel between a Check Point SASE Gateway and a Barracuda firewall.
Prerequisites
-
Check Point SASE Administrator Portal account.
-
Check Point SASE Agent installed on the device.
-
Administrator account for the Barracuda Management Portal.
Configuring the Tunnel in the Check Point SASE Administrator Portal
-
Access the Check Point SASE Administrator Portal and click Networks.
-
Select the network.
-
For the required gateway, click the
 and click Add Tunnel.
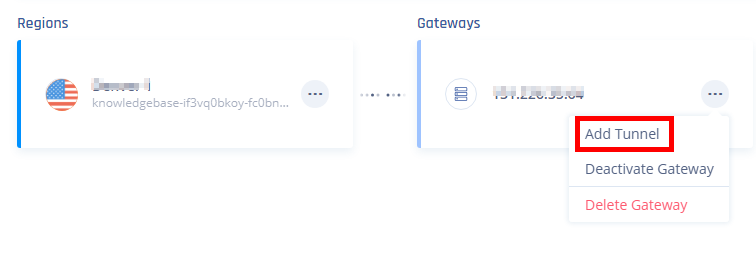
-
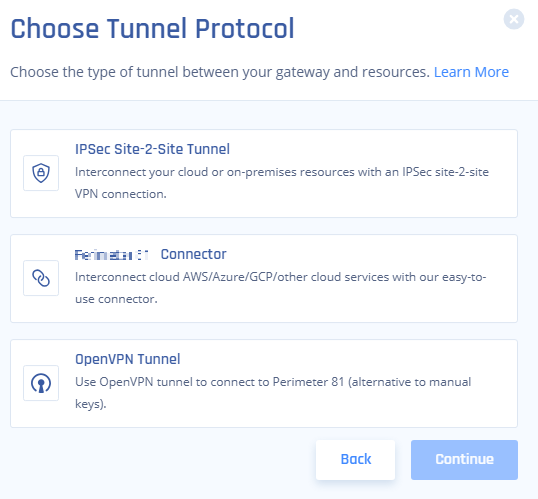
Click IPSec Site-2-Site Tunnel and click Continue.
-
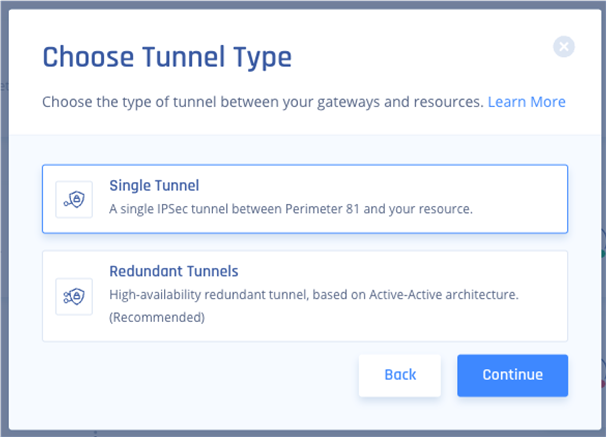
Select Single Tunnel and click Continue.
-
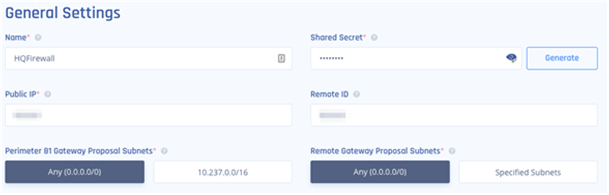
In the General Settings section, enter these values:
Field
Value
Name Tunnel name Shared Secret
Enter a shared secret, or click Generate Public IP Barracuda firewall public WAN IP address Remote ID Barracuda firewall public WAN IP address Check Point SASE Gateway Proposal Subnets Check Point SASE network subnet
Remote Gateway Proposal Subnets
Barracuda internal LAN subnet
-
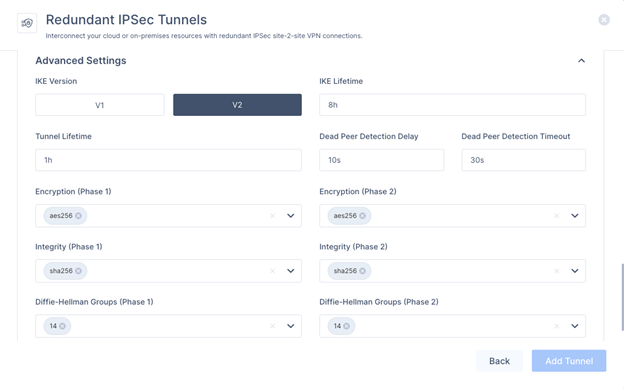
In the Advanced Settings section, specify these:
Field
Value
IKE Version V2 IKE Lifetime
8h Tunnel Lifetime 1h Dead Peer Detection Delay 10s Dead Peer Detection Timeout 30s
Phase 1
Barracuda internal LAN subnet
-
IKE Version - V2
-
IKE Lifetime - 8h
-
Tunnel Lifetime - 1h
-
Dead Peer Detection Delay - 10s
-
Dead Peer Detection Timeout - 30s
-
Phase 1:
-
Encryption (Phase 1) - aes256
-
Integrity (Phase 1) - sha1
-
Key Exchange Method - modp1024
-
-
Phase 2:
-
Encryption (Phase 2) - aes256
-
Integrity(Phase 2) - sha1
-
Key Exchange Method - modp1024
-
-
-
Click Add Tunnel.
Configuring the tunnel in the Barracuda Management Portal
-
Log in to the Barracuda Management Portal with the Administrator account.
-
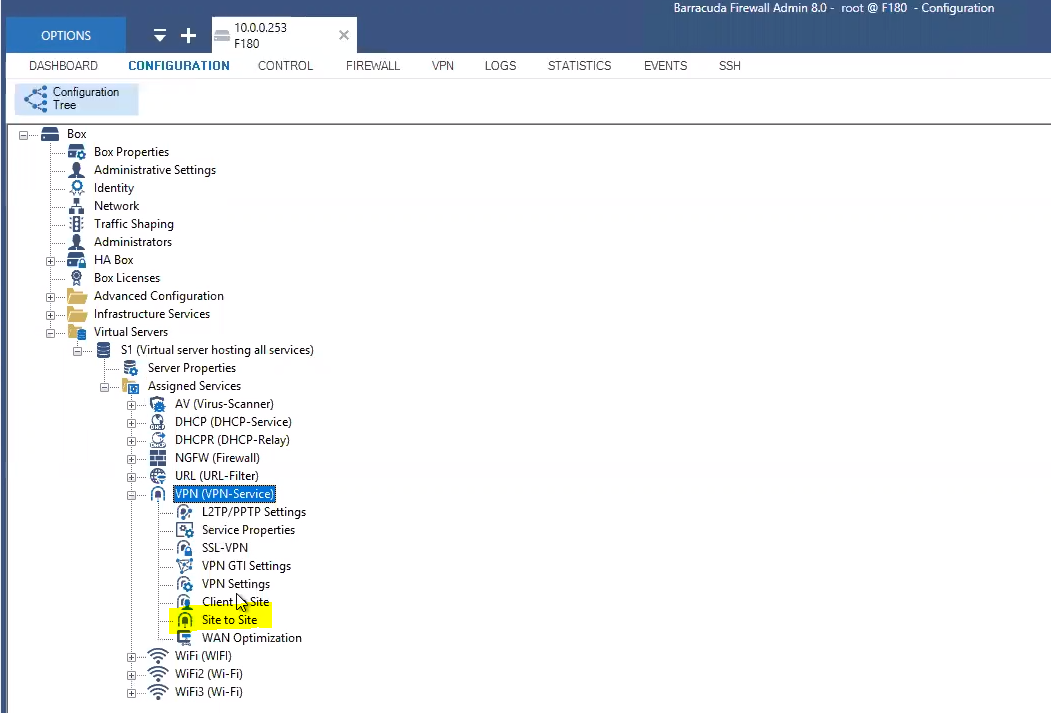
From the top menu, click Configuration > Virtual Servers > Your virtual server > Assigned Services > VPN (VPN-Service) > Site to Site.
-
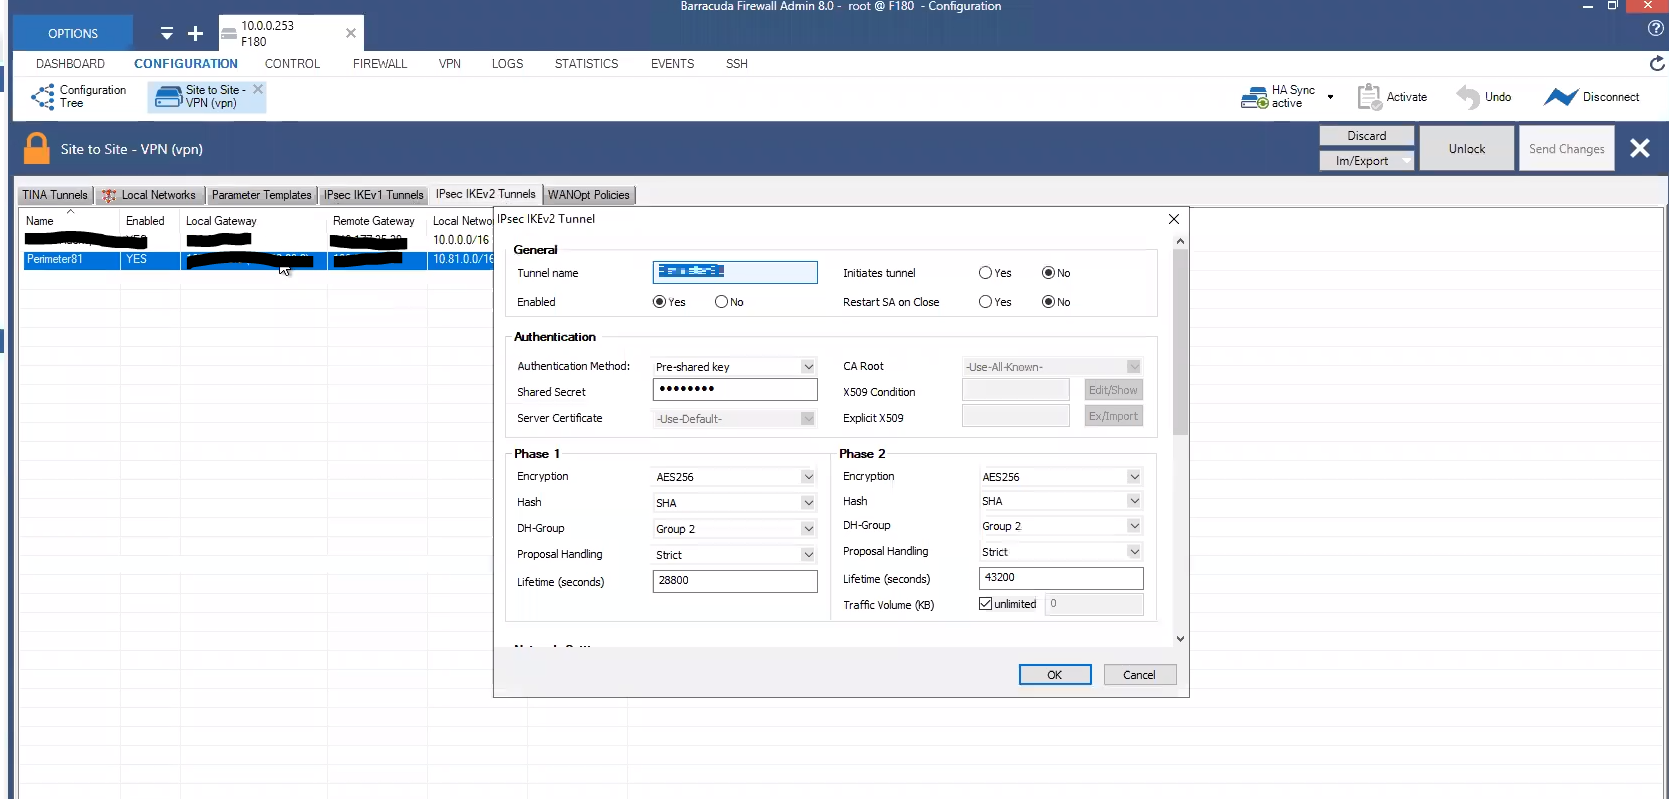
In the IPsec IKEv2 Tunnels tab, create a new tunnel:
-
In the General section, enter a name for the tunnel. Leave the other fields at their default values.
-
In the Authentication section, specify these:
-
Authentication Method list, select Pre-shared key.
-
In the Shared Secret field, enter the same secret key that you specified in step 6 in Configuring the Tunnel in the Check Point SASE Administrator Portal.
-
Leave the rest of fields to default settings.
-
-
In the Phase 1 section:
Field
Enter
Encryption AES256 Hash
SHA Diffie-Hellman Group 2 Proposal Handling Strict Lifetime 28800
-
In the Phase 2 section:
Field
Enter
Encryption AES256 Hash
SHA DH-Group 2 Proposal Handling Strict Lifetime 3600
Traffic Volume (KB)
Unlimited
-
-
Click Configuration > Site to Site VPN (vpn):
-
Create a new site-to-site VPN or edit an existing one.
-
In the IPSec IKEv2 Tunnel selection:

Field
Enter
Endpoint Type IPv4 One VPN Tunnel per Subnet Pair Clear Universal Traffic Selectors Clear Force UDP Encapsulation Clear IKE Reauthentication Select Next Hop Routing 0.0.0.0 Interface Index
0
-
In the Network Local selection:
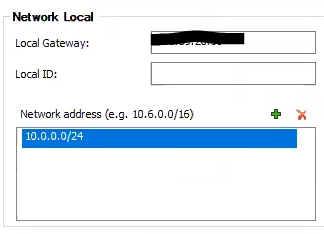
Field
Enter
Local Gateway Barracuda Firewall Public IP address Local ID Barracuda Firewall Public IP address Network address Internal network subnets -
In the Network Remote selection:
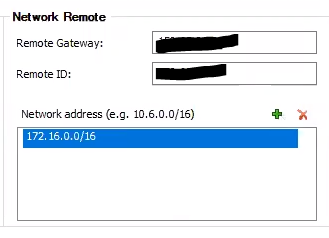
Field
Enter
Remote Gateway Check Point SASE Public IP address Remote ID Check Point SASE Public IP address Network address Check Point SASE network subnets -
In the Dead Peer Detection selection:
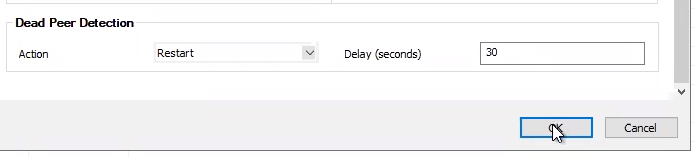
Field
Enter
Action Restart Delay (seconds) 30 -
Click OK.
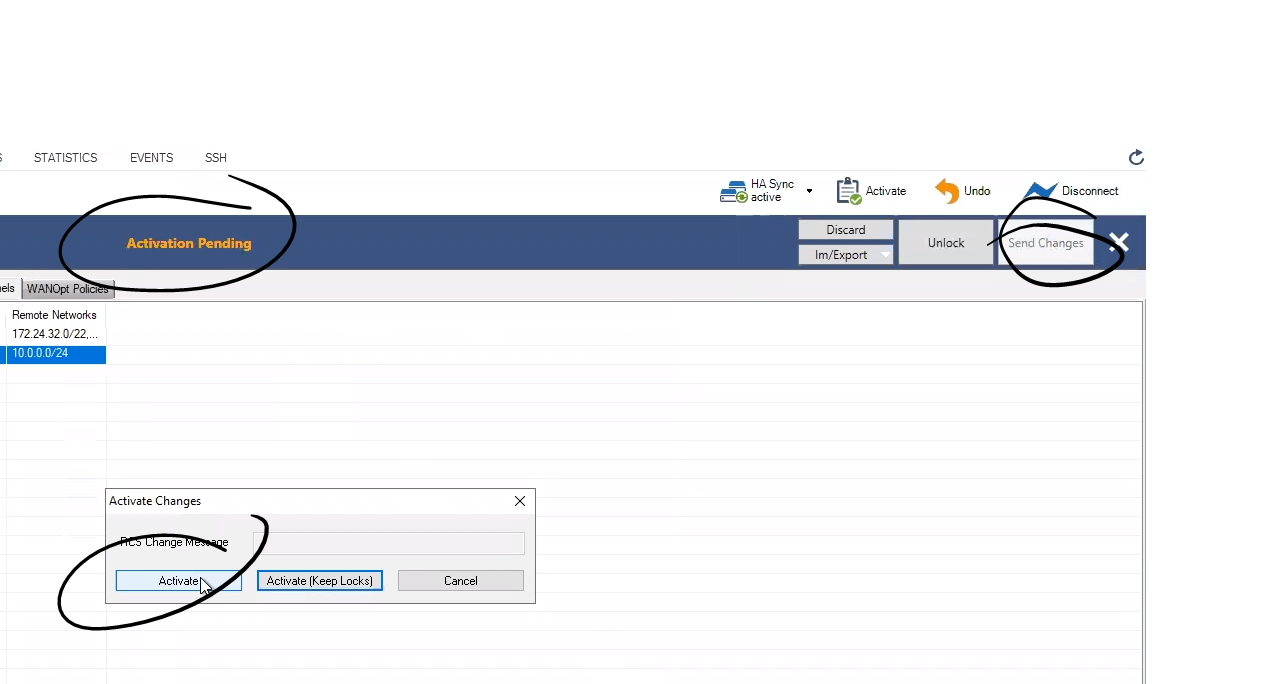
-
Click Send Changes.
-
Click Activate.
-
-
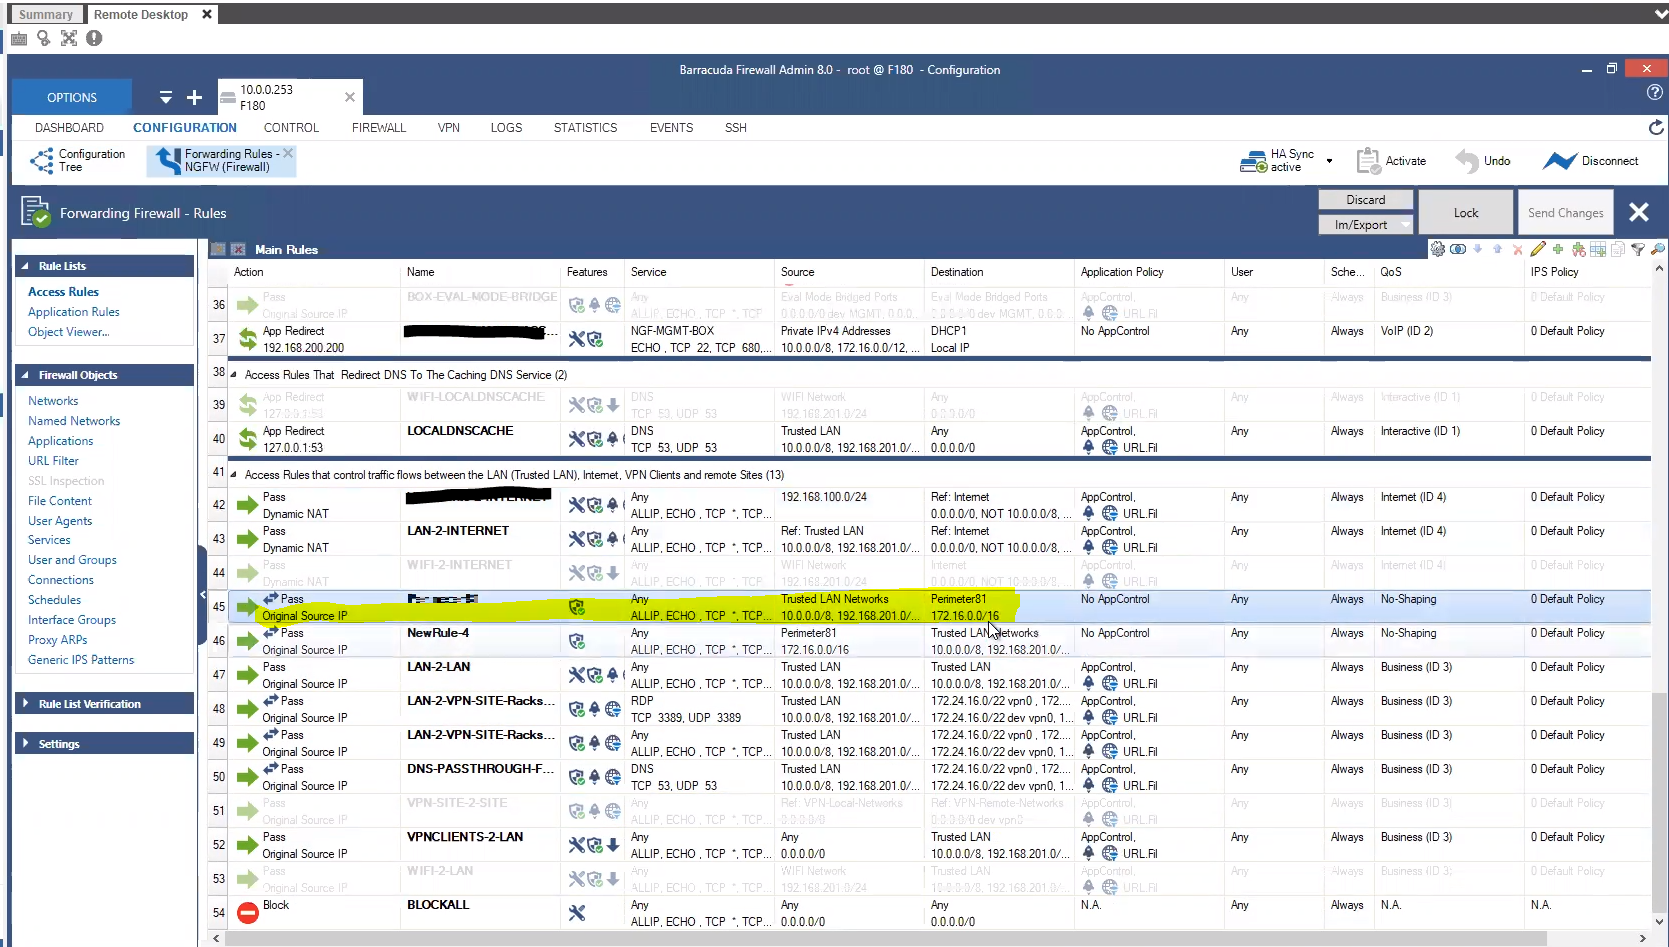
Click Firewall > Forwarding Rules:
-
Add Check Point SASE gateway public IP address to the allow-list.
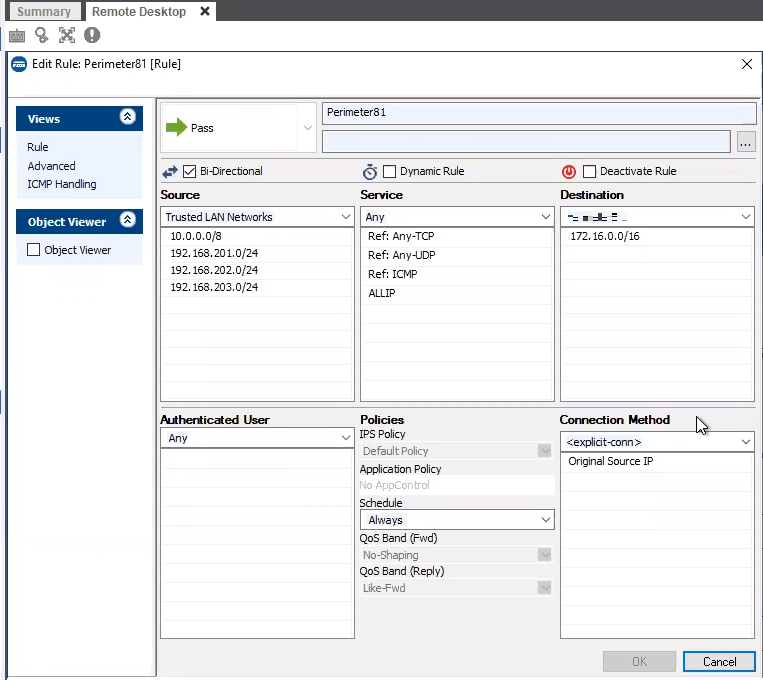
-
Ensure that the Check Point SASE gateway public IP address is listed under the firewall rules.
-
Add the static routes from the Check Point SASE subnet (10.XXX.0.0/16) to the local network and from the local network to the Check Point SASE subnet (10.XXX.0.0/16) through the VPN tunnel gateway.
-
-
Click Configuration > Site to Site VPN (vpn):
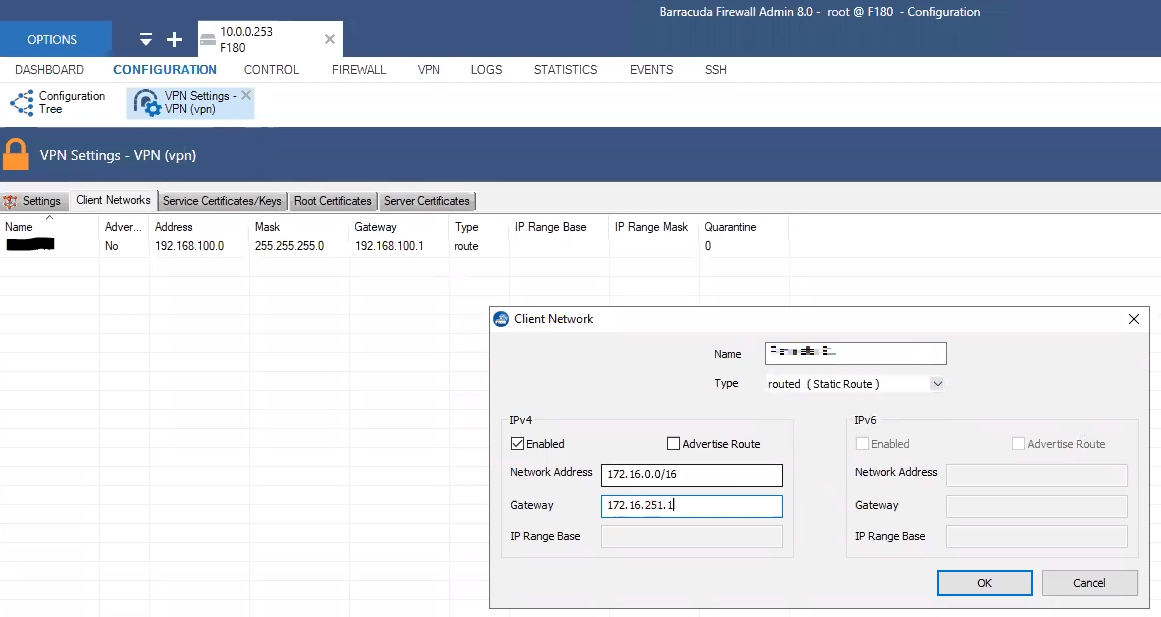
-
In the Client Networks tab:
Field
Enter
Network Address 172.xxx.0.0/16 (or relevant subnet0 Gateway Local Barracuda IP address Name Tunnel name. -
Click OK.
-
-
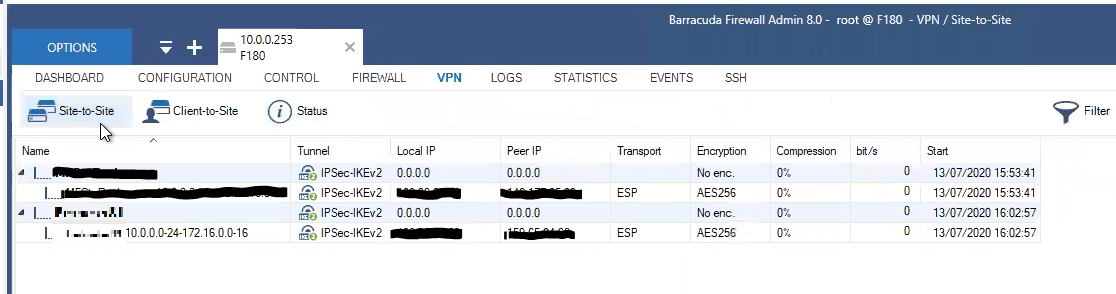
To verify that the tunnel is up, go to VPN > Site-to-Site. If the tunnel is listed in the table, then the tunnel is up.