AWS Virtual Gateway
This chapter describes the process to establish a Site-to-Site IPsec tunnel between your Check Point SASE network and your AWS environment.
Use this configuration if your connection is intended for a single Virtual Private Cloud (VPC).
If you have multiple VPCs, see AWS Transit Gateway.
Prerequisites
-
An active Check Point SASE Administrator Portal account and network.
-
Make sure you have installed the Check Point SASE Agent on your devices.
-
Administrator account in the Firewall/ Router/ Cloud Management Portal.
Step 1 - Configuring the Tunnel in the AWS Management Console
-
Access the AWS Management console and go to the VPC section.
-
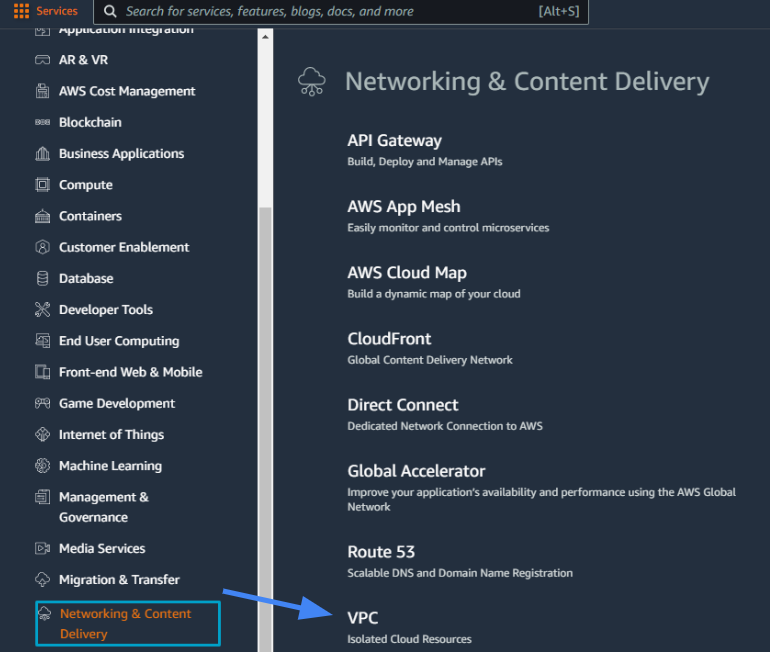
In the Services section, scroll down to Networking & Content Delivery and select VPC.
-
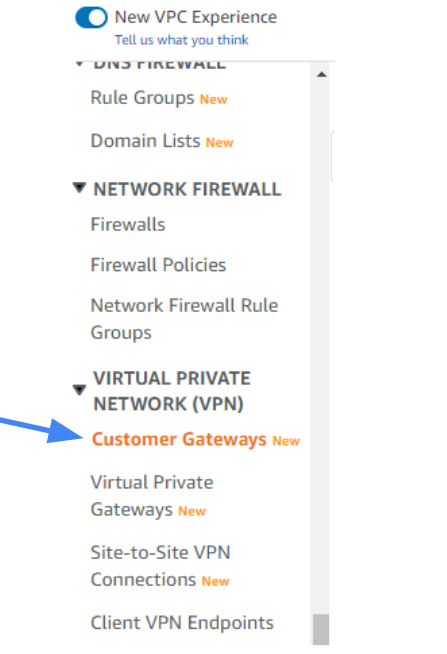
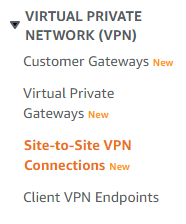
In the left menu Virtual Private Network (VPN) section, click Customer Gateways.
-
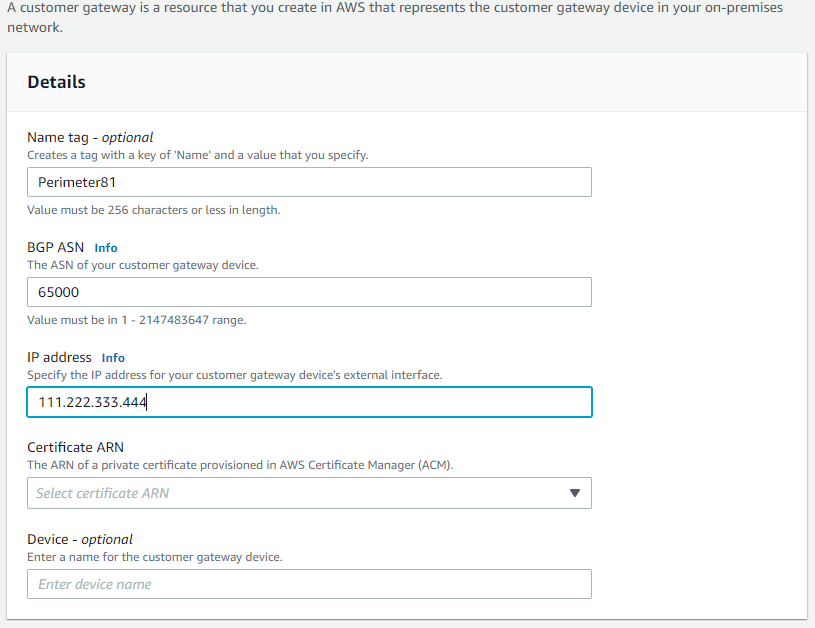
Click Create Customer Gateway.
-
Click static routing.
-
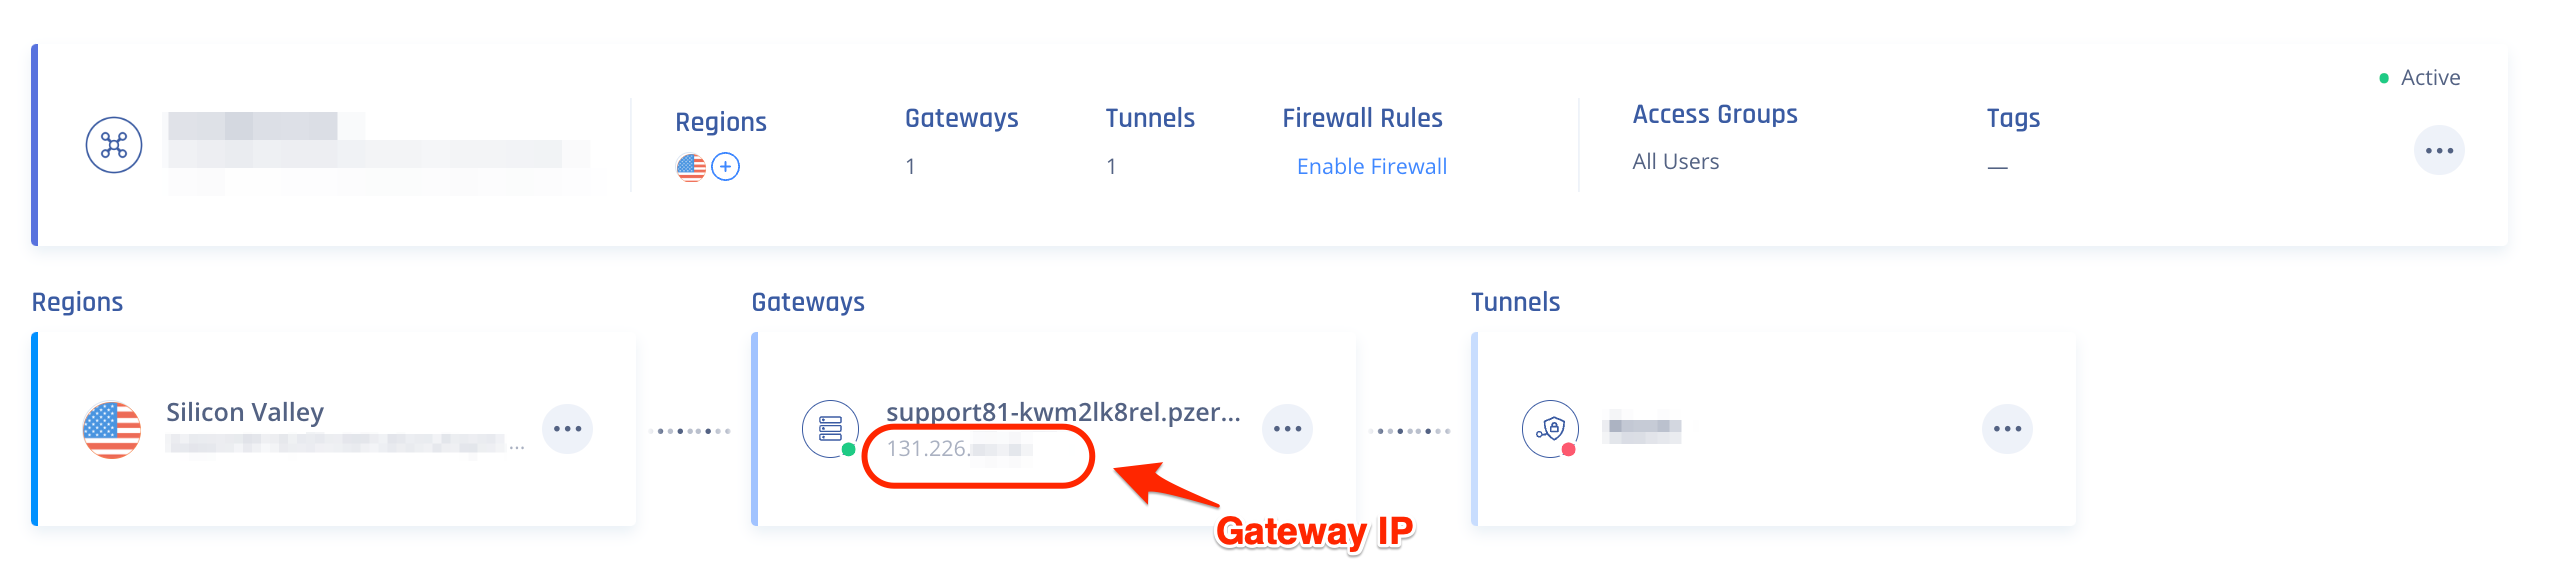
Enter the IP Address of the Check Point SASE Gateway. To get the IP Address, go to the Check Point SASE Administrator Portal and see the Networks page.
-
Select Create Customer Gateway.
A message displays to indicate that the gateway was created successfully.
Configuring a Virtual Private Gateway
|
|
Important - If you already have a virtual private gateway attached to your VPC, skip this section and continue with Creating a Virtual Private Network Connection. |
-
Access the AWS Management console and go to Services, scroll down to Networking & Content Delivery and click VPC.

-
On the left menu, go to Virtual Private Network (VPN) > Virtual Private Gateways.
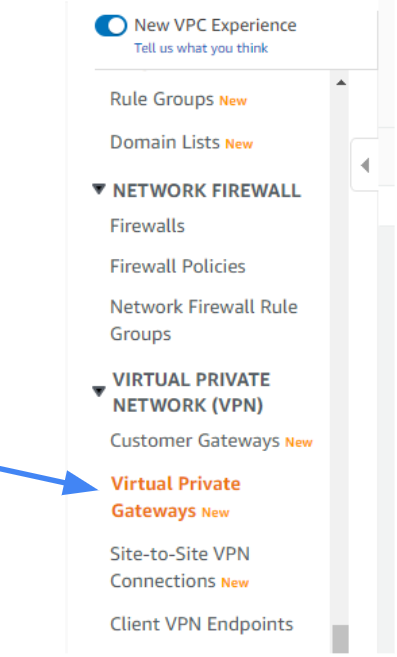
-
Click Create Virtual Private Gateway.

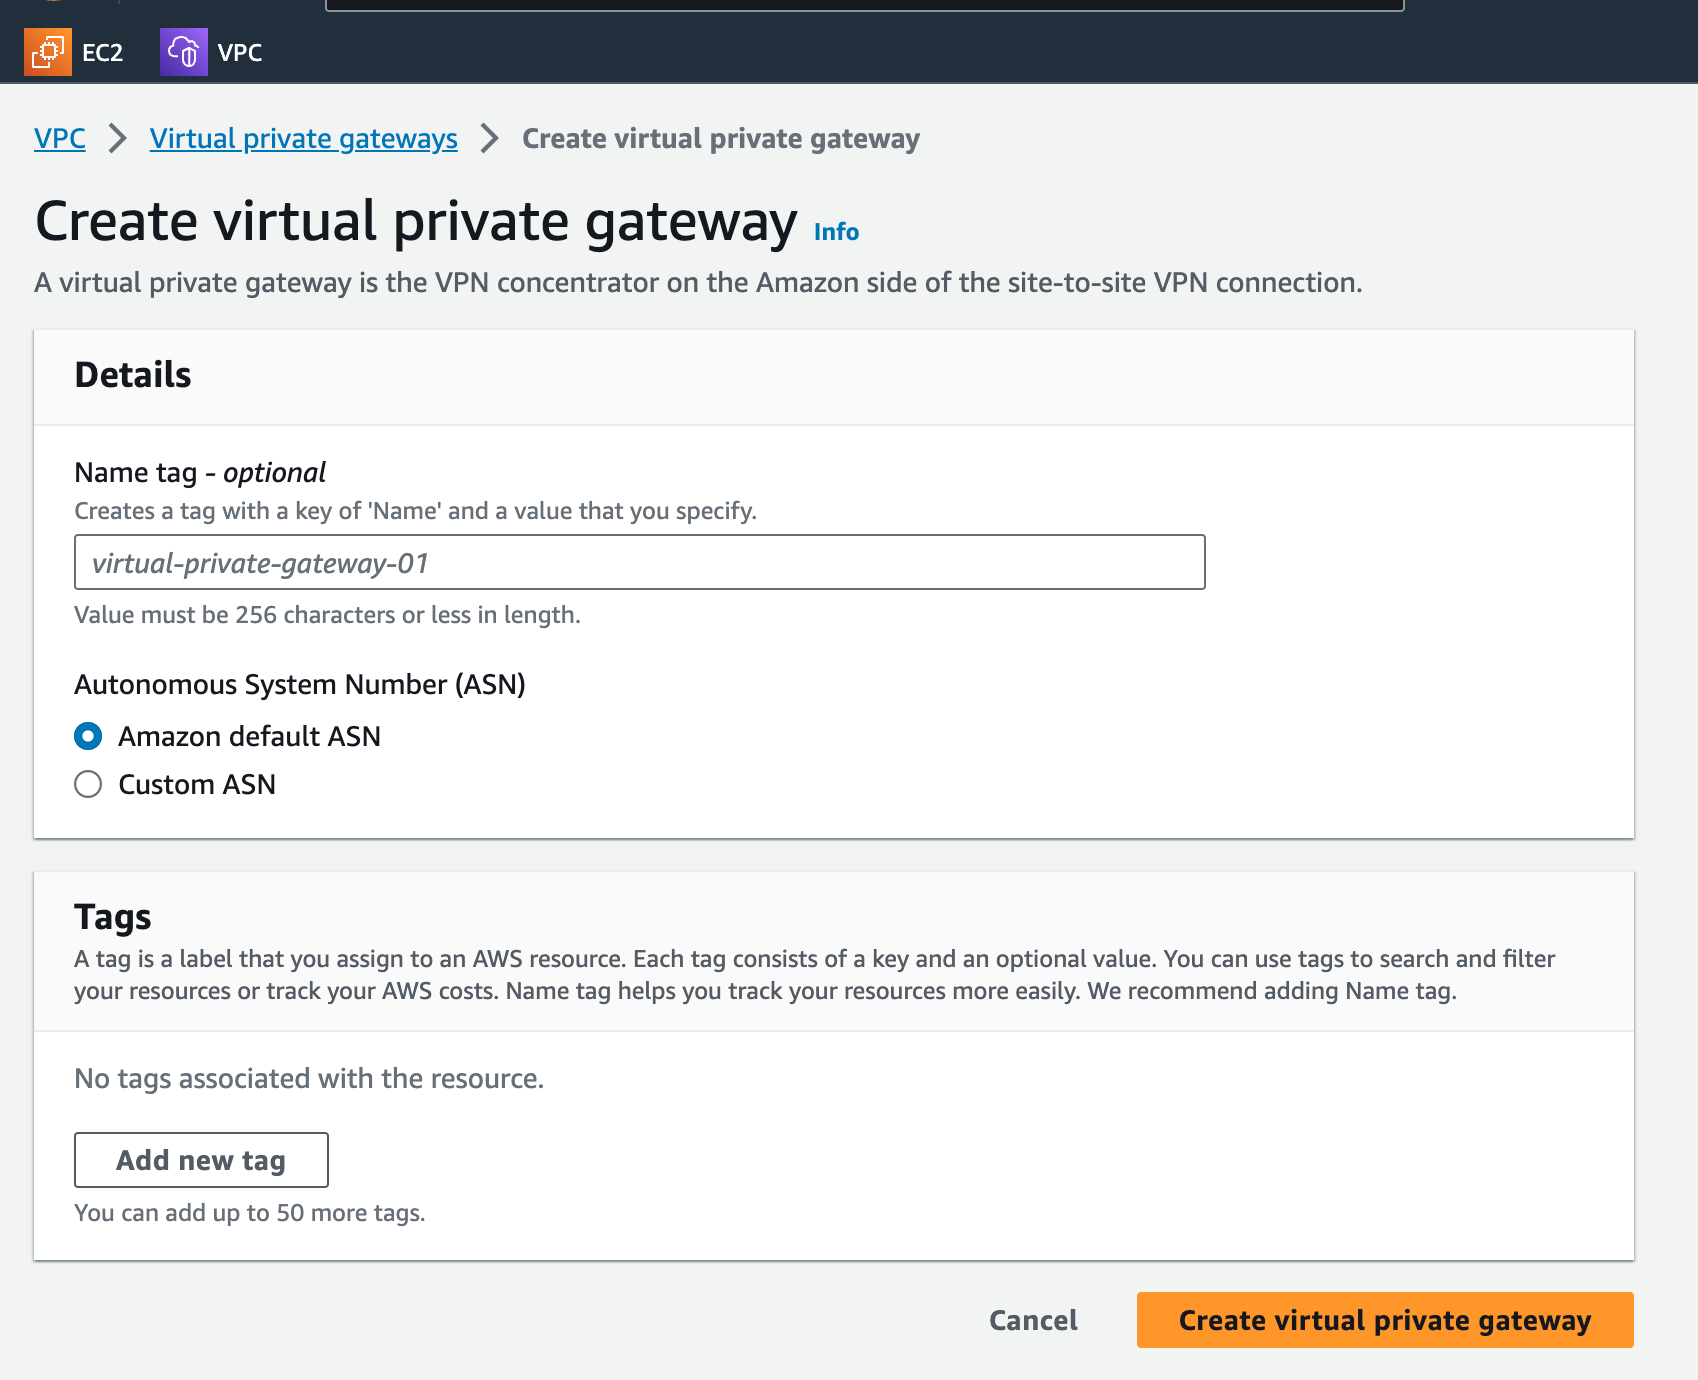
The Create virtual private gateway window appears.
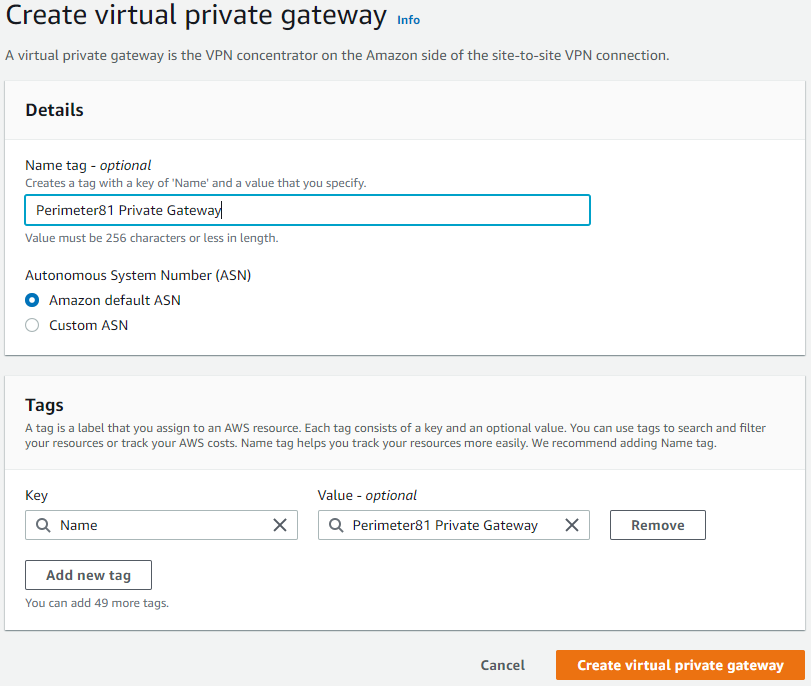
-
In the Name field, enter the name of the gateway, for example US_HQ.
-
In the ASN field, click Amazon default ASN.
-
Click Create virtual private gateway.
The systems displays a message that the virtual Private Gateway was created successfully.
-
Select the newly created gateway and click Actions. On the context menu, select Attach to VPC.
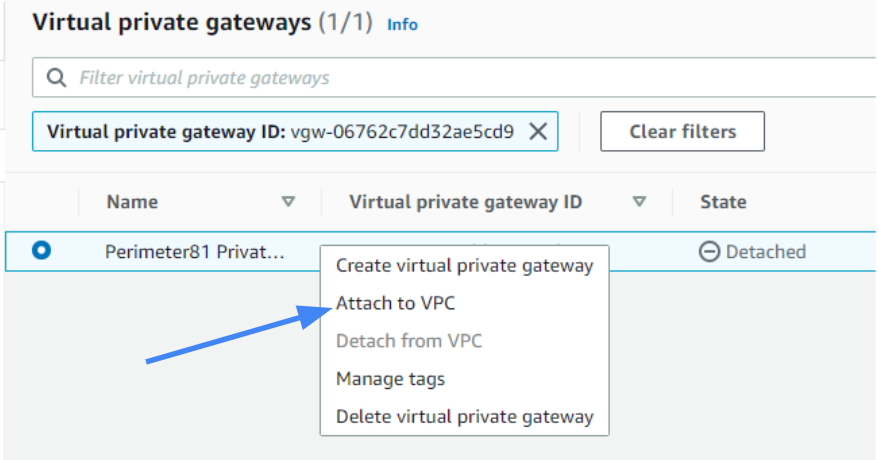
-
From the drop-down menu, select the VPC and select Yes, Attach.
Creating a Virtual Private Network Connection
-
Access the AWS Management console and go to Services, scroll down to Networking & Content Delivery and click VPC.
-
On the left menu, go to Virtual Private Network > Site-to-SiteVPN Connections.
-
Click Create VPN Connection.

The Create VPN Connection window appears.
-
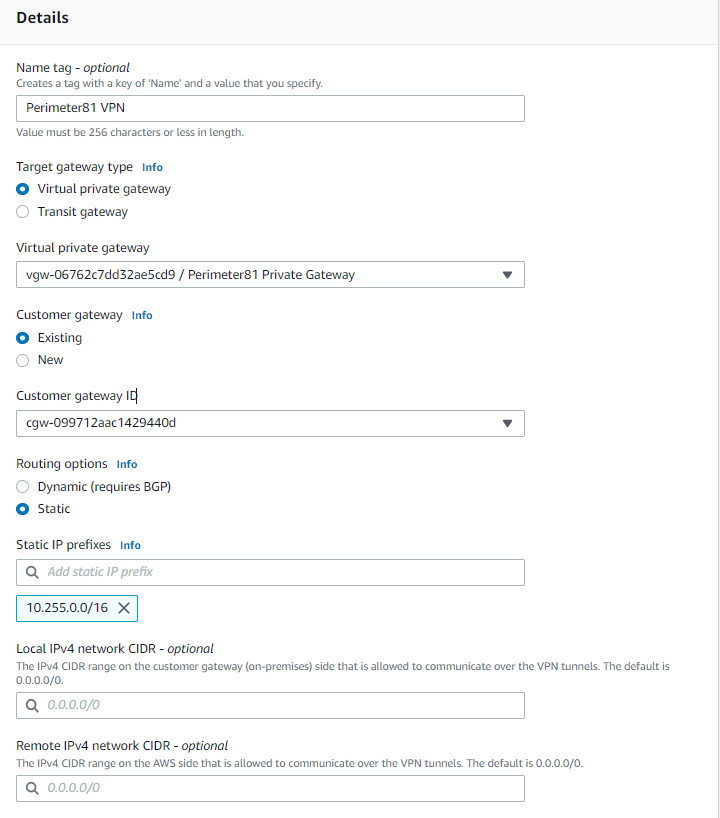
In the Name field, enter the name tag (for example, US_HQ).
-
In the Target gateway type field, click Virtual private gateway.
-
In the Customer gateway field, click Existing.
-
From the Customer gateway ID list, select the Customer Gateway that you have created.
-
In the Routing Options field, select Static.
-
In the Static IP prefixes field, enter your Check Point SASE network subnet (Usually 10.255.0.0/16).

Important - This address might differ if you have not chosen the default subnet mask for your tunnel.
-
In Tunnel Options section:
-
In Advanced Options, select Edit Tunnel Options.
-
In DPD timeout, set the value to 60.
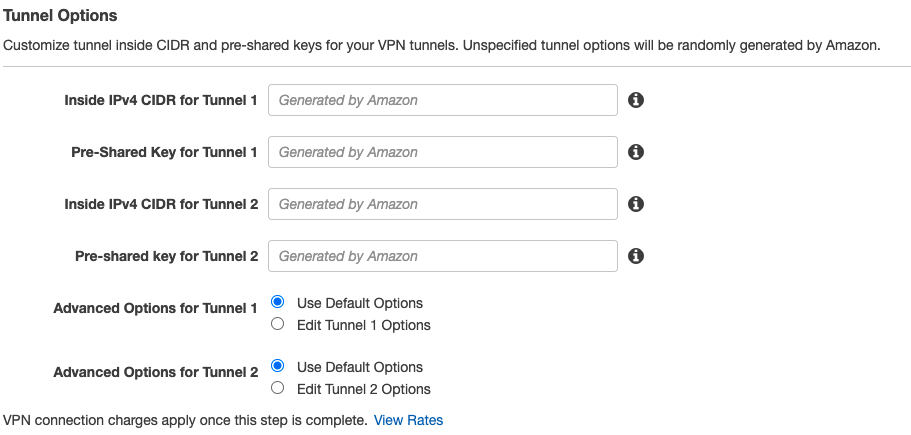

Note - AWS supports various types of encryption and hash formats for both the tunnels. If the tunnel options are set to default (as shown below) it accepts any encryption suite you want for the handshake with Check Point SASE. In this screen, you can also select the inside subnets you want to connect through the tunnel.
-
-
Click Create VPN connection.
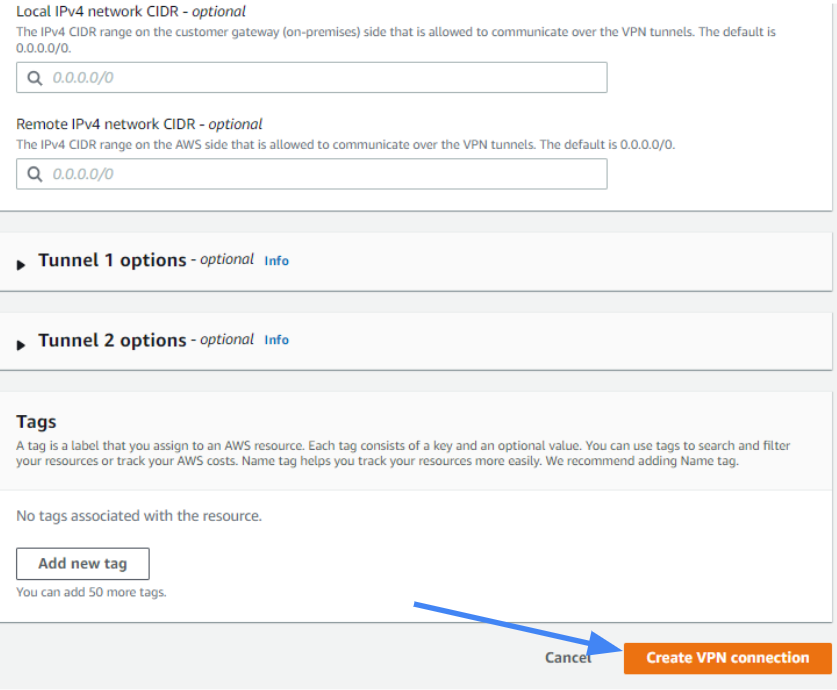
The system displays a message that a VPN Connection Request was created successfully.
Configuring the Routing Rules to the Default Gateway
-
Access the AWS Management console and go to the VPC section.
-
Enter the Route table associated with your VPC.

-
In the Route Tables menu option, select the routing table associated with the VPC you have created for the tunnel.

-
Click Edit.
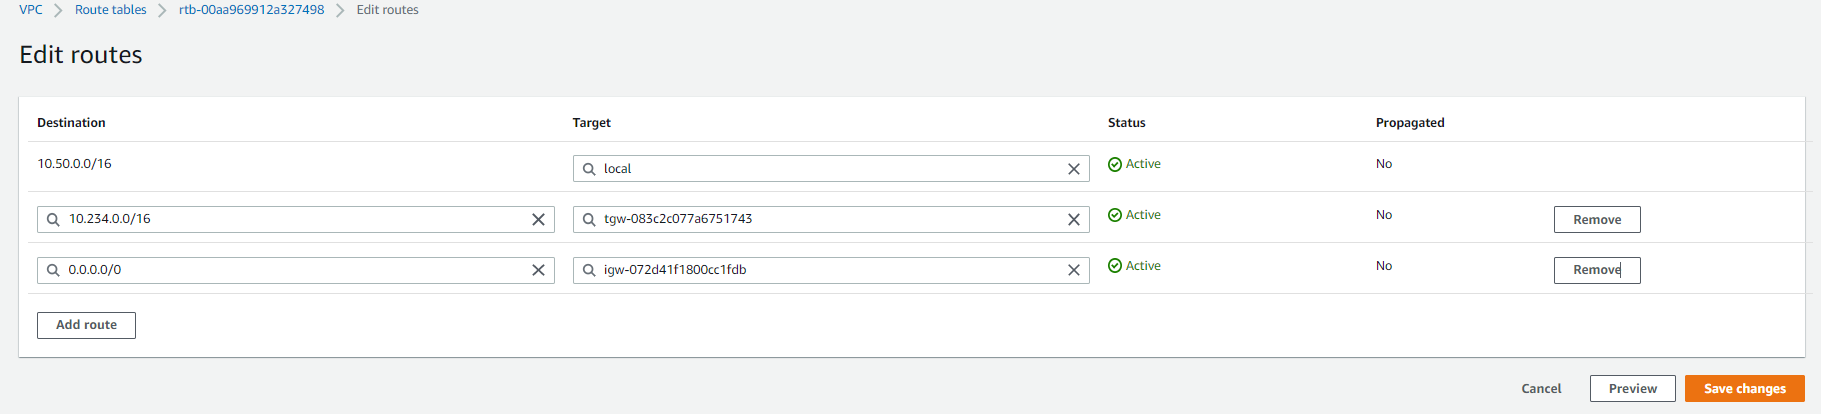
The Edit routes window appears.
-
Add the new static routes for these subnets:
-
In the Destination field, enter your Check Point SASE network subnet listed in the Check Point SASE Administrator Portal (Networks > Gateway > Settings)
Usually 10.255.0.0/16
-
In the Target field, enter your new VPN Gateway ID as the target (it appears under the subcategory Virtual Private Gateway).
-
-
Click Save changes.
|
|
Note - If you have a customized security group associated with your VPC, configure your AWS security groups to allow all traffic from Check Point SASE subnets (usually 10.255.0.0/16) or allow only particular traffic using the port and IP restrictions. |
Configuring the Tunnel
-
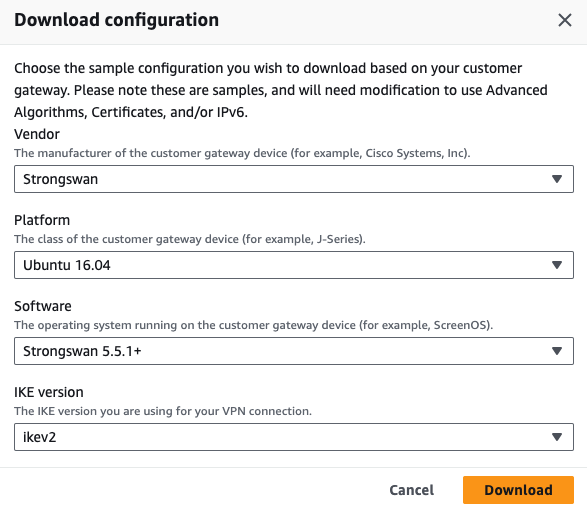
Access the AWS Management console and go to Site-to-Site VPN Connections and click Download configuration.

The Download configuration window appears.
-
Enter these:
- Vendor - Strongswan
-
Platform - Ubuntu 16.04
-
Software - Strongswan version.
-
Ike version - Ikev2
-
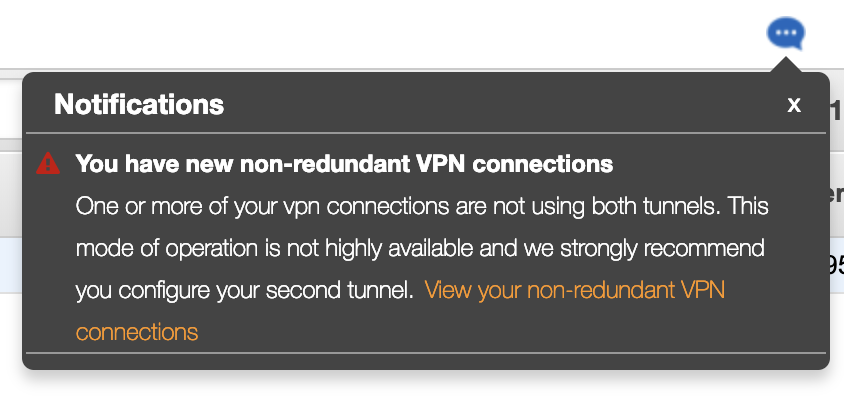
Important - When you examine the configuration file, you may notice that AWS has created two separate tunnels for the same VPN connection, however Check Point SASE utilizes only one of them.
We recommend you to use the one that appears first in the file.
Step 2 - Creating the Tunnel in the Check Point SASE Administrator Portal
-
Access the Check Point SASE Administrator Portal and click Networks.
- Click the network where you want to create the tunnel.
-
In the required gateway, click
 > Add Tunnel.
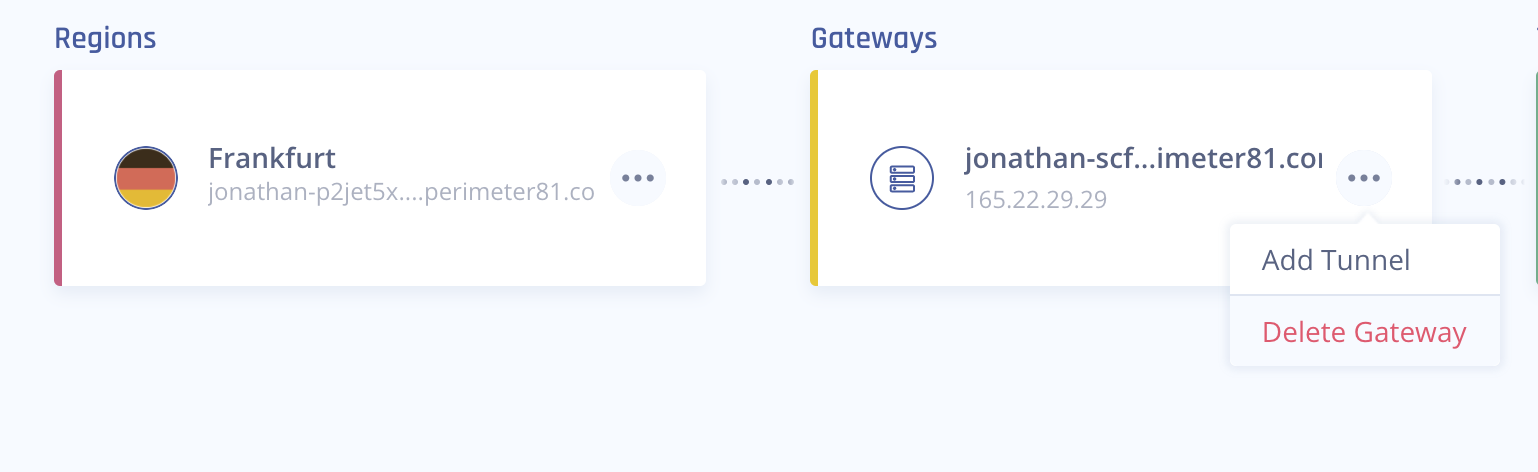
-
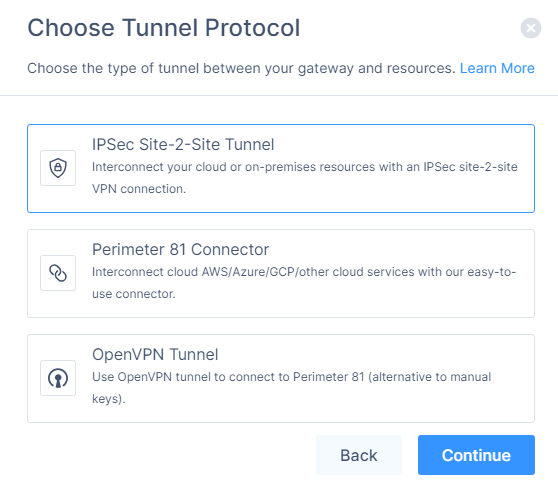
Click IPSec Site-2-Site Tunnel and click Continue.
-
Click Single Tunnel and click Continue.
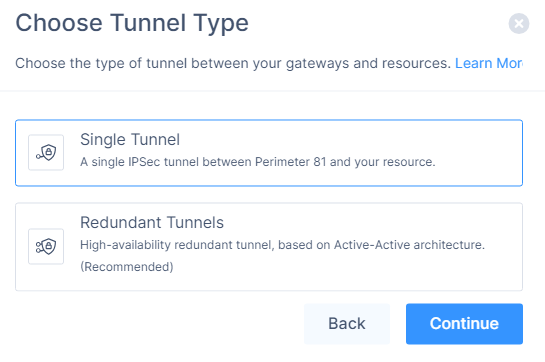
The IPSec Site-2-Site Tunnel window appears.
-
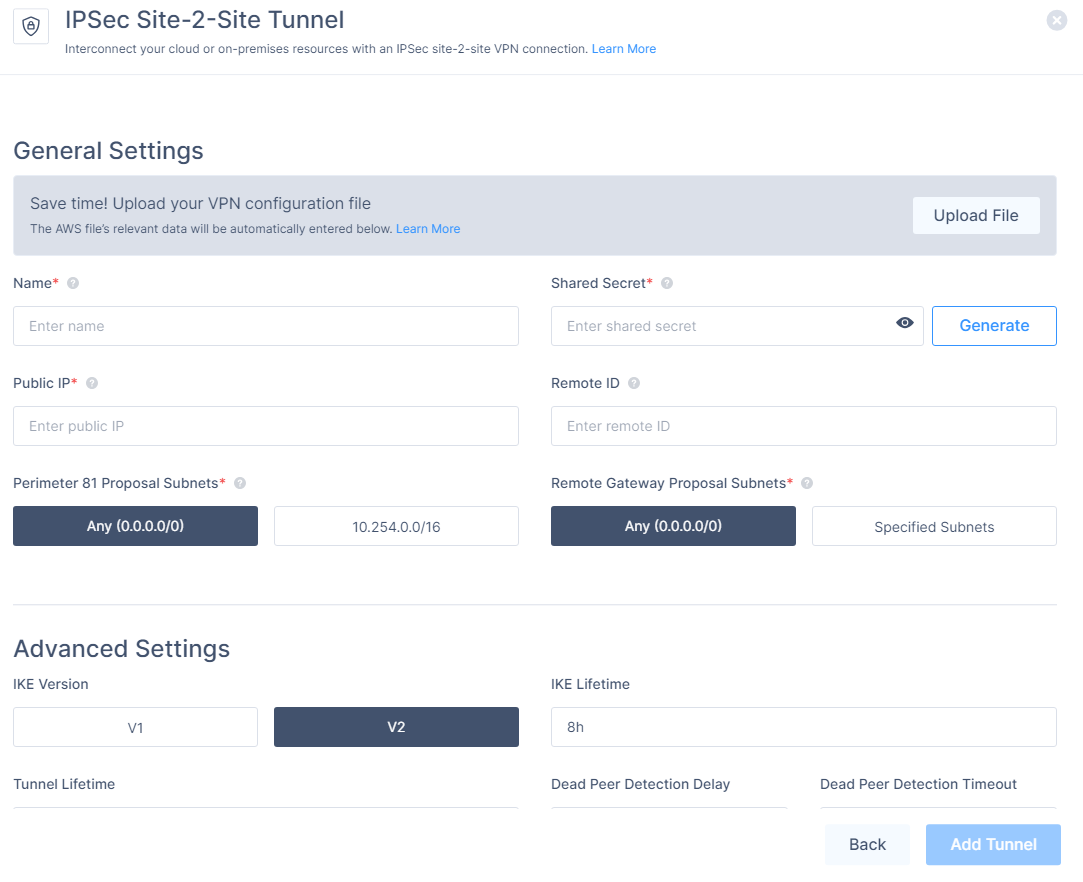
To automatically populate the tunnel configuration values, in the General Settings section, click Upload File and upload the configuration file downloaded from the AWS Management console.
-
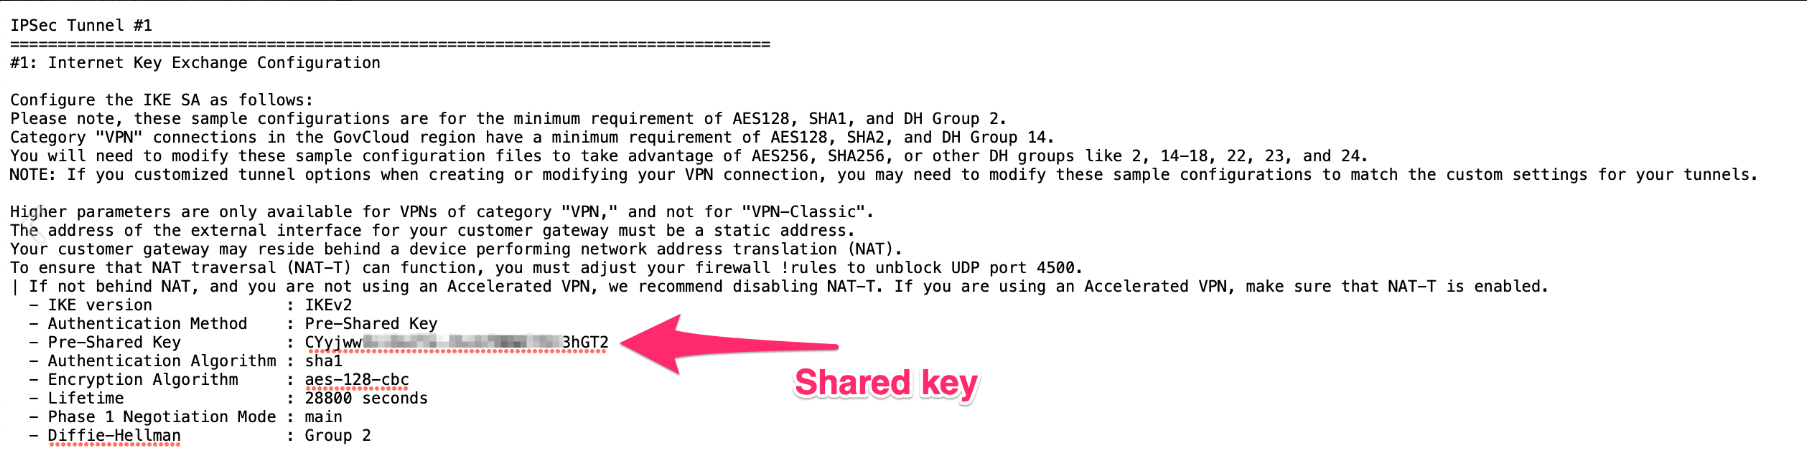
For manual configuration, open the configuration file you downloaded and copy the below values and paste it for Public IP, Remote ID (both identical), and Shared Secret.

-
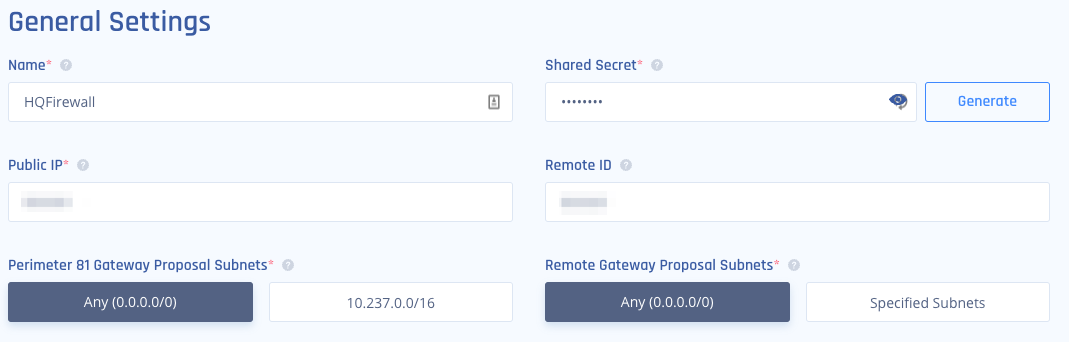
In the General Settings section, enter these:
-
Name - Name of the tunnel.
-
Check Point SASE Gateway Proposal Subnets - Any (0.0.0.0/0).
-
Remote Gateway Proposal Subnets - Any (0.0.0.0/0).
-
-
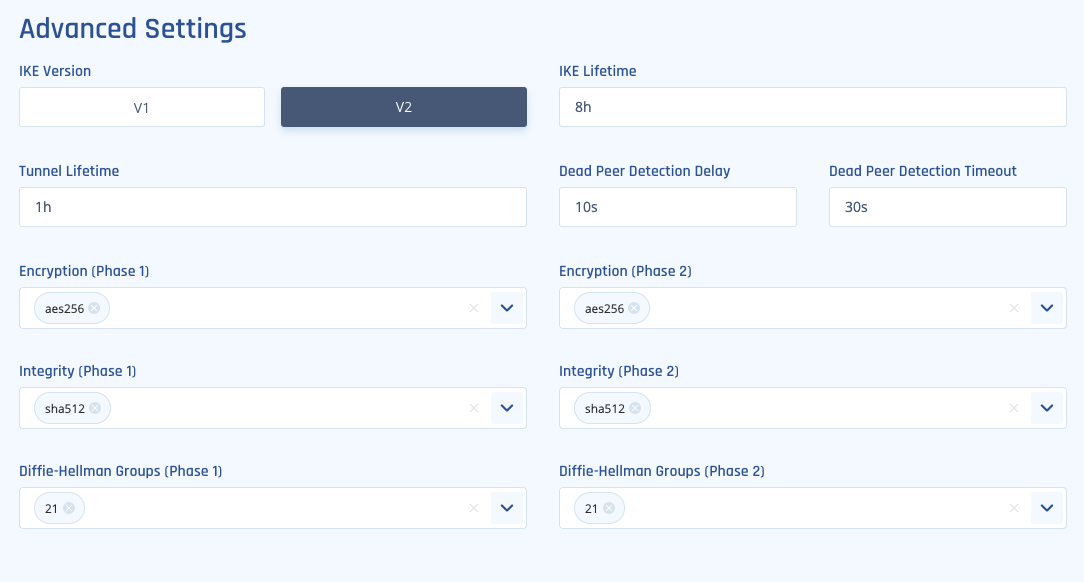
In the Advanced Settings section, enter the information for your tunnel type:
Field
IKE Version
IKE Lifetime
Tunnel Lifetime
Dead Peer Detection Delay
Dead Peer Detection Timeout
Encryption (Phase 1)
Encryption (Phase 2)
Integrity (Phase 1)
Integrity (Phase 2)
Diffie Hellman Groups (Phase 1)
Diffie Hellman Groups (Phase 2)
Cloud Vendor
Amazon AWS
Single Tunnel - AWS Virtual Gateway V2 8h 1h 10s 30s aes256 aes256 sha512 sha512 ecp521 ecp521 Single Tunnel - AWS Transit Gateway V2 8h 1h 10s 30s aes256 aes256 sha512 sha512 ecp521 ecp521 Redundant Tunnels - AWS Virtual Private Gateway V2 8h 1h 10s 30s aes256 aes256 sha512 sha512 ecp521 ecp521 Redundant Tunnels - AWS Transit Gateway V2 8h 1h 10s 30s aes256 aes256 sha512 sha512 ecp521 ecp521 Google Cloud Platform
Single Tunnel 1 V2 8h 1h 10s 30s aes256 aes256 sha512 sha512 ecp521 ecp521 Redundant Tunnels
V2 8h 1h 10s 30s aes256 aes256 sha512 sha512 ecp521 ecp521 Microsoft Azure Single Tunnel -
Azure Virtual Network Gateway
V2
3600s
27000s
10s
45s
aes256 aes256 sha1 sha1 modp1024 modp1024 Redundant Tunnels - Virtual Network Gateway
V2
9h
9h
10s 30s aes256 aes256 sha1 sha1 modp1024 modp1024 Redundant Tunnels - Virtual WAN
V2
8h
1h 10s 30s aes256 aes256 sha256
sha256
modp2048 modp2048 Other tunnel types
Alibaba Cloud V1 8h 1h 10s 30s aes256 aes256 sha1 sha1 modp1024 modp1024 IBM Cloud
V1
8h 1h 10s 30s aes256 aes256 sha256
sha256
ecp521 ecp521 1 Suggested values. For other supported ciphers, see this Google article.
Make sure to verify the tunnel settings under section 3 in the configuration.
-
Click Add Tunnel.