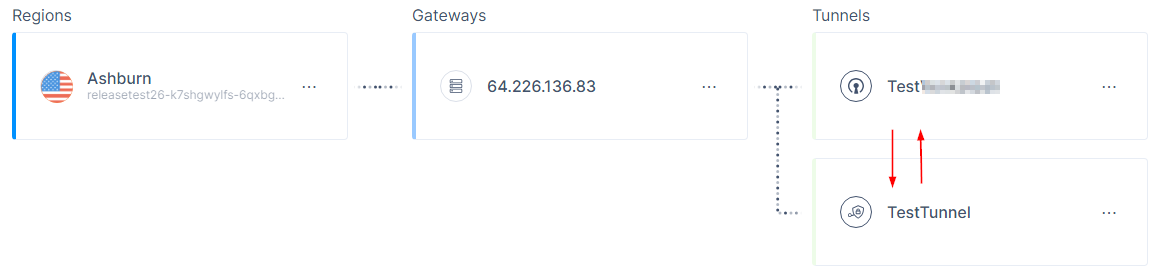
Interconnectivity (Cloud-Agnostic)
This chapter describes how to securely connect sites and cloud resources using Check Point SASE. When two sites are tunneled to your Check Point SASE network, they can securely communicate through this network without the Check Point SASE Agent.
IPSec Based Connections
-
Make sure both tunnels are route-based. This means they do not rely on a specific internal subnet for a handshake between sites. Instead, a route is configured on each device's Route Table, to indicate which subnets to send through the tunnel.
-
In the Check Point SASE Administrator Portal, go to your network and set Perimeter Proposal Subnets and Remote Gateway Proposal Subnets to ANY (0.0.0.0/0) for both the tunnels.

This may make the tunnel go down. Make sure the device you use supports route-based VPN. This means the tunnel is set up to 0.0.0.0/0 and a route is added separately.
-
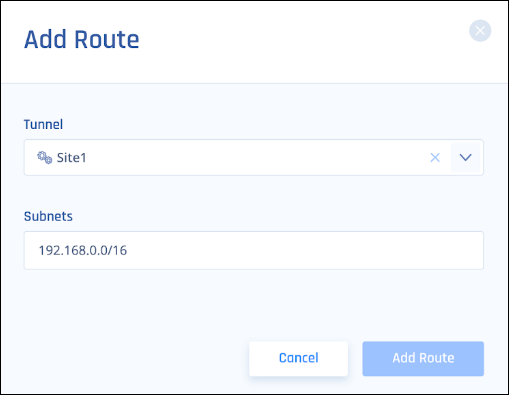
Make sure the Routes Table in the Check Point SASE side has the routes of all of the configured sites.
To add Routes Table, see Adding a route. In the Subnets field, add the routing to the internal LAN subnets behind each tunnel.
-
Go to the first site's Routes Table (Site1) and add a route to direct the traffic to the second site's LAN subnet, in addition to the route that indicates all Check Point SASE subnets (usually 10.255.0.0/16) to go through the IPSec Site-2-Site tunnel.
-
Go to the second site's Routes Table (Site2), and set up a static route for both the Check Point SASE LAN Subnet and Site1’s LAN subnet to go through the IPSec Site-2-Site tunnel.
Policy-based IPSec Tunnels
To achieve interconnectivity in a Policy-based Site-to-Site environment:
-
Go to the first site's Routes Table (Site1), and ensure that there are two Phase II tunnels:
-
One from Site1's internal subnet to Check Point SASE's subnet.
-
Another from Site1's internal subnet to Site2's internal subnet.
-
-
Go to the second site's Routes Table (Site2), and ensure that there are two Phase II tunnels:
-
One from Site2's internal subnet to Check Point SASE's subnet.
-
Another from Site2's internal subnet to Site1's internal subnet.
-
|
|
Note - As this feature is not supported by most of the routers, Check Point recommends to use Route-based IPSec tunnels. |
WireGuard Connector Based Connections
To establish a connection from one resource to another, you must reinstall the connector, as the default installation (Accessor mode) does not allow it.
-
Uninstall the connector.
-
Ubuntu
Copy# Locate the WireGuard packages (the output of this command is the full package name)
dpkg -l | grep wireguard
# Delete all packages found that are associated with WireGuard (replace pkg with the output from the previous command)
apt-get remove --purge pkg -
CentOS
Copy# Locate the WireGuard packages (the output of this command is the full package name)
yum list installed | grep wireguard
# Delete all packages found that are associated with WireGuard (replace pkg with the output from the previous command)
yum remove pkg
-
-
Reboot the machine and execute the connector installation script (the curl command copied from the Check Point SASE Administrator Portal). For more information, see Installing the WireGuard Connector on a Linux Server.
-
At Stage 4, select NO (n), which prevents accessor mode installation.
-
To ensure that the default route for the Linux machine is not modified, select N for
"Do you want to route whole traffic through connector tunnel? [Y/N]".
Note - In Full Tunnel Mode, the site's entire traffic is sent through the WireGuard connector and the entire firewall is placed behind the Check Point SASE secure network. To operate in this mode:
-
Select Y to override the default route on the machine and forward the traffic through the connector.
-
Ensure that the Router/Firewall on the network sends all of the route's traffic(0.0.0.0/0) through the internal IP of the WireGuard connector. Follow the instructions below if Linux machine is the router.
-
-
For
Do you want to enable IP forwarding (router mode)? [Y/N]:-
If the Linux server is acting as a firewall, router, or NAT device, select Y.
-
For any other device, select N.
-
-
Open the Route Table of the network in which the WireGuard connector is installed (usually your router or firewall).
-
Configure a static route to direct the traffic from your Check Point SASE LAN subnet (10.XXX.0.0/16) and your other desired remote subnet to the IP address of the machine hosting the connector.
Open the Linux machine terminal that hosts the connector and run:
Copy# Temporarily shut the connector down
wg-quick down wg0
# Open the connector's route table.
vi /etc/wireguard/wg0.conf
# Enter the subnets of the resources you'd like to communicate with each other
set AllowedIPs = <Harmony SASE Subnet>, <Site1 Subnet>,< Site 2 Subnet>
# Turn the connector up
wg-quick up wg0
# Make sure that the desired change has taken place
wg show
Interconnectivity Using AWS EC2 Instance
For WireGuard connector installed over AWS EC2 instance, you must disable the source/destination checks.
To disable source/destination checks:
-
Log in to Amazon EC2 console.
-
In the navigation pane, click Instances and select the relevant instance.
-
Select Actions, Networking, Change source/destination check.
-
For Source/destination checking , select Stop.
-
Click Save.
-
If the instance has a secondary network interface:
-
Go to Networking tab > Network interfaces and select the secondary network interface.
-
Select the interface ID and go to the Network Interfaces page.
-
Select Actions, Change source/dest. check.
-
Clear the Enable checkbox.
-
Click Save.
-