WireGuard Connector Tunnel
Prerequisites
A Linux machine with these specifications:
-
Kernel: Any of these packages installed:
-
Ubuntu (Server/Desktop) 22.04 LTS or higher
-
CentOS 9 or CentOS 10
-
RHEL 9 or RHEL 10
-
-
Packages installed:
-
Ubuntu - curl; dig; software-properties-common
-
CentOS - curl, bind-utils
-
RHEL9 or RHEL 10 iptables-nft-services should be installed
-
-
20 GB free disk space
-
2 GB RAM
-
Static internal IP address
-
Network adapter that supports bridge connection

Note - For Linux deployed on a Windows host, enable virtualization on Windows BIOS.
Configuring a WireGuard Connector Tunnel
Configuring the Connector in the Harmony SASE Administrator Portal
-
Access the Harmony SASE Administrator Portal and click Networks.
-
Select the network.
-
For the gateway to which you want to add the WireGuard Connector tunnel, click
 and click Add Tunnel.
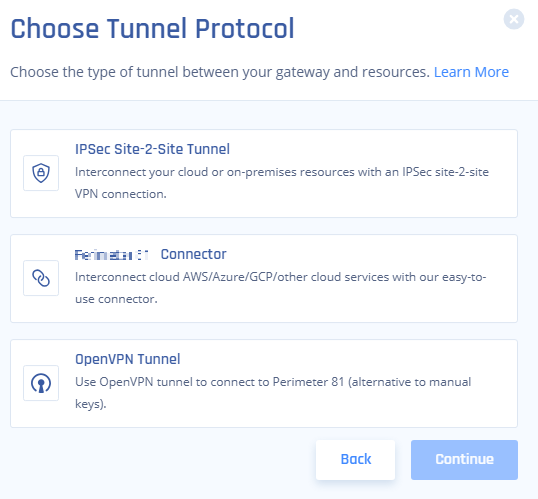
The Choose Tunnel Protocol window appears.
-
Select WireGuard Connector and click Continue.
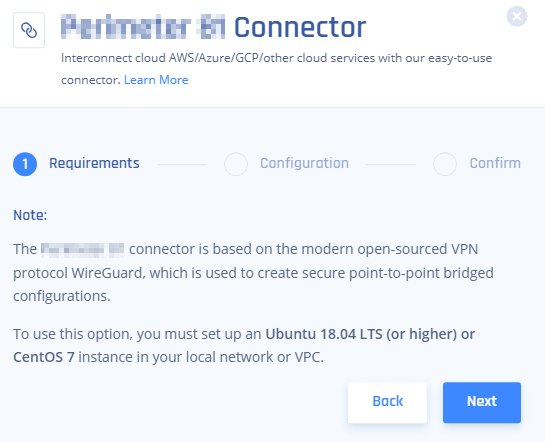
The Harmony SASE Connector window appears.
-
In the Requirements section, read the requirements and make sure they are met. Click Next.
-
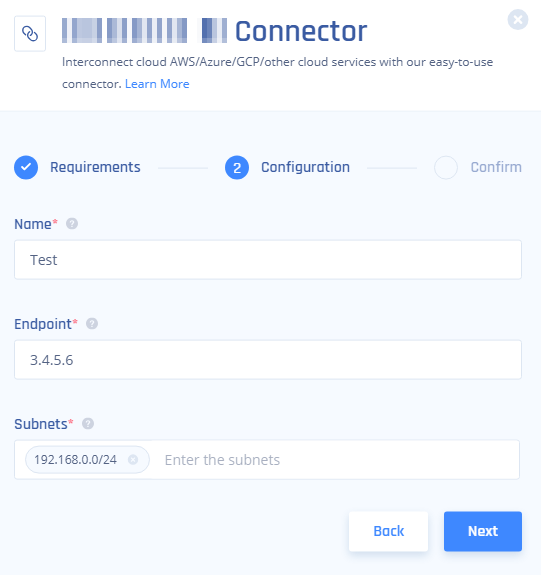
In the Configuration section, enter these:
-
Name - Name for the connector.
-
Endpoint - IP address of the Linux server that has the WireGuard Connector installed.
If you are using a dynamic public IP address, enter 0.0.0.0

Note - If you do not know the IP address, query the server by running this command in your Linux terminal:
dig +short myip.opendns.com @resolver1.opendns.com -
Subnets - Subnets of your local network.
-
Click Next.
-
-
In the Confirm section, click Apply.
After deployment, the connector appears in the Networks page.
Installing the WireGuard Connector on a Linux Server
-
Access the Harmony SASE Administrator Portal and click Networks.
-
Click
 for the WireGuard Connector tunnel that you just configured and then click Configuration.
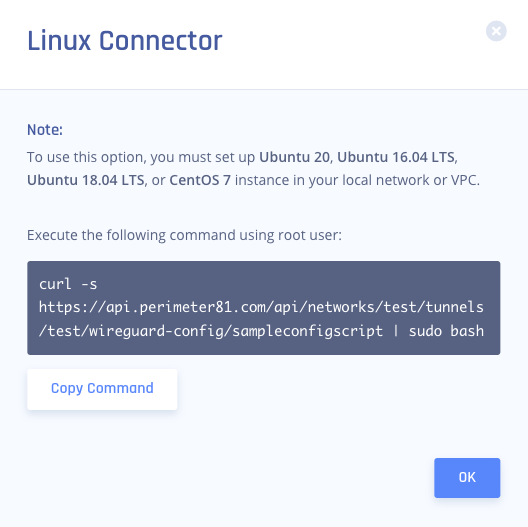
The Linux Connector window appears.
-
Click Copy Command.

Note - The command is unique to each connector.
-
Open the Linux terminal and connect as Root user.
-
Run the copied command.
-
Select Yes at Stage 4 for access or mode - Remote Access only and follow the instructions to install the connector.
Verifying the Setup
-
Connect to your network using the Harmony SASE Agent on a device.
-
Open the command line and run:
ping <Internal resource IP address> -
Make sure that outbound port UDP/8000 is not blocked in your firewall/router, and that you have followed all the steps.
-
If the issue persists, on the Linux server, collect these logs and contact Check Point Support. The logs are available in:
Copy##Configuration file
/etc/wireguard/wg0.conf
##Connection logs
/tmp/p81-wg-connector.log
Removing the WireGuard Connector
Connect to the command line of Linux server where you have installed the WireGuard Connector and run:
# Locate the WireGuard packages # (the output of this command will show you all wireguard packages installed on the machine)
dpkg -l | grep wireguard

# Delete all packages found that are associated with WireGuard
# (Run this command for each package found, replace  with the output from the previous command)
apt-get remove --purge # Locate the WireGuard packages # (the output of this command will show you all wireguard packages installed on the machine)
dpkg -l | grep wireguard# Locate the WireGuard packages # (the output of this command will show you all wireguard packages installed on the machine)
yum list installed | grep wireguard
# Delete all packages found that are associated with WireGuard# (Run this command for each package found, replace with the output from the previous command)
yum remove # Locate the WireGuard packages # (the output of this command will show you all wireguard packages installed on the machine)
yum list installed | grep wireguard


