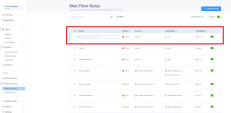
Web Filter Rules
The Web Filter Rules page allows you to create internet access policies.
To view the Web Filter Rules page, access the Harmony SASE Administrator Portal and click Internet Access > Web Filter Rules.
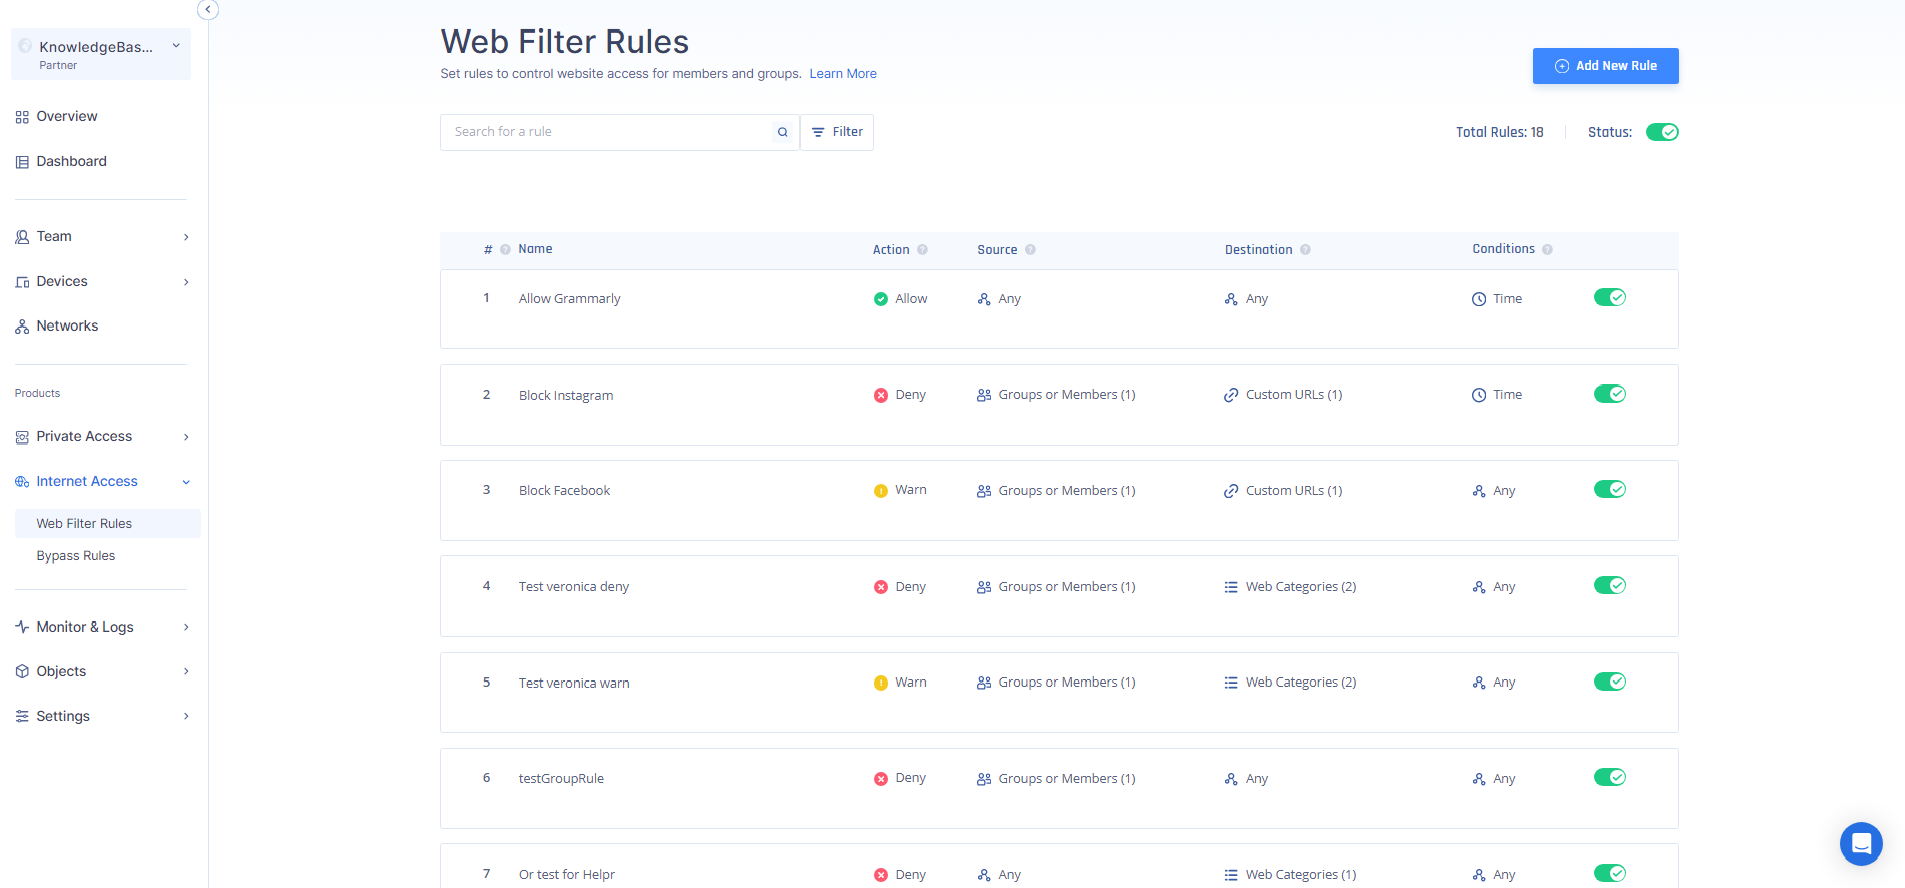
|
Column |
Description |
|---|---|
|
Name |
Name of the Rule. |
|
Action |
Action for web traffic:
|
|
Source |
Groups or members to which the rule is applied. |
|
Destination |
Destination of the web traffic generated by the source (Managed categories and/or Custom URLs). |
|
Conditions |
Condition for the rule. |
Creating a Web Filter Rule
-
Access the Harmony SASE Administrator Portal and click Internet Access > Web Filter Rules.
-
Click Add New Rule.
A new rule appears in the table.
-
In the Name field, enter a name for the rule.
-
From the Action list, select one:
-
Deny (default)
-
Allow
-
Warn

Notes:
-
The Secure Web Gateway (SWG) do not support wildcards. However, you can block the domain and its subdomains within the same object.
-
URLs containing protocols, queries, parameters, or anchors are not supported.
-
-
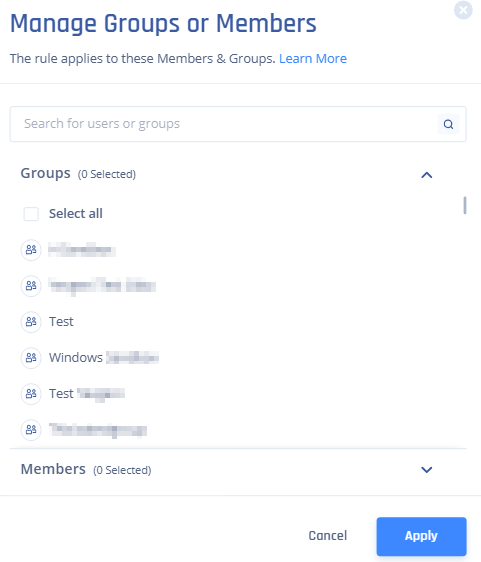
In the Source field, add user or group list to which you want to apply the rule. Default is Any.
-
Click Any > Add Source > Groups or Members.

-
Select group(s) or member(s) from the list.
-
Click Apply.
-
-
In the Destination field, select the destination. Default is Any.
-
Click Any > Add Destination.
-
To add web categories, select Web Caregories.
The Manage Web Categories window appears.
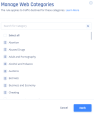
-
Select the categories from the list.
-
Click Apply.
-
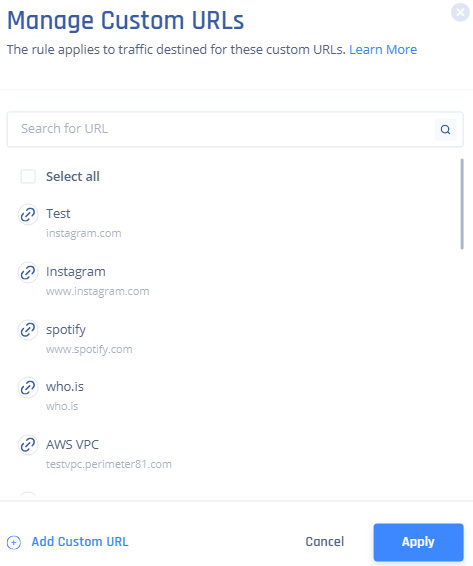
To add custom URLs, select Custom URLs.
The Manage Custom URLs window appears.

-
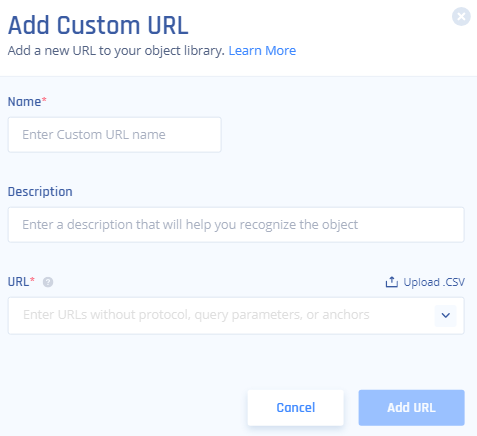
Select the custom URL. If the URL is not listed, click Add Custom URL and specify these and click Add URL:
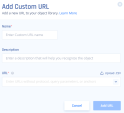
-
Name
-
Description
-
URL
Optionally, click Upload .CSV to upload a .csv file with list of URLs.
-
-
Click Apply.
-
-
In the Conditions field, specify the duration for which the rule must be active.
-
Click Any > Add Condition > Time.
The Manage Time window appears.
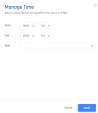
-
Select the Start time from the list.
-
Select the End time from the list.
-
Select the Days from the list.
-
Click Apply.
-
-
Turn on the Status toggle button.
-
Click Apply in the bottom of the page.

-
Click Apply.