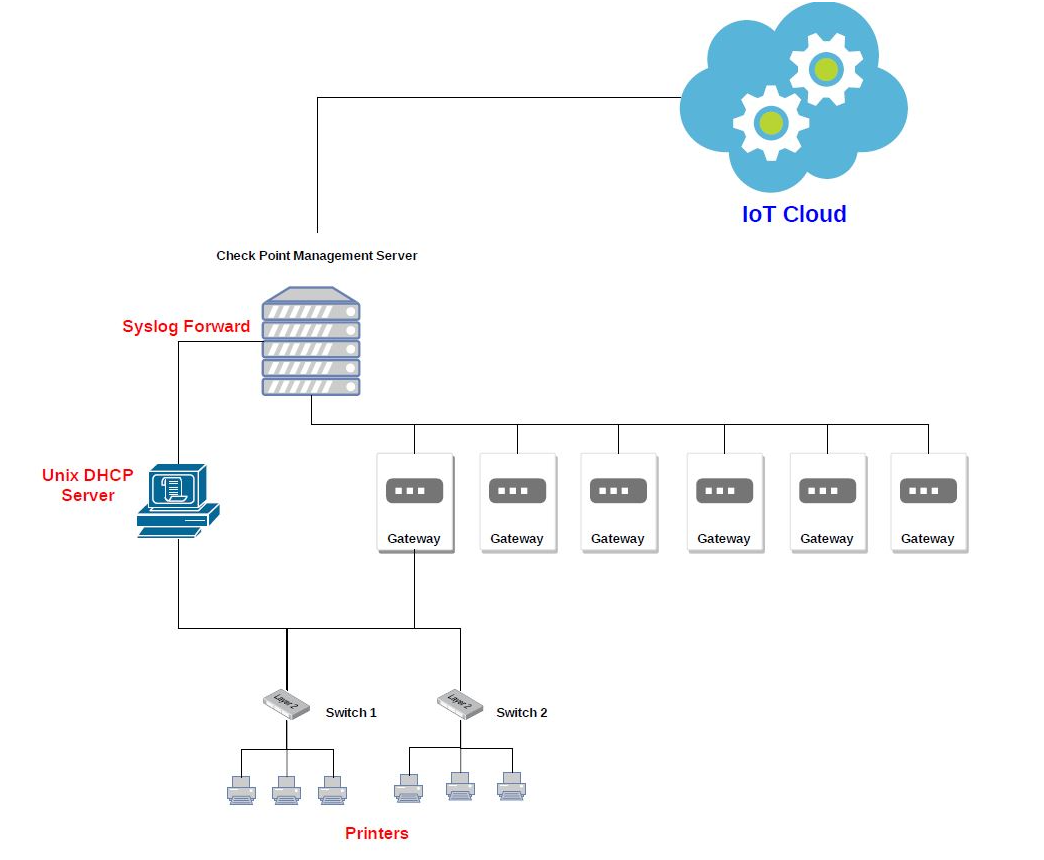
Appendix E - Using Unix DHCP - Syslog as the IoT Discovery Engine
You can set up an IoT discovery engine on the Check Point Management Server to discover IoT assets in your network. The IoT discovery engine uses the network devices in the network, such as switches, routers, gateways, or Network Access Control (NAC) devices to discover IoT assets.
You can use Unix DHCP server as an IoT discovery engine. The Unix DHCP server maintains a pool of IP addresses and provides an IP address to every new DHCP-enabled client.
Unix DHCP - Syslog integration is based on Syslog messages generated by the Unix DHCP server. The Syslog message includes the MAC address of the device (DHCP-enabled client) and the leased IP address. Syslog uses port 514 to send log messages over TCP or UDP.
Prerequisites
Set the relevant Access Control rules on the relevant gateway to allow Syslog traffic between the Unix DHCP server and the Check Point Management Server.
To configure the Access Control rule:
-
Connect with SmartConsole to the Check Point Management Server.
-
From the left navigation panel, click Security Policies.
-
In the Access Control section, click Policy.
-
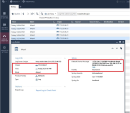
Configure this rule:
Setting Up the Unix DHCP - Syslog as the IoT Discovery Engine
To set up Unix DHCP - Syslog as the IoT Discovery Engine:
-
Configure the Unix DHCP server:
-
Download the
syslog-dest.shfile.The system downloads the file.
-
Transfer the file to the Unix DHCP server.
-
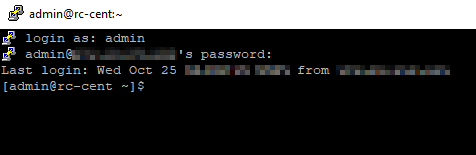
Connect to the command line on your Unix DHCP server (over SSH or console).
-
Log in with your administrator credentials.
Output:
-
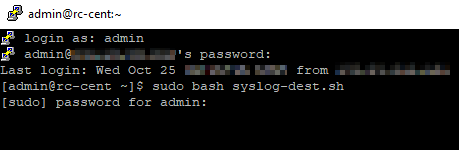
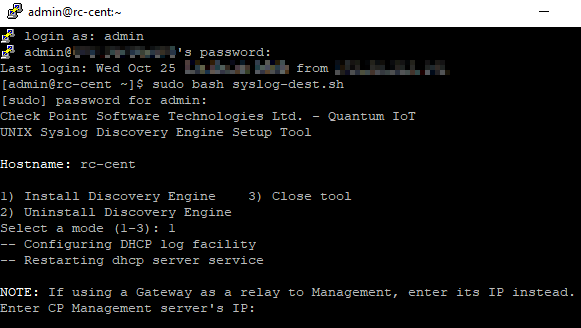
Run:
sudo bash syslog-dest.shOutput:
-
Enter the administrator password.
Output:
-
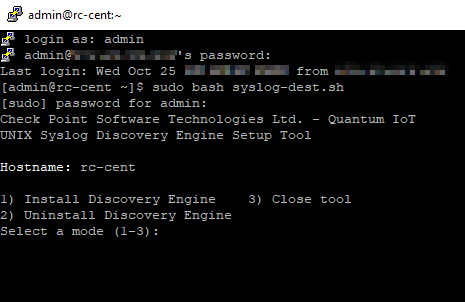
To install the discovery engine, enter 1 and press Enter.
Output:
-
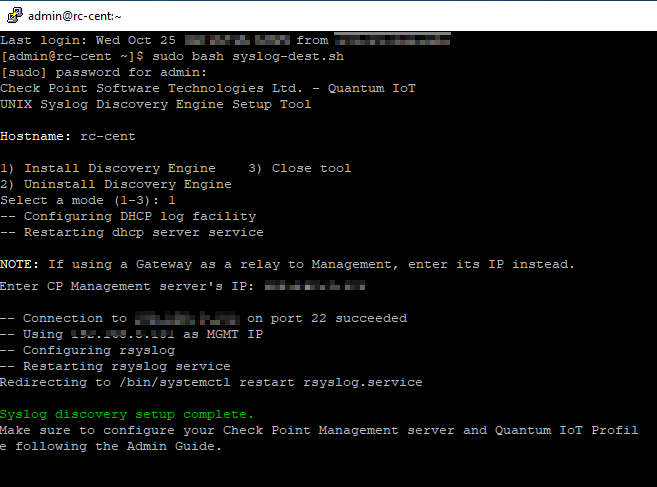
Enter the IP address of your Check Point Management Server, and press Enter.
Output:
-
To close the setup tool, type exit.
After the installation, the system copies the Syslog logs to your Check Point Management Server at one-minute intervals.
-
-
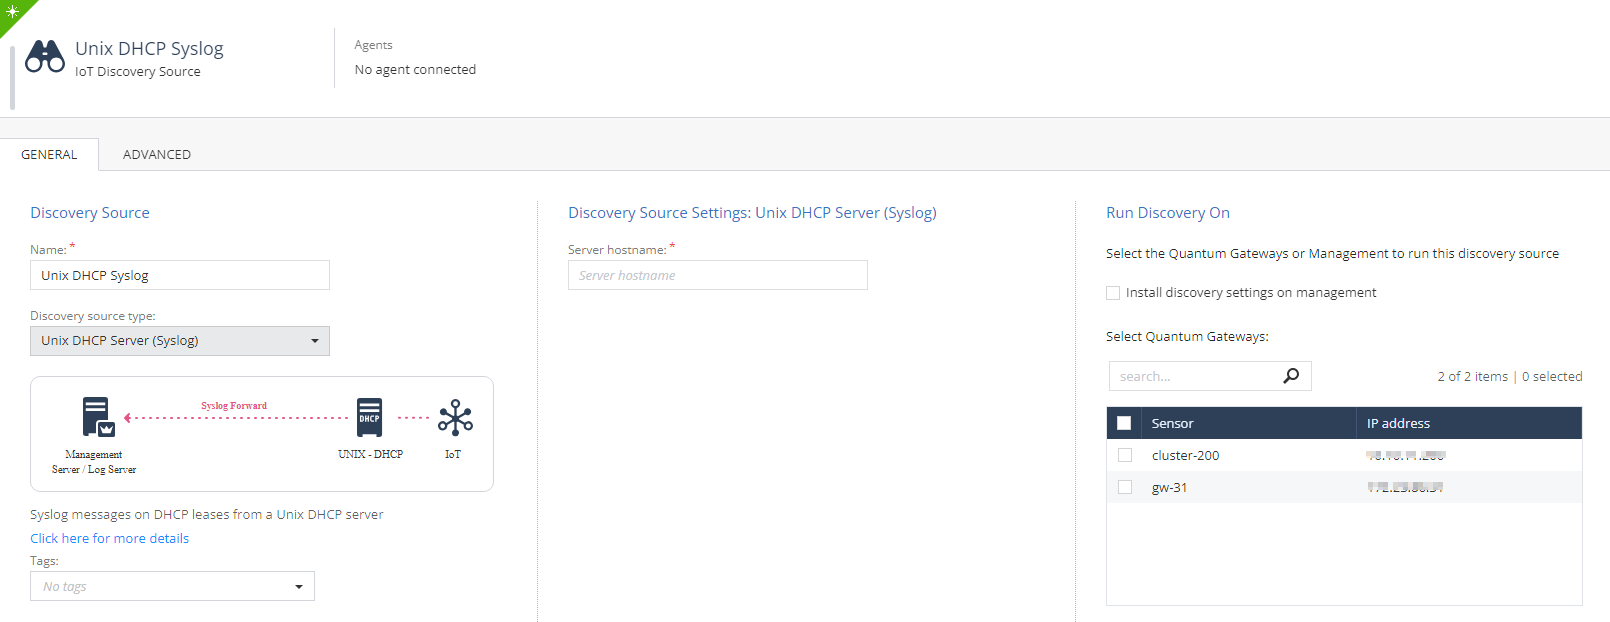
Configure Unix DHCP - Syslog as the IoT discovery engine in Quantum IoT Protect.

Notes:
-
When you install the Unix DHCP - Syslog built-in discovery engine, it modifies the configuration of the Check Point Management Server on which it is installed and enables it to receive Syslog messages.
-
Make sure no other user is logged in to SmartConsole.
-
Log in to the Check Point Infinity Portal.
-
In the Quantum section, go to IoT Protect > IoT > Profiles.
-
Click
 and select IoT Discovery Source Profile.
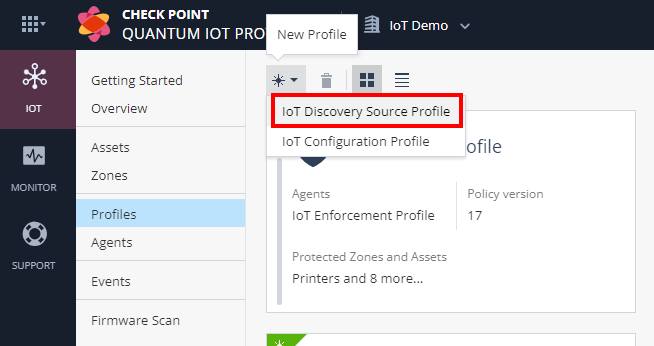
-
Enter these:
-
In the Discovery Source section, from the Discovery source type list, select Unix DHCP Server (Syslog).
-
In the Discovery Source Settings section, in the Server hostname field, enter the hostname of the Unix DHCP server.
-
In the Run Discovery On section, select your Check Point Management Server.

-
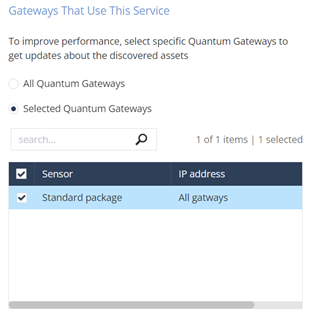
In the Gateways That Use This Service section, select the gateways relevant to your discovered assets, or select the policy-package for all gateways.
-
-
Click Enforce.
The system installs the Unix DHCP - Syslog discovery engine and starts running on the Check Point Management Server.
-
Testing the Unix DHCP - Syslog IoT Discovery Engine
-
Connect to the command line on the Check Point Management Server (over SSH or console).
-
Log in to the Expert mode.
-
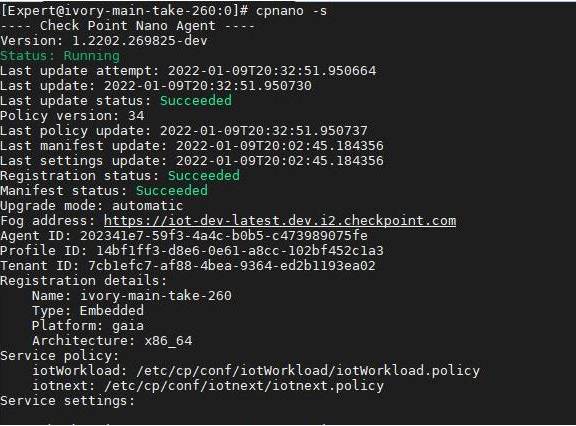
Run:
cpnano -sOutput:
-
These nano services must be running:
-
Check Point Orchestration
-
Check Point IoT Syslog DHCP
-
Removing Unix DHCP - Syslog as the IoT Discovery Engine
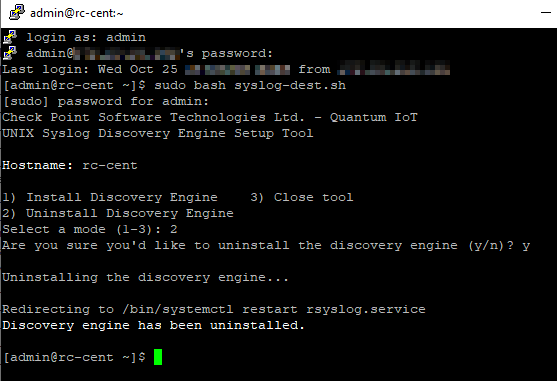
To remove Unix DHCP - Syslog as the IoT discovery engine from the Unix DHCP server:
-
Connect to the command line on your Unix DHCP server (over SSH or console).
-
Log in with your administrator credentials.
Output:
-
Run:
sudo bash syslog-dest.shOutput:
-
Enter the administrator password.
Output:
-
To uninstall the discovery engine, enter 2 and press Enter.
Output:
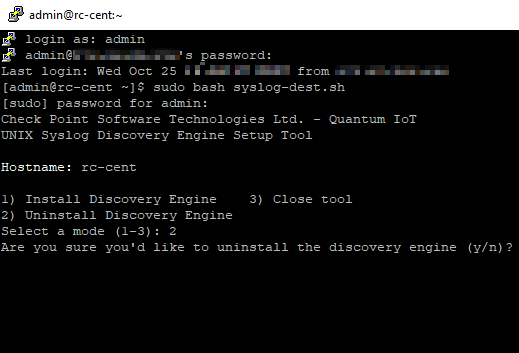
-
Enter y and press Enter.
Output:
-
To close the setup tool, type exit.
The system uninstalls the Unix DHCP - Syslog discovery engine. DHCP logs are no longer copied to the Check Point Management Server.
To remove the IoT Discovery Source Profile in Quantum IoT Protect:
-
Log in to Check Point Infinity Portal.
-
In the Quantum section, go to IoT Protect > IoT > Profiles.
-
On the Unix DHCP Syslog discovery engine profile, click
 and then Delete.
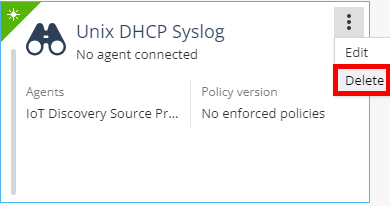
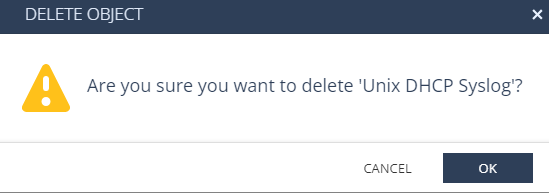
-
Click OK.
-
Click Enforce.
Troubleshooting the Unix DHCP - Syslog IoT Discovery Engine
-
Connect with SmartConsole to the Check Point Management Server.
-
From the left navigation panel, click Gateways & Servers.
-
Double-click the Management Server object.
-
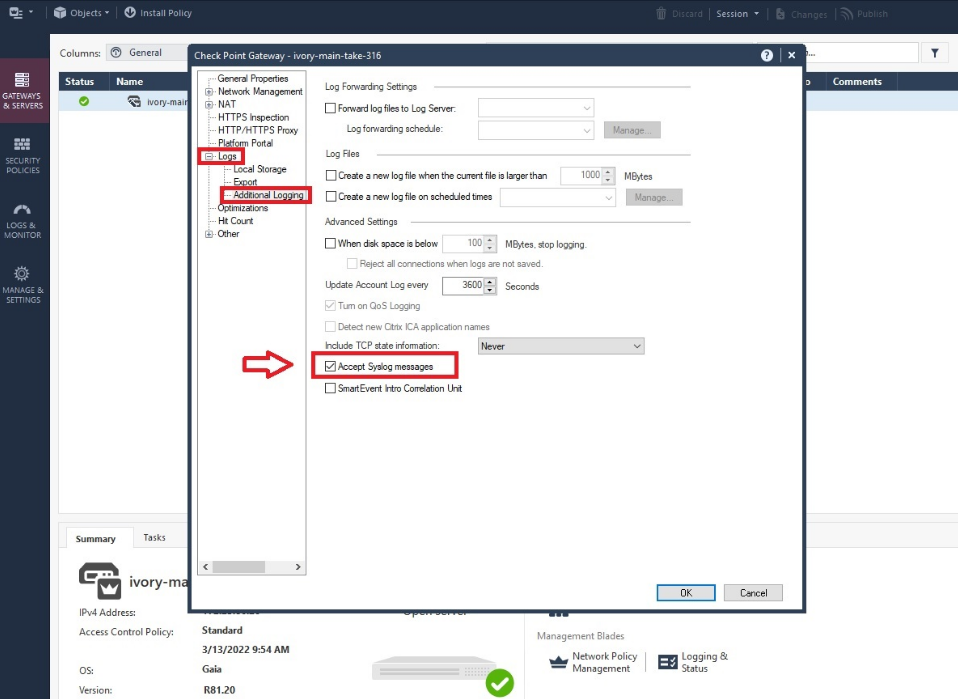
Expand Logs > click Additional Logging.

-
Select Accept Syslog messages.
-
Click OK.
-
Install the Access Control policy.
-
Enable Syslog traffic from the Unix DHCP server to the Check Point Management Server:
-
Connect to the command line on your Unix DHCP server (over SSH or console).
-
Log in with your administrator credentials.
-
Run:
-
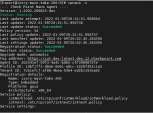
nmap –sU –p 514 <IP Address of Management Server>Expected output:

-
echo "Syslog Test Message - #1" | nc -u <IP Address of Management Server> 514Expected output in SmartConsole > Logs & Monitor view > Logs.
-
-
-
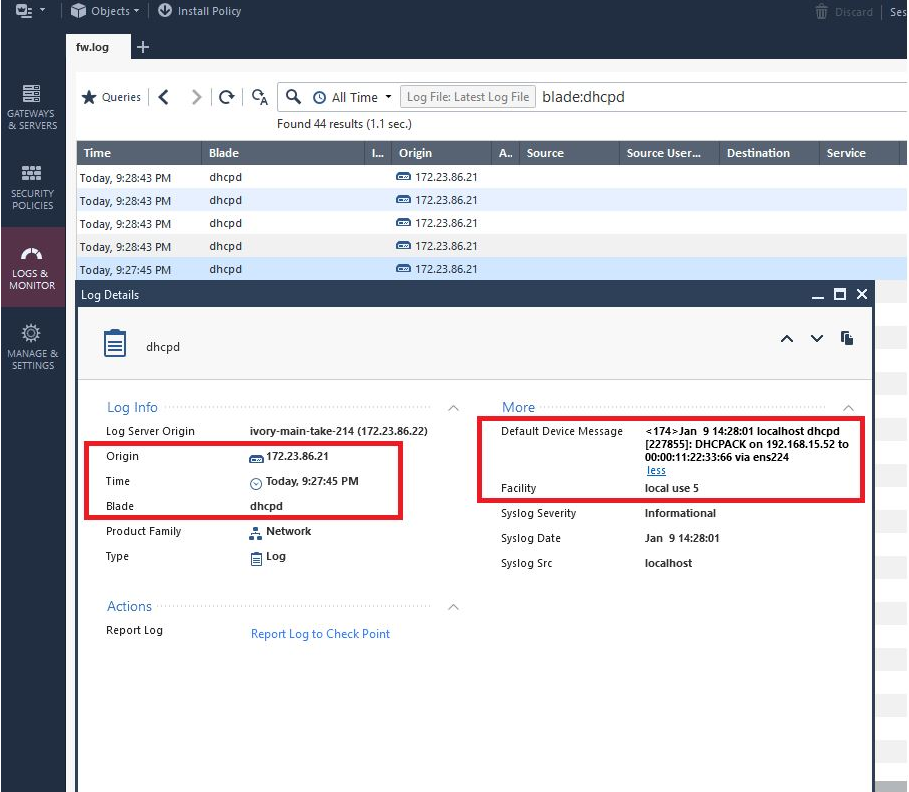
Filter the logs with this query:
blade: dhcpd or blade: syslog
-
Connect to the command line on the Check Point Management Server(over SSH or console).
-
Log in to the Expert mode.
-
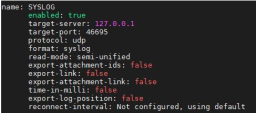
Run:
cp_log_export showExpected output: