Appendix C - Using MS-DHCP as the IoT Discovery Engine (Logs Read from Local Directory)
You can set up an IoT discovery engine on the Check Point Security Gateway or Management Server to discover IoT assets in your network. The IoT discovery engine uses the network devices in the network, such as switches, routers, gateways, or Network Access Control (NAC) devices to discover IoT assets.
You can use the Microsoft Dynamic Host Configuration Protocol (MS-DHCP) server to discover IoT assets. It maintains a pool of IP addresses and provides (leases) an IP address to every new DHCP-enabled client. MS-DHCP integration is based on events log files created by the MS-DHCP server. The events may include the MAC address of the device (DHCP-enabled client) and the leased IP address.
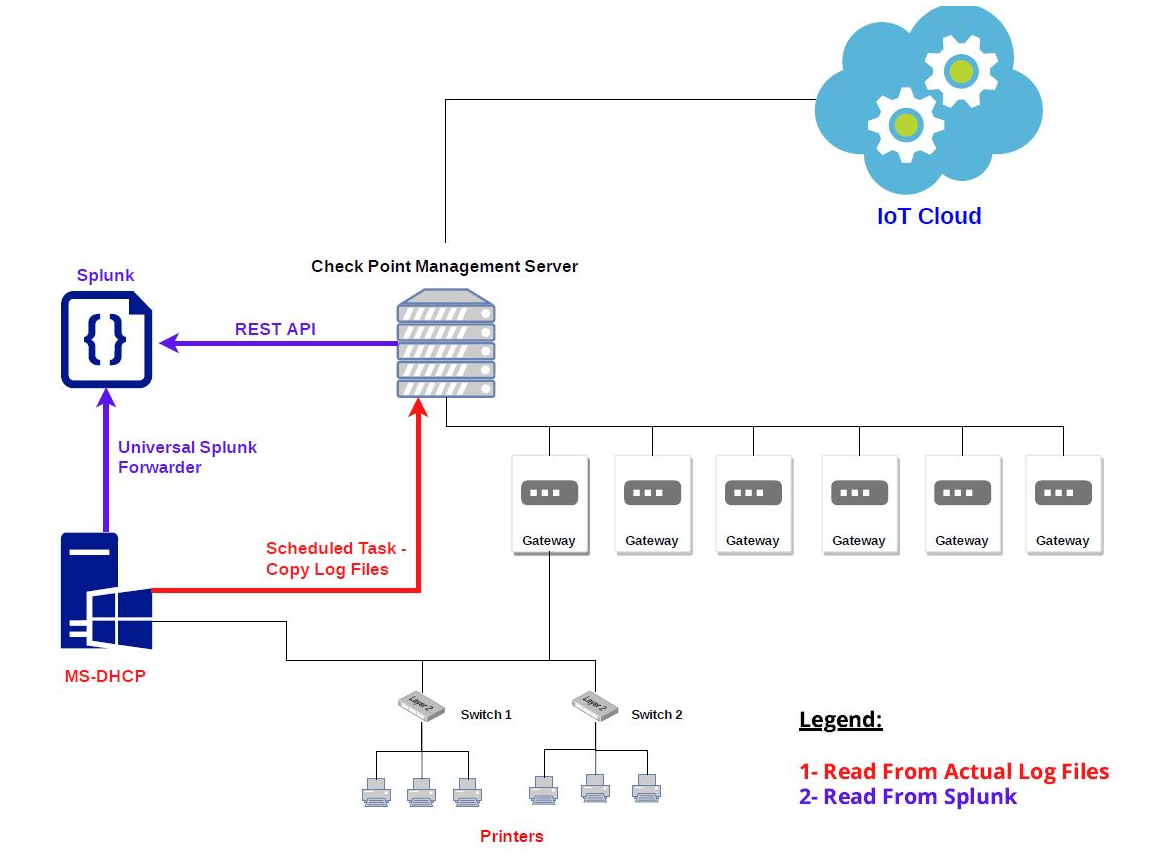
MS-DHCP server reads the DHCP events by one of these methods:
-
The event logs from the MS-DHCP server are copied to a local directory and the logs are read from this local directory.
-
The event logs from the MS-DHCP server are forwarded to the Splunk server and the logs are read from the Splunk server.
This appendix describes the MS-DHCP integration when the event logs are read from the local directory.
Prerequisites
-
MS-DHCP Server 2012 (R2) and higher.
-
For MS-DHCP Server 2016 and lower, install OpenSSH. See Installing OpenSSH on the MS-DHCP Server.
-
IP address and login credentials of your Check Point Security Gateway / Management Server that is used to discover IoT assets in your network.
-
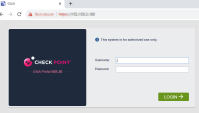
Verify that your Check Point Security Gateway / Management Server is accessible. To verify, go to:
https://<IP address of Gaia Management Interface on Security Gateway>If the Gaia Portal login page appears, then the Security Gateway / Management Server is accessible.
-
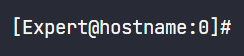
On your Check Point Security Gateway / Management Server, the default shell must be the Expert mode (
/bin/bash).To change the default user shell:
-
Connect to the command line on the Check Point Security Gateway / Management Server (over SSH or console).
-
Next step depends on the current configuration:
-
If you default shell is the Expert mode, then the prompt shows the word "
Expert" in front of the hostname.There is nothing else to configure.
Example:
-
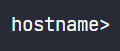
If you default shell is Gaia Clish, then the prompt shows only the hostname.
Example:
You can change the default shell in one of these ways:
-
In Gaia Portal, configure:
-
Go to User Management > Users.
-
Select and edit the admin user.
-
In the Shell field, select /bin/bash.
-
Click OK.
-
-
In Gaia Clish, run:
-
set user admin shell /bin/bash -
save config
-
-
-
-
Restart your SSH session and check if you are in Expert mode by default.
If you are still in Clish mode, make sure you have entered the correct commands and restart the SSH session.
-
Connect to the command line on the Check Point Security Gateway / Management Server (over SSH or console) again.
-
The prompt must show the word "
Expert" in front of the hostname.
-

Setting Up MS-DHCP as the IoT Discovery Engine (Logs Read from Local Directory)
To set up MS-DHCP as the IoT Discovery Engine:
-
Create a scheduled task to securely copy the leased log files from the MS-DHCP server to the Check Point Security Gateway server / Management Server.

Important - The tool will install PowerShell and OpenSSH on the DHCP server if they are not already installed.
Once the setup is complete, SSH configuration changes will be applied to the Security Gateway/Management Server to enable passwordless (public key) authentication for the DHCP server. DHCP log files will then be periodically sent from the DHCP server to the Security Gateway/Management Server through SCP.-
Download the
ms-dest.batfile:-
Click here.
The Download Details page appears.
-
Click Download.
The system opens the file.
-
Right-click on the page and click Save as.
-
Enter the file name as
ms-dest.batand click Save.
-
- Transfer the file to the MS-DHCP server.
-
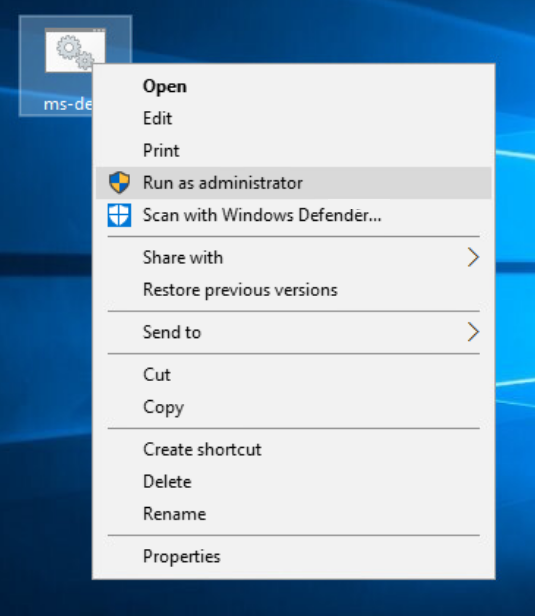
On the MS-DHCP server, right-click the ms-dest.bat file and click Run as administrator.
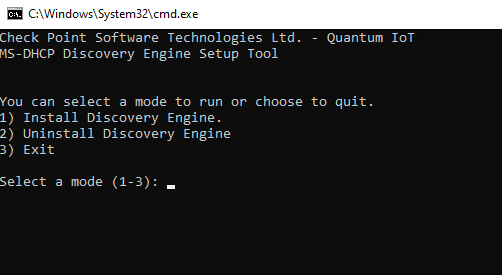
The Command Prompt window opens:
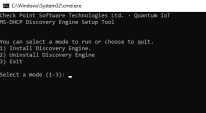
-
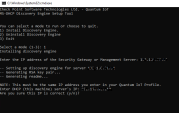
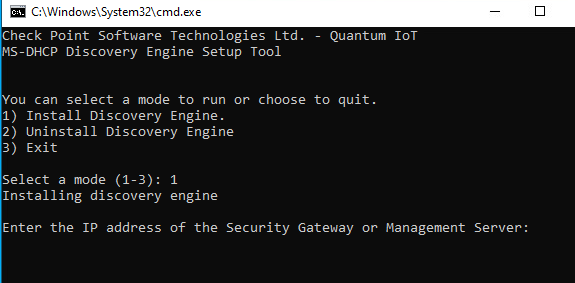
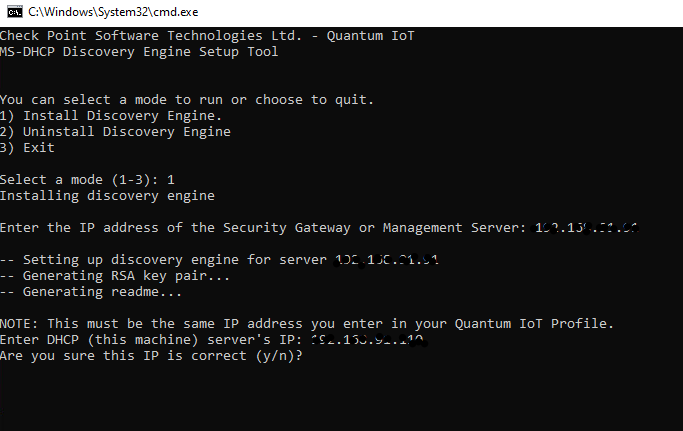
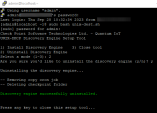
To install the discovery engine, enter 1 and press Enter.
Output:
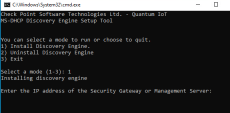
-
Enter the IP address of Security Gateway server / Management Server and press Enter.
Output:
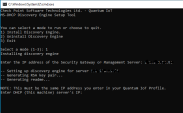
-
Enter the IP address of the MS-DHCP server.
Output:
-
Enter y and then press Enter.
Output:
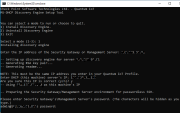
-
Enter the Expert mode password of your Security Gateway / Management Server.
Output:
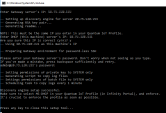
The discovery engine setup is complete.
-
To close the setup tool, press any key.
After the installation, the system copies the DHCP logs to your Security Gateway / Management Server at one-minute intervals.
-
-
Configure MS-DHCP as the discovery engine in Quantum IoT Protect:
-
Log in to Check Point Infinity Portal.
-
In the Quantum section, go to IoT Protect > IoT > Profiles.
-
Click
 and select IoT Discovery Source Profile.
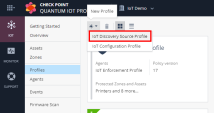
-
Enter these:
-
In the Discovery Source section, from the Discovery source type list, select Microsoft DHCP Server.
-
In the Discovery Source Settings section:
-
In the IP address field, enter the IP address of the MS-DHCP server.
-
From the Read logs from list, select Log files.
-
-
In the Run Discovery On section, select the Security Gateway from the list.
If you use a Standalone or Management server, select Install discovery settings on management.
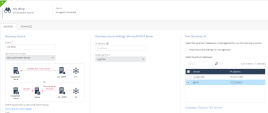
-
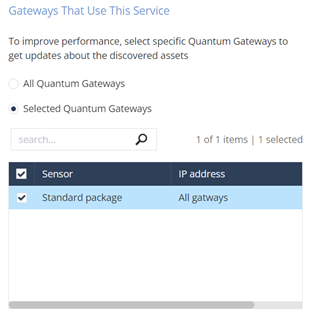
In the Gateways That Use This Service section, select the gateways relevant to your discovered assets, or select the policy-package for all gateways.

-
-
Click Enforce.
The system installs the MS-DHCP discovery engine and starts running on the Check Point Security Gateway / Management Server.
-


Testing the MS-DHCP - IoT Discovery Engine
-
Connect to the command line on the Check Point Security Gateway / Management Server (over SSH or console).
-
Log in to the Expert mode.
-
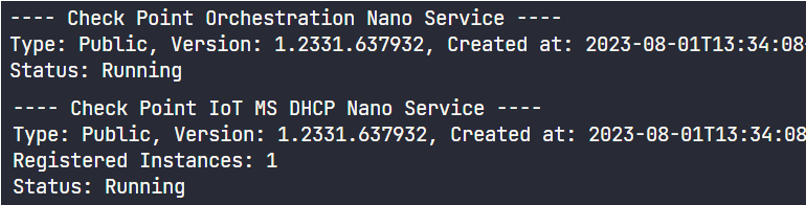
Run:
cpnano -s
Note - The output for this command may take time to appear depending on how long the system takes to enforce the profile. If you do not see the output, then verify whether you have selected the correct Security Gateway / Management Server in the Profiles setting.
-
These nano services must be running:
-
Check Point Orchestration -
Check Point IoT MS DHCP
Output:
-
Removing MS-DHCP as the IoT Discovery Engine (Logs Read from Local Directory)
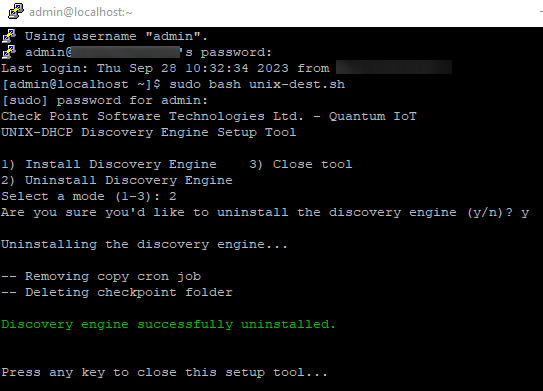
To remove MS-DHCP as the IoT discovery engine from the MS-DHCP server:
-
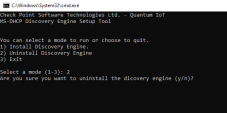
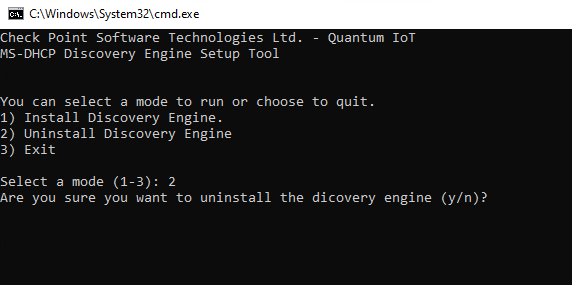
On the MS-DHCP server, right-click the setup tool ms-dest.bat and click Run as administrator.
Output:
-
Enter 2 and press Enter.
Output:
-
To confirm, enter y and press Enter.
The system removes the scheduled copy task and uninstalls the MS-DHCP server as the discovery engine.
-
To close the tool, press any key.
DHCP logs are no longer copied to the Security Gateway / Management Server.
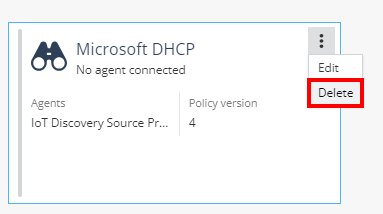
To remove the IoT Discovery Source Profile in Quantum IoT Protect:
-
Log in to Check Point Infinity Portal.
-
In the Quantum section, go to IoT Protect > IoT > Profiles.
-
On the Microsoft DHCP discovery engine profile, click
 and then Delete.
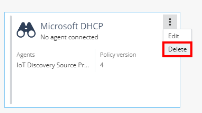
-
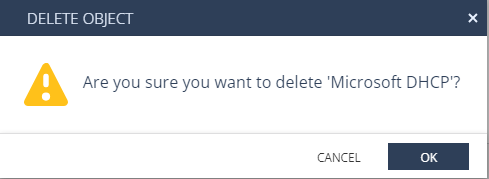
To confirm deletion, click OK.

-
Click Enforce.
Installing OpenSSH on the MS-DHCP Server
|
|
Note - This is required only for MS-DHCP Server 2016 and lower. |
The MS-DHCP server requires OpenSSH to copy log files to the Check Point Security Gateway / Management Server over SSH.
It is installed by default on Windows Server 2019 and higher. For older versions, you can manually install it or use the MS-DHCP Discovery Engine Setup tool to install it for you.
Installing OpenSSH using the MS-DHCP Discovery Engine Setup Tool
This procedure requires PowerShell 3.0 or higher installed on the MS-DHCP server.
To install OpenSSH using the MS-DHCP Discovery Engine Setup Tool:
-
On the MS-DHCP server, right-click the ms-dest.bat file and click Run as administrator.
Output:
-
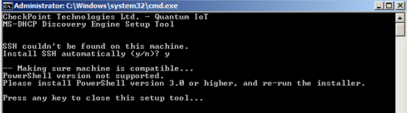
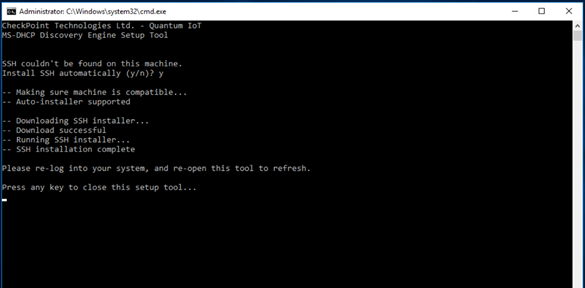
Enter y and then press Enter.
Output:

Note - If this output appears, you can either install OpenSSH manually or install PowerShell 3.0 and repeat the procedure.
-
Press any key to close the window.
-
Continue with the installation of MS-DHCP Discovery Engine Setup tool.


Installing OpenSSH Manually
-
Go to OpenSSH release page.
-
For the version you want to install, scroll down and expand Assets.
-
Download this package:
OpenSSH-Win64-<version>.msi -
Run the installer on the MS-DHCP server.
-
Continue with the installation of MS-DHCP Discovery Engine Setup tool.

Troubleshooting
If the prompt to automatically install SSH appears again, it indicates that the environment variables are not refreshed.

Do one of these:
-
Close and open the ms-dest.bat file again directly from the Desktop.
-
Sign out and log in again into the MS-DHCP server.
-
Restart the MS-DHCP server.
Troubleshooting MS-DHCP IoT Discovery Engine (Logs Read from Local Directory)
-
Connect to the command line on the Check Point Security Gateway / Management Server (over SSH or console).
-
Log in to the Expert mode.
-
The DHCP logs files are available in this location:
/var/log/iot-discovery/ms-dhcp-logs