Appendix B - Using SNMP as the IoT Discovery Engine
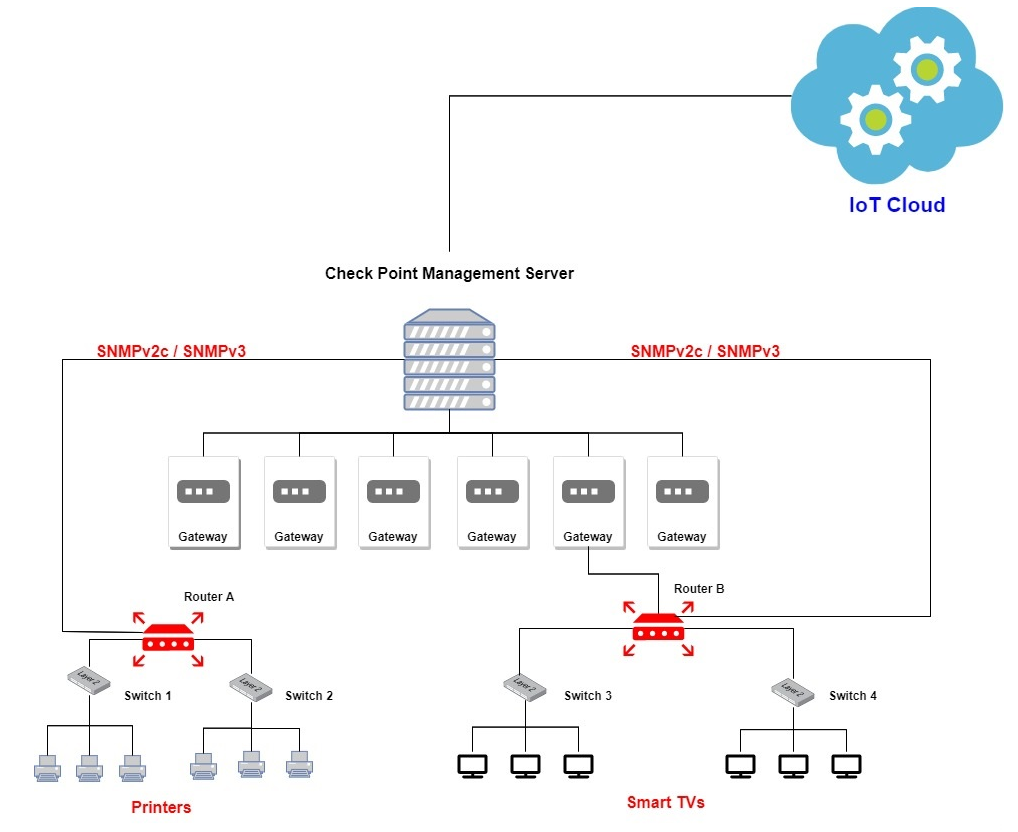
You can set up an IoT discovery engine on the Check Point Security Gateway or Management Server to discover IoT assets in your network. The IoT discovery engine uses the network devices in the network, such as switches, routers, gateways, or Network Access Control (NAC) devices to discover IoT assets.
The Simple Network Management Protocol (SNMP) integration sends queries to network devices such as switches, routers, or gateways to get the data stored in their Address Resolution Protocol (ARP) tables. SNMP integration can be configured on the Management Server or on the Security Gateway.
SNMP integration supports both SNMPv2c and SNMPv3. SNMPv3 is the most secure version of the SNMP protocol.
SNMP uses snmp get and snmp walk to send commands and messages. SNMP packets are typically sent over UDP, though SNMP over TCP port is possible.
The SNMP profiles are tested on these SNMP servers:
-
Cisco Catalyst 9300
-
Cisco Catalyst 9500
-
Check Point Security Gateways
-
HPE Networking Comware Switch Series 5940
-
HP Enterprise Aruba 6405
-
MikroTik CRS317
-
FortiGate 200F firewall
-
Any router which supports:
Prerequisites
-
Configure the SNMP service on the network device (switch, router or gateway) to be queried. For more information, refer to your router documentation.

Notes:
-
When you configure the SNMP built-in discovery integration to query the ARP table of Check Point cluster of gateways, configure it for both cluster members: Active and Standby.
-
Cisco VRF Router
Virtual Routing and Forwarding (VRF) technology lets multiple instances of a routing table co-exist on the same router at the same time.
To configure a different SNMP context for each VRF, run this command on the router's shell (only when using SNMPv3):
snmp-server context <context-1-name> vrf <vrf-1-name>
-
-
Allow SNMP traffic between the Security Gateway or Management Server on which the integration is installed and the switch or router which needs to be queried, configure relevant security rules on the gateway.
-
From SmartConsole, connect to Security Gateway or Security Management Server or Domain Management Server.
-
Configure the relevant security rules to allow the SNMP traffic:
-
To allow the SNMP Request and SNMP Response, use the pre-defined service snmp.
-
To allow the SNMP Trap packets, use the pre-defined service snmp-trap.
-
-
Install the policy on the relevant Security Gateway or Cluster.
-
Setting Up SNMP - IoT Discovery Integration
To set up SNMP as the IoT Discovery Engine:
-
Configure SNMP Integration in Quantum IoT Protect.
-
Log in to Check Point Infinity Portal.
-
In the Quantum section, go to IoT Protect > IoT > Profiles.
-
Click
 and select IoT Discovery Source Profile.
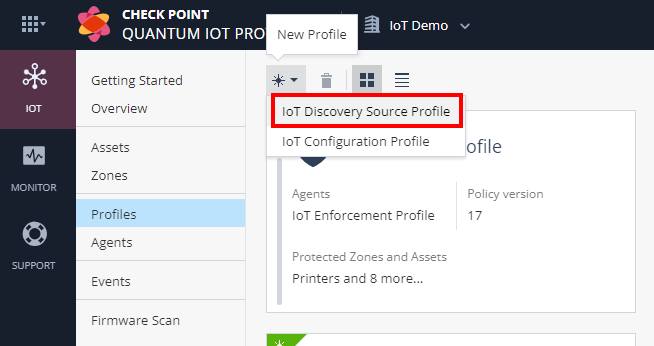
-
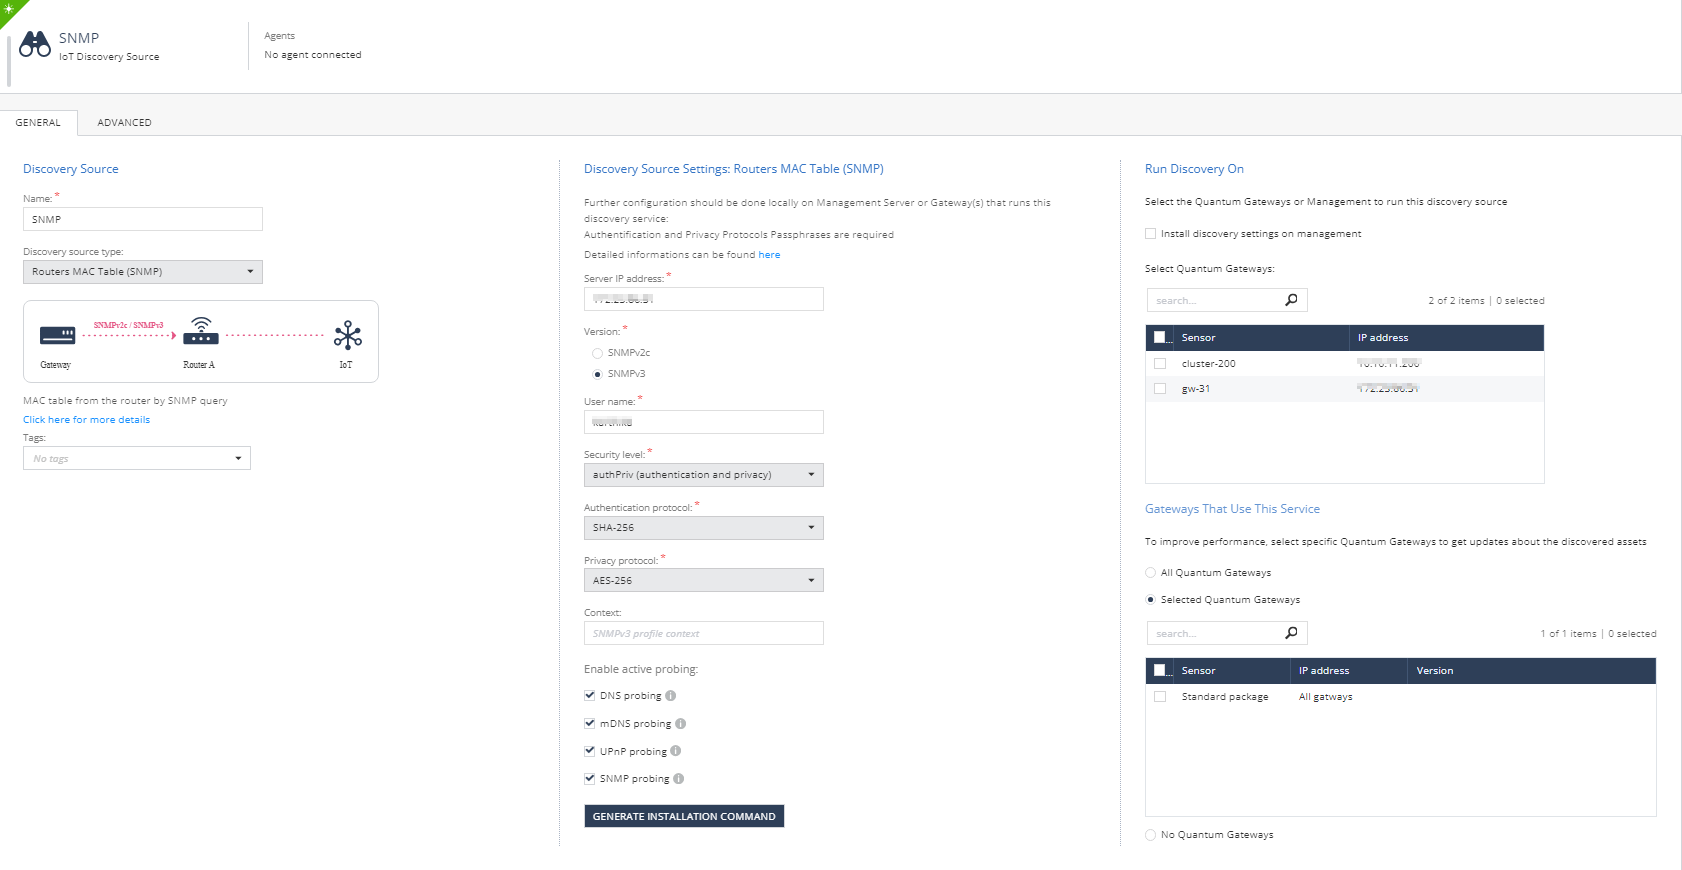
In the Discovery Source section, from the Discovery source type list, select Routers MAC Table (SNMP).
-
In the Discovery Source Settings section:

-
In the Server IP address field, enter the IP address of the SNMP server.
-
In the Version section, select the SNMP version.
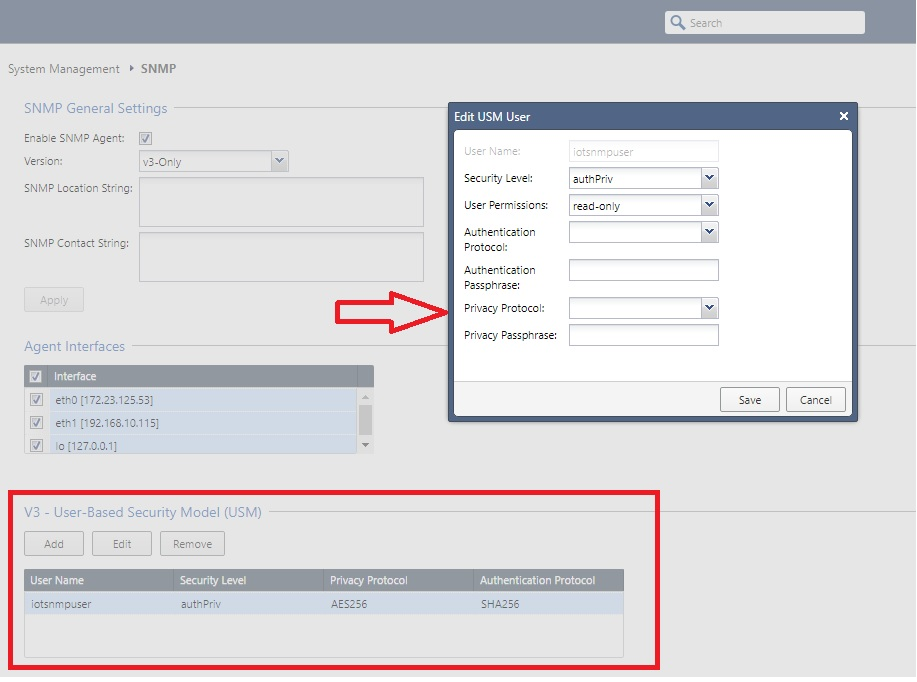
If you selected SNMPv3:
-
In the User name field, enter the SNMP user name.
-
From the Security level drop-down list, select the security level for SNMP integration.
-
From the Authentication protocol drop-down list, select the authentication protocol for SNMP integration.
-
From the Privacy protocol drop-down list, select the privacy protocol for SNMP integration.
SNMP built-in discovery integration depends on local configuration:
SNMP Integration Type
Local Configuration
SNMPv2c
Community String
SNMPv3, Security Level: Authentication and Privacy (authPriv)
-
Authentication Protocol Passphrase
-
Privacy Protocol Passphrase
SNMPv3, Security Level: Authentication no Privacy (authNoPriv)
Authentication Protocol Passphrase
-
-
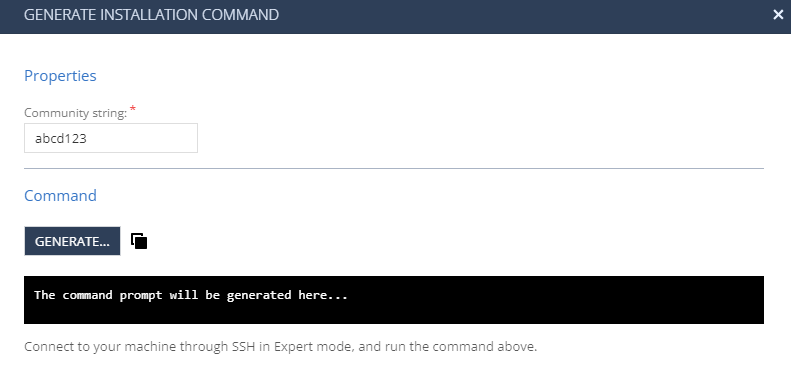
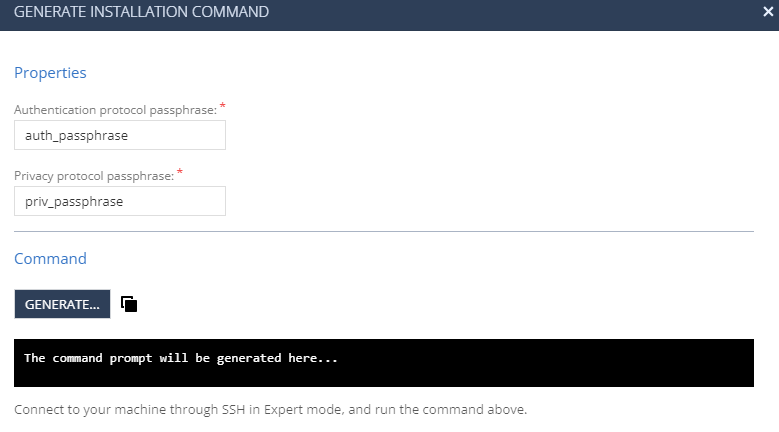
Click Generate Installation Command.
The Generate Installation Command window appears.
-
In the Properties section:
-
For SNMPv2c, enter the Community string.
-
For SNMPv3, enter:
-
Authentication protocol passphrase
-
Privacy protocol passphrase
-
-
-
In the Command section, click Generate.
The system generates the command to configure the SNMP discovery engine on the Check Point Security Gateway / Management Server.
-
Copy the generated command.
-
Access your Check Point Security Gateway / Management Server through SSH, for example using PuTTY.
-
Log in to Expert mode.
-
Paste the generated command.
-
If the integration is installed on a cluster gateway or Management Server with High Availability (HA) or Multi-Domain Server (MDS) with HA:
-
Access each member through SSH and log in to Expert mode.
-
Paste the generated command.
-
-
-
In the Run Discovery On section, select the Security Gateway / Management Server on which the integration must be installed.
-
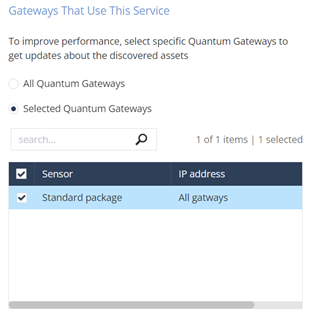
In the Gateways That Use This Service section, select the gateways relevant to your discovered assets, or select the policy-package for all gateways.
-
Click Enforce.
-
Testing the SNMP- IoT Discovery Integration
-
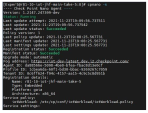
Access the Check Point Security Gateway / Management Server through SSH and run:
cpnano -sSample output:
-
Make sure these nano services are running:
-
Check Point Orchestration

-
Check Point IoT SNMP

-

Troubleshooting the SNMP- IoT Discovery Integration
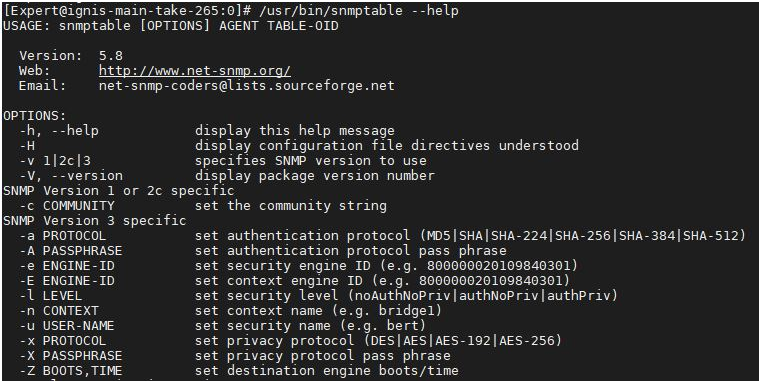
To troubleshoot, access the Check Point Security Gateway / Management Server through SSH and query the network device.
-
For SNMP v2c:
Copysnmptable -v 2c -c<community> <snmp server>
ipNetToMediaTable -C H -C f "," | awk -F ',' '{print $3 " " $2 ":"}'|
sed -e 's/\b[0-9a-f]\b:/0&/g;s/:*$//'Example:
snmptable -v 2c -cpublic <snmp server>
ipNetToMediaTable -C H -C f "," | awk -F ',' '{print $3 " " $2 ":"}'|sed -e 's/\b[0-9a-f]\b:/0&/g;s/:*$//'
-
For SNMP v3:
Copysnmptable -v3 -a<authentication_protocol> -x<privacy_protocol> -u<username> -A<authphrase> -X<privphase>
-l<security_level> <snmp server> ipNetToMediaTable -C H -C f "," |
awk -F ',' '{print $3 " " $2 ":"}' |
sed -e 's/\b[0-9a-f]\b:/0&/g;s/:*$//'Example:
snmptable -v3 -aSHA -xAES -u<username> -A<authphrase> -X<privphase>
-lauthPriv <snmp server> ipNetToMediaTable -C H -C f "," |
awk -F ',' '{print $3 " " $2 ":"}' |sed -e 's/\b[0-9a-f]\b:/0&/g;s/:*$//'