Identity Providers
In Identity & Access, add an Identity Provider![]() A system entity that creates, maintains, and manages identity information for principals and also provides authentication services to relying applications within a federation or distributed network. Acronym: IdP or IDP. (IdP) to authenticate your organization's users through Single Sign-On (SSO
A system entity that creates, maintains, and manages identity information for principals and also provides authentication services to relying applications within a federation or distributed network. Acronym: IdP or IDP. (IdP) to authenticate your organization's users through Single Sign-On (SSO![]() Single Sign-On (SSO) - A session/user authentication process that permits a user to enter one name and password in order to access multiple applications.). In addition, the use of an Identity Provider gives you the control to set permissions and policies based on the organization's identities. When logged in to the Check Point Portal, you get access through SSO to all of the different services offered through the portal.
Single Sign-On (SSO) - A session/user authentication process that permits a user to enter one name and password in order to access multiple applications.). In addition, the use of an Identity Provider gives you the control to set permissions and policies based on the organization's identities. When logged in to the Check Point Portal, you get access through SSO to all of the different services offered through the portal.
|
|
Note - You can set a maximum of five different Identity Providers for each account. |
How to Integrate with an Identity Provider
-
Below Identity Providers, click the plus icon. The Integration wizard opens with list of Identity Providers.
-
For the specific Identity Provider, go to SSO Authentication Setup with Identity Provider and open the instructions.
How to Change an Identity Provider Integration
-
In the Check Point Portal, go to
 > Identity & Access.
 -
On the Identity Provider (IdP) card, click
 .
.
-
Select one of these options:
-
Edit
The IDP INTEGRATION window opens.
You can edit configurations in the IDP INTEGRATION window. For more information, see the configuration instructions for the Identity Provider:

Note - When you edit an IdP configuration, remote users are disconnected after you apply the changes.
-
Test Connectivity - Tests connectivity between the IdP and Check Point SSO authentication.
-
Disable SSO login - Stops the SSO. The existing SSO authentication details stay in the system. You can start the authentication again, if necessary.
-
Remove - Deletes the existing SSO authentication details. If you configure the SSO authentication with a different SSO provider, then Check Point Portal does not keep the former provider's details.

Important - Removing an IdP deletes only the IdP configuration; it does not remove user-level IdP associations. Before adding a replacement IdP, remove all users provisioned through the previous IdP from the portal and reprovision them through the new IdP. Skipping this step creates dual IdP associations and causes SCIM provisioning and deactivation failures. The portal supports only individual user removal; bulk removal is not available.
-
How to Regenerate a SCIM API Token
If you configured a SCIM API token and it is expired, near its expiration date, or lost, then regenerate the token.
-
In the Check Point Portal go to
> Identity & Access. -
On the relevant Identity Provider (IdP) card, click
. -
Click Edit.
The IDP INTEGRATION window opens.
-
Open the Set Directory Integration tab.
-
Click Regenerate Token.
Important - After you click Regenerate token, Check Point Portal creates a new token that overwrites the existing token.
-
Copy and save the SCIM API Token.
-
Copy and save the URL.
-
In a new browser tab, open the IdP's portal. Keep the Check Point Portal open.
-
In the IDP's portal:
-
Paste the URL from the Check Point Portal.
-
Paste the SCIM API Token from the Check Point Portal.
-
Test the connectivity.
For details, see SCIM configuration instructions for Microsoft Entra ID or for Okta.
-
-
In the Check Point Portal, click Apply.
Integration Type for an Identity Provider
A unique URL is a link to a specific web address (in this case, a Check Point Portal account). This URL is unique because it includes authentication information that allows the Check Point Portal to give or deny access based on a preconfigured IdP authentication procedure. If you have multiple Check Point Portal accounts, you may want to use the same IdP for all accounts to simplify user management. Alternatively, you may select to use a unique URL for specific accounts to provide additional security or control.
-
Your IdP is associated only with one Check Point Portal account.
-
Users log in through the Check Point Portal login page.
-
Require domain validation.
Without a unique URL, to log in to the Check Point Portal, users first enter a preconfigured domain (domain verification) that has been set up by the administrator. To validate the user's credentials, the portal sends them to the configured IdP. If the IdP authenticates the user, access to the Check Point Portal is given and the user is directed to the last opened account.

If the domain is configured with more than one IdP, the portal uses an IdP discovery page to validate the user.

-
Your IdP is associated only with multiple Check Point Portal accounts, which are managed separately.
-
Users can login to the Check Point Portal with the unique URL.
Unique URL removes the domain verification requirement from mandatory to optional. In addition, the unique URL gives users a direct link to a specific Check Point Portal account. To do this, the portal uses the IdP configured for the account.
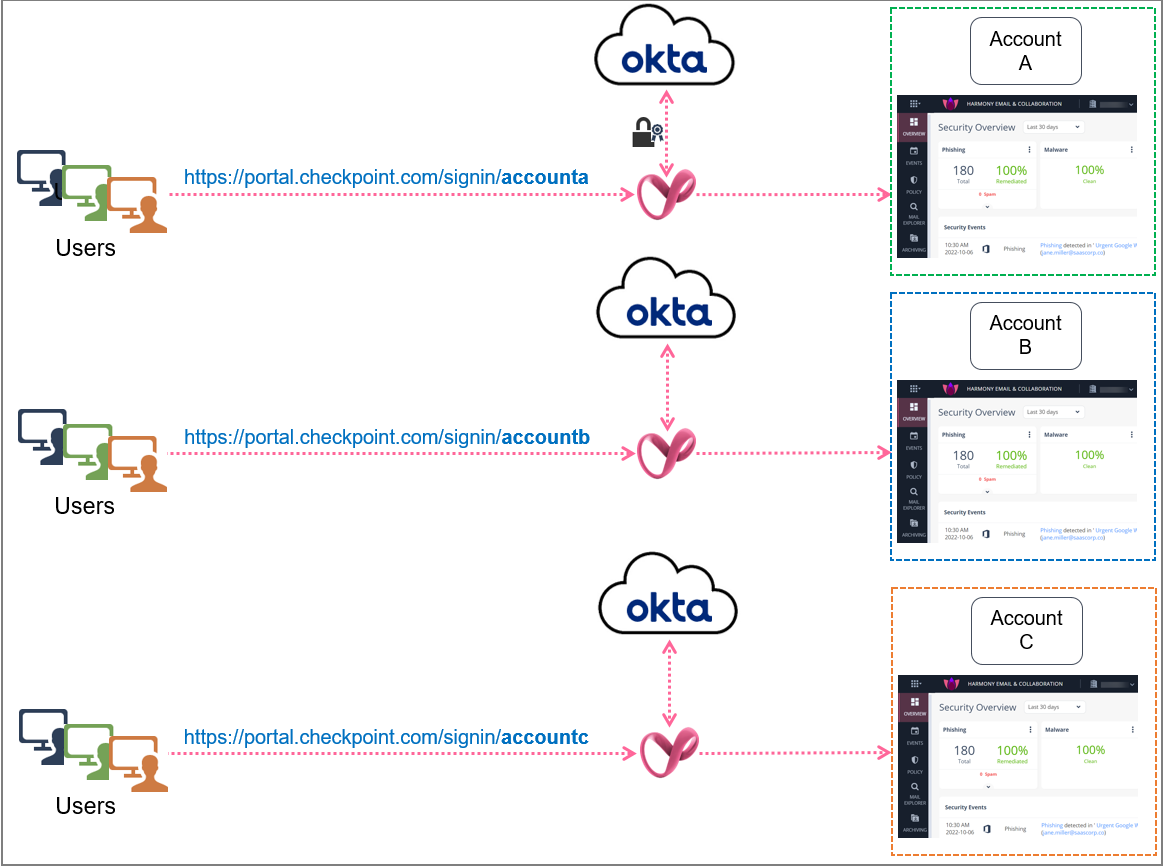
In this illustration, users click a unique URL to get access to the ACME account, https://portal.checkpoint.com/signin/ACME. The portal then validates the user through the IdP configured for the account, in this case, Okta.

In addition, Check Point Portal administrators or account managers can select one IdP to manage multiple accounts without domain verification. For instance, in this scenario, Okta serves as the IdP for three Check Point Portal accounts labeled as "a," "b," and "c." Even though each account uses Okta as its IdP, the login URLs for each account are distinct, which means that users must access each account through its unique URL.
|
|
Notes:
|
Before you start
-
Make sure that you know how to set up an identity provider in the Check Point Portal, see SSO Authentication Setup with Identity Provider.
-
To add the same domain name for a new account is not allowed. When there is no selected domain name, the user can log in only through the unique URL, see SSO Authentication Setup with Identity Provider.
-
Existing Check Point Portal users can continue to log in through the Global URL (
portal.checkpoint.com) as long as there is a domain configured. Or they can use a unique URL.
-
In the Check Point Portal, go to
> Identity & Access and select an Identity Provider.For specific IdP instructions, see SSO Authentication Setup with Identity Provider.
-
In Step 2 Integration Type, select Login with a unique URL.
-
Click
 to copy the unique URL. Make sure to save the URL.
 -
To continue, click Next and follow the IdP Integration steps.
-
In the Check Point Portal, go to
> General. -
The Unique Login URL shows below the account's name.
-
To copy the URL, click
.
Configuring Directory Integration
Directory Integration enables Check Point services to obtain user and group information from an Identity Provider. To configure Directory Integration, enter credentials from the Identity Provider in the Check Point Portal. After you finish configuring Directory Integration, the Identity Provider and the Check Point services synchronize. The Check Point services then pull information about users and groups from the Identity Provider.
Notes:
-
Directory Integration is available for these IdPs: Microsoft Entra ID, Okta, OneLogin, Ping Identity, and Google Workspace.
-
Before you can set up Directory Integration, you must configure the Identity Provider.
To set up Directory Integration:
-
Navigate to
> Identity & Access. -
Below Identity Providers, on the IdP tab, click
. If the IdP is already configured, then click Next until you get to step 5 Set Directory Integration. -
In Set Directory Integration, enter the necessary credentials for directory synchronization to connect to the IdP.
-
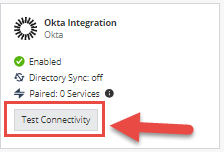
To test the connection between the IdP and the Check Point Portal, click Test Connectivity.
If the connection test passes, then the check mark icon shows as green. If the connection test does not pass, make sure the correct credentials were entered. -
Click Next.
|
|
Important - For users whose IdP is integrated with the Check Point Portal, but do not want to synchronize their IdP objects to the Check Point Portal, select the checkbox I want to skip this step and use this IdP for SSO authentication only. |
Testing IdP Connectivity
In addition to the test connectivity step in the IdP directory configuration, it is possible to test the IdP connectivity any time after the configuration with the Test Connectivity option. This test allows administrators to make sure that the IdP setup is correct and if any issues with the connection exist.
To test IdP connectivity:
-
In the Check Point Portal, select
> Identity & Access. -
Below Identity Providers, for the specific IdP click Test Connectivity.
-
Click Run test and enter your credentials.
A page with success or failed messages shows.