Applying the Harmony Mobile Protect app Configuration and Policy Enforcement
If a device is at risk because of a malicious app or activity, the Mobile Security system notifies the user through the in-app notifications. It also updates the risk state and sets the appropriate risk_level extension attribute to Jamf Pro for the device. This device is added automatically to a Smart Mobile Device Group, with the criteria of an extension attribute. Jamf Pro must have a Configuration Profile that can apply a policy on a Mobile Device Group.
For example, if an administrator blocked a Waze app, then all the devices with Waze are identified as devices at High Risk (“risk_level”=”CHKP_Risk_High”). The Mobile Security Dashboard notifies the user and marks the device with “risk_level” set to ”CHKP_Risk_High” in Jamf Pro. This adds the device to the Smart Mobile Device Group “CHKP_Risk_High”. Then the Jamf Pro system enforces policy actions specified in the Configuration Profile. This mitigation process is described in Integration with Jamf Pro and Configuring Jamf Pro Integration Settings.
Configuring the Harmony Mobile Protect app Installation
If Harmony Mobile Protect app is not installed or is removed from the device, the device is marked as not protected.
To configure the Required/Automatic Installation:
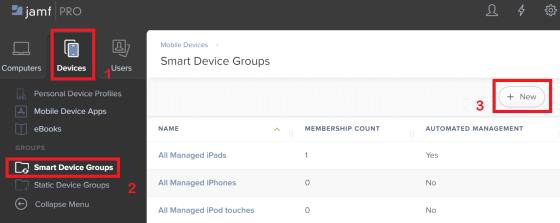
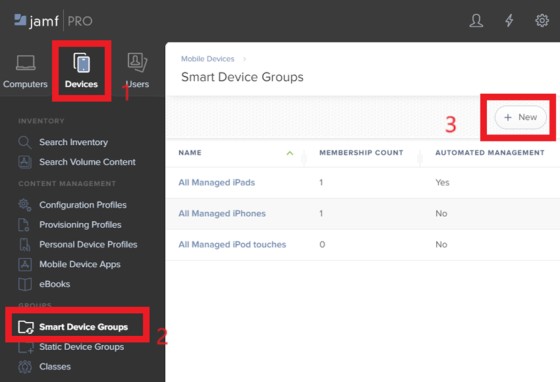
On Jamf Pro, go to Devices > Smart Device Groups > New.
Configure settings in the Mobile Device Group section:
In Display Name, enter the group name (recommended: “Not Protected Devices”).
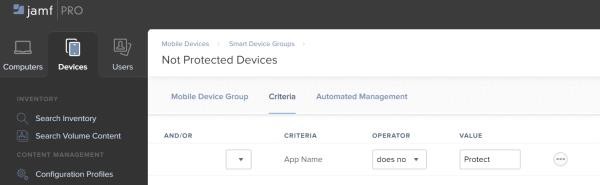
Configure settings in the Criteria section:
Click Add.
Click Show Advanced Criteria.
Scroll down to the App Name option and click Choose.
In the Operator field, select does not have.
For Value, click the (…) on the right.
Scroll-down to the Protect and click Choose.
Click Save.
Click Done.
Creating Smart Group for Devices with High Risk
Go to Devices > Smart Device Groups > New.
Configure the settings in the Mobile Device Group section:
In Display Name, enter the group name (recommended: “CHKP_Risk_High”).
Select the option Send email notification on membership change (recommended).
Configure the settings in the Criteria section:
Click Add.
Click Show Advanced Criteria.
Scroll-down to the risk_level option and click Choose.
In the Operator field, select is.
In the Value field, enter CHKP_Risk_High.
Click Save.
Click Done.

Note - Check Point recommends that you create a separate Smart Group for each risk level and for each device status (active, inactive, and more).
Creating Configuration Profile for Compromised Devices
For compromised and unprotected devices, you must configure and apply a separate Configuration Profile.
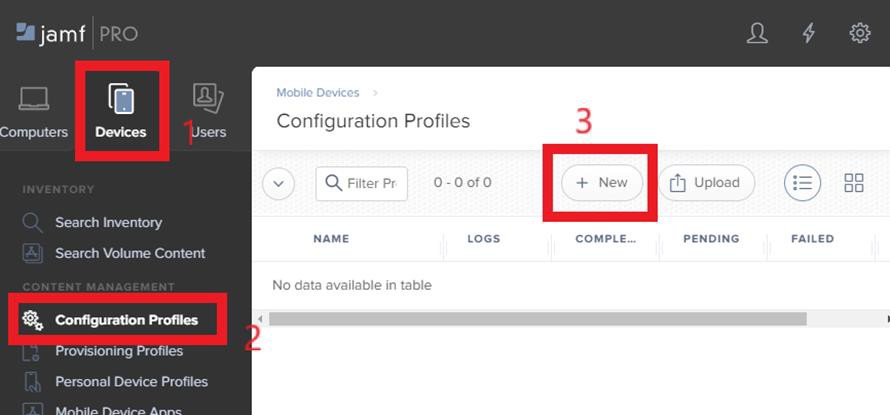
Go to Devices > Configuration Profiles > New.
Configure the settings in the Options section.
Note - In this example, the camera for the applied devices is blocked and is used as a Test App. But you can s example, removing apps, etc.
In the General tab, enter the Profile name, for example, Non-Compliant Devices.
In the Restrictions tab, click Configure.

In the iOS > Functionality section, clear the Allow use of camera option.

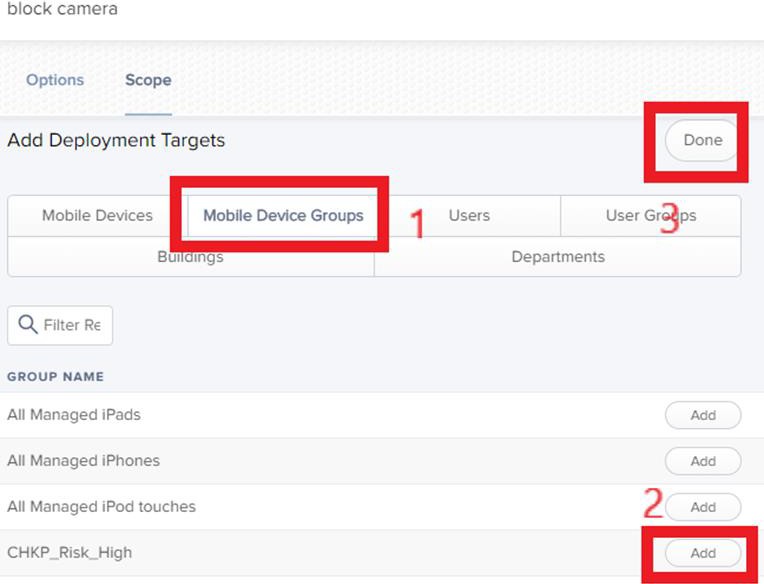
In the Scope > Targets section:
In the Selected Deployment Targets row, click Add.
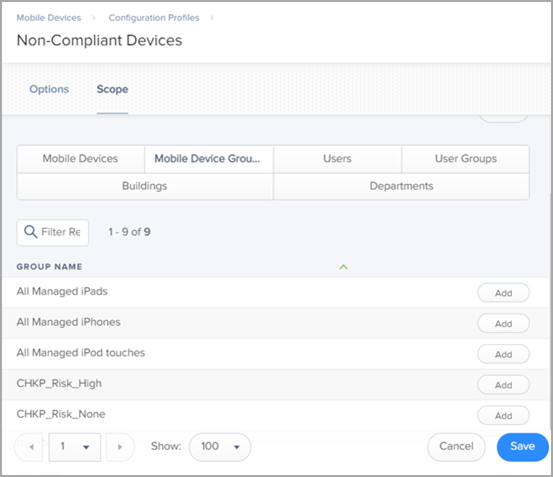
Click the Mobile Device Groups tab.
Click Add in the row of the Smart Group that you created for the devices at risk CHKP_Risk_High (see Creating Smart Group for Devices with High Risk).
In the Not Protected Devices Smart Group row, click Add.
Click Save.
Click Done.