Configuring UEM to Deploy the Harmony Mobile Protect app
Now that we have completed the integration steps, we can continue with the configuration of the UEM![]() Unified Endpoint Management. An architecture and approach that controls different types of devices such as computers, smartphones and IoT devices from a centralized command point. platform.
Unified Endpoint Management. An architecture and approach that controls different types of devices such as computers, smartphones and IoT devices from a centralized command point. platform.
For this process we will return to the Endpoint Management Console to complete the configuration.
General Workflow
-
Add the Harmony Mobile Protect App to your App Catalog. See Adding the Harmony Mobile Protect App to Your App Catalog.
-
Add an iOS Configuration Policy for Harmony Mobile. See Adding an iOS Configuration Policy for Harmony Mobile Protect.
-
Collect App list from iOS Devices. See Collecting App List from iOS Devices.
-
Require the Harmony Mobile Protect app to be installed on your mobile. See Requiring the Harmony Mobile Protect app to be Installed".
-
Create a Mitigation Process. See Creating a Mitigation Process.
Configuring UEM to Deploy Harmony Mobile Protect app
Prerequisites
Harmony Mobile Security Gateway![]() Dedicated Check Point server that runs Check Point software to inspect traffic and enforce Security Policies for connected network resources. (Choose the server for your region):
Dedicated Check Point server that runs Check Point software to inspect traffic and enforce Security Policies for connected network resources. (Choose the server for your region):
Enter the Security Gateway server for your region:
|
Region |
Server |
|---|---|
|
US |
gw.locsec.net |
|
Ireland (EU region) |
eu-gw.locsec.net |
|
Australia (Asia region) |
au-gw.locsec.net |
|
Canada (Canada) |
ca-gw.locsec.net |
|
UK region (UK) |
uk-gw.locsec.net |
|
India |
in-gw.locsec.net |
Adding the Harmony Mobile Protect App to Your App Catalog
In this process we will be using the CHKP_Status tag.
Using the CHKP_Status tag we can start deploying the Harmony Mobile Protect app from the public stores to those devices that will be protected by Check Point Harmony Mobile. We will do this to only require the Protect app when the device has the CHKP_Status of Provisioned, Active, or Inactive. If CHKP_Status device property has not been set, then the user will NOT be prompted to install the Harmony Mobile Protect app. This ensures that the devices are synchronized in the Harmony Mobile Dashboard before asking the user to install the Harmony Mobile Protect app.
Add the Protect App for both iOS and Android operating systems.
-
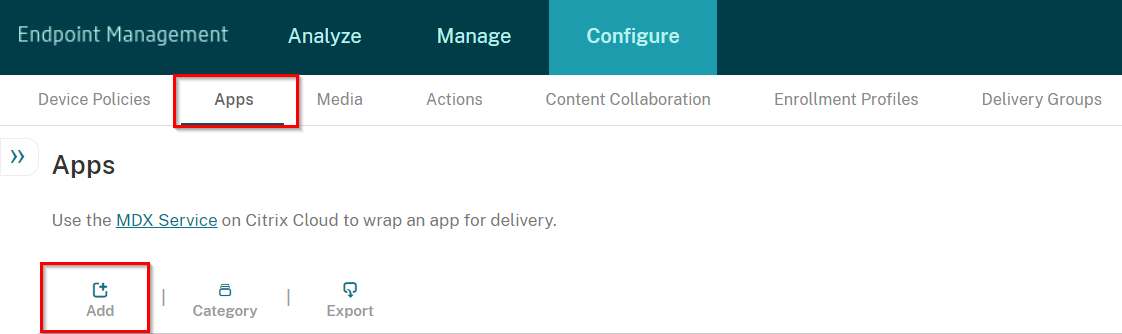
Navigate to Configure > Apps, and click Add.
-
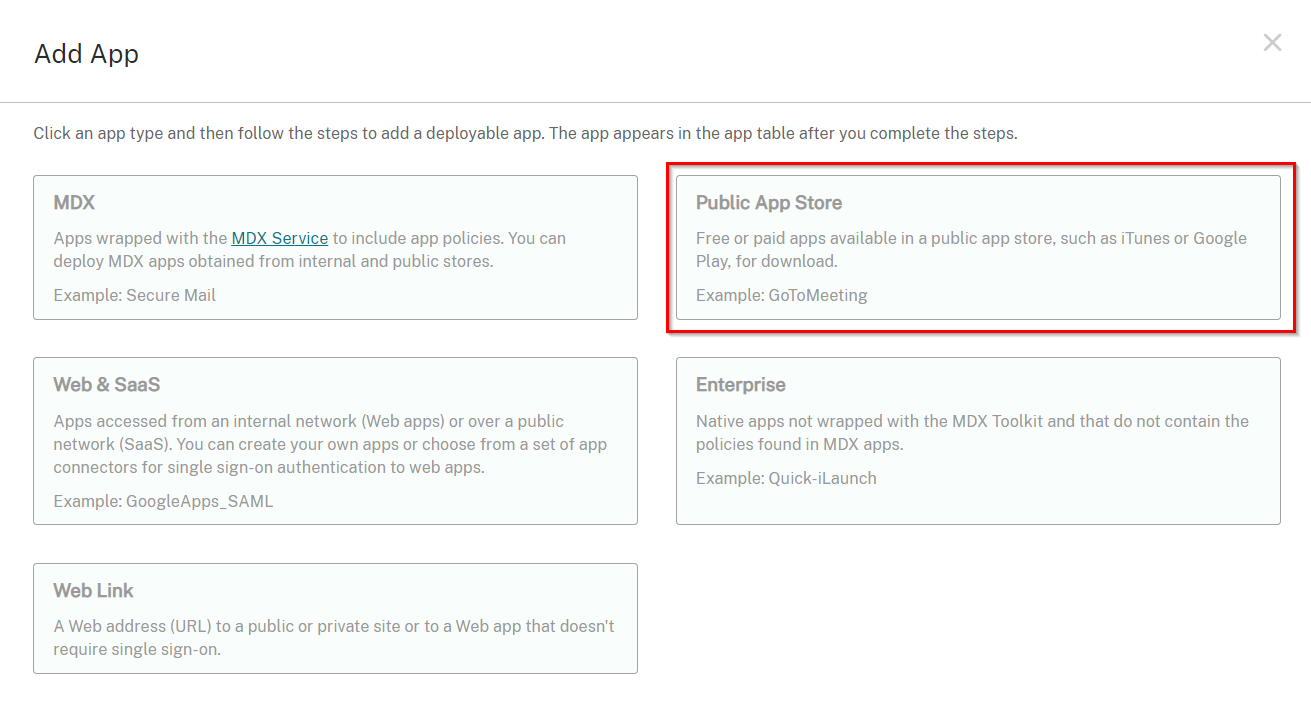
On the Add App pop-up window, select Public App Store.
-
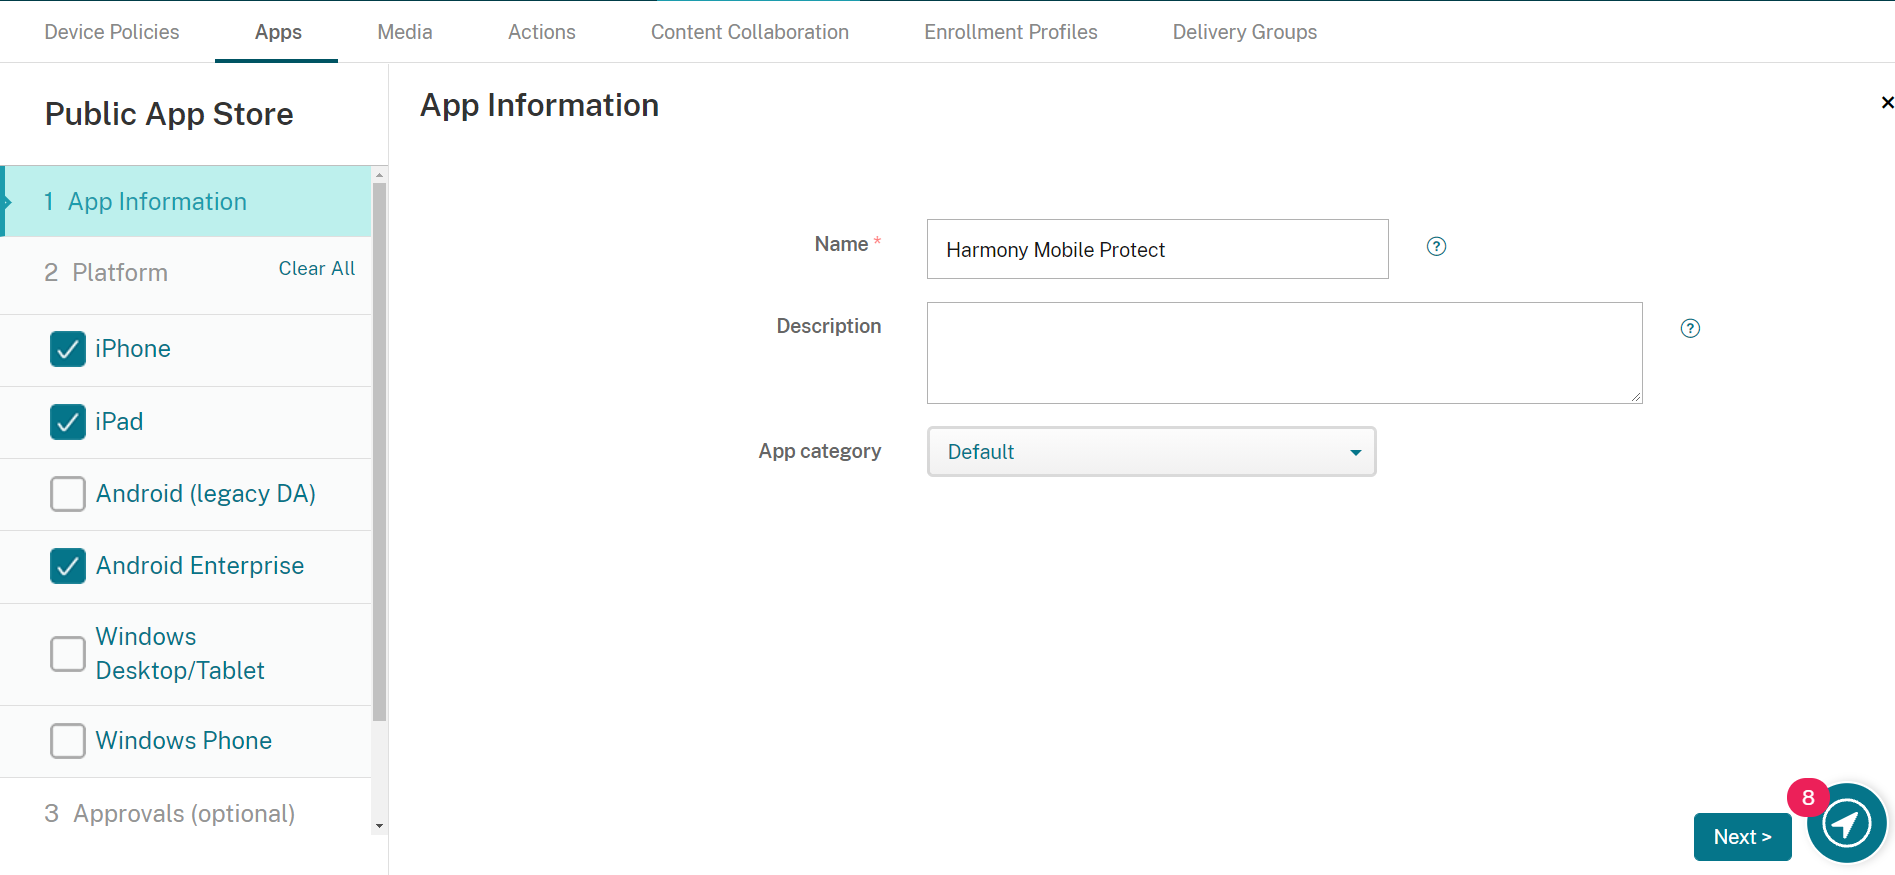
Enter in a Name for the app: Mobile Security Protect.
-
Click Next.
-
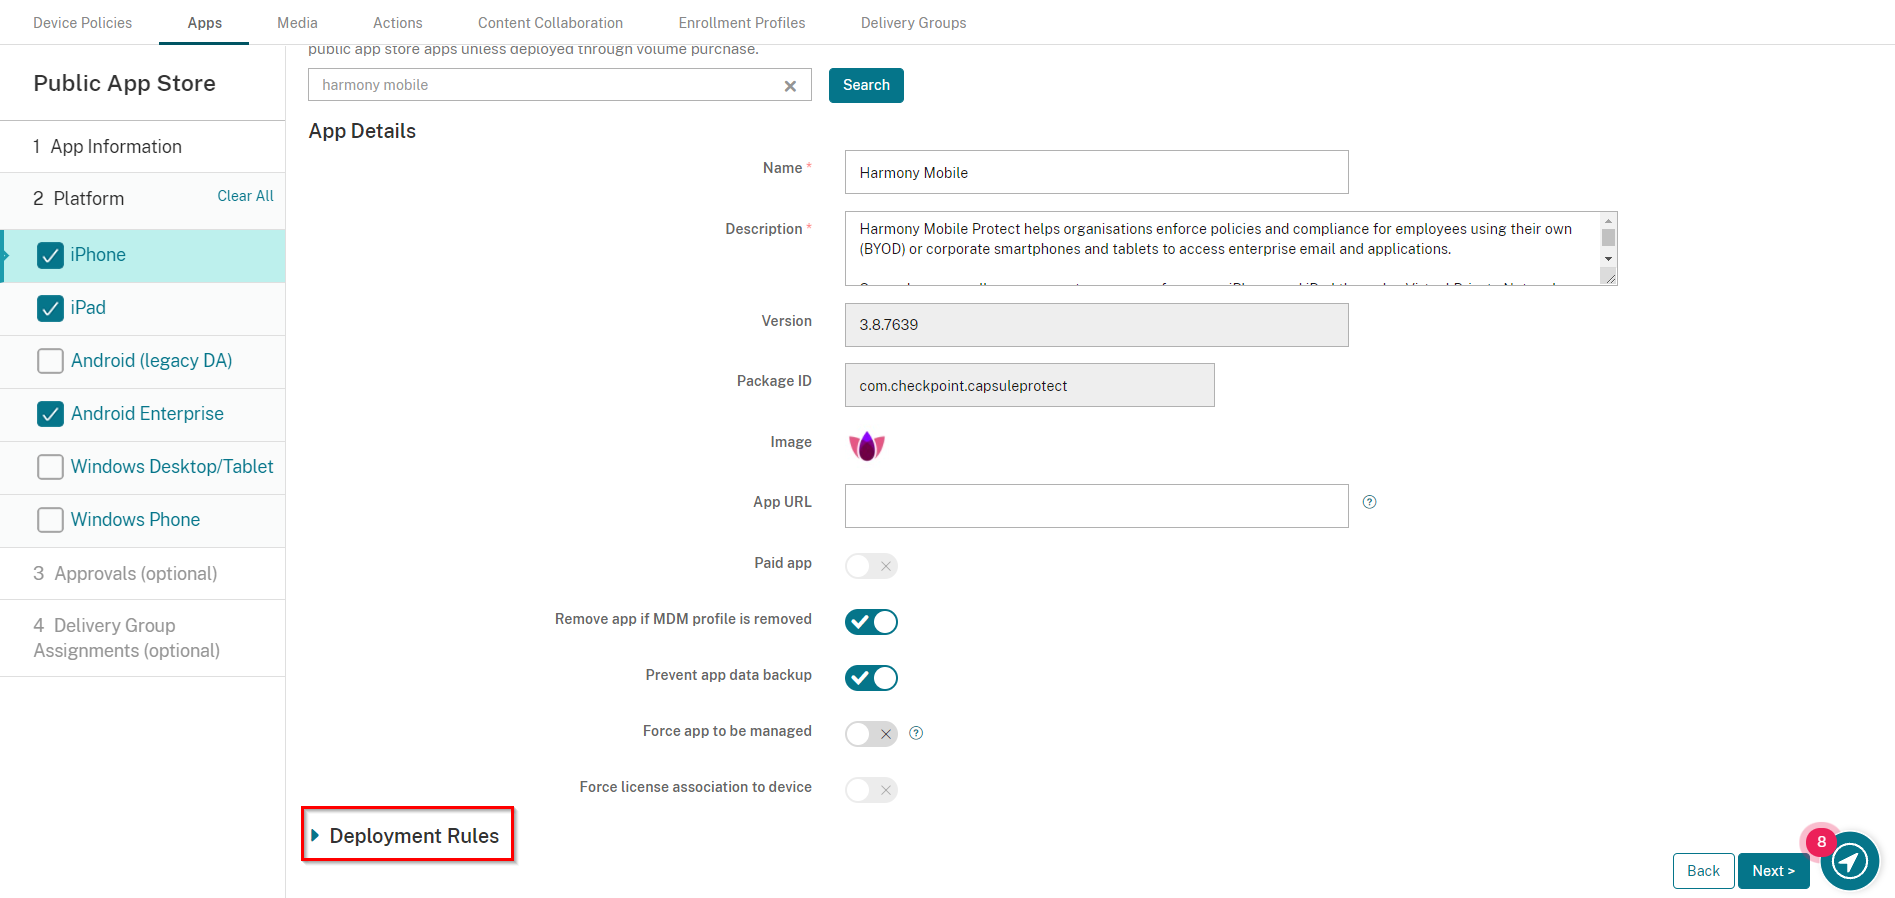
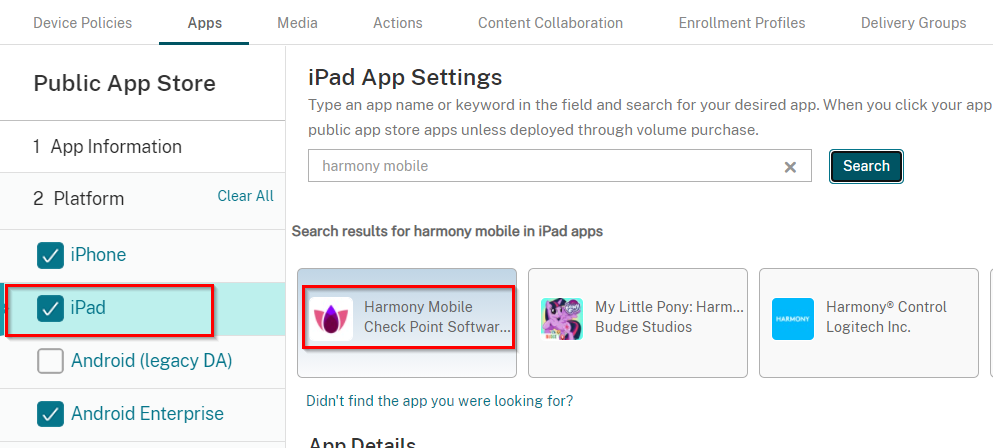
In the Platform pane select iPhone, iPad and Android Enterprise.
-
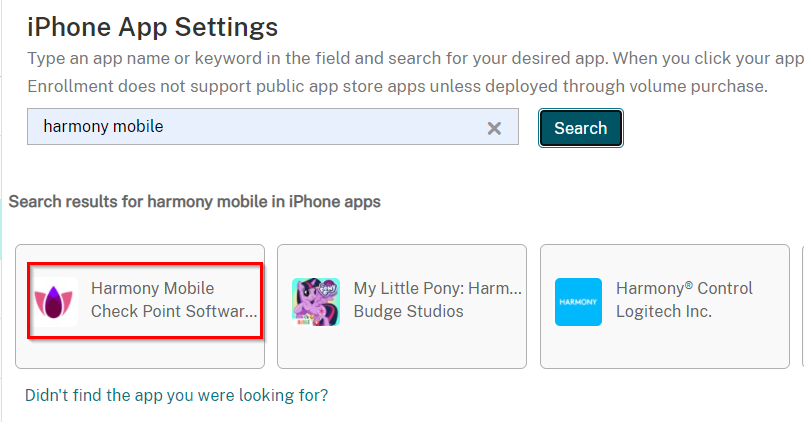
Enter in Harmony Mobile Protect and click Search.
-
The search result window should show the Harmony Mobile Protect app, such as in the example below.
-
Click Harmony Mobile Protect app.
-
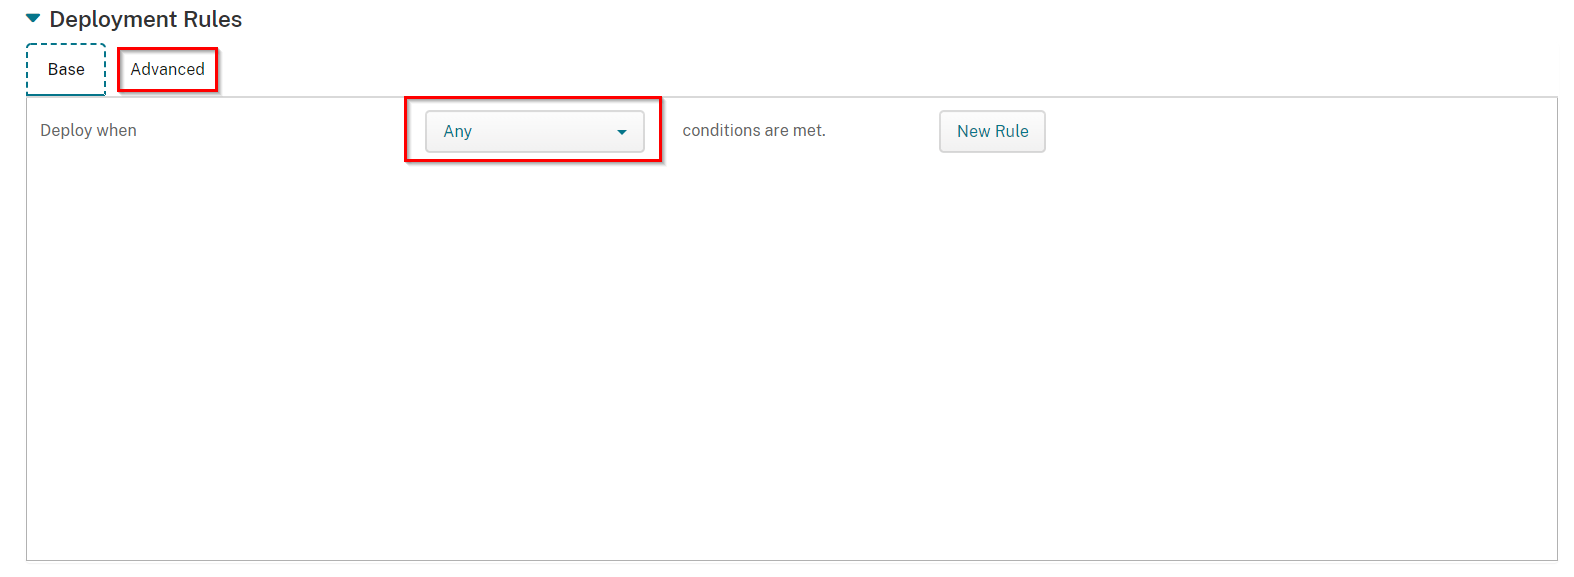
Scroll down and Select Deployment Rules.
-
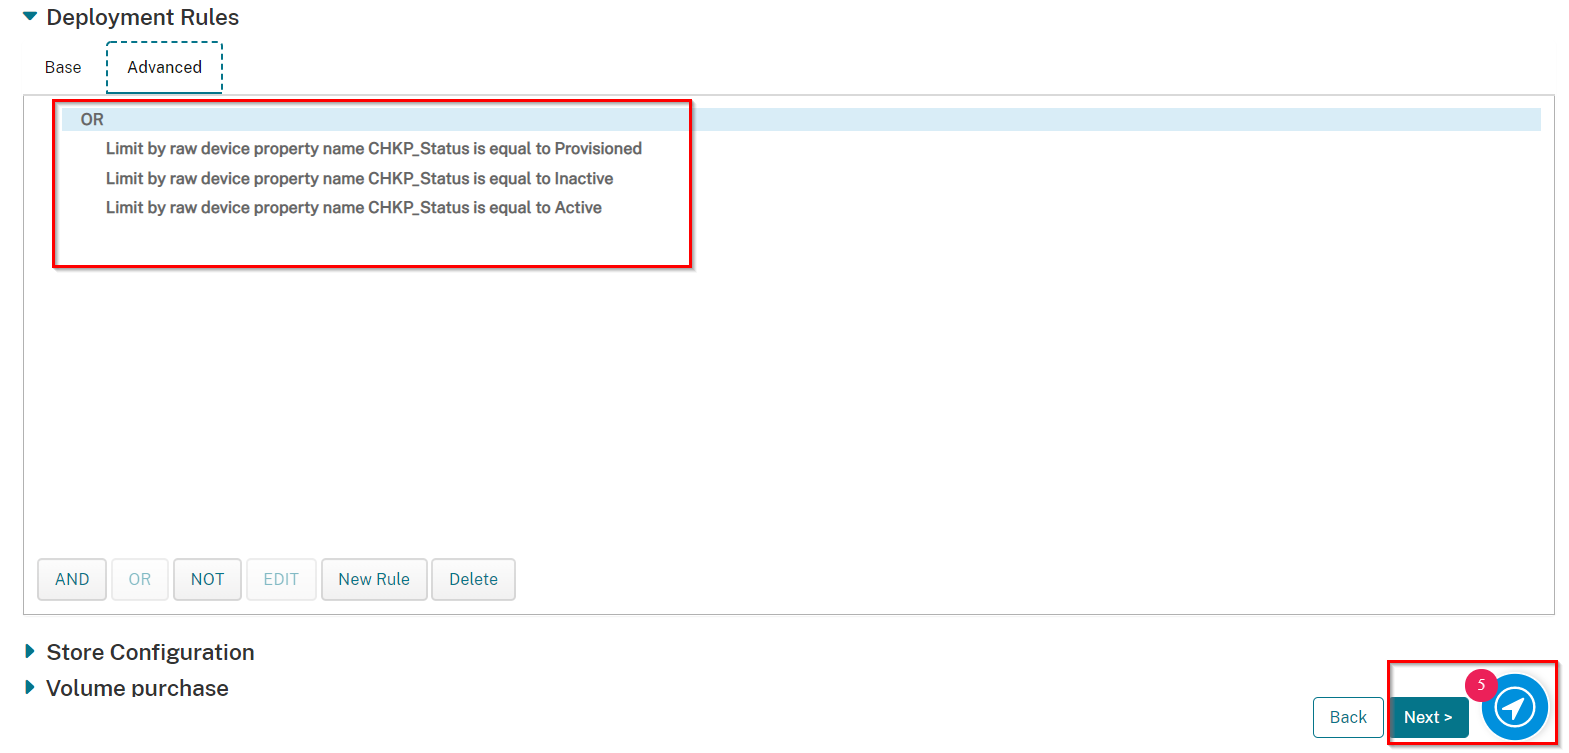
Change Deploy when to Any, and click on the Advanced tab.
-
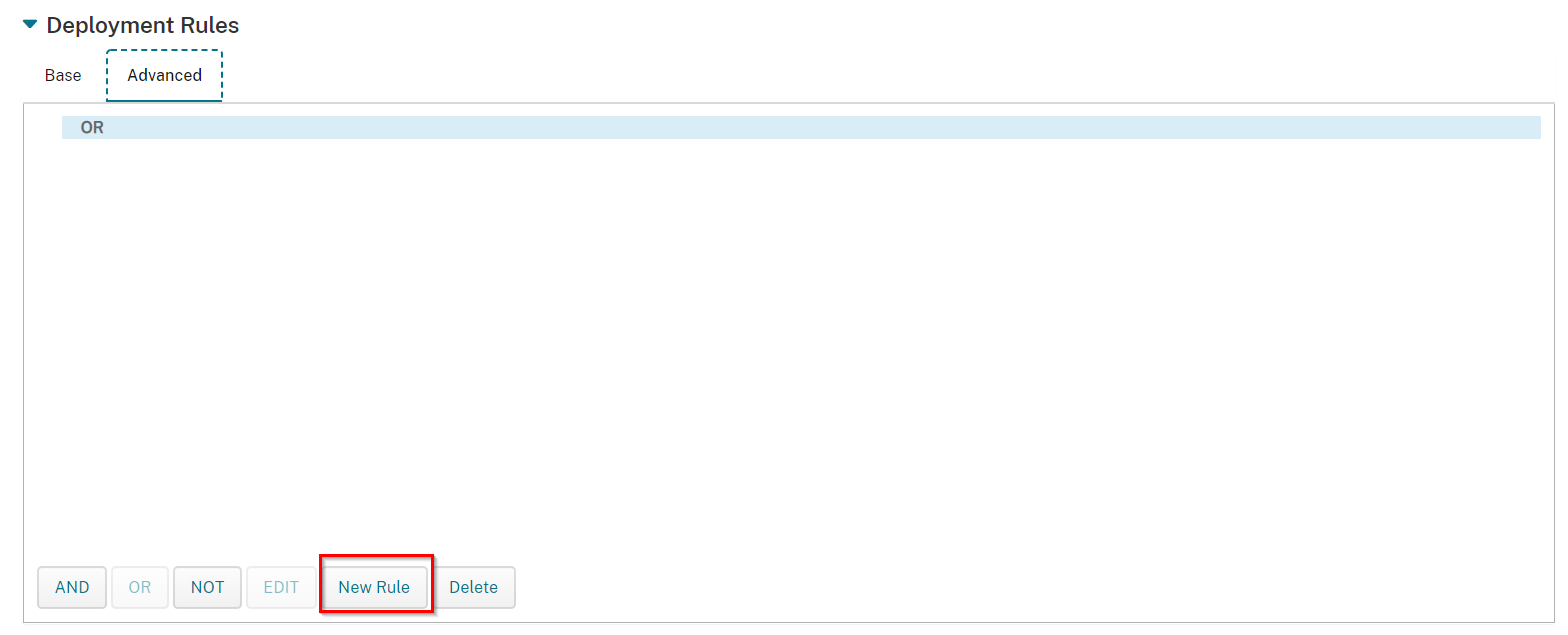
Click on New Rule tab at the bottom.
-
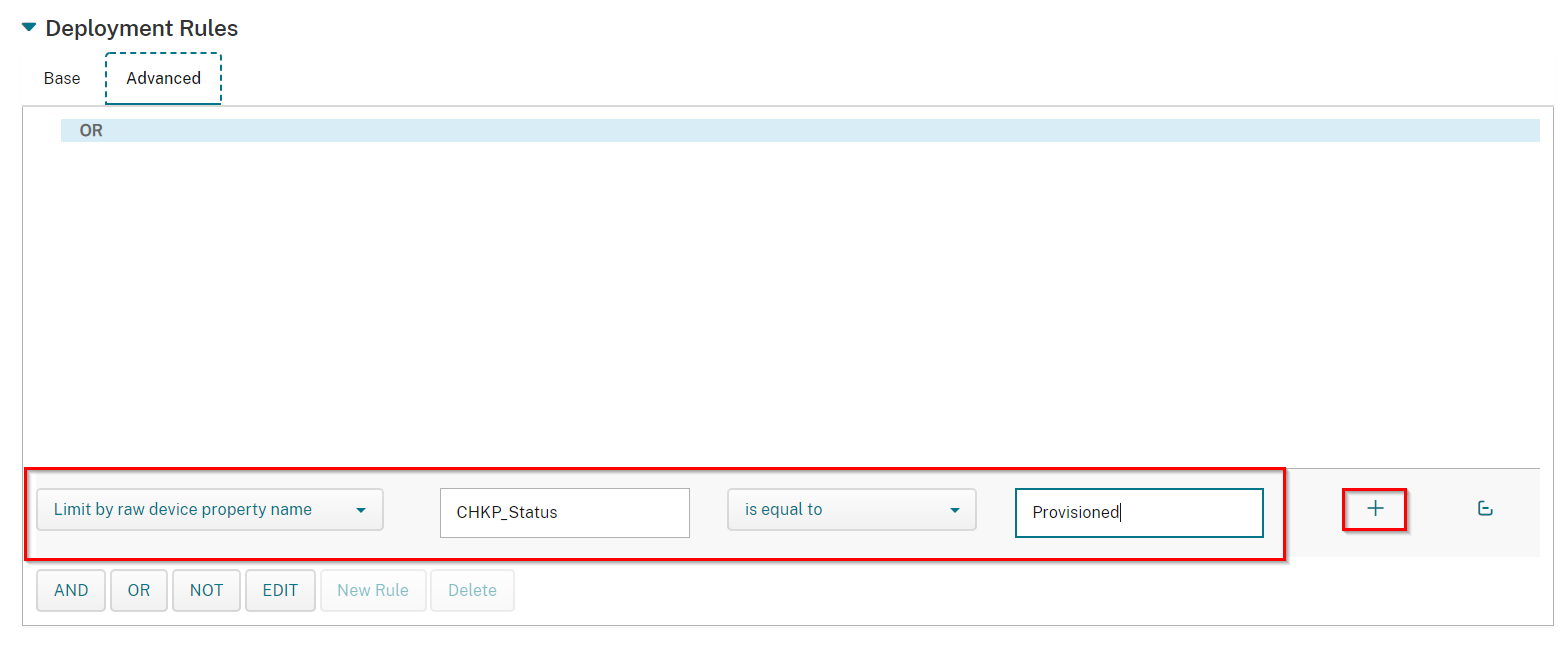
Select Limit by raw device property name with CHKP_Status is equal to Provisioned.
-
Click "+" sign.
-
Click on the OR word and the New Rule button will be active again.
-
Click New Rule.
-
Select Limit by raw device property name with CHKP_Status is equal to Active.
-
Click + sign.
-
Click New Rule.
-
Select Limit by raw device property name with CHKP_Status is equal to Inactive.
-
Click "+" sign.
-
Once all the Deployment Rules are listed as they are below, click Next.
-
On the iPad Platform tab, select the Harmony Mobile Protect app, and scroll down to Deployment Rules.
-
Repeat the Change Deploy when to Any, and click on the Advanced tab. steps as with the iPhone platform for the iPad platform as well as below:
-
Once all the Deployment Rules are listed as they are above, click "Next".
-
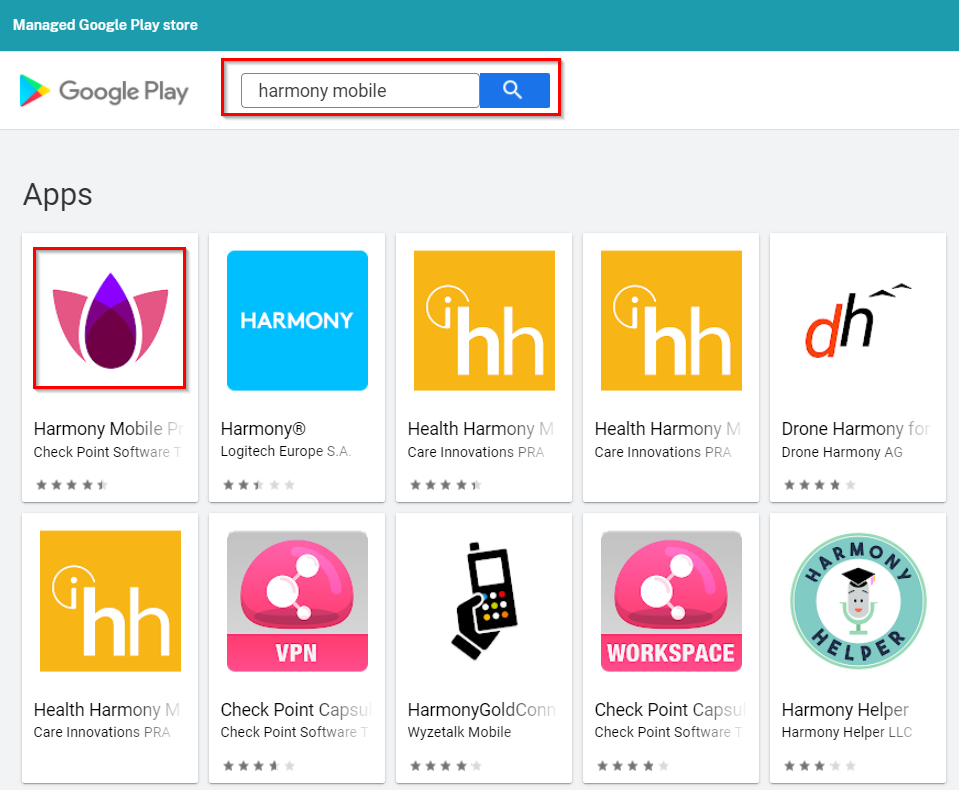
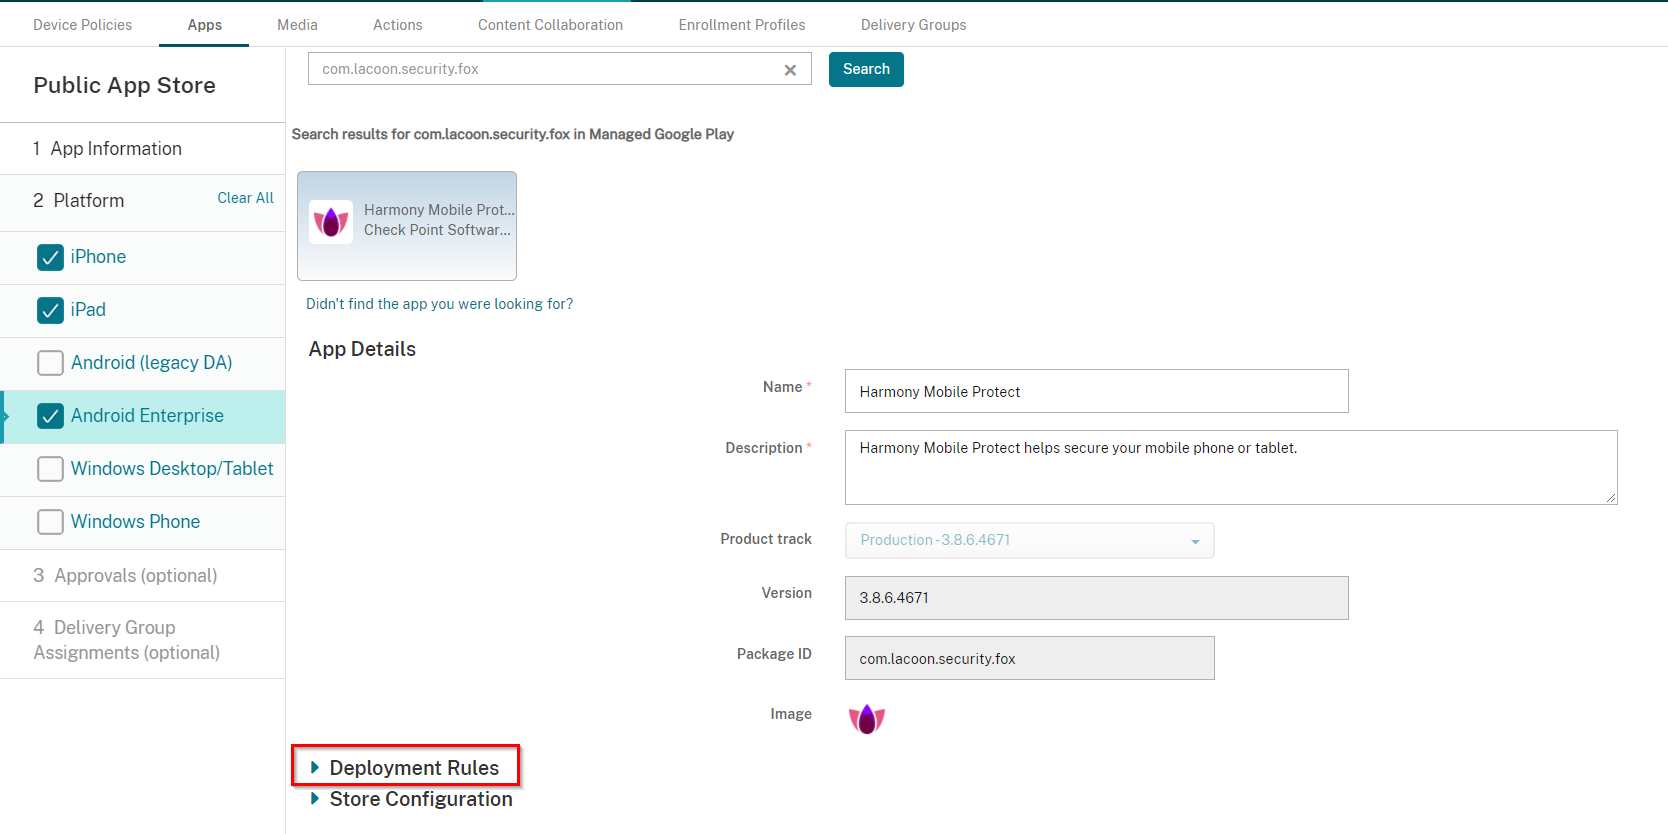
On the Android Enterprise Platform tab, enter in Harmony Mobile Protect and click Search.
-
Select the Harmony Mobile Protect app shown in the search result window, such as in the example below: approve it and click Select
-
Click on the Harmony Mobile Protect app, approve the app and click Select
-
Scroll down to Deployment Rules.
-
Repeat the steps Change Deploy when to Any, and click on the Advanced tab. for the Android Enterprise Platform as well and create 3 new rules as below.
-
Once all the Deployment Rules are listed as they are below, click Next.

-
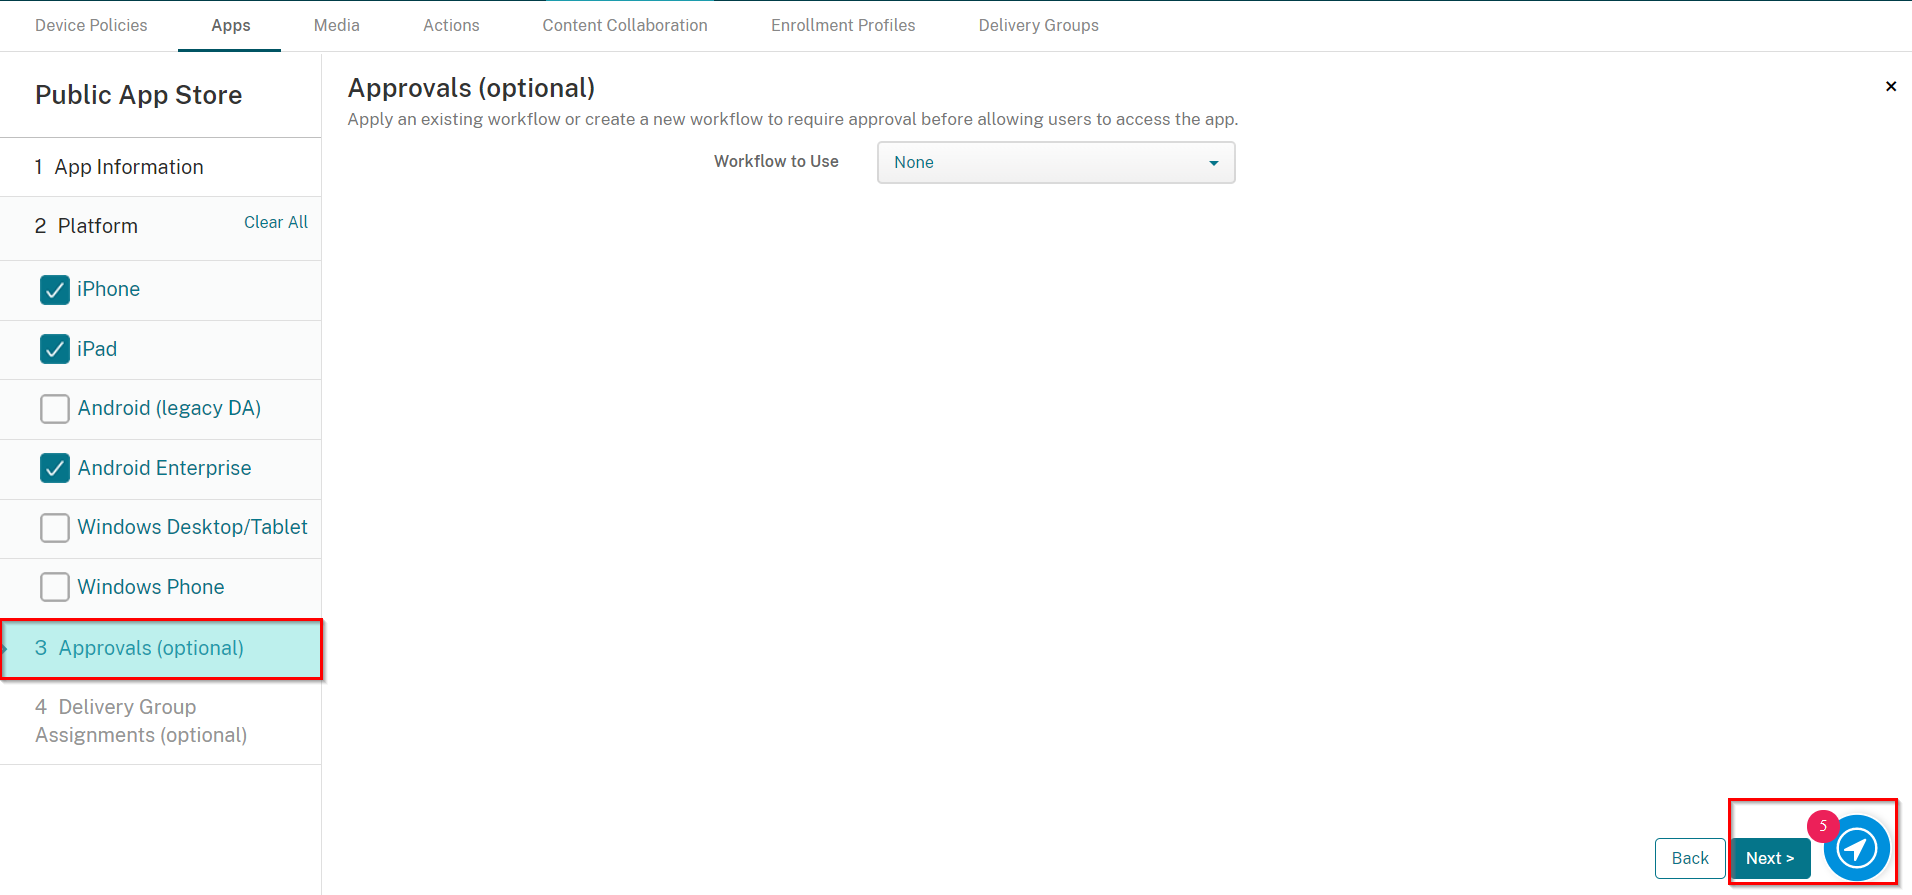
On the Approvals (optional) tab click Next.
-
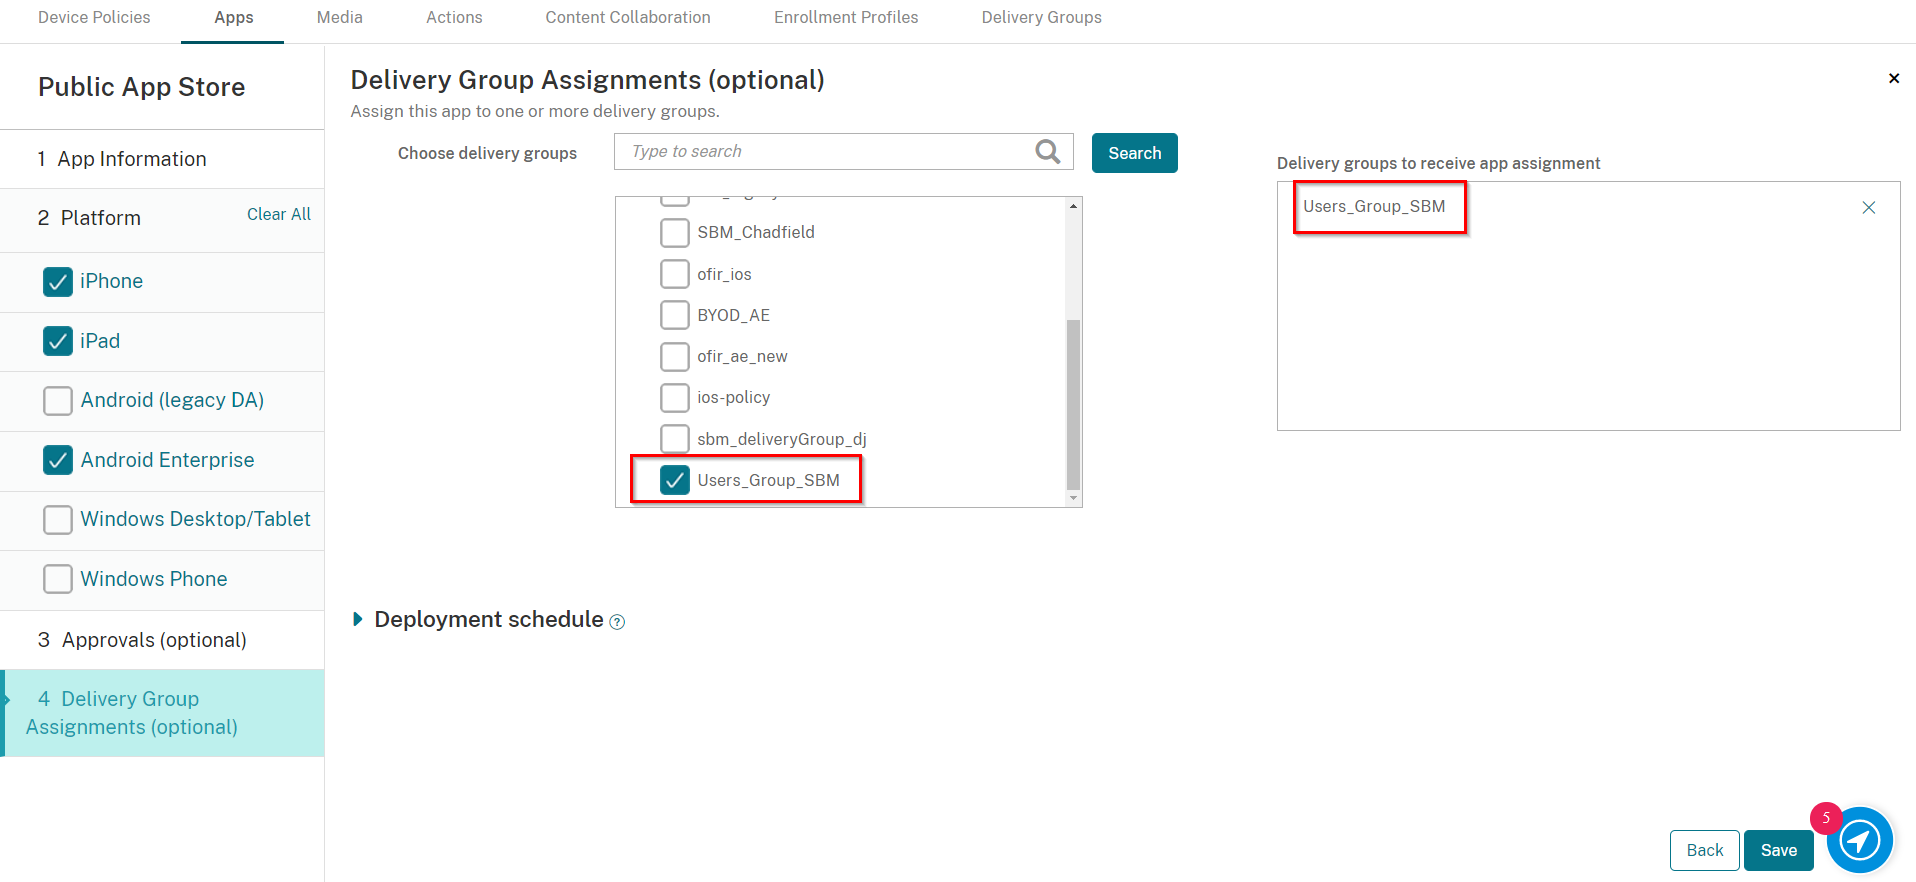
On the Delivery Group Assignments tab, select the Delivery Group you created in Creating a Delivery Group
-
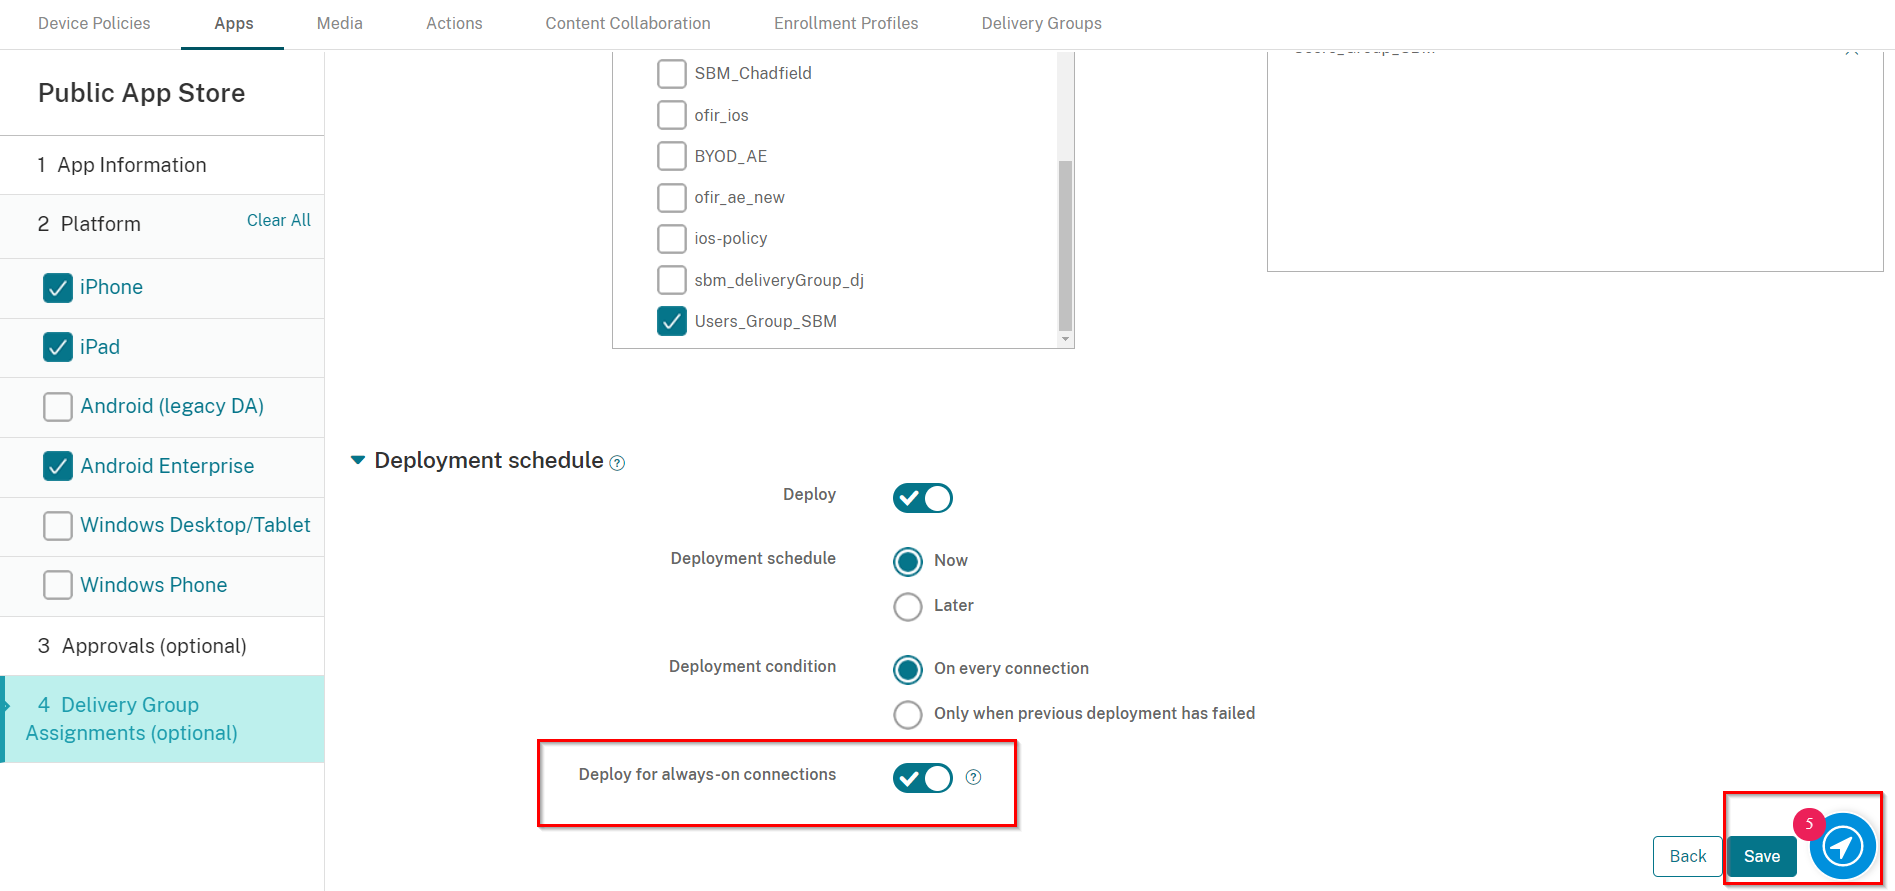
Click on the Deployment Schedule section toggle the Deploy for always-on connection button to be ON.
-
Click Save.
-
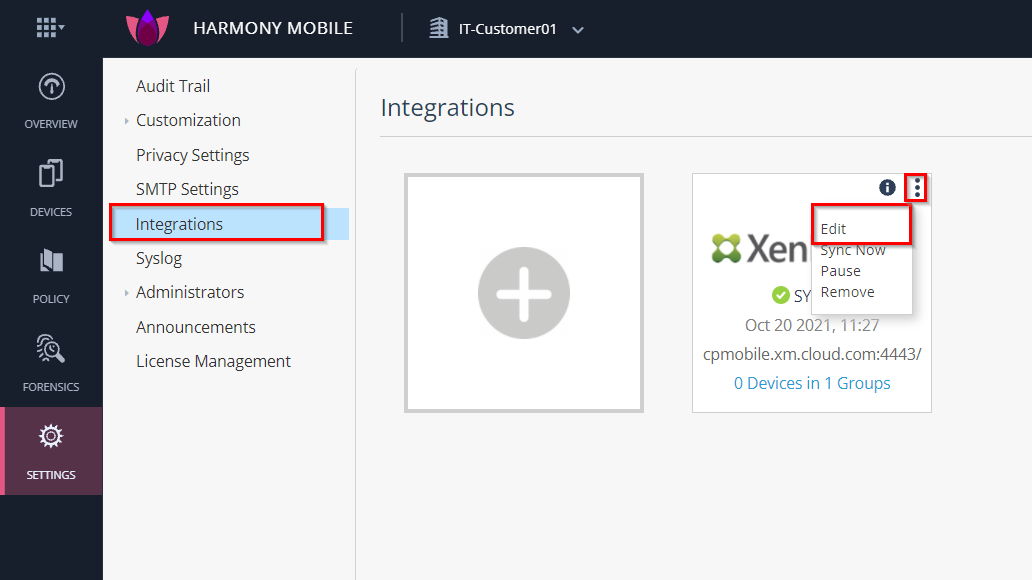
Get the dashboard’s token.
Go to your Harmony Mobile dashboard > Settings > Integrations > Select the three dots > Edit:
-
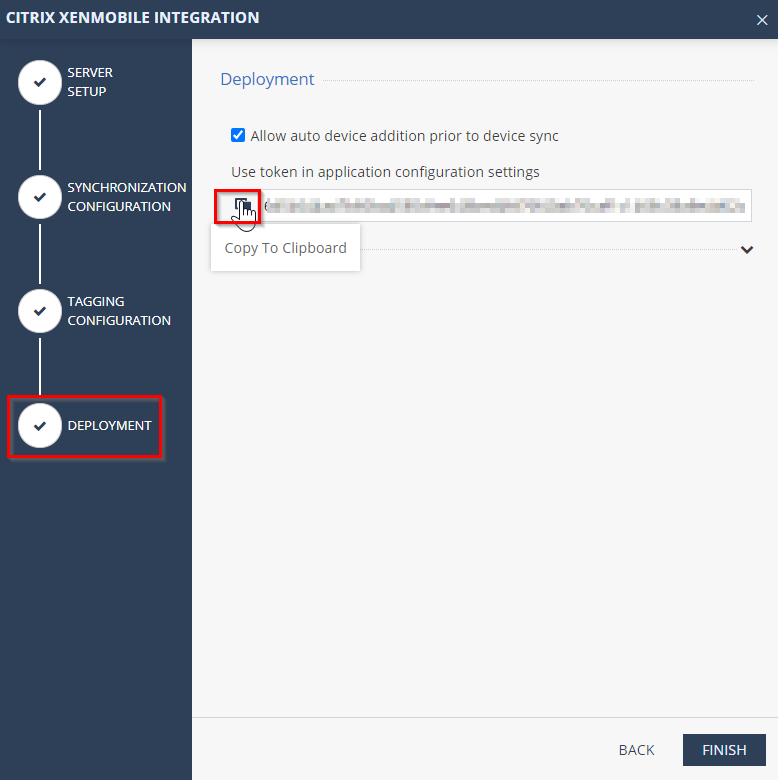
Go to Deployment and copy the token of your dashboard:
Adding Android Enterprise Managed Configurations
-
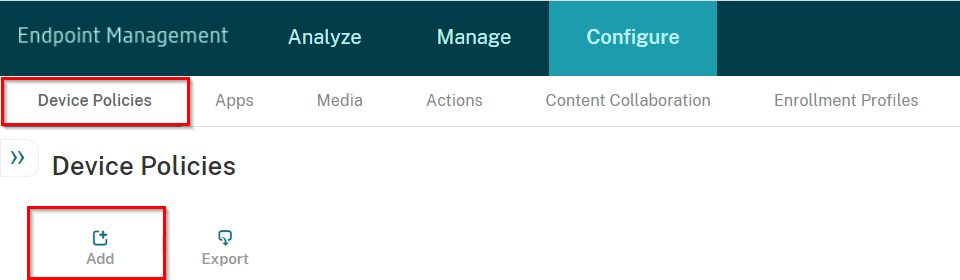
Navigate to Configure > Device Policies > and click Add.
-
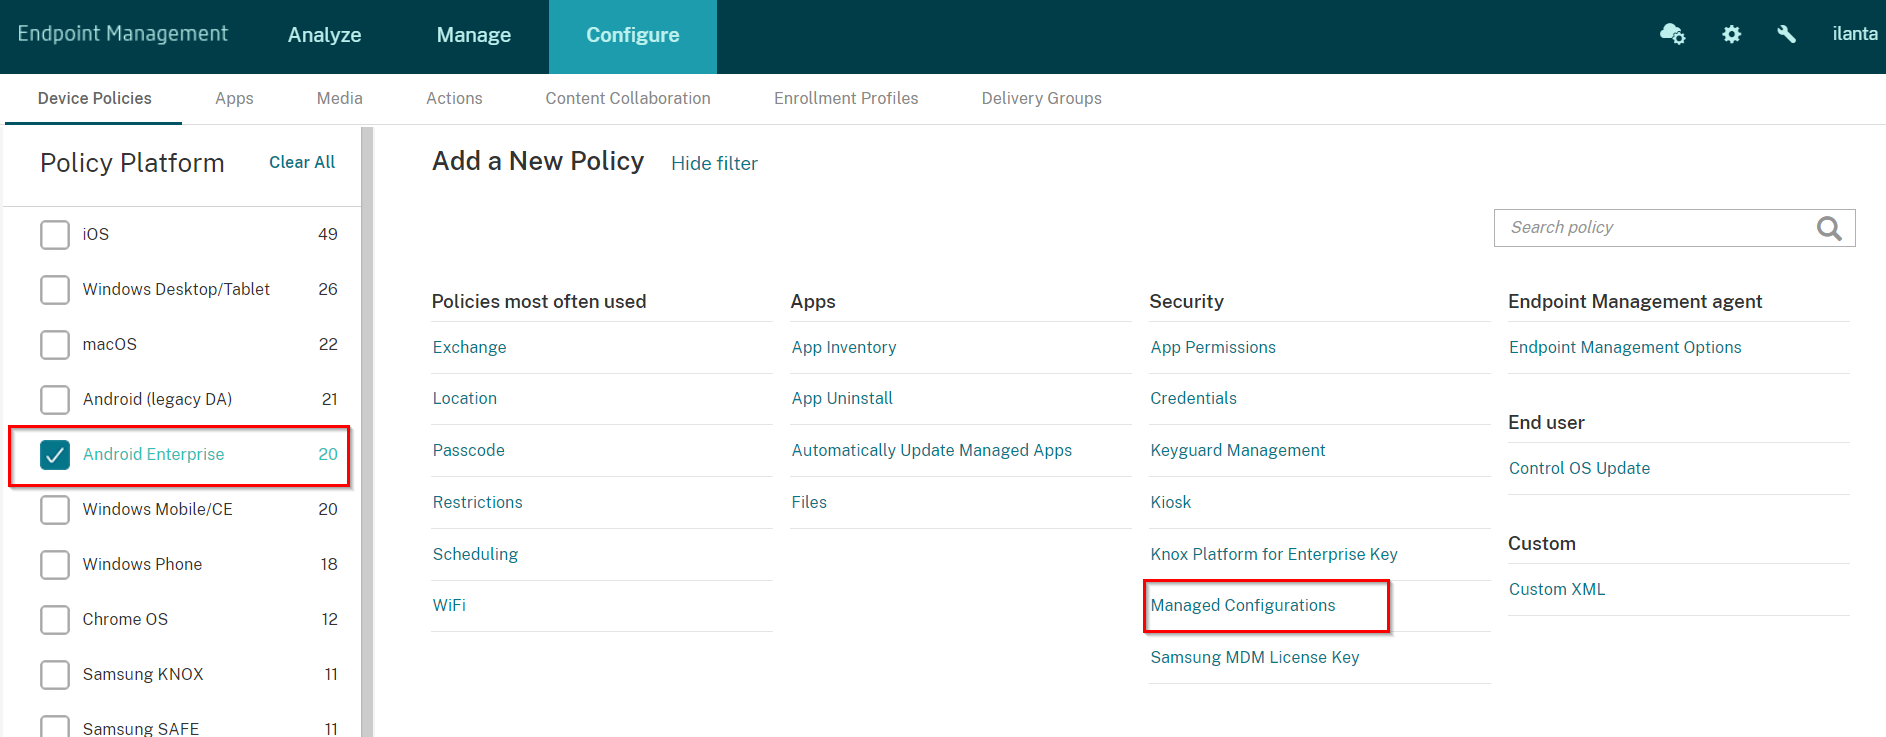
On the Policy Platform pane click on the Android Enterprise check box.
-
On the Security option choose Android Enterprise Managed Configurations.
-
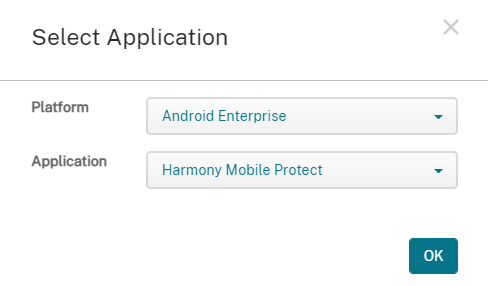
On the Select Application ID pop up window select the Harmony Mobile Protect app and click OK.
-
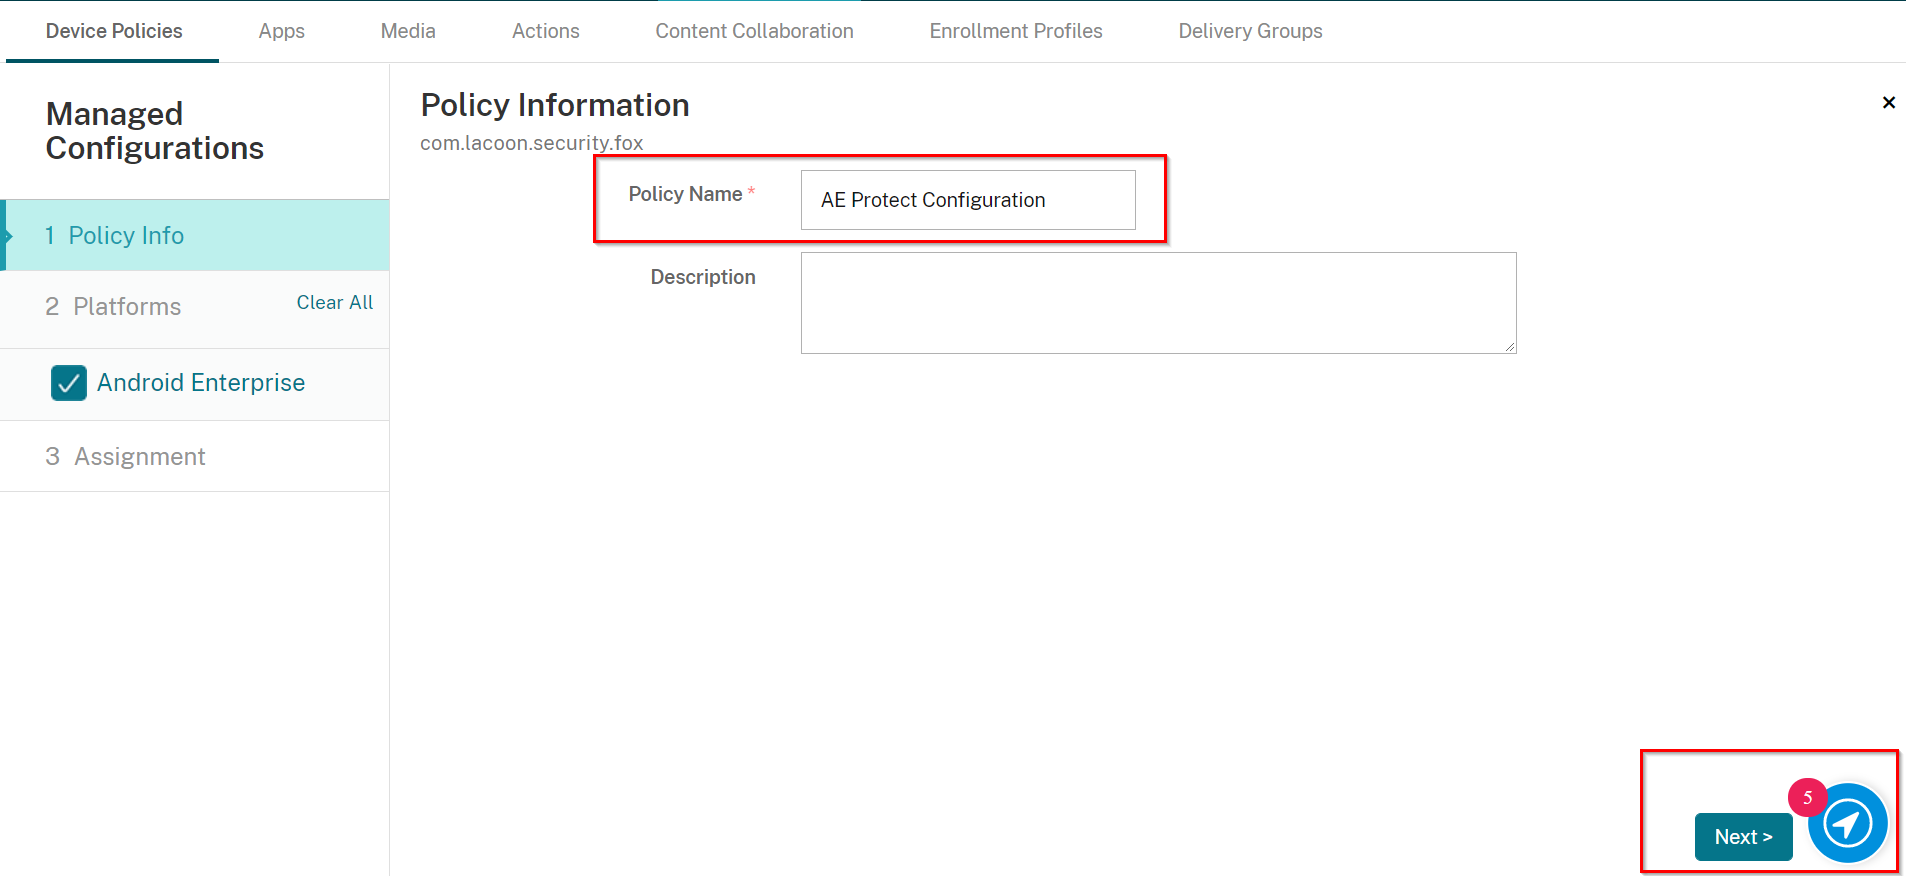
On the Policy Info pane enter in a policy name AE Protect Configuration and click Next.
-
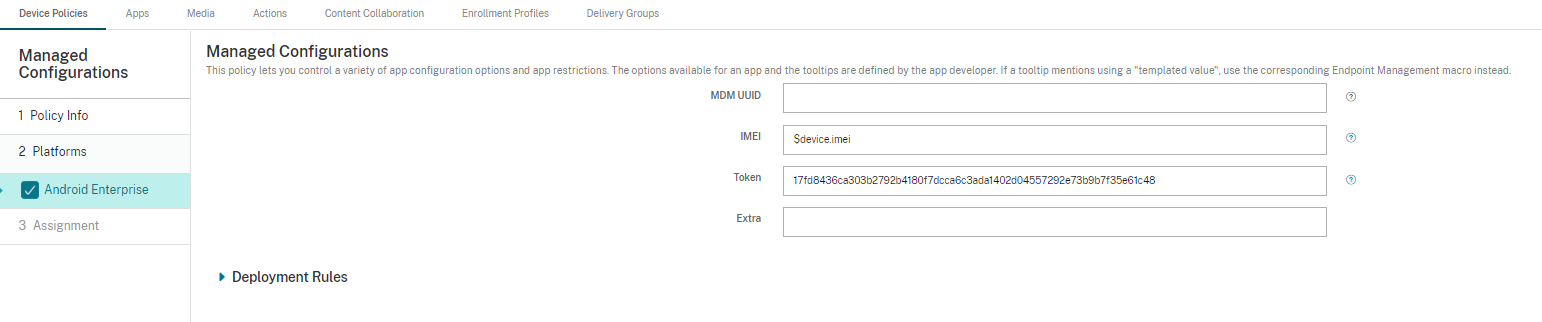
On the Android Enterprise pane enter in the configurations as described below (See example) and click Next.
Item
Value Type
Configuration Value
IMEI
String
$device.imei
gwAddress
String
Enter the Security Gateway server for your region:
Region
Server
US
gw.locsec.net
Ireland (EU region)
eu-gw.locsec.net
Australia (Asia region)
au-gw.locsec.net
Canada (Canada)
ca-gw.locsec.net
UK region (UK)
uk-gw.locsec.net
India
in-gw.locsec.net
token
String
Take the copied value from the previous section
portalAccountId
String
Account ID of the application in the Check Point Portal.
-
Under Assignment tab, assign the configuration to your group and click Save.

Adding an iOS Configuration Policy for Harmony Mobile Protect
To auto-register iOS devices to Harmony Mobile, we need to configure an iOS Configuration Policy.
-
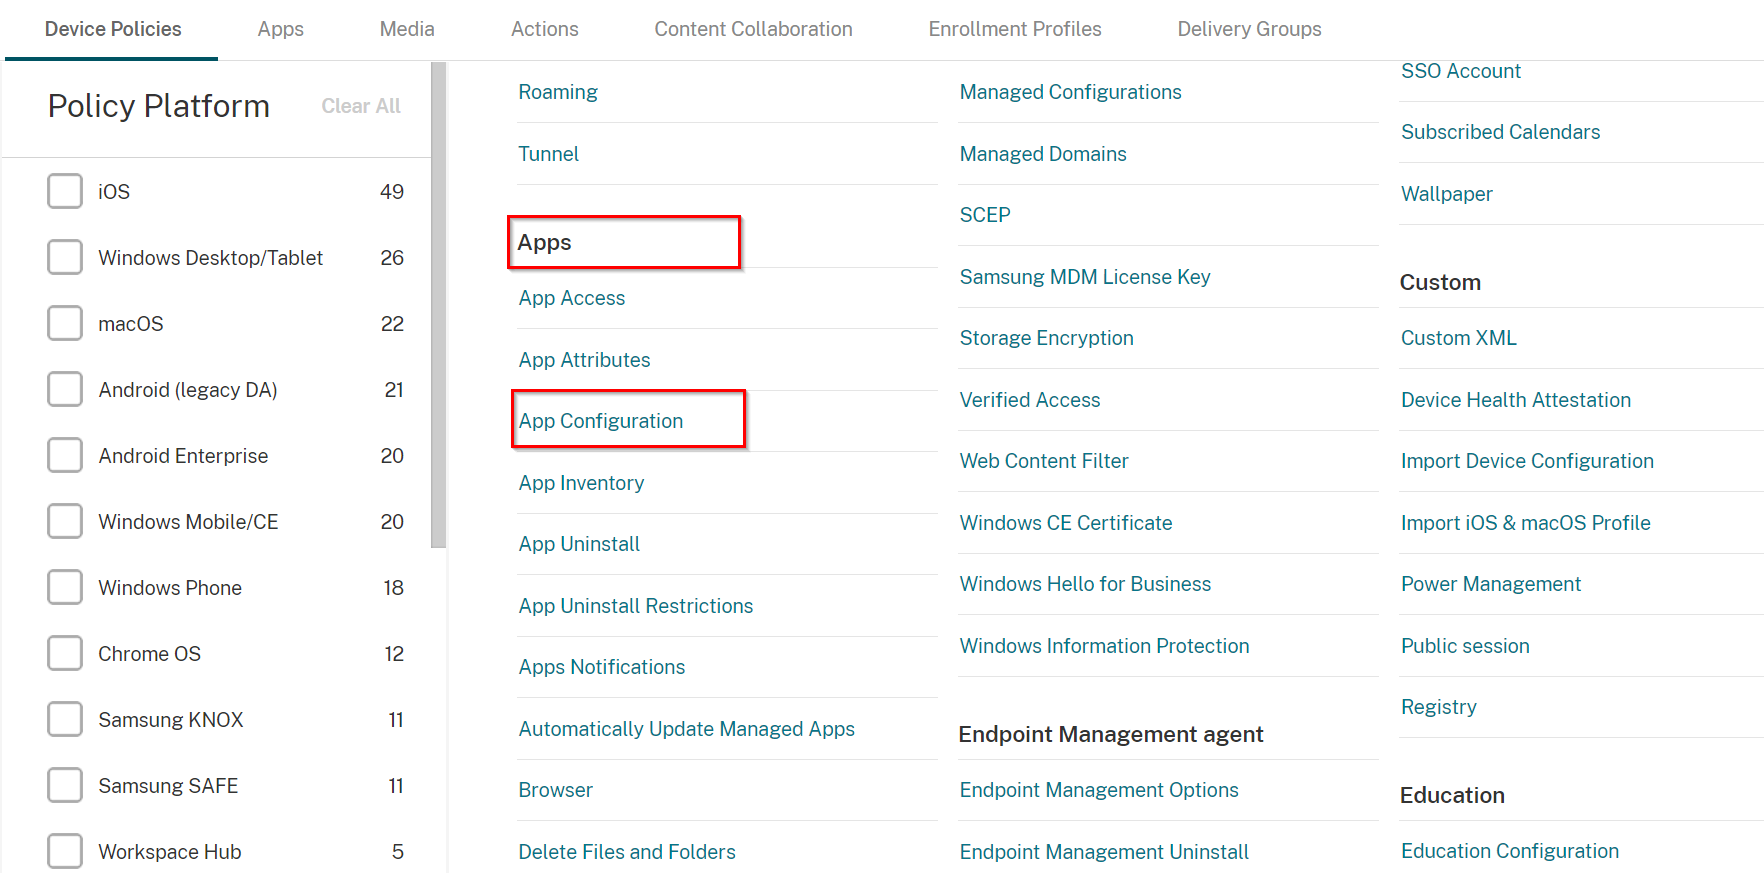
Navigate to Configure > Device Policies, and click Add.
-
Scroll down to Apps section and select App Configuration.
-
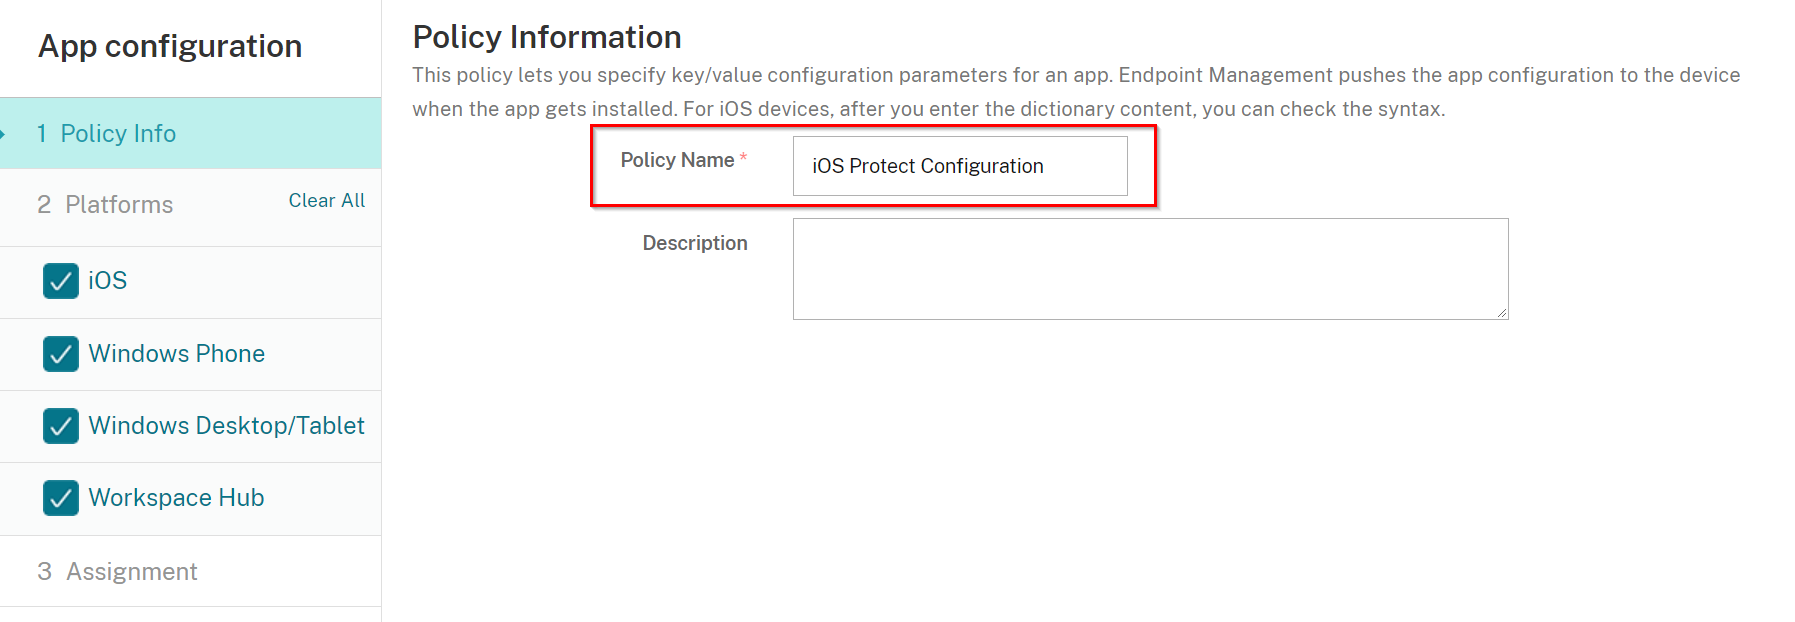
On the Policy Info enter in a Policy Name ''iOS Protect Configuration'' and click Next.
-
Select iOS only from Platforms, and select Add new for Identifier.
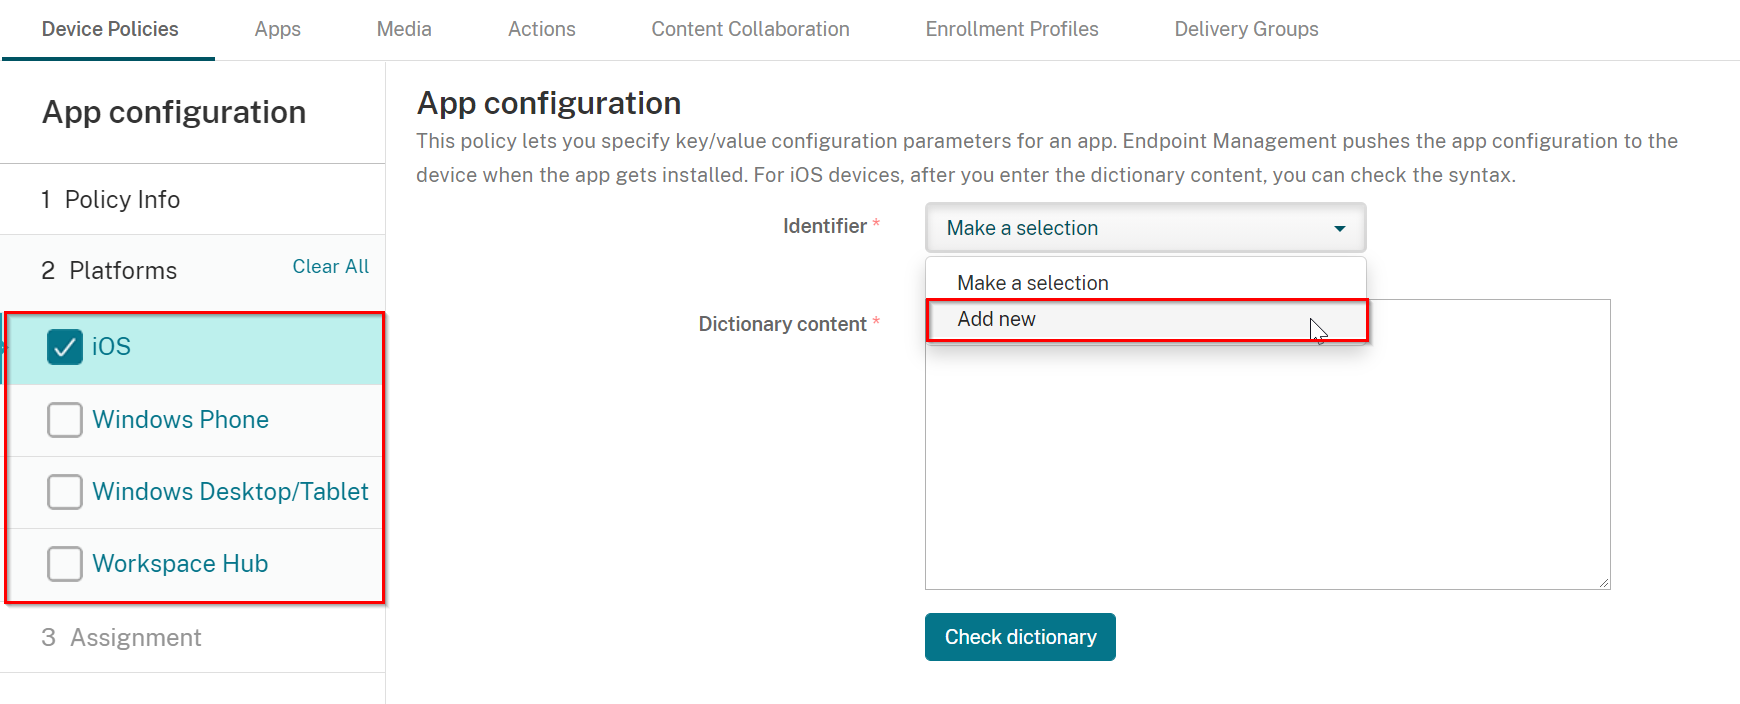
-
On the box appeared under the Identifier enter "com.checkpoint.capsuleprotect".
-
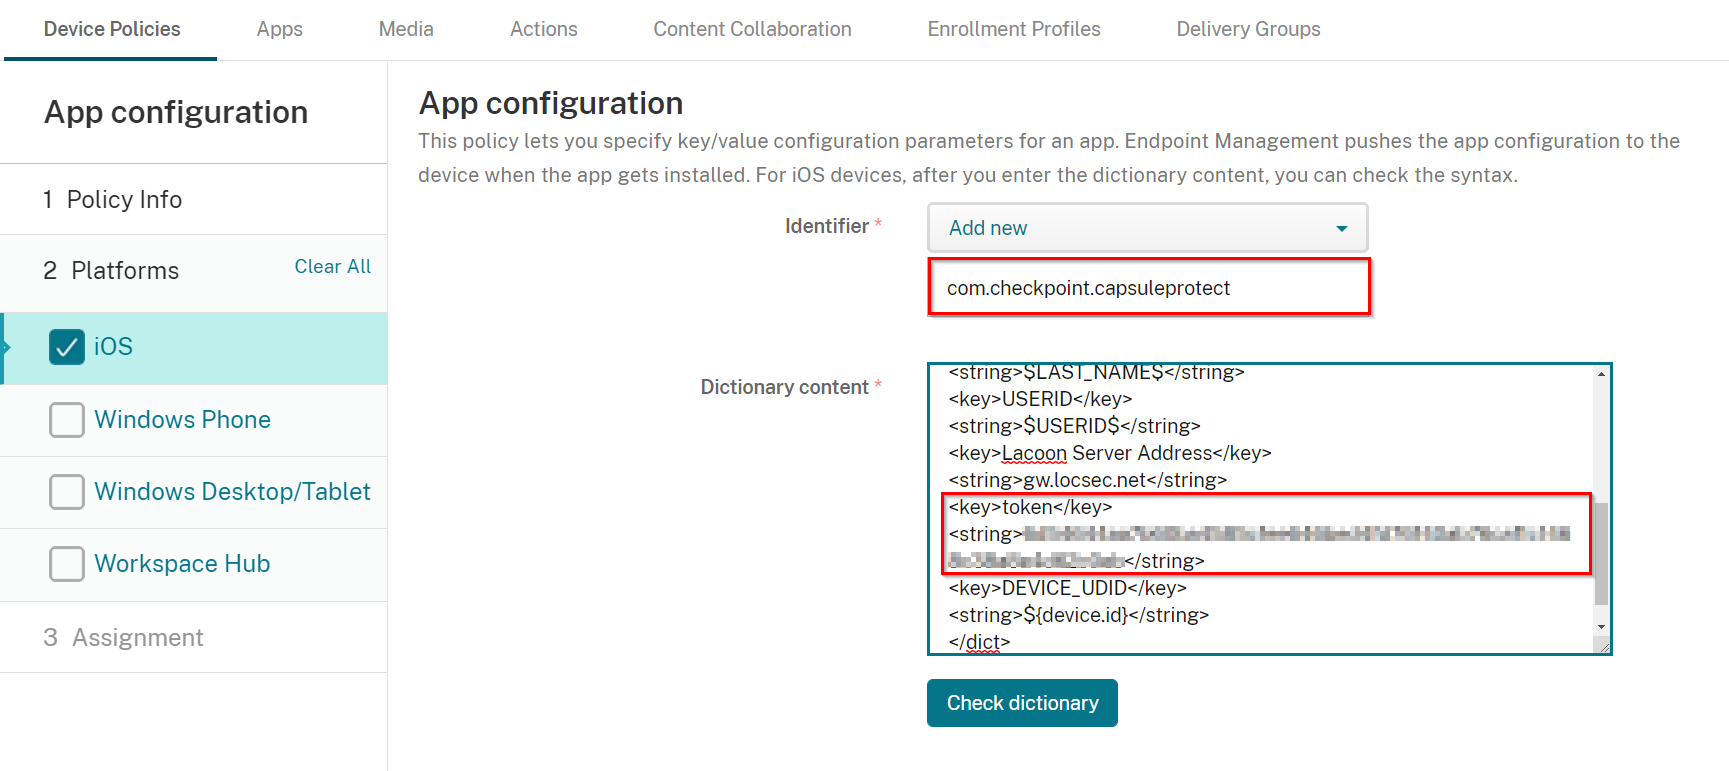
In the Dictionary content field copy and paste this text:
Copy<dict>
<key>Device Serial Number</key>
<string>${device.serialnumber}</string>
<key>DEVICE_MAC</key>
<string>$DEVICE_MAC$</string>
<key>DISPLAY_NAME</key>
<string>$DISPLAY_NAME$</string>
<key>EMAIL</key>
<string>$EMAIL$</string>
<key>FIRST_NAME</key>
<string>$FIRST_NAME$</string>
<key>LAST_NAME</key>
<string>$LAST_NAME$</string>
<key>USERID</key>
<string>$USERID$</string>
<key>Lacoon Server Address</key>
<string>gw.locsec.net</string>
<key>token</key>
<string>hash_tenant_id</string>
<key>DEVICE_UDID</key>
<string>${device.id}</string>
</dict>In line number 17, replace the gateway server (gw.locsec.net) with the local gateway based on your region:
Enter the Security Gateway server for your region:
Region
Server
US
gw.locsec.net
Ireland (EU region)
eu-gw.locsec.net
Australia (Asia region)
au-gw.locsec.net
Canada (Canada)
ca-gw.locsec.net
UK region (UK)
uk-gw.locsec.net
India
in-gw.locsec.net
-
Change the <string>hash_tenant_id</string> content to your token value that you copied from your Infinity Portal dashboard (i.e. instead of “hash_tenant_id” text) from the previous section.
-
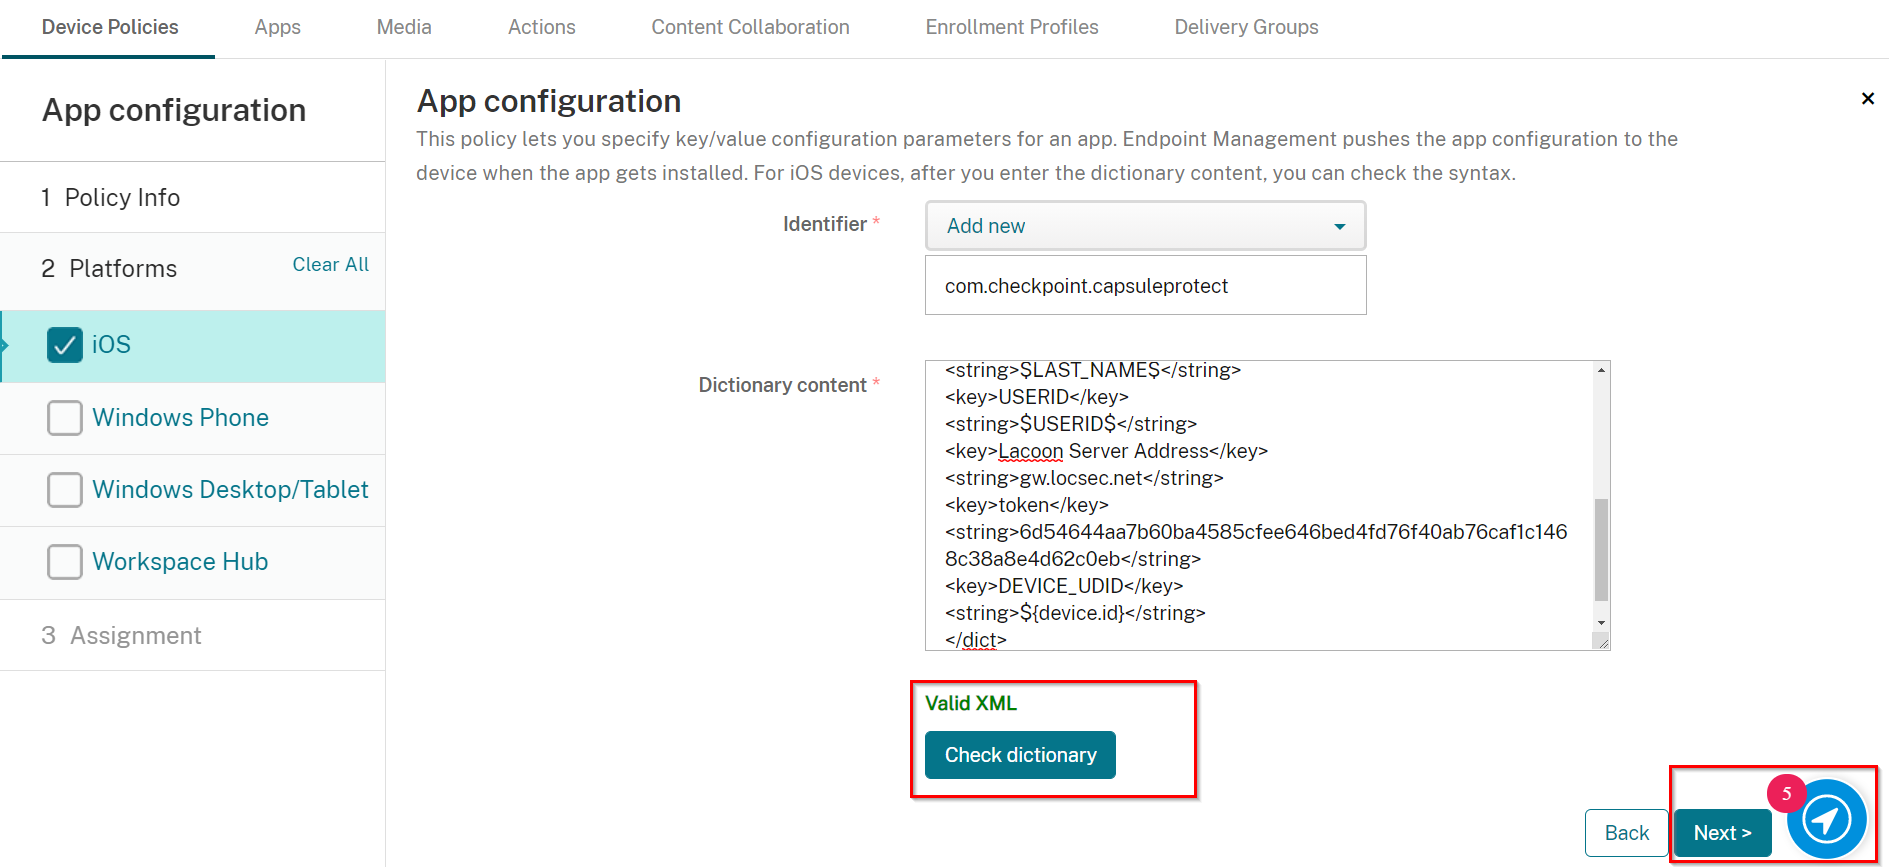
Click Check Dictionary to make sure that there are no errors. If no error found a Valid XML label should appear.
-
Click Next.
-
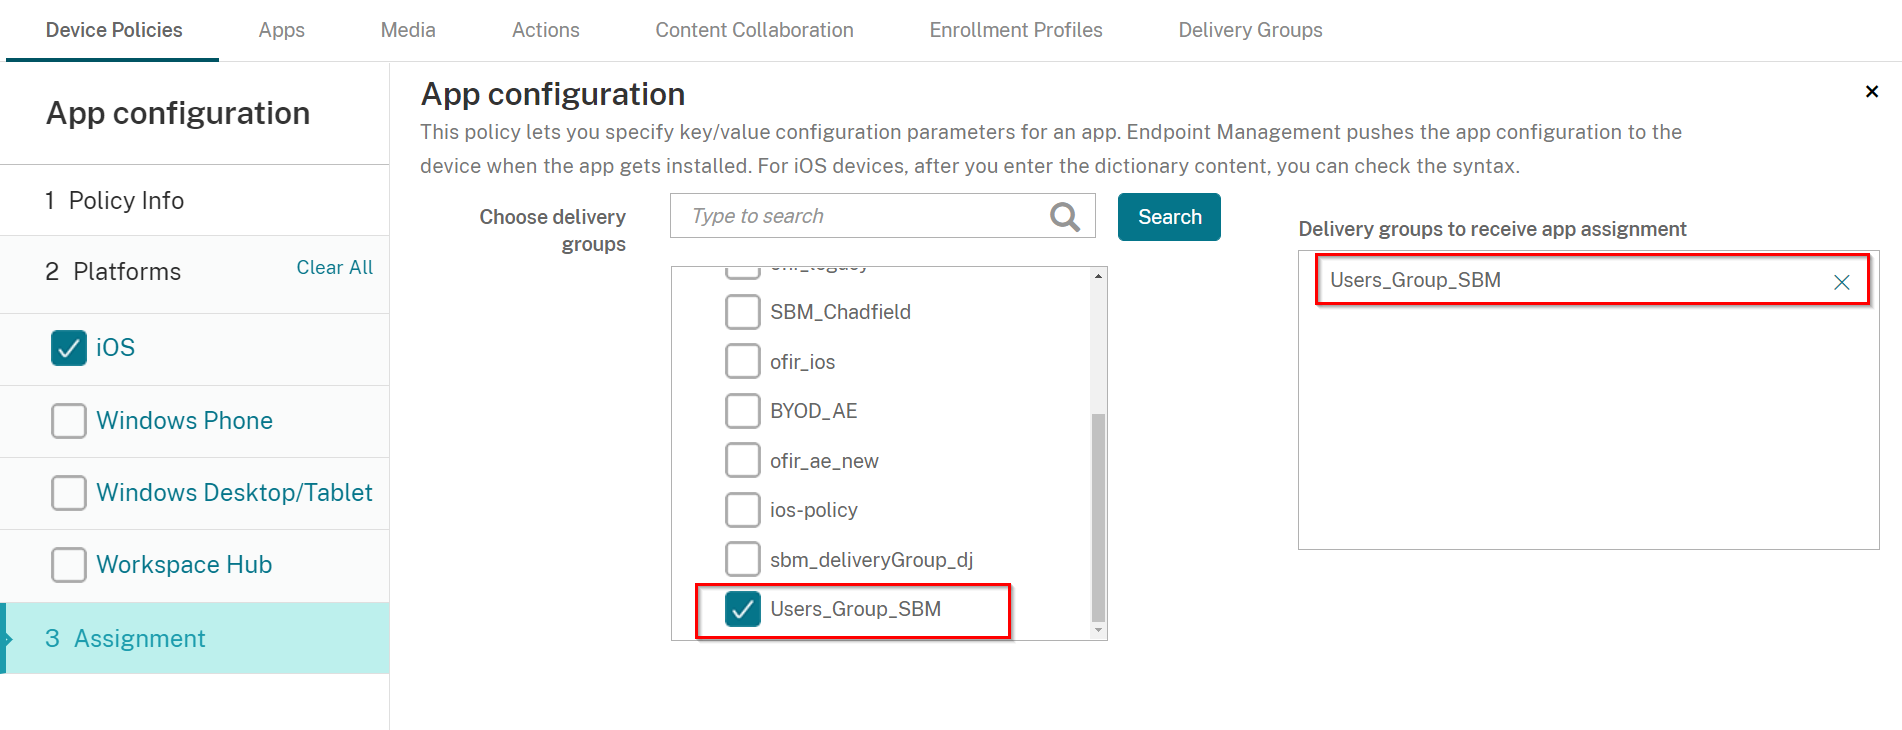
On the Assignment tab, select the Delivery Group you created in Creating a Delivery Group
-
In Deployment Schedule toggle the Deploy for always-on connections button to be ON.
-
Click Save.

Collecting App List from iOS Devices
This step is important to allow Harmony Mobile to protect against malicious apps.
-
Navigate to Configure > Device Policies, and click Add.
-
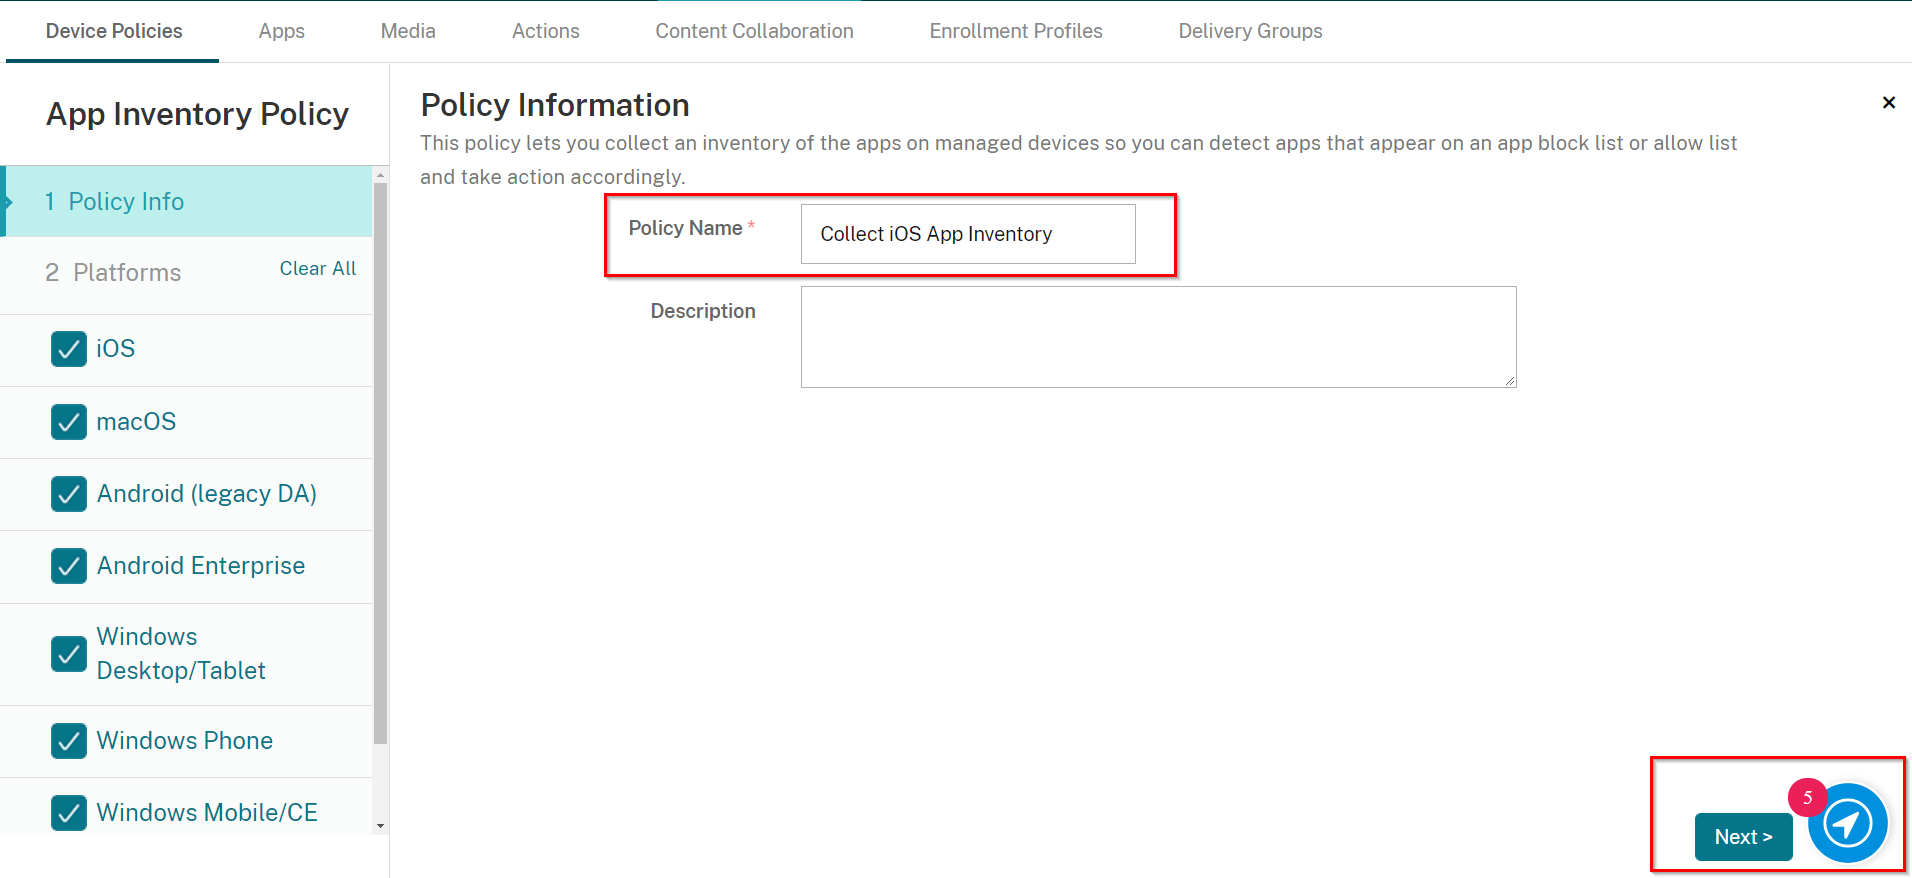
Scroll down to Apps section and select App Inventory.

-
On the Policy Info pane enter a Policy Name ''Collect iOS App Inventory'' and Click Next.
-
On the Platforms pane select iOS only and make sure the iOS button toggled to be ON.
-
Click Next.

-
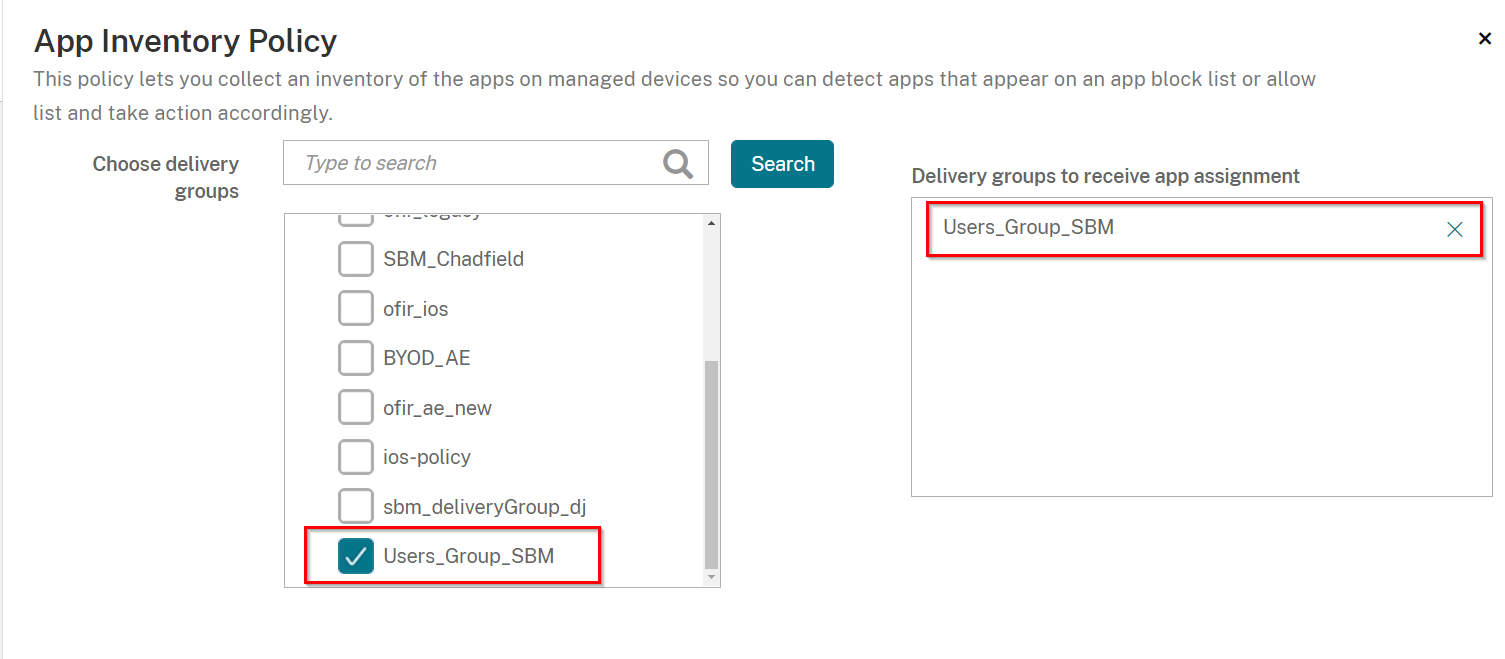
On the Assignment tab, select the Delivery Group you created in Creating a Delivery Group.
-
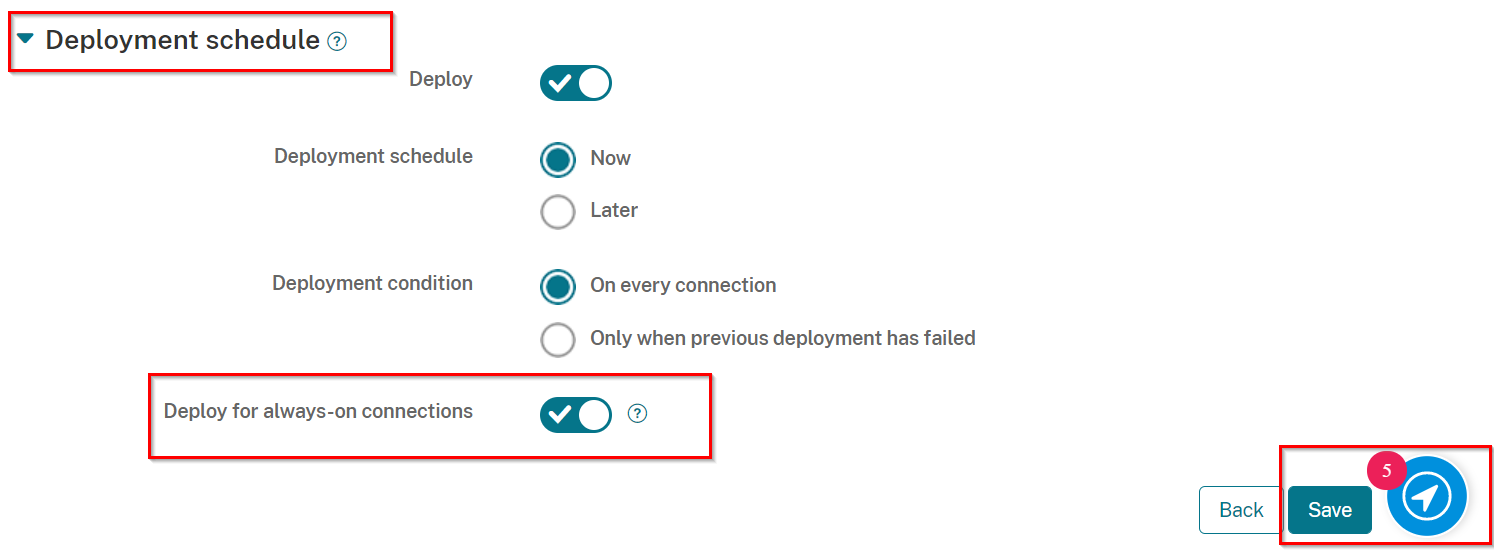
In the Deployment Schedule select Deploy for always-on connections button to be ON.
-
Click Save.
Requiring the Harmony Mobile Protect app to be Installed
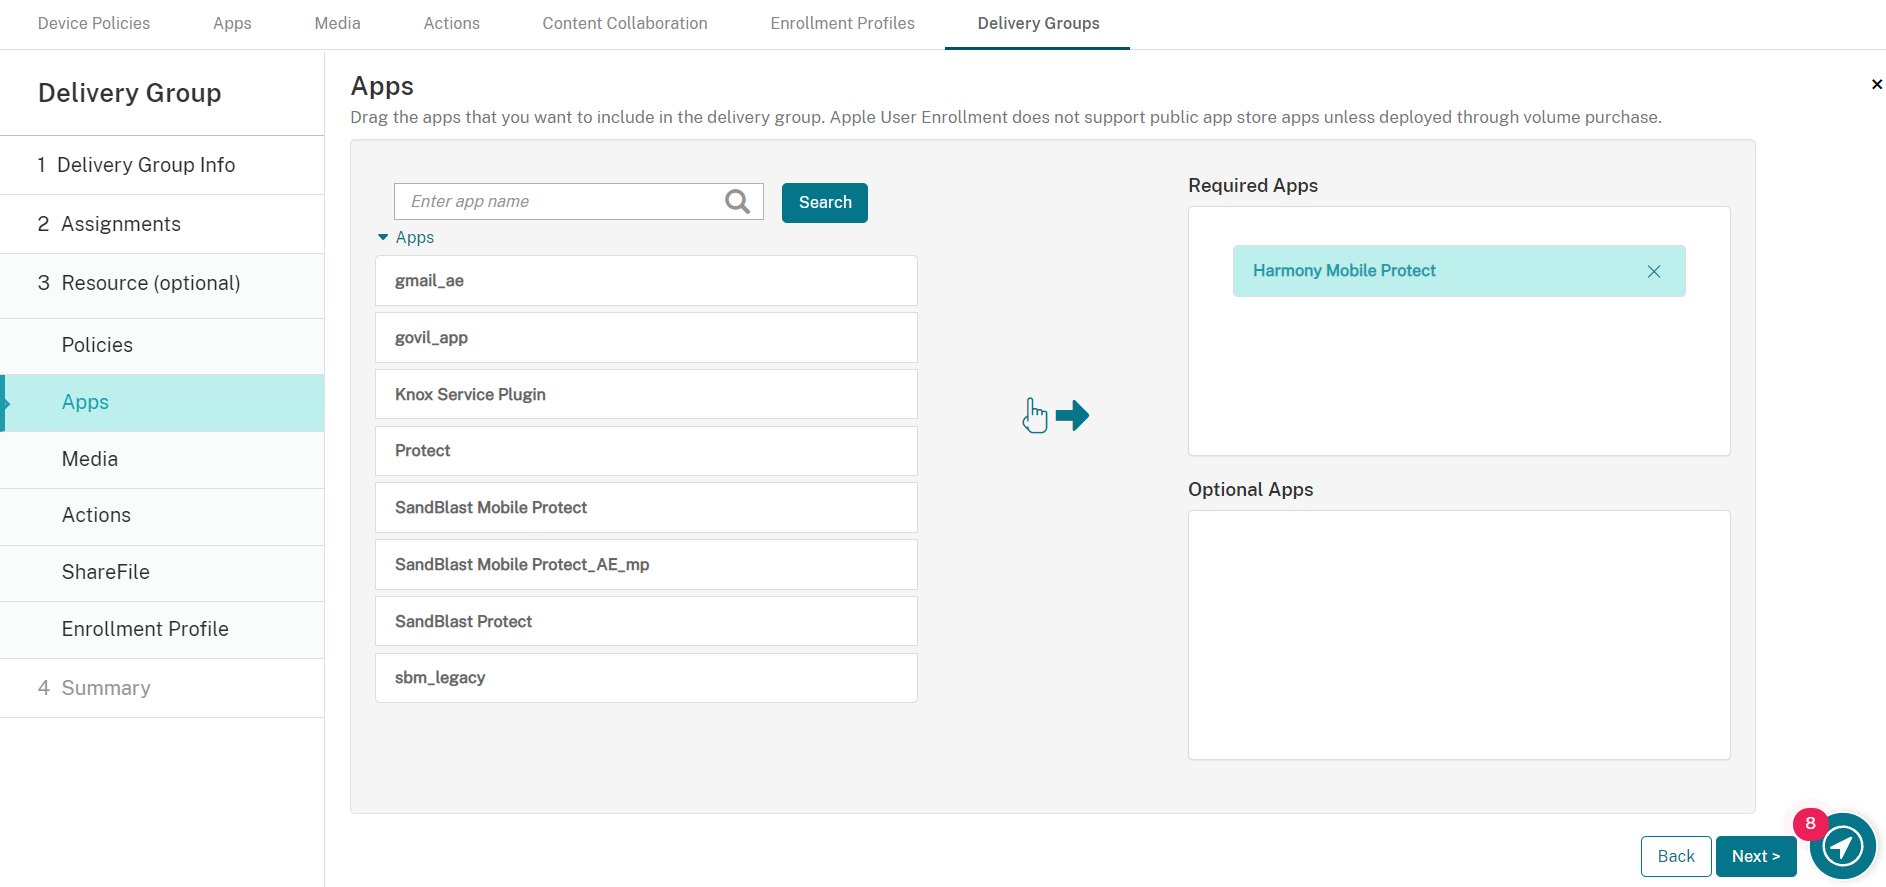
The Harmony Mobile Protect app is required by editing the Delivery Group Apps tab and moving the Harmony Mobile Protect app from Optional to Required.
-
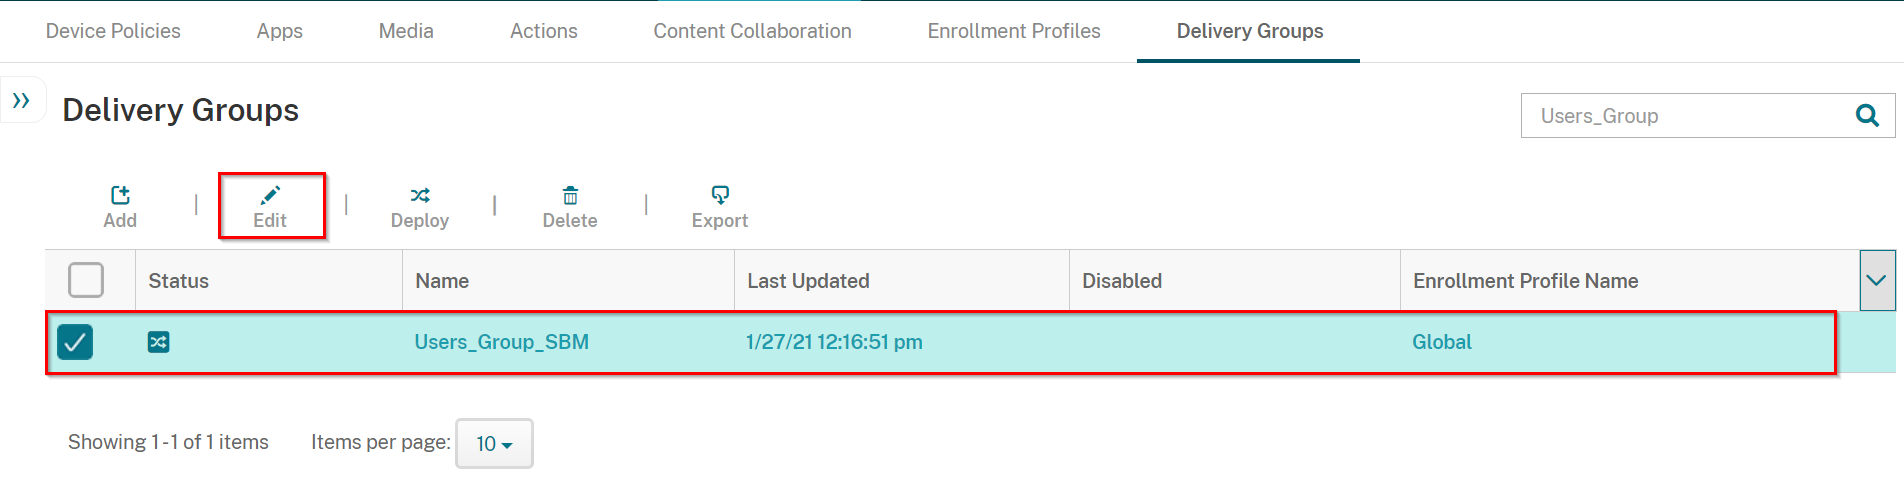
Navigate to Configure > Delivery Groups.

-
Select the Delivery Group you created in Creating a Delivery Group and click Edit.
-
Select the Apps tab.
-
Drag Harmony Mobile Protect to Required Apps.
-
The app adds to the Required Apps list as below:
-
Scroll down to Summary tab.
-
On the Summary tab, make sure the app shows up correctly, and click Save.
Creating a Mitigation Process
In this section, you will reference a device property (CHKP_Risk) Harmony Mobile Dashboard will use to label any device in High, Medium, or Low Risk, or None for device with No Risk as determined by the Harmony Mobile Analysis. This device property, CHKP_Risk, will allow the Citrix Endpoint Management system to identify which devices are at risk and to enforce actions and policies based on risk level.
We will use the CHKP_Risk device property in several actions as a trigger that when met will enact the action described.
|
|
Notes:
|

Creating Actions for Devices at High Risk - Send Notification to User
-
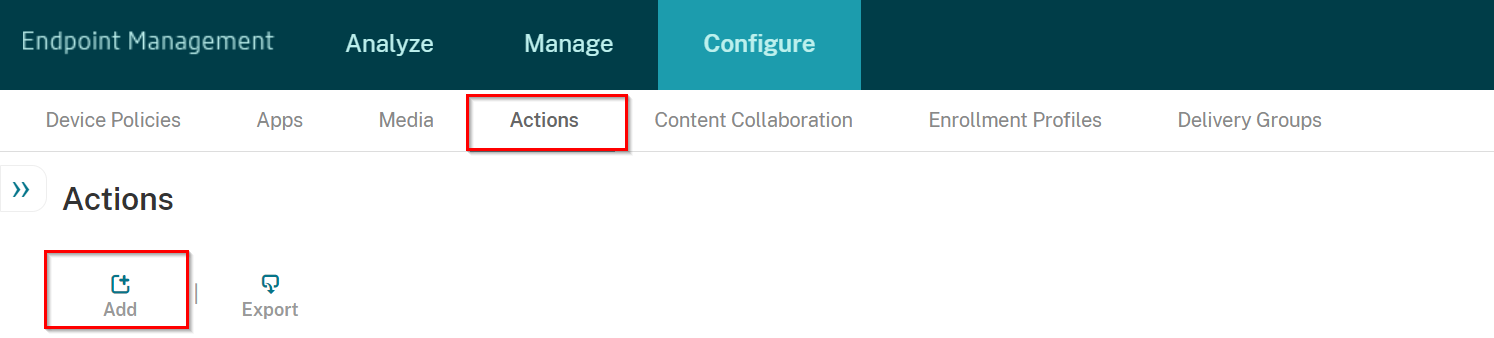
Navigate to Configure > Actions, and click Add.
-
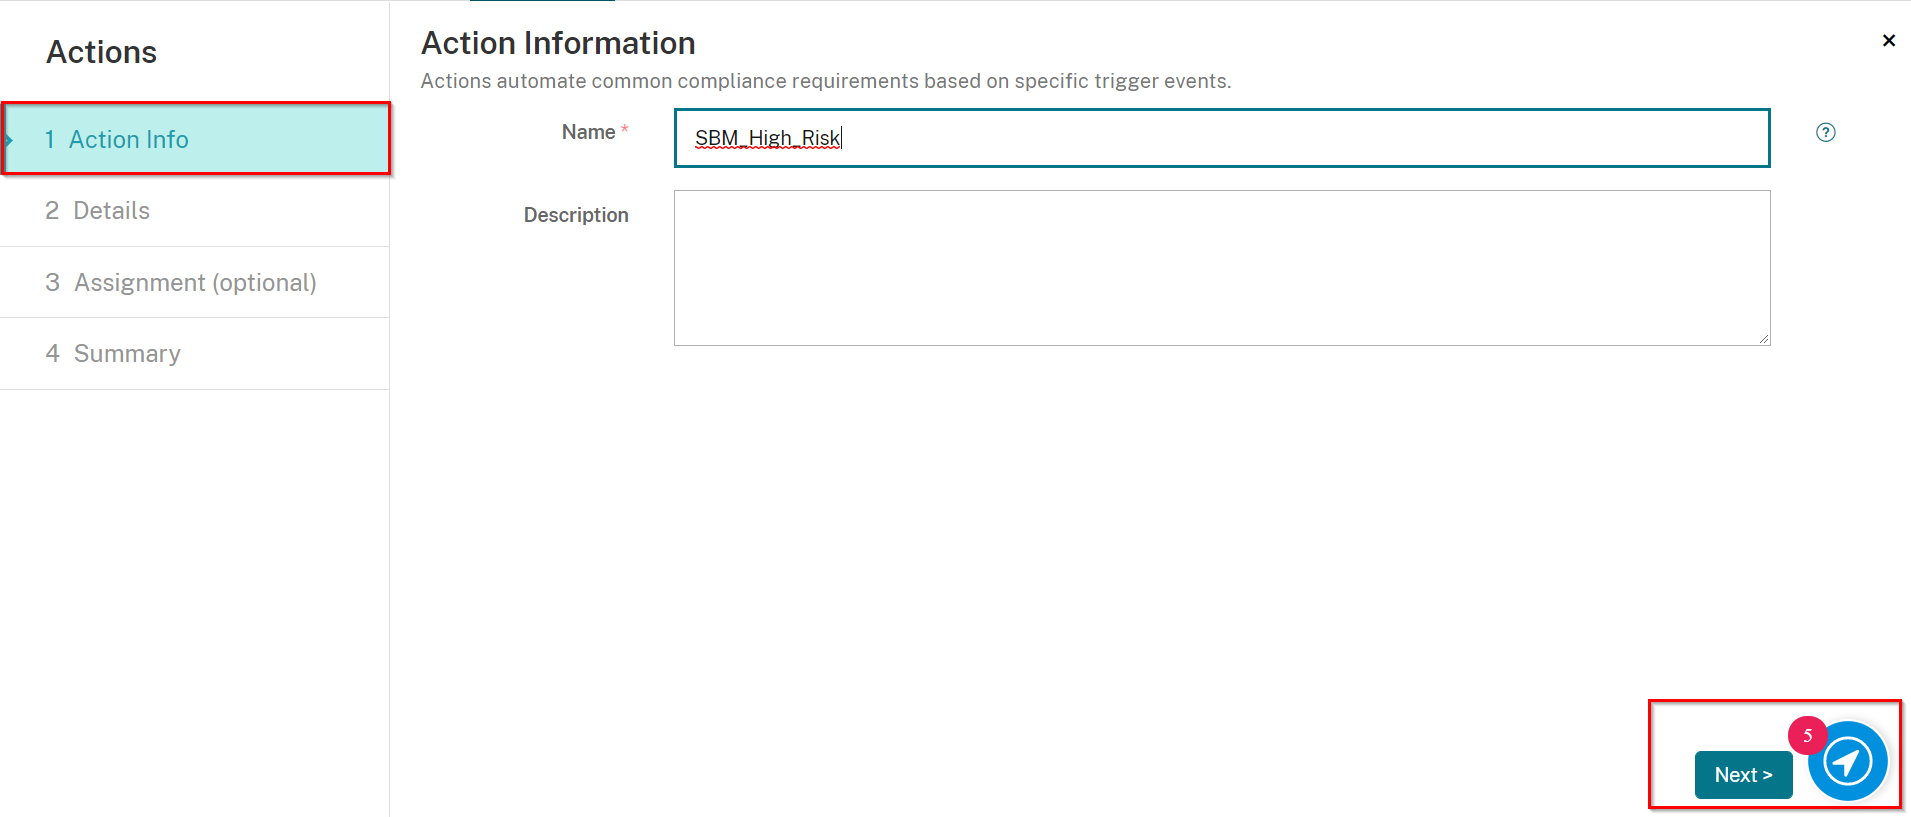
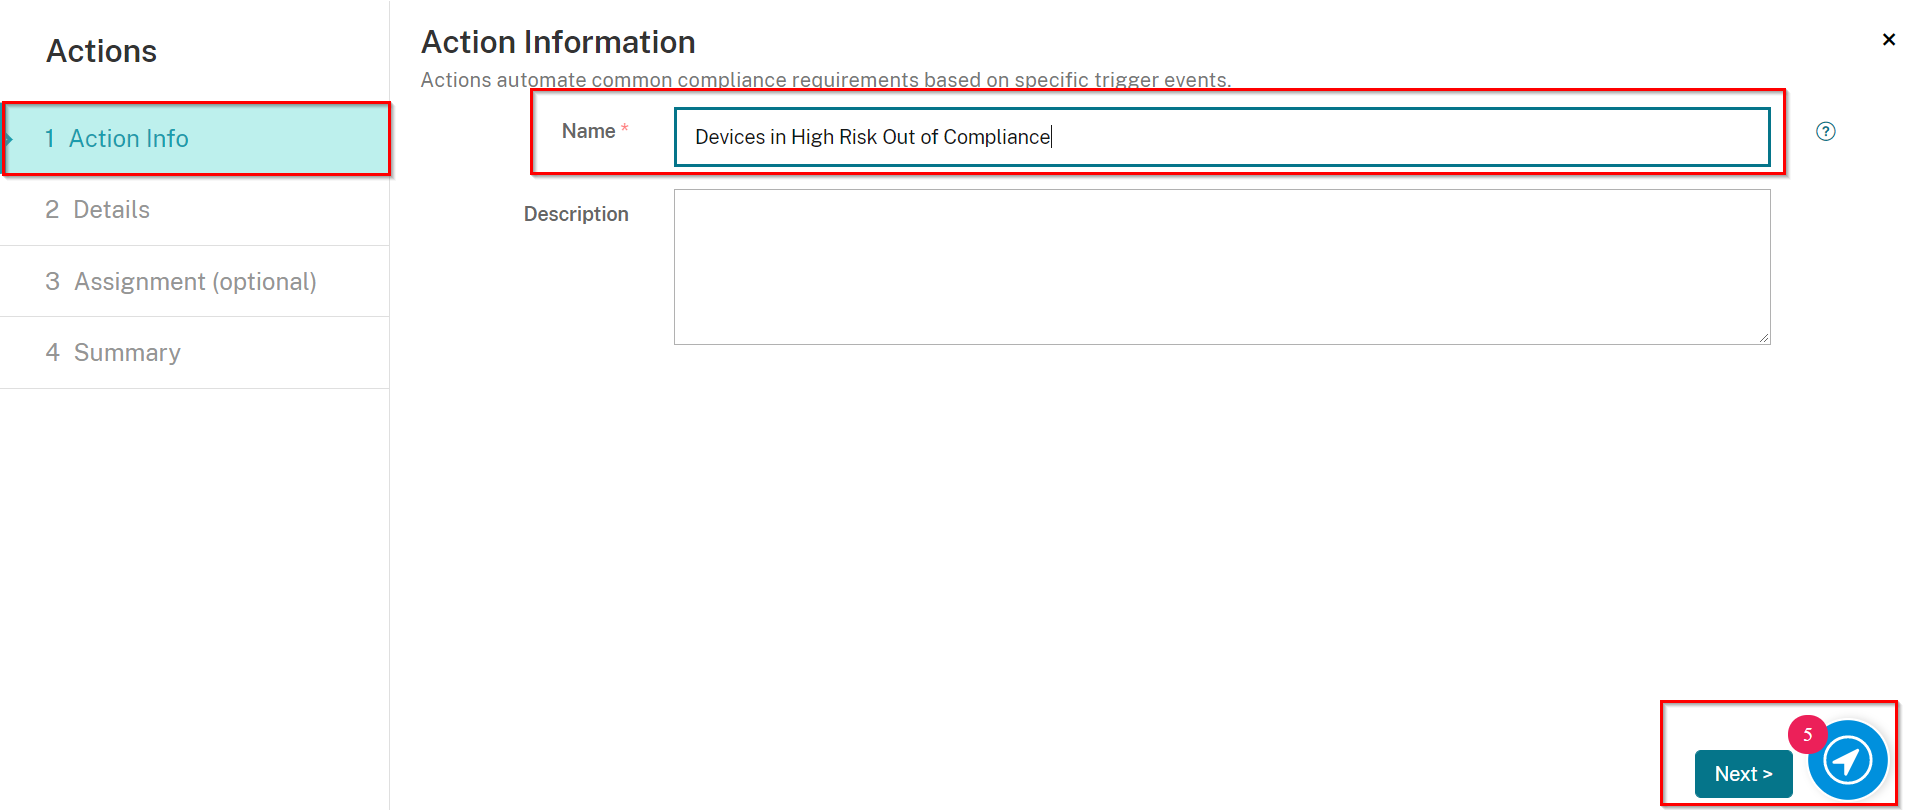
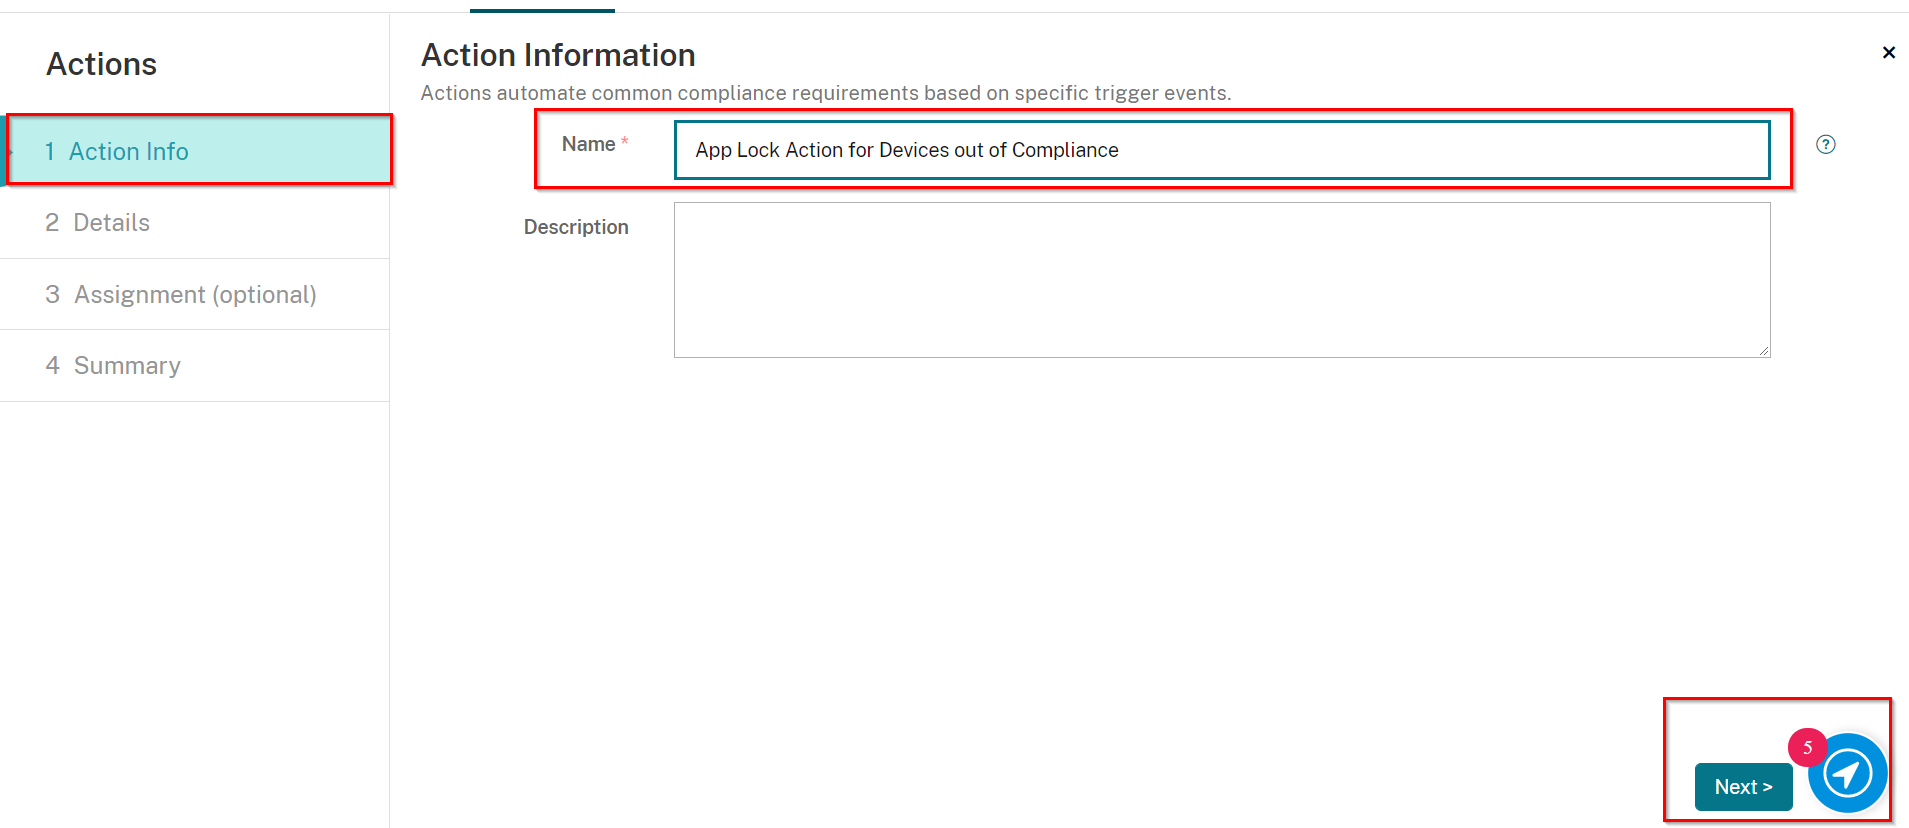
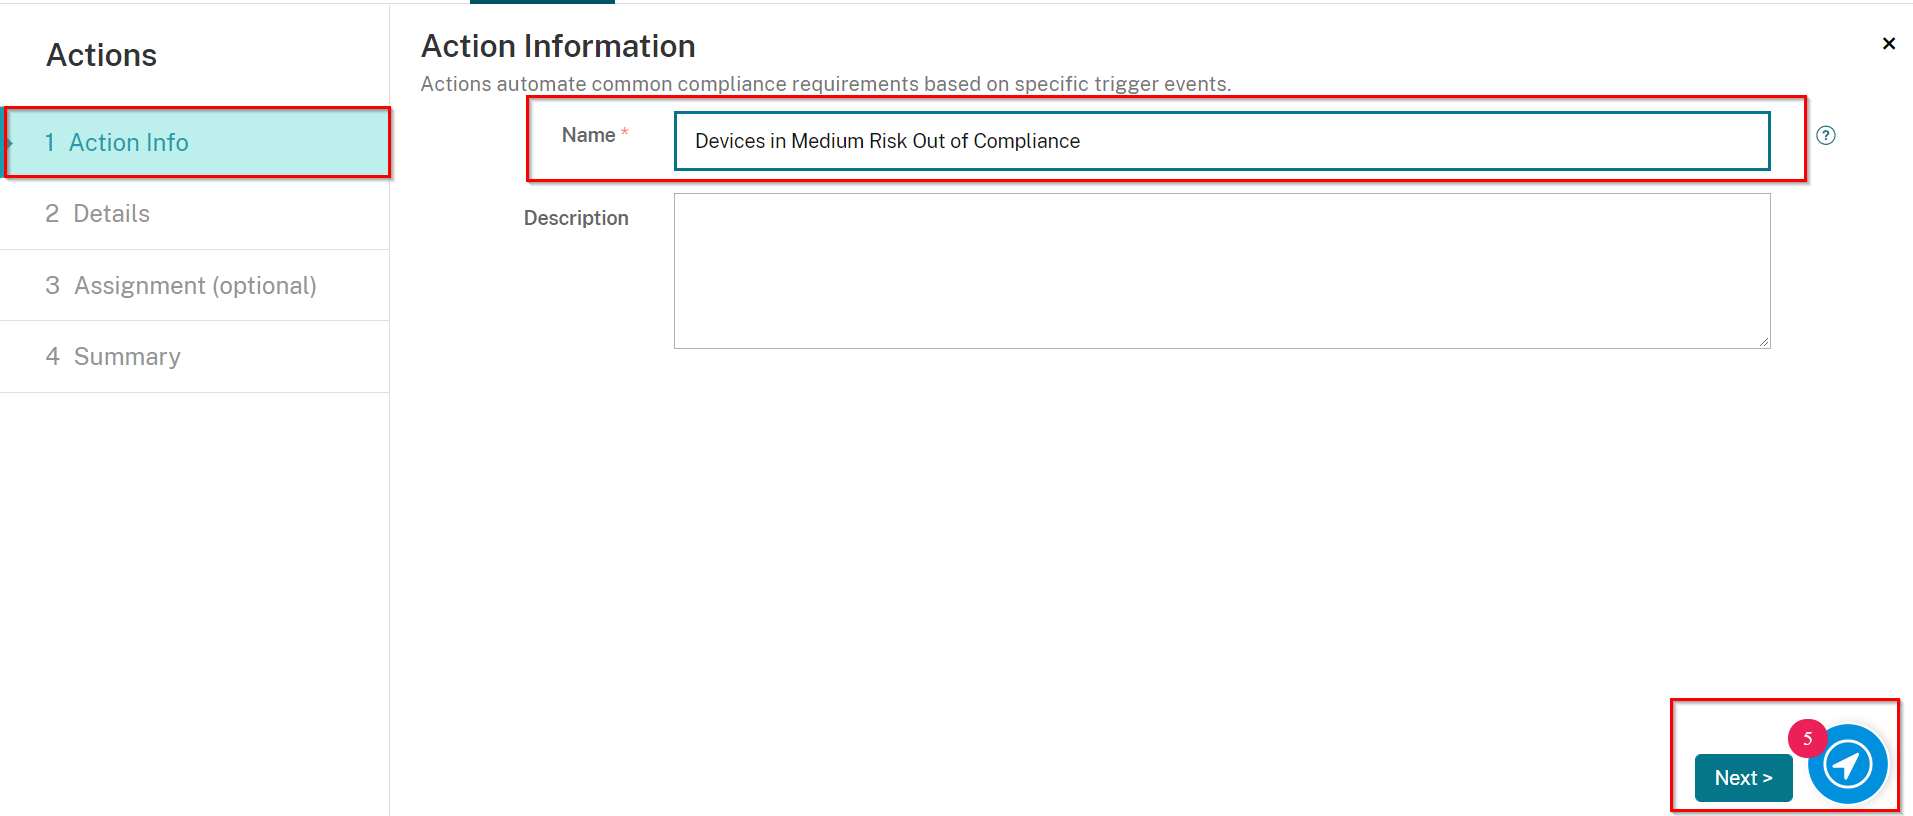
On the Action Info screen, enter in a unique name, and if desired, a description.
-
Click Next.
-
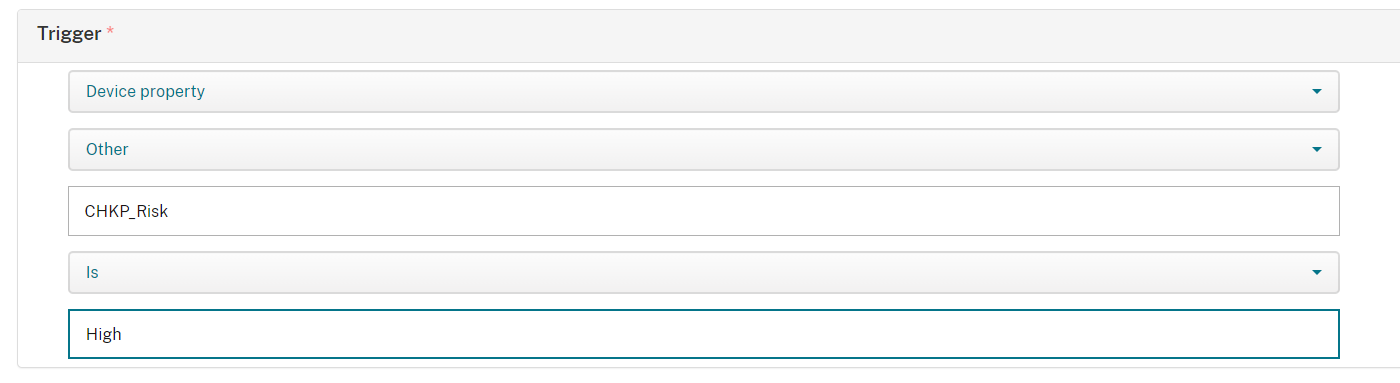
On the Details screen, select a trigger as follows:
-
Select Device property
-
On Select a Device Property select Other
-
On Enter a property name enter in "CHKP_Risk"
-
Select is
-
On Enter a String enter in High.
-
-
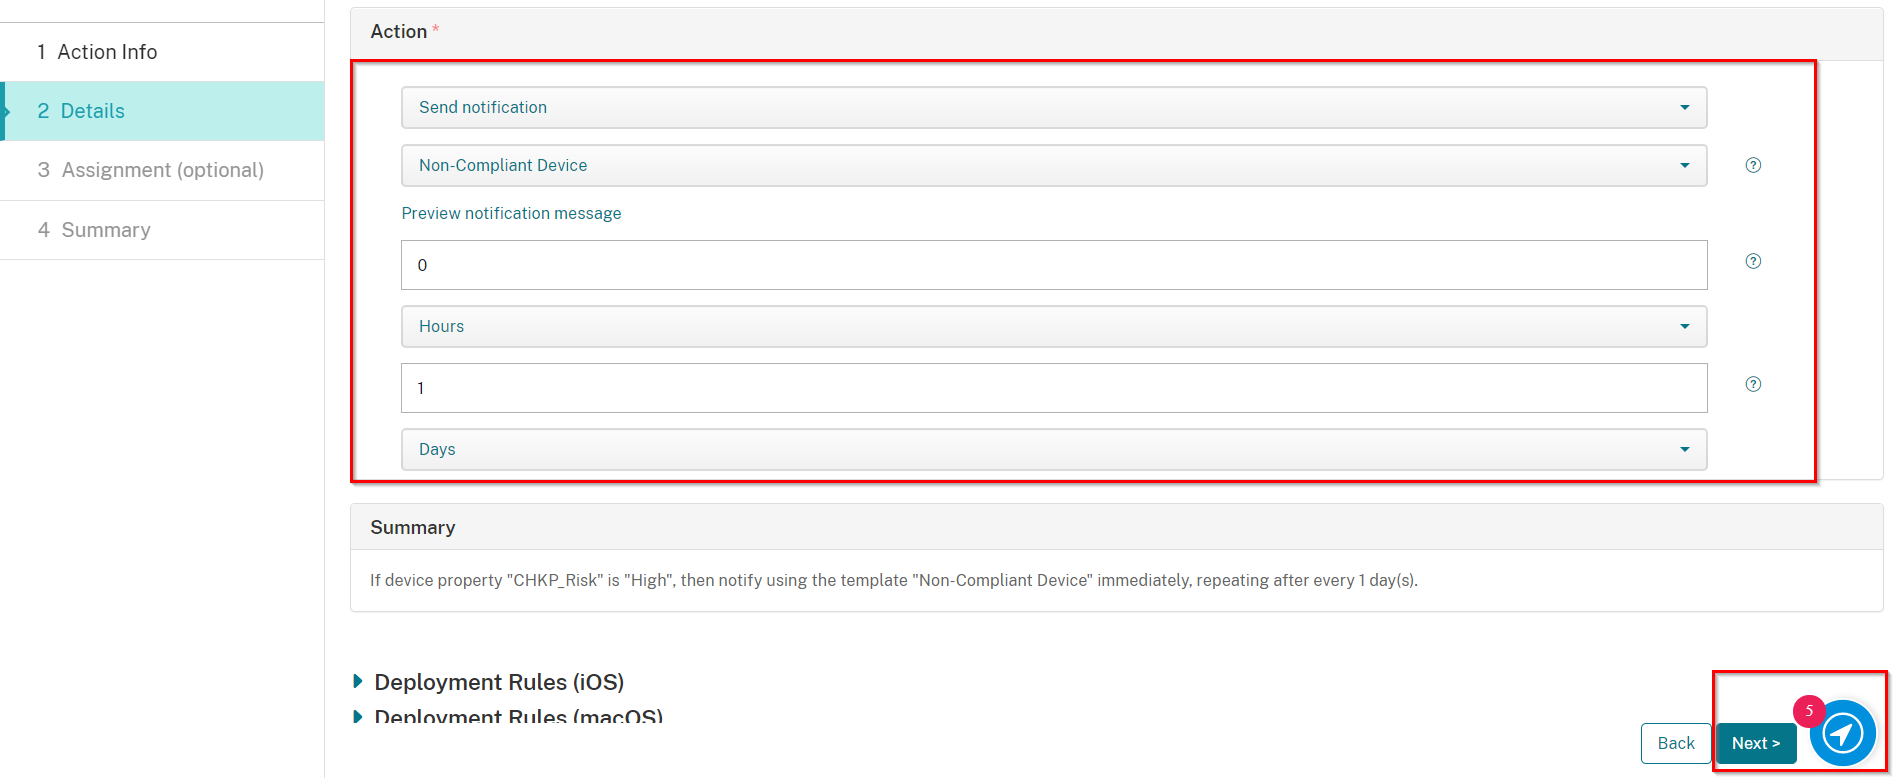
Select an Action as follows:
-
On Select an action select Send notification
-
On Select a template select Non-Compliant Device
-
Set to 0 Hours (for immediately)
-
Set to 1 Days for reminder
-
-
Click Next.
-
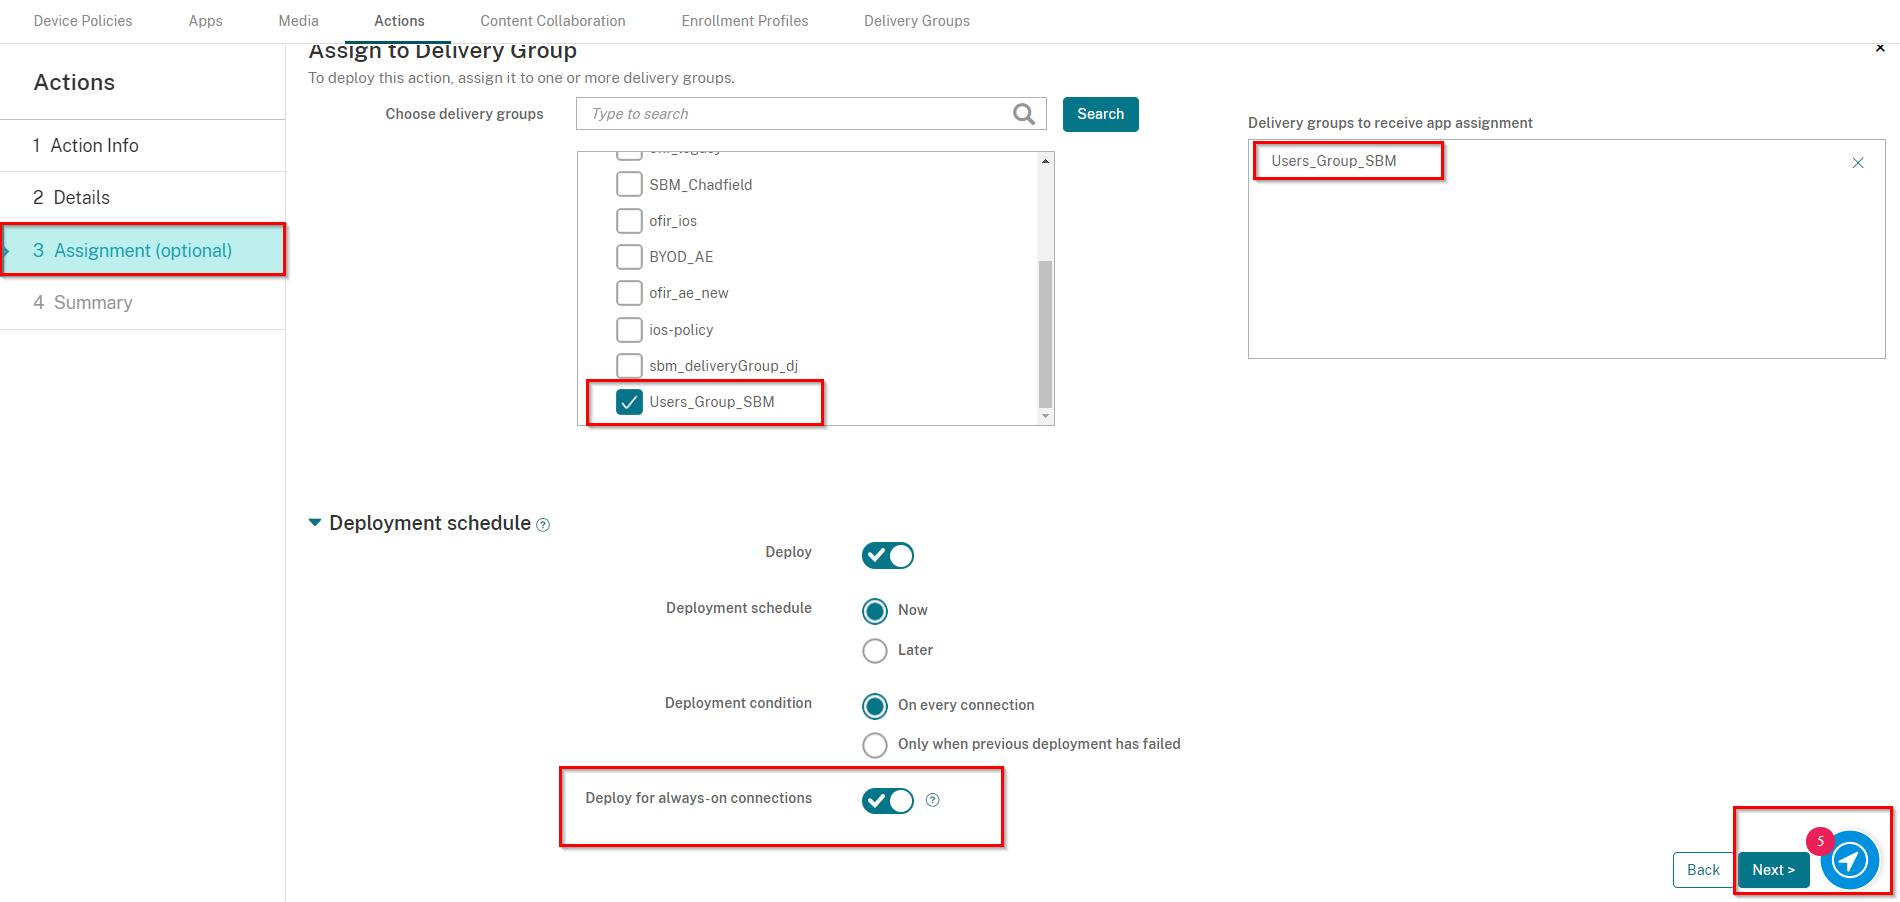
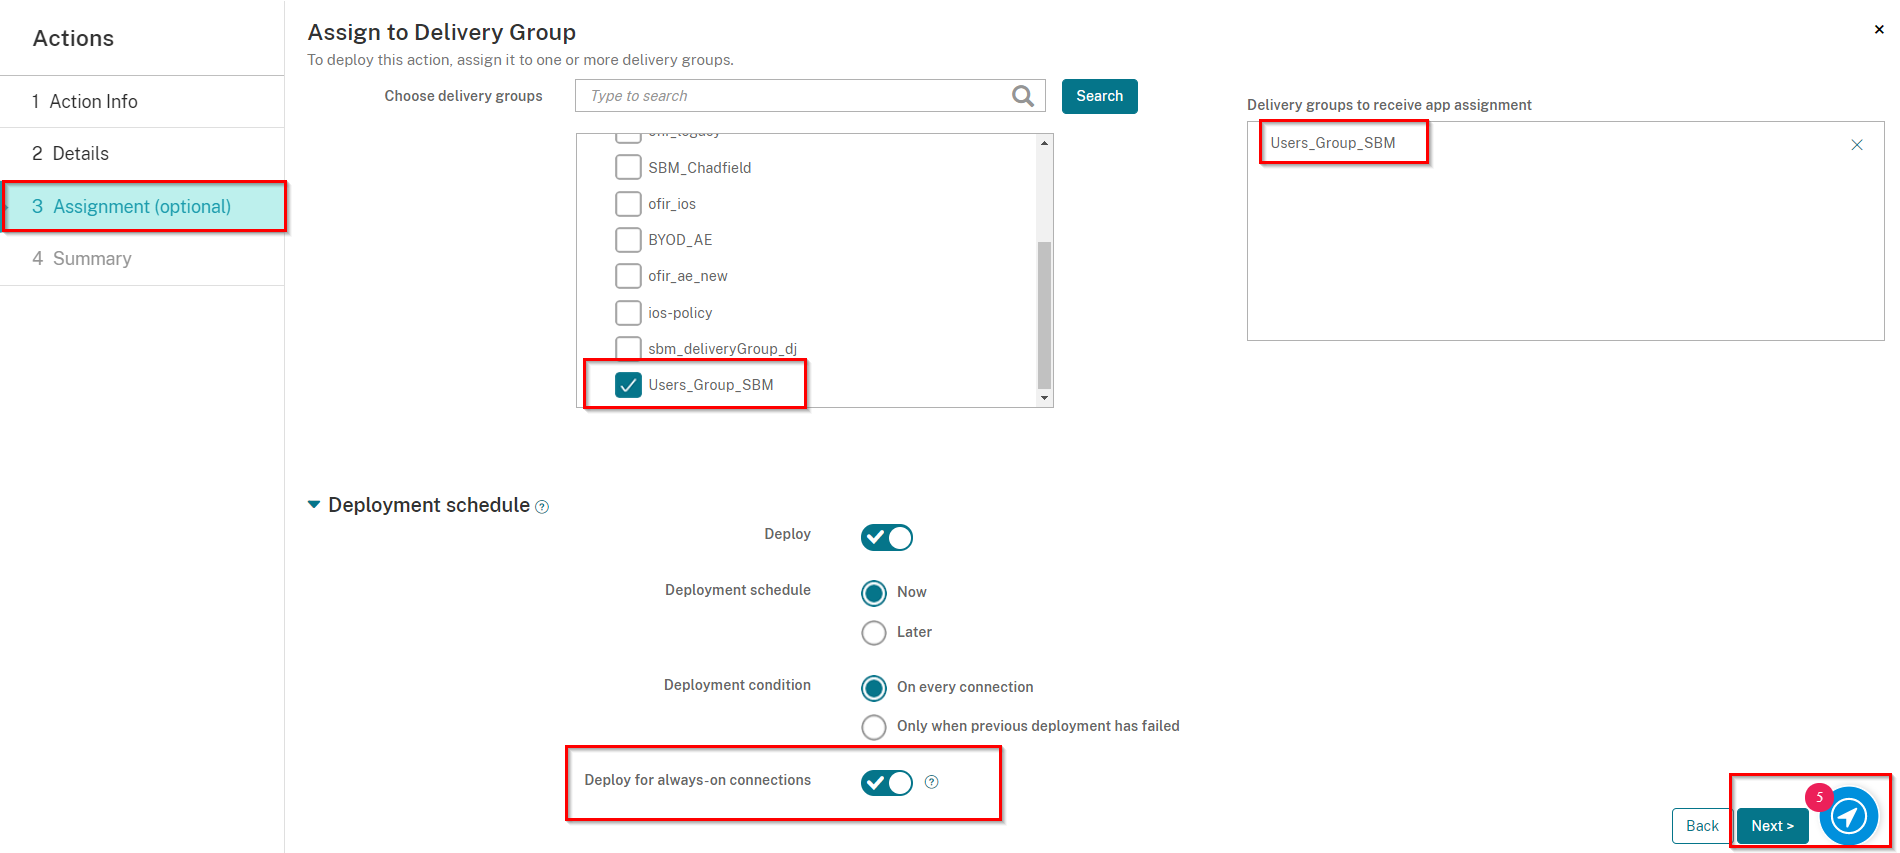
On the Assignment screen, select the Delivery Group you created in Creating a Delivery Group, in our example: Users_Group_SBM
-
Also, under Deployment Schedule, toggle the button Deploy for always-on connections to be ON.
-
Click Next.
-
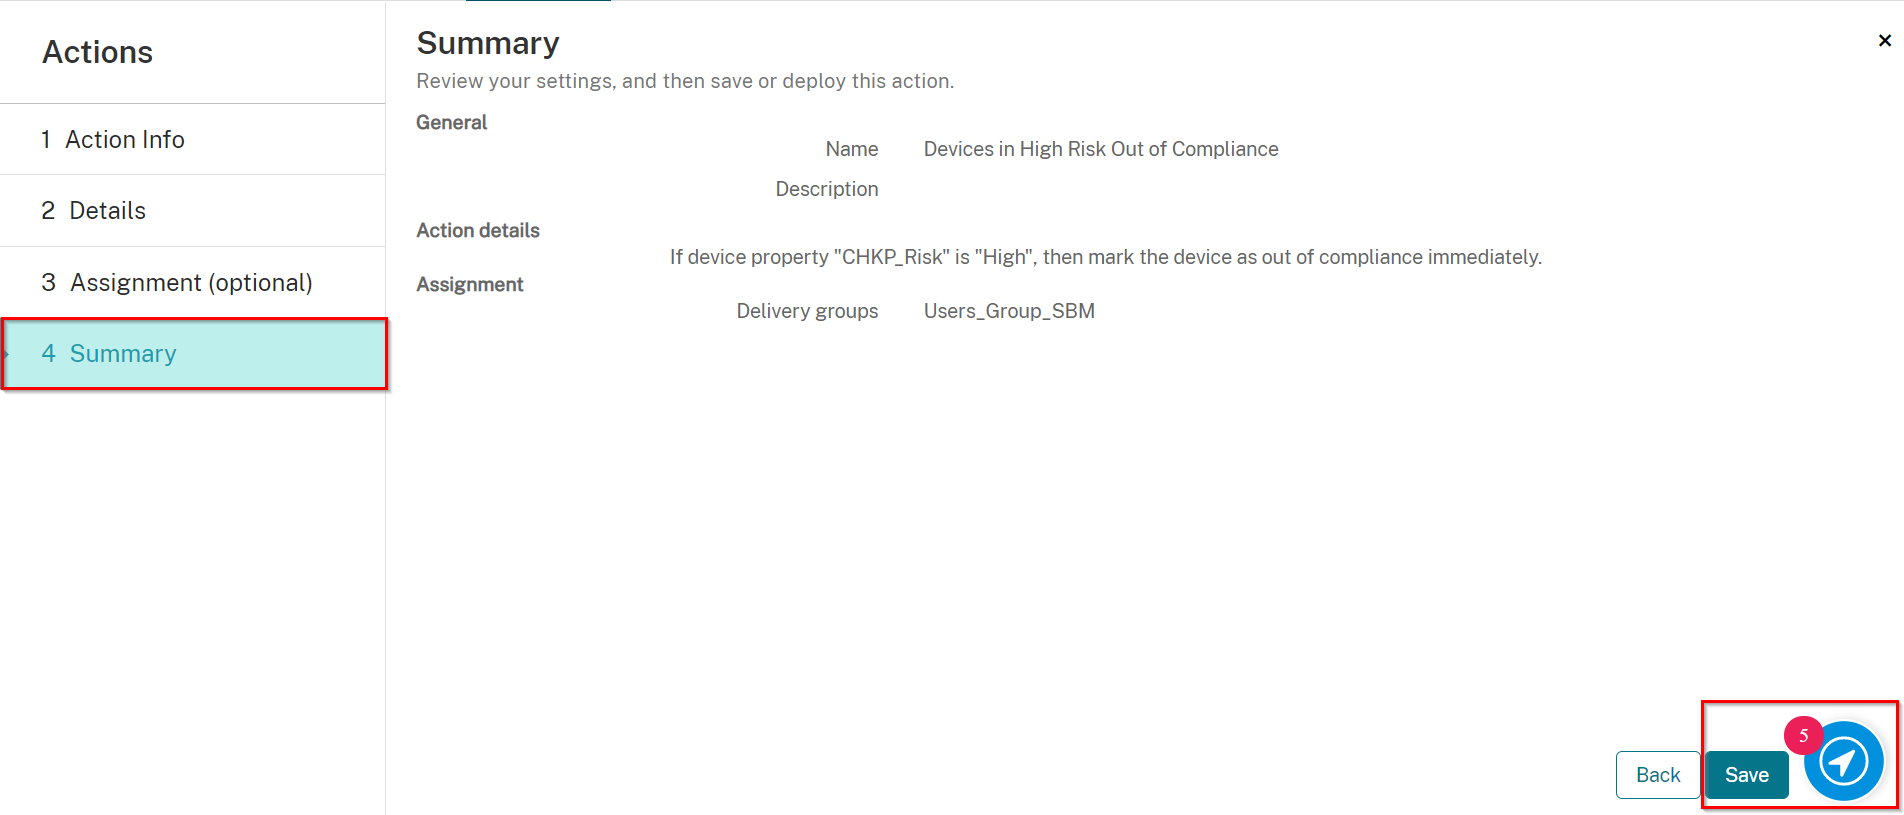
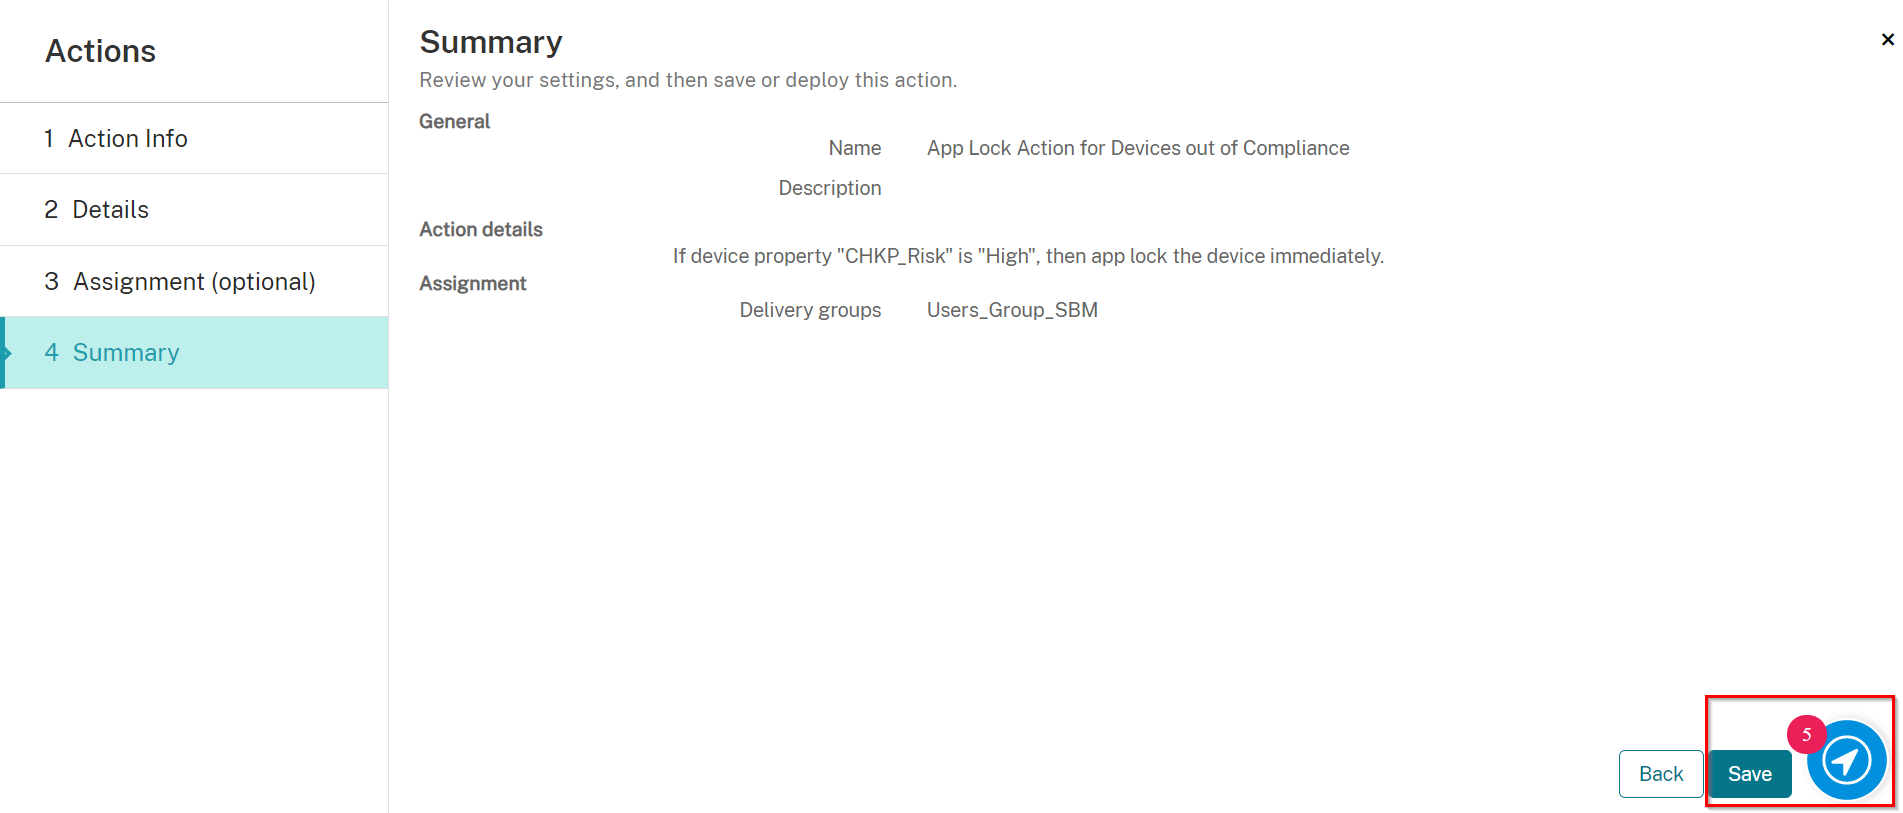
On the Summary screen, click Save.

Mark Devices at High Risk as Out of Compliance
-
Navigate to Configure > Actions, and click Add.
-
On the Action Info screen, enter in a unique name, and if desired, a description.
-
Click Next.
-
On the Details screen, select a trigger as follows:
-
Select Device property
-
On Select a Device Property select Other
-
On Enter a property name enter in CHKP_Risk
-
Select is
-
On Enter a String enter in High.
-
-
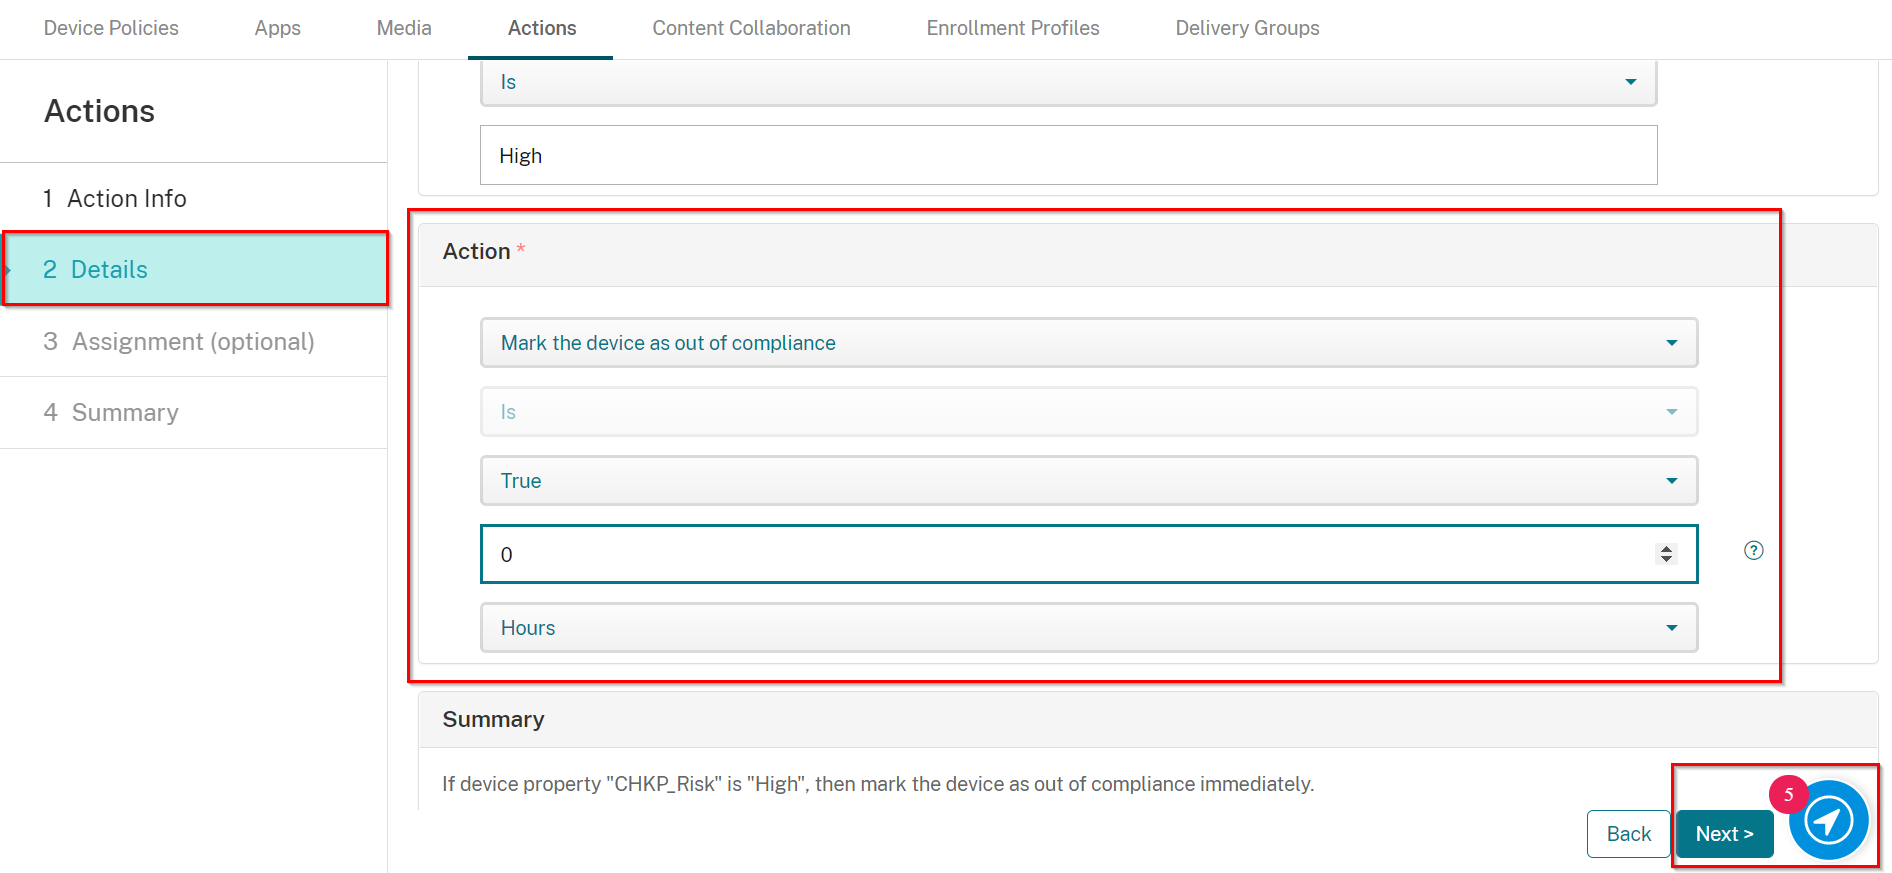
Select an Action as follows:
-
Select Mark the device as out of compliance
-
Select is
-
Select True
-
Set to 0 Hours (for immediately).
-
-
Click Next.
-
On the Assignment screen, select the Delivery Group you created in Creating a Delivery Group, in our example: Users_Group_SBM
-
Also, under Deployment Schedule, toggle the button Deploy for always-on connections to be ON.
-
Click Next.
-
On the Summary screen, click Save.
Creating an AppLock Policy for Devices at High Risk
-
Navigate to Configure > Actions, and click Add.
-
On the Action Info screen, enter in a unique name, and if desired, a description.
-
Click Next.
-
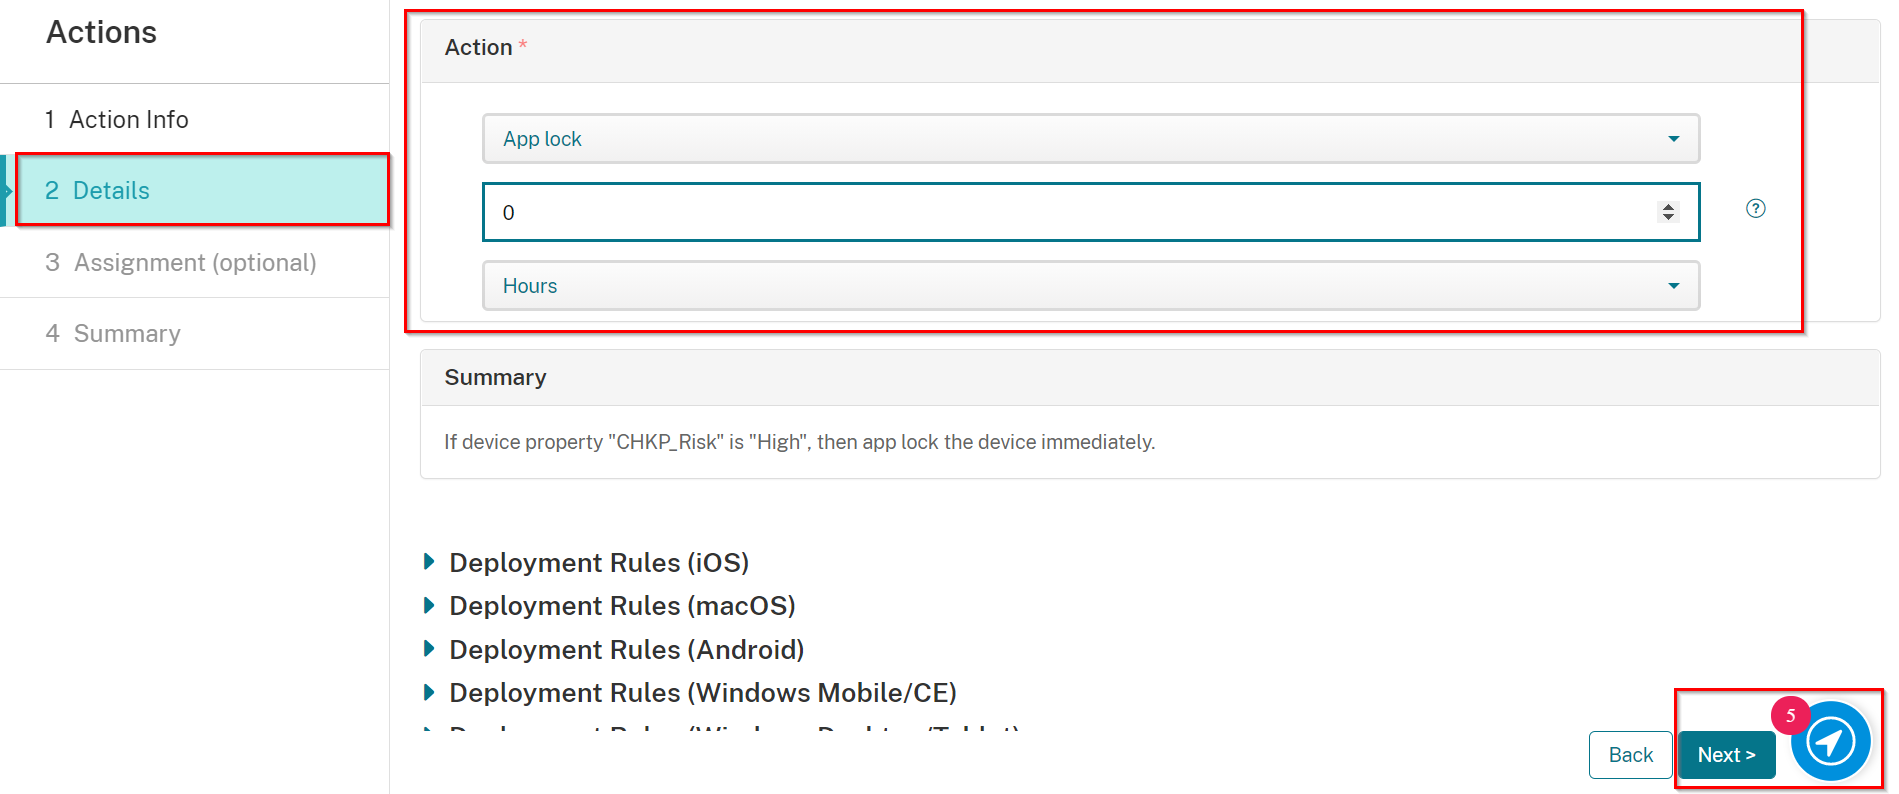
On the Details screen, select a trigger as follows:
-
Select Device property
-
On Select a Device Property select Other
-
On Enter a property name enter in CHKP_Risk
-
Select is
-
On Enter a String enter in High.
-
-
Select an Action as follows:
-
Select App Lock
-
Set to 0 Hours (for immediately)
-
-
Click Next.
-
On the Assignment screen, select the Delivery Group you created in Creating a Delivery Group, in our example: Users_Group_SBM
-
Also, under Deployment Schedule, toggle the button Deploy for always-on connections to be ON.
-
Click Next.
-
On the Summary screen, click Save.
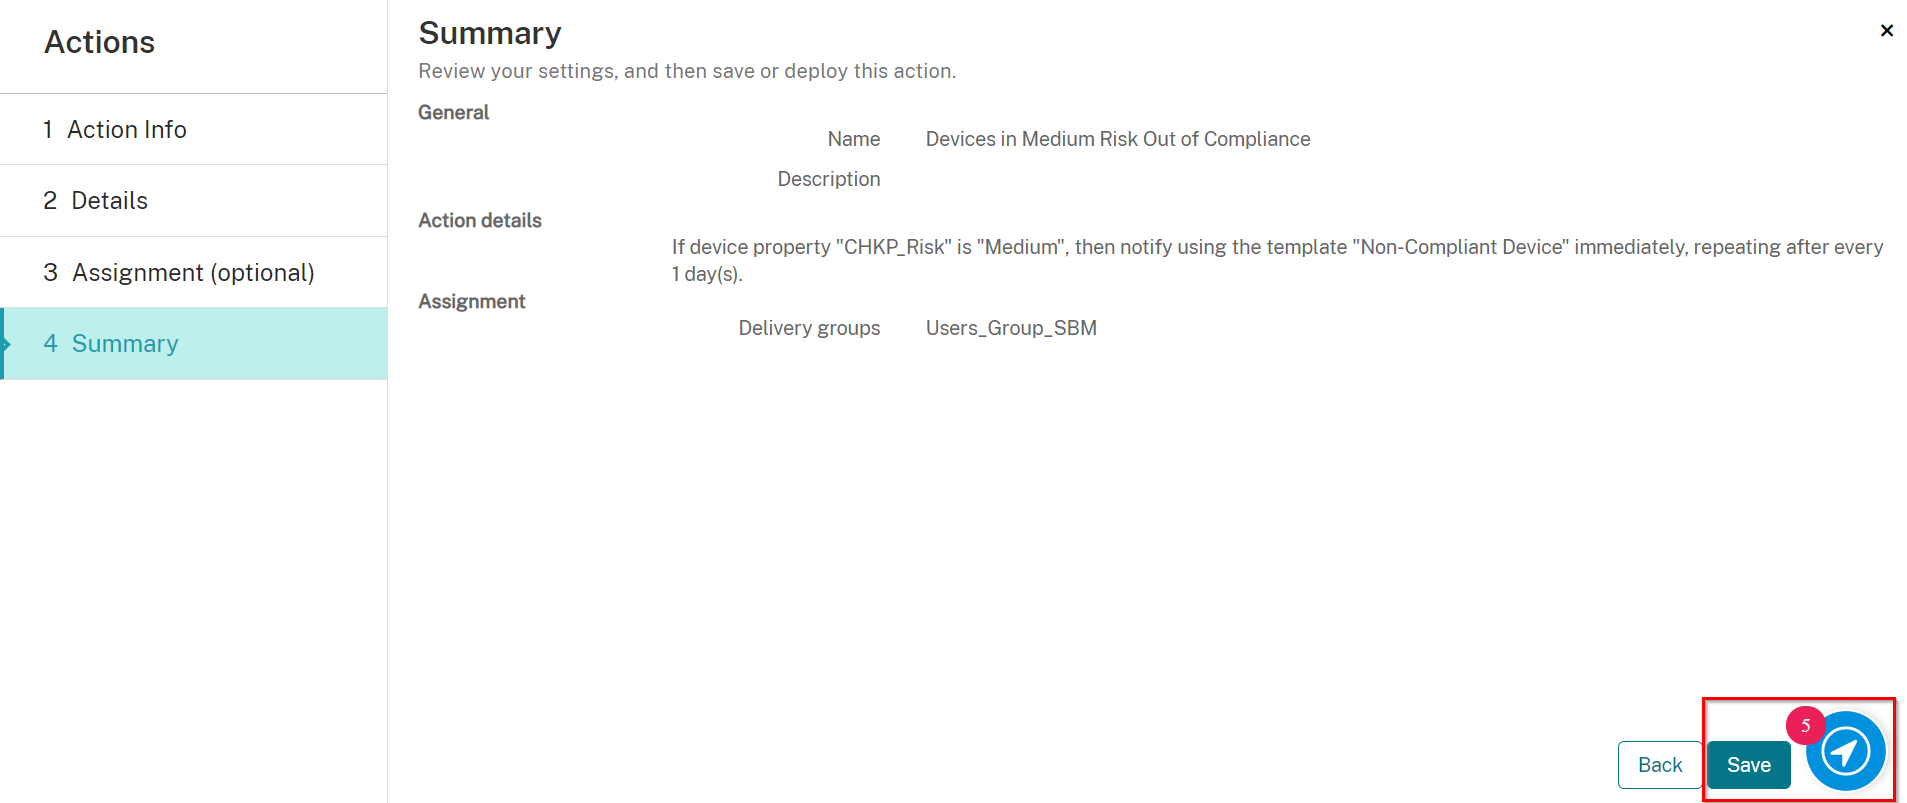
Creating Actions for Devices at Medium Risk
-
Navigate to Configure > Actions, and click Add.
-
On the Action Info screen, enter in a unique name, and if desired, a description.
-
Click Next.
-
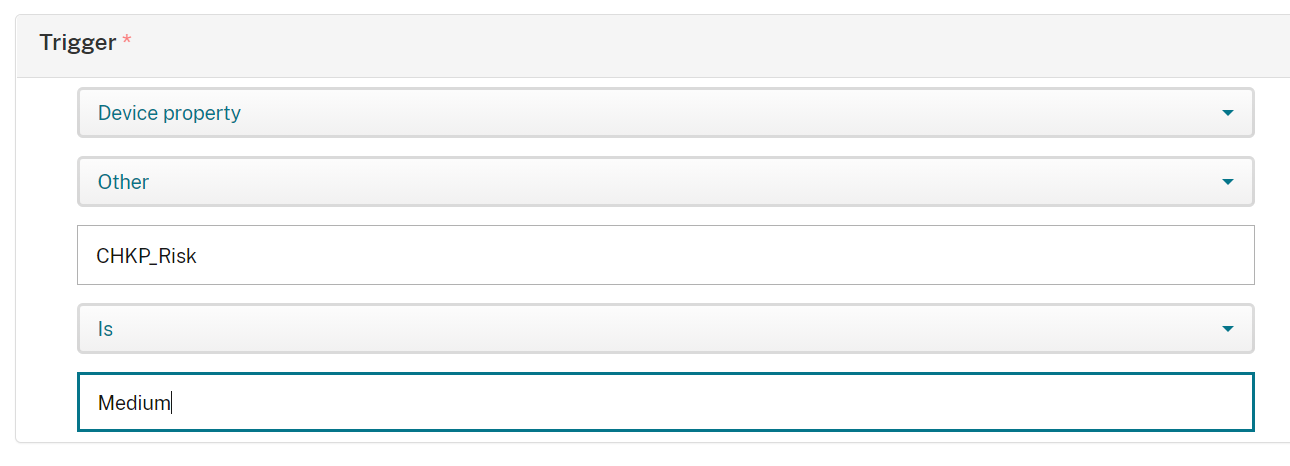
On the Details screen, select a trigger as follows:
-
Select Device property
-
On Select a Device Property select Other
-
On Enter a property name enter in CHKP_Risk
-
Select is
-
On Enter a String enter in Medium.
-
-
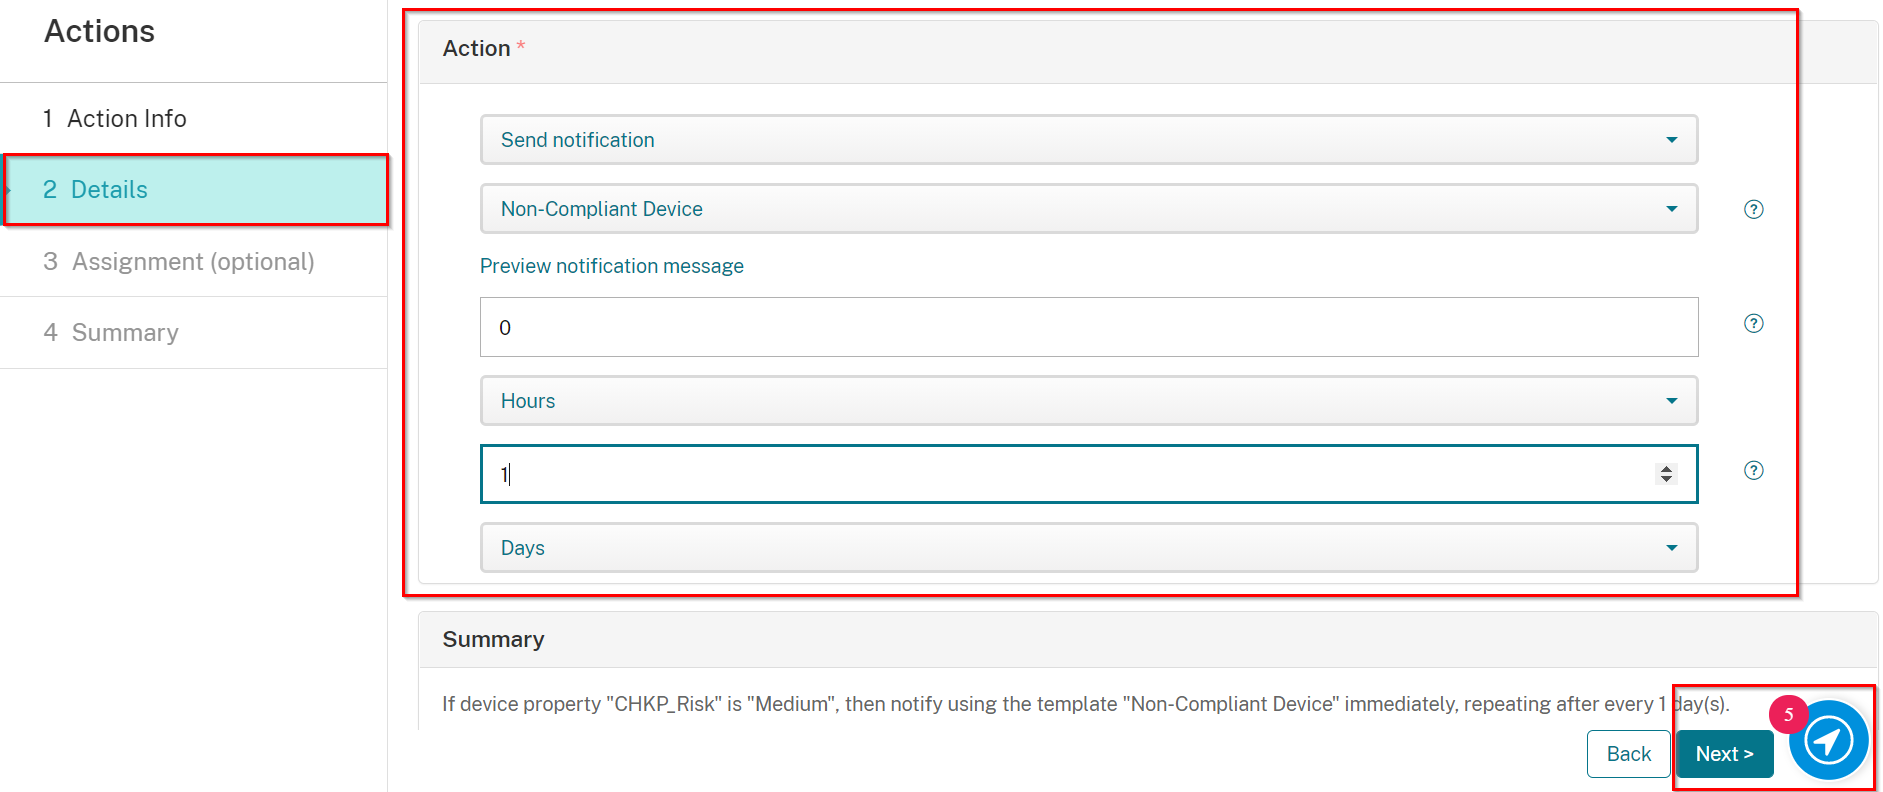
Select an Action as follows:
-
On Select an action select Send notification
-
On Select a template select Non-Compliant Device
-
Set to 0 Hours (for immediately)
-
Set to 1 Days for reminder
-
Click Next.
-
On the Assignment screen, select the Delivery Group you created in Creating a Delivery Group, in our example: Users_Group_SBM
-
Also, under Deployment Schedule, toggle the button Deploy for always-on connections to be ON.
-
Click Next.
-
On the Summary screen, click Save.
Mark Devices Not at High Risk as Compliant
-
Navigate to Configure > Actions, and click Add.
-
On the Action Info screen, enter in a unique name, and if desired, a description.
-
Click Next.

-
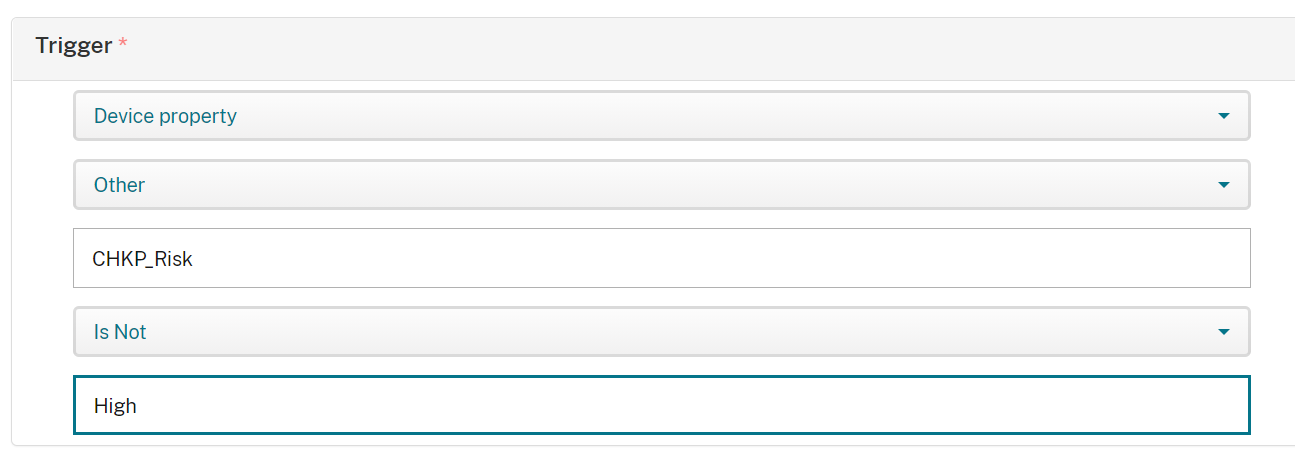
On the Details screen, select a trigger as follows:
-
Select Device property
-
On Select a Device Property select Other
-
On Enter a property name enter in CHKP_Risk
-
Select Is Not
-
On Enter a String enter in High.
-
-
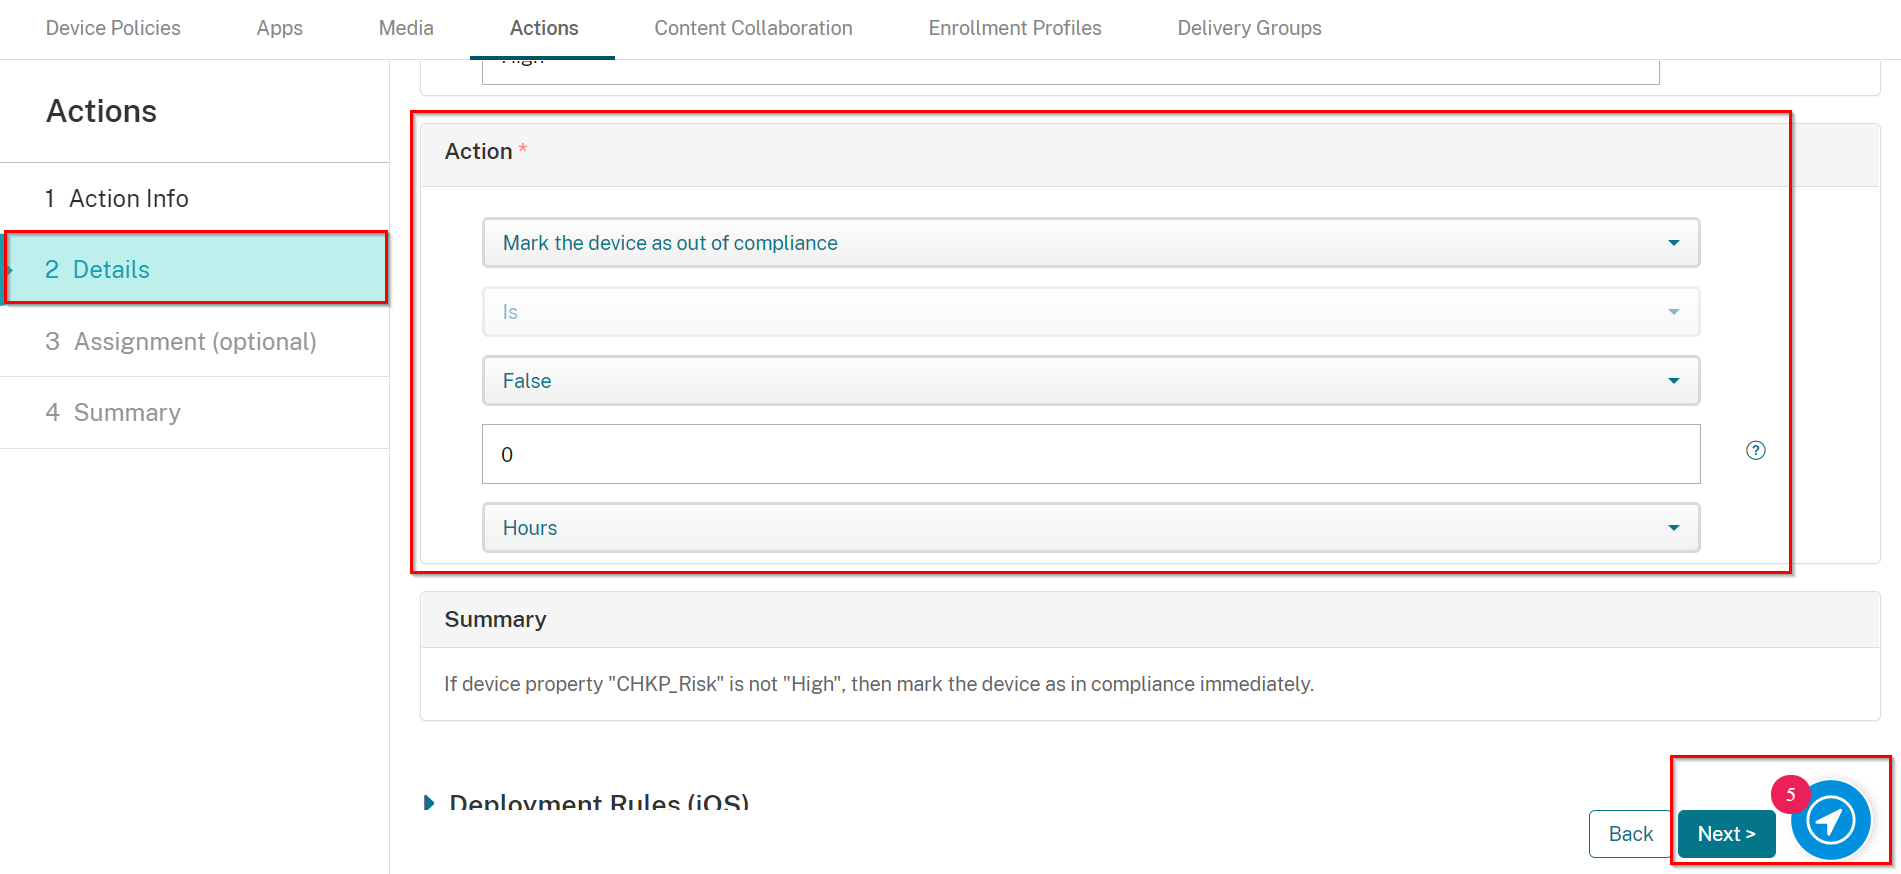
Select an Action as follows:
-
Select Mark the device as out of compliance
-
Select is
-
Select False
-
Set to 0 Hours (for immediately).
-
Click Next.
-
On the Assignment screen, select the Delivery Group you created in Creating a Delivery Group, in our example: Users_Group_SBM
-
Also, under Deployment Schedule, toggle the button Deploy for always-on connections to be ON.
-
Click Next.
-
On the Summary screen, click Save.

|
|
Note - Now any device in the Delivery Group ("Users_Group_SBM") that has the Device Property "CHKP_Risk" "equal to" "High" or "Medium" set by the Harmony Mobile system will be acted upon by the Actions and Policies. |