Integration with Citrix Endpoint Management (Formerly XenMobile)
Preparing UEM Platform for Integration
Citrix Endpoint Management deploys Harmony Mobile Protect app on a device.
Prerequisites
-
Mobile Security (formerly Harmony Mobile) service integrates with Citrix Endpoint Management through the existing API. To enable integration, you must first create a Citrix Endpoint Management API account.
Mobile Security integrates with Citrix Endpoint Management (On-Premise) and Citrix Endpoint Management is version 10.7 or later, through API access. Mobile Security uses the API to synchronize the device records, to retrieve device apps list, and to report the device risk level to Citrix Endpoint Management.
-
Citrix Endpoint Management must be configured with an Apple Push Certificate (APNS) and Google Play Credentials.
-
The MDX app files for Citrix Mail and Citrix Web Browser have been added to the App Catalog.
-
For Active Directory integration, users to be registered to Mobile Security must belong to Security Group(s) to be tied to Mobile Security. See "Creating a Delivery Group" on the next page.
Citrix Endpoint Management Console (Example):

General Workflow
-
Create a Delivery Group for Check Point Mobile Security. See Creating a Delivery Group.
-
For user's enrollment into Citrix Endpoint Management send an enrollment invitations. See Sending Enrollment Invitations.
-
For integration from Mobile Security to Endpoint Management create a limited administrator account (optional). See Creating Limited Administrator Account (optional)
Creating a local users Group
To include the delivery group, that will be created in the next step, in our own group, we must create a local group.
-
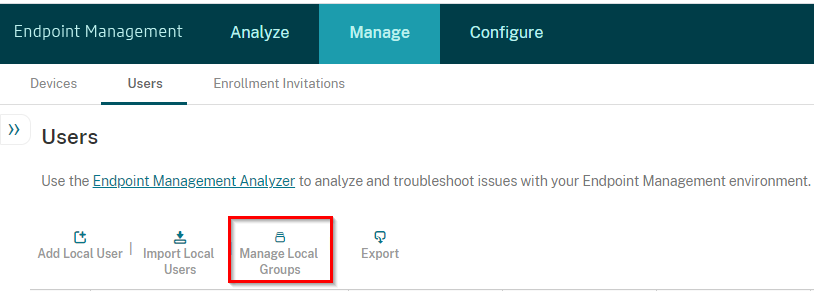
Navigate to Manage > Users and click on Manage Local Groups tab.
-
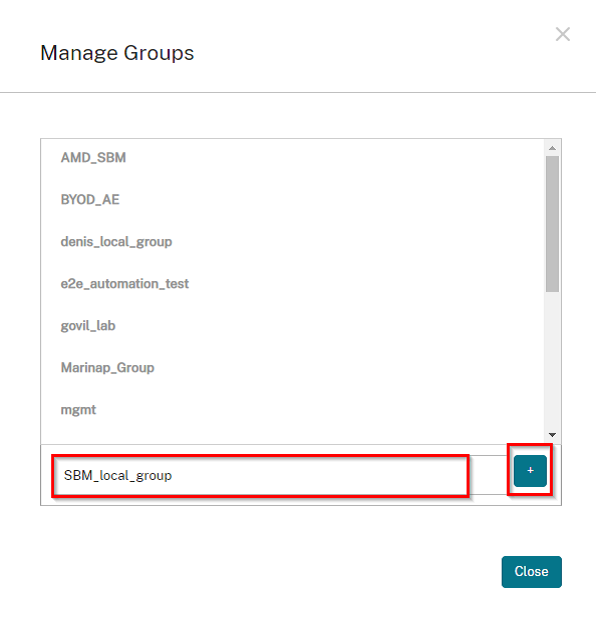
Enter a Local Group name as shown in the example below and click on the “+” sign to the right.
Creating a Delivery Group
To deploy policies, configurations, apps, etc. in Endpoint Management, you must create a delivery group that contains the users whose devices are registered to Mobile Security.
-
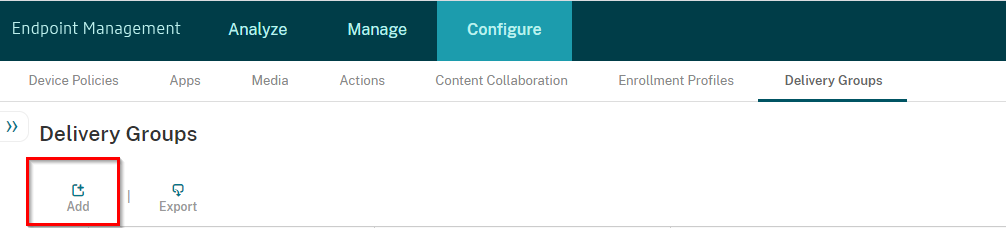
Navigate to Configure > Delivery Group and click Add.
-
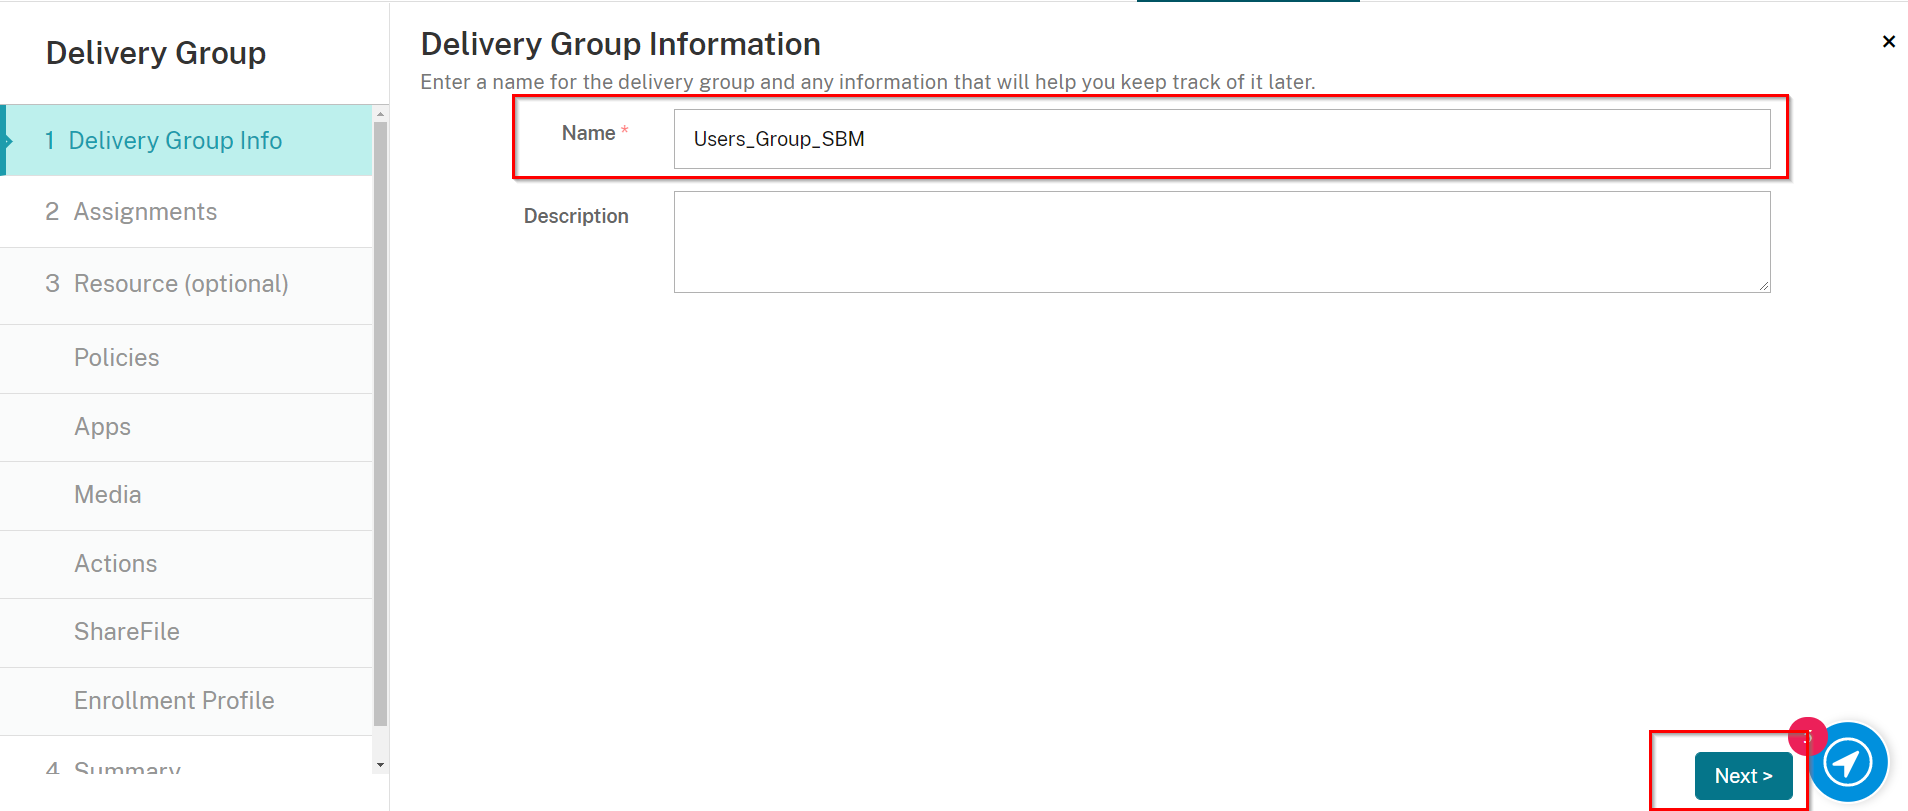
On the Delivery Group Info tab, provide a unique name for the Delivery Group, such as in the example below.
-
Click Next.
-
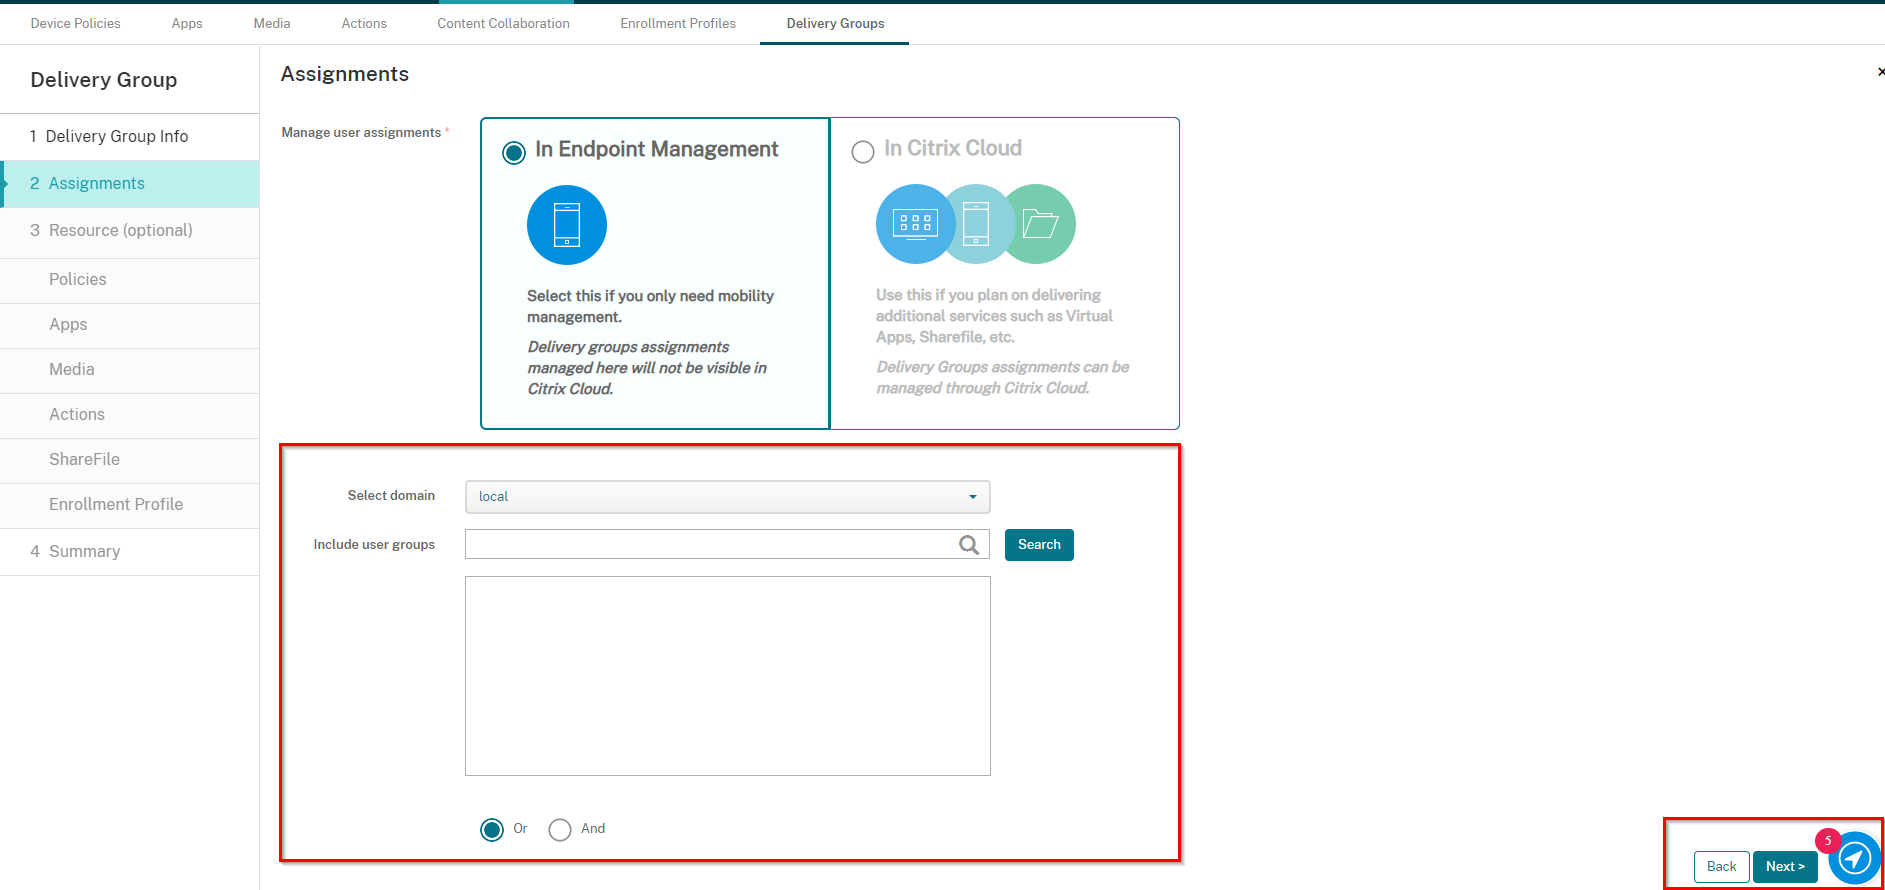
On the Assignments tab, in Mange user Assignment section select whether it is In Endpoint Management, or In Citrix Cloud.
-
In the Select Domain section select whether this is an AD Domain user group or a local Citrix group.
-
If an AD Domain group, select the domain, and then enter in a Security Group name to search the AD database for the group. Select the Security Group(s) to include.
-
If a local group, select local from the Domain section and enter in a User Group if one exists. If a user group doesn’t exist, you can skip selecting a group.
-
If a local group, select local from the Domain section and enter in a User Group that you’ve created in the previous section.
-
Click Next.
-
Click Next through the remaining tabs until the final Summary tab, and then click Save.
-
Sending Enrollment Invitations
This step is not absolutely required, but it is nice for the workflow for user engagement/enrollment into Citrix Endpoint Management. By sending enrollment invitations, the users are emailed enrollment instructions and any required authentication information.
-
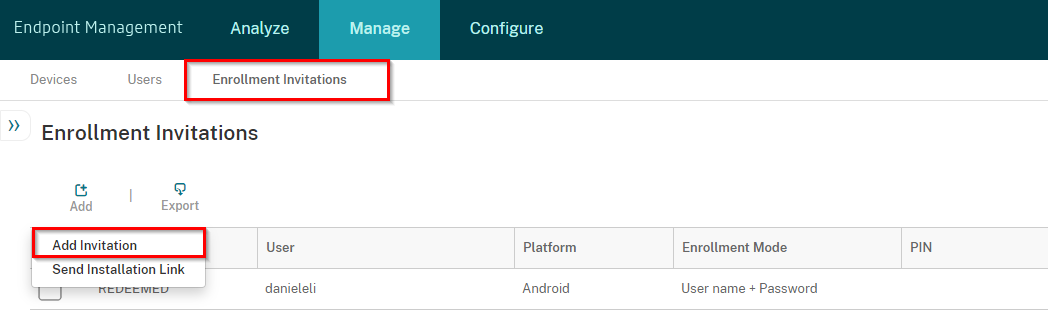
Navigate to Manage > Enrollment Invitations, click Add, and select Add Invitation.
-
On the Enrollment Invitation tab, select the following:
-
Recipient Group
-
Platform: Select Android and iOS
-
Domain: local
-
Group: Select the group you created in the previous step
-
Enrollment mode: User name + Password
-
-
Toggle the Send Invitation button to be ON.
-
Click Save & Send.
Enrolling Devices to Citrix Endpoint Management
Visit this guide for details on device enrollment to Citrix Endpoint Management.
Creating Limited Administrator Account (optional)
For integration from Mobile Security to Endpoint Management, create an administrator role and account that limits the access of this admin to only those permissions necessary to provide integration.
|
|
Best Practice - It is a best practice to create such an admin account, but it is optional. |

Create a New Administrator Role
-
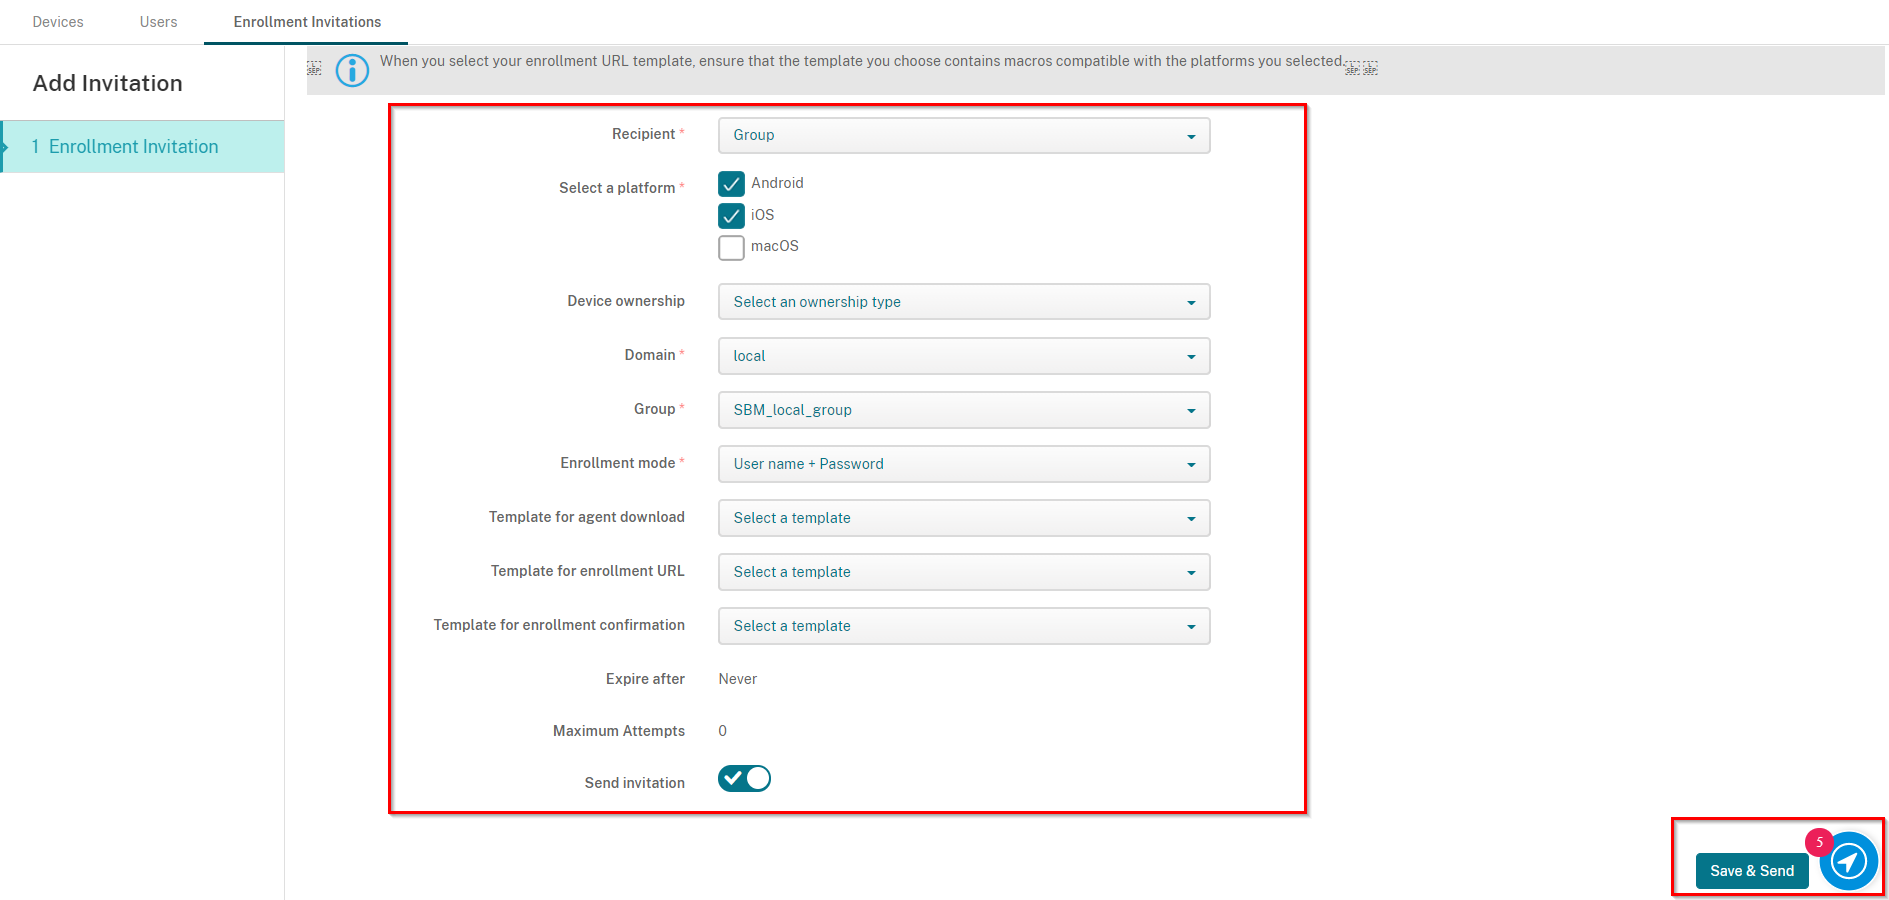
Navigate to Settings > Server tab > find Role-Based Access Control in the list and click on it.
-
Click Add.
-
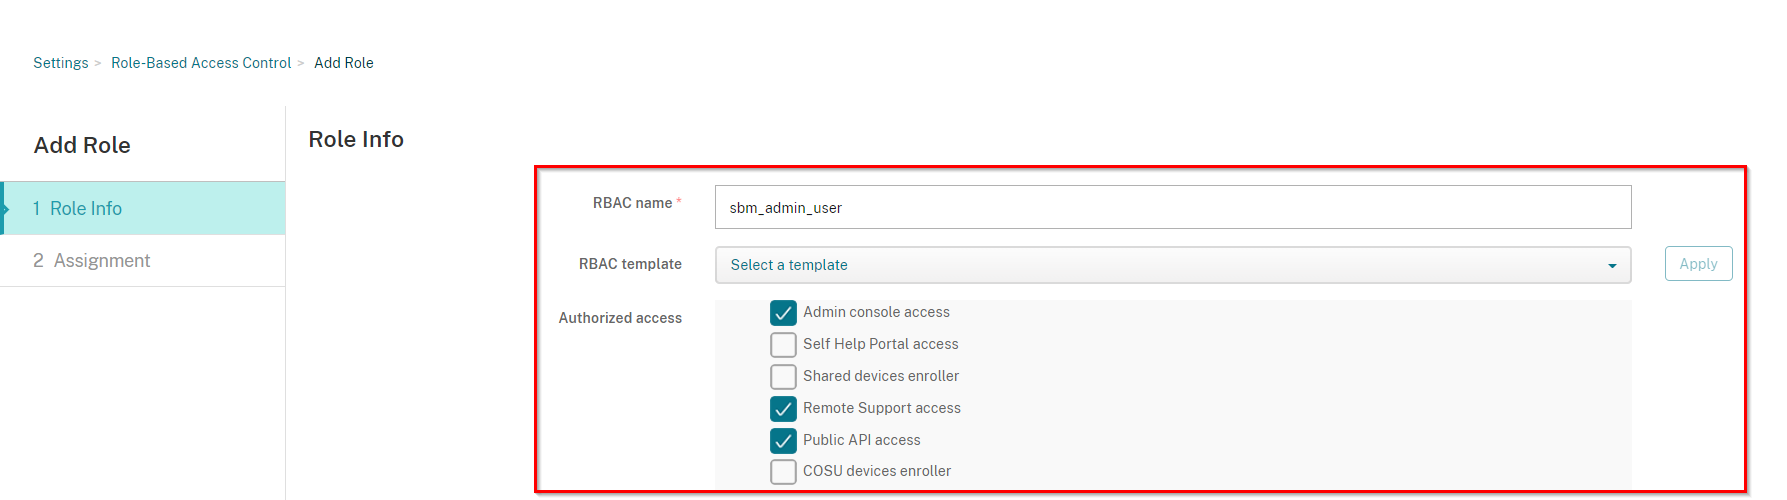
On the Add Role window, enter in a Name and select the following Authorized Access for this new role:
-
Admin console access
-
Remote Support access
-
Public API access
-
-
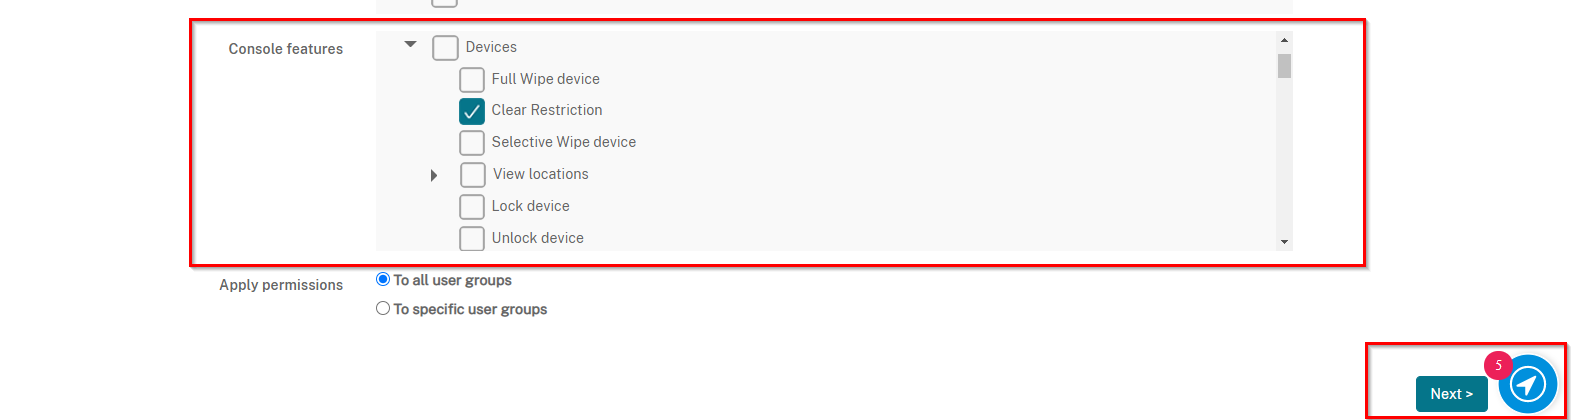
In addition the Authorized Access permissions, we are going to select the following Console features for this role by scrolling to the desired features and selecting checkboxes as written below:
-
Devices > Clear Restriction
-
Devices > Edit device
-
Devices > View software inventory
-
Local Users and Groups > Edit Local User
-
Local Users and Groups > Local User Groups
-
-
Click Next.
-
On the Assignment tab click Save.

Create a New Administrator Account
-
Navigate to Manage > Users, click Add Local User.

-
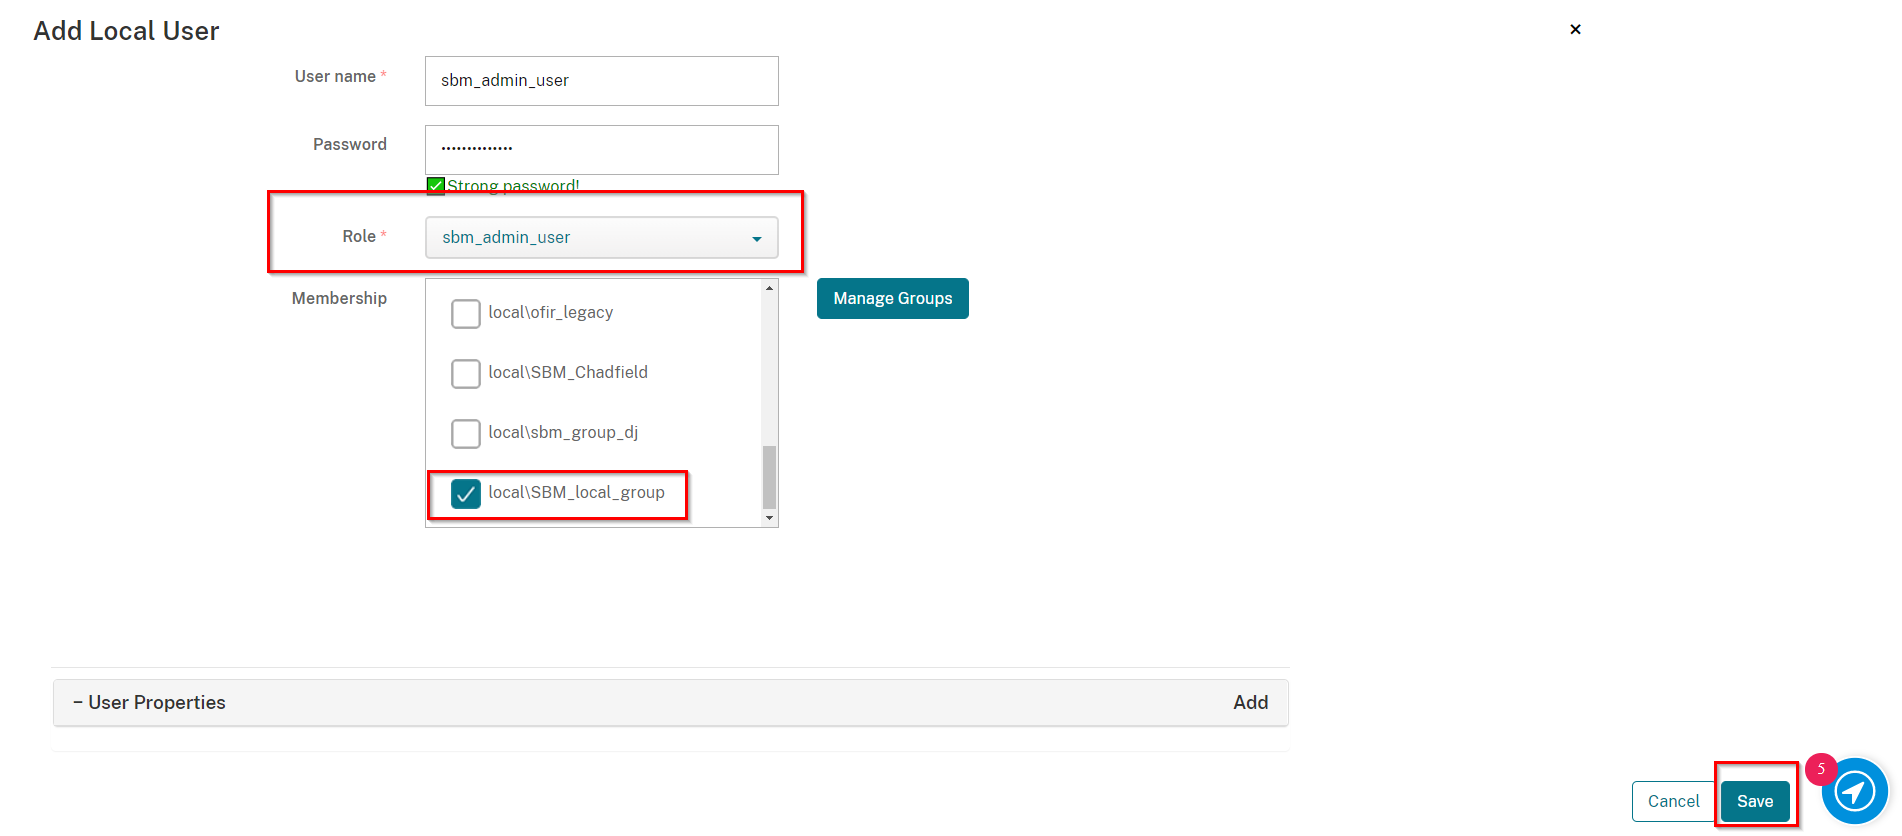
In Add Local User screen, fill in all required (*) fields with appropriate information, such as in the example below:
-
Enter a valid name and password.
-
In the Role field select the Role we created in the previous step Creating Limited Administrator Account (optional).
-
In the Membership field select the local users group we created in the section Creating a local users Group.
-
-
Click Save.
|
|
Note - At this point, you have all the information you need to configure the Device Management integration settings in the Mobile Security dashboard. From our examples:
|
