
BlackBerry UEM Cloud - Configuring the Mobile Security Dashboard
Prerequisites
You need the following details from your BlackBerry UEM Unified Endpoint Management. An architecture and approach that controls different types of devices such as computers, smartphones and IoT devices from a centralized command point. Cloud Deployment:
-
Server: The URL of your BlackBerry UEM Cloud account. Example:https://xx1234.dd.uem.blackberry.com/
-
Client ID and Secret: The Client ID and Secret created in the BlackBerry UEM console. See Prerequisites - BlackBerry UEM Cloud .
-
SRP ID: The Tenant ID of your BlackBerry UEM account. To obtain the tenant ID, go to Services > UEM and expand your BlackBerry Cloud account.

Integration Procedure
-
Log in to the Check Point Portal and access the Mobile Security dashboard.
-
Go to Settings > Integration.
-
Click Add > UEMs.
-
In the UEM integration window, select BlackBerry UEM and click Next.
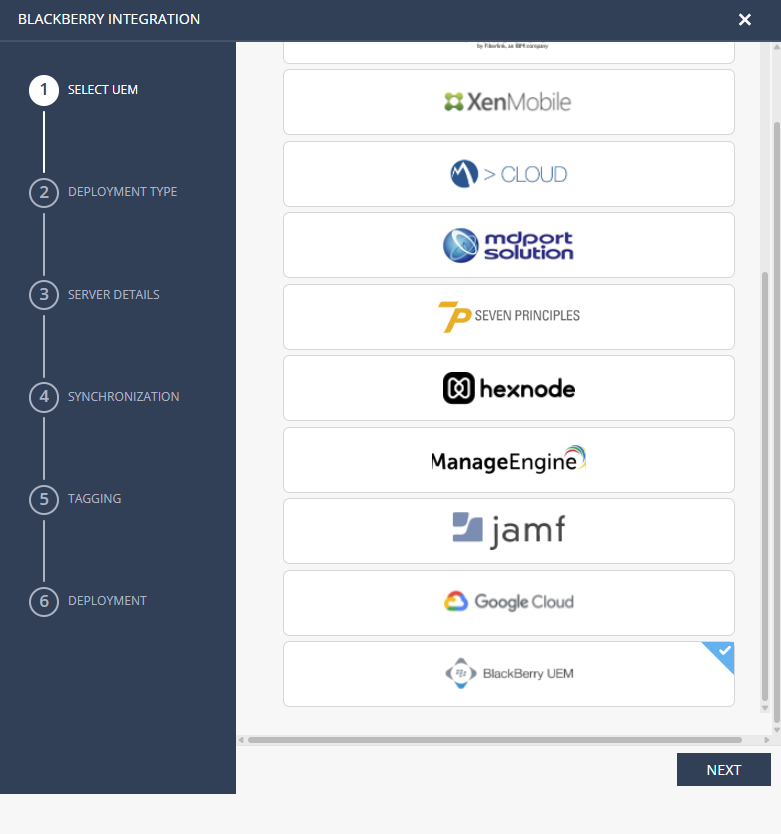
The BlackBerry Integration wizard appears.
-
Select BlackBerry on-cloud.

-
Click Next.
-
Configure these settings:
Server Details
-
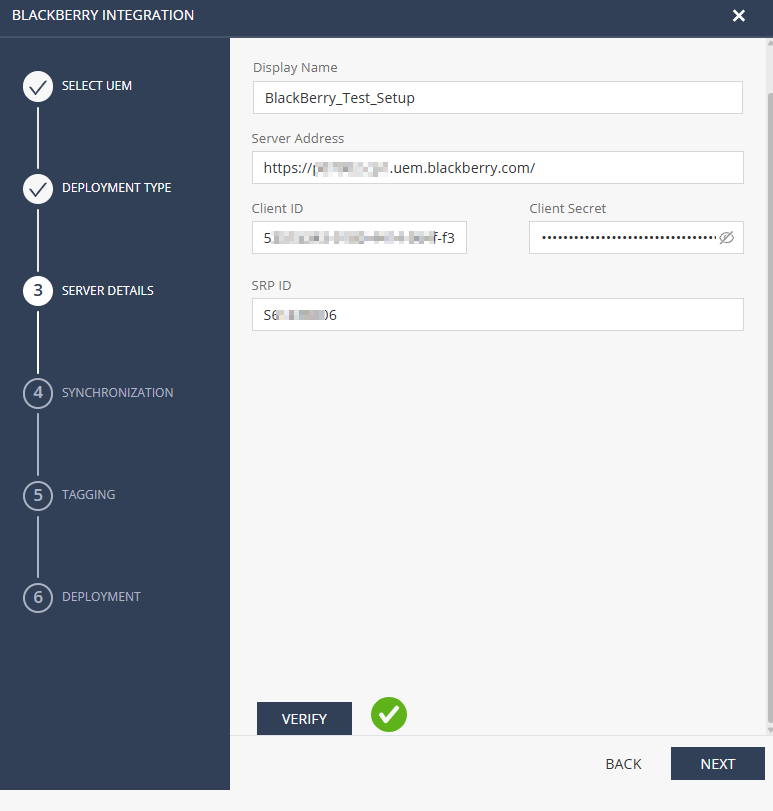
In Server Setup section, enter this information:
-
Display Name - Enter a name for your integration.
-
Server Address - The URL of your BlackBerry UEM Cloud account
-
Client ID - Enter the Client ID from BlackBerry UEM console.
-
Client Secret - Enter the Client Secret from BlackBerry UEM console.
-
SRP ID - Enter the Tenant ID of your BlackBerry UEM account.
-
-
Click Verify.
-
After successful verification, click Next.
Synchronization
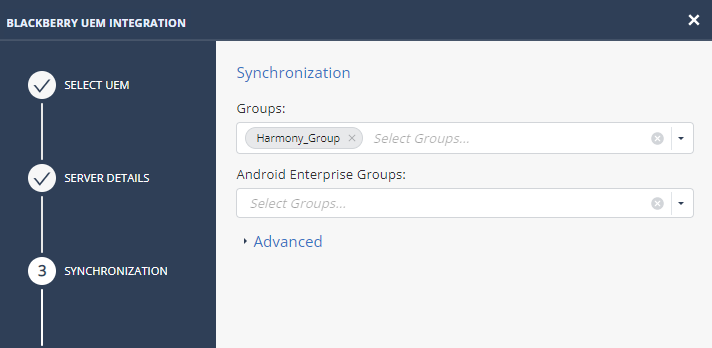
In Synchronization section, select the user groups that you want to protect and that are synchronized with Mobile Security. All devices that belong to users in the selected group(s) are synchronized with Mobile Security.

|
Note - The selected groups must be of type user groups (not dynamic device groups). |
-
From the Groups list, select the group(s) you need for integration with BlackBerry UEM Cloud.
-
(Optional)From the Android Enterprise Groups list, select the groups for the BlackBerry UEM Android Enterprise deployment.
Note - This step applies only to Android devices with both personal and work profiles. Fully managed devices without a personal profile do not require to add these groups.
-
In the Advanced section:
-
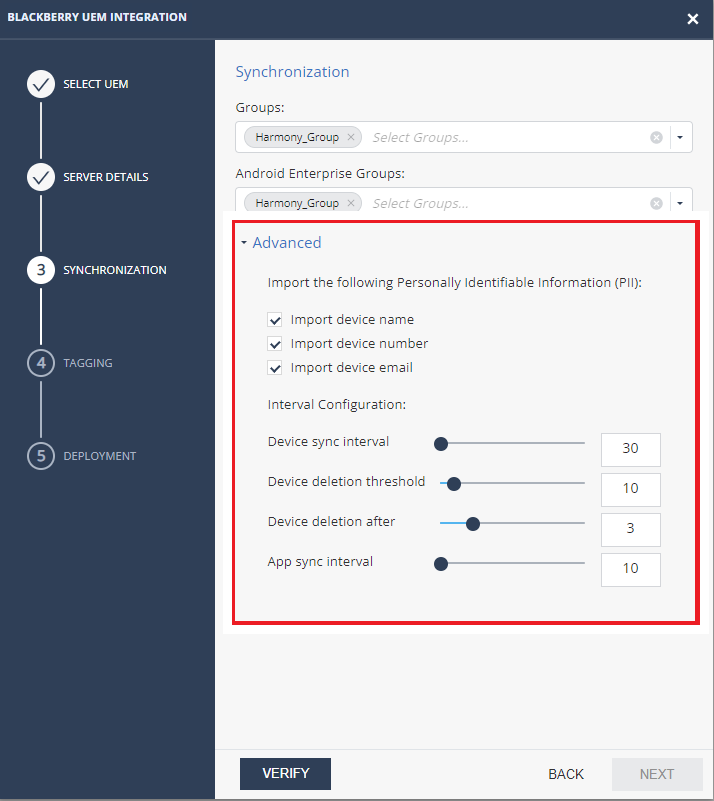
Import Personally Identifiable Information (PII) and set the synchronization intervals.
You can limit the import of the PII devices (users) to Mobile Security, by default it is set to ON.
Note - If all entries are OFF, the placeholder information set
for the email address is placed in the Device Owner's Email,
in form of "UEMDevice UDID@vendor.UEM".
-
Evaluation/test usage - When you are adding a small amount of devices.
-
Planned bulk deletion of devices from the UEM (see sk184319). After the devices are deleted from the Mobile Security Admin Portal, set it back to a safer value (such as 5–10%) to prevent accidental mass deletions in the future.
Setting
Description
Values
Device sync interval
Interval to connect with UEM to sync devices.
30-120 minutes, in 10 minute intervals.
Device deletion threshold
Percentage of devices allowed for deletion after UEM device sync (in %).
0-100%
Note - Use 100% for no threshold.
100% value is recommended for:
Device deletion after
Delay device deletion after several sync attempts - device is deleted after this amount of sync tries that confirmed deletion
1-10 sync tries.
App sync interval
Interval to connect with UEM to sync applications.
30-1440 minutes, in 10 minute intervals.
-
-
Click Verify and then click Next.
Tagging
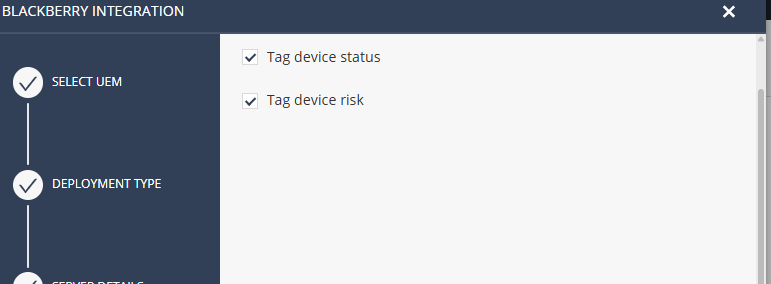
Specify whether to send information to BlackBerry UEM in order to communicate the deployment status of Mobile Security Protect and the risk level of the device.
-
Enable the Tag device status checkbox:
-
The Device Status tag creates these CHKP_Status user groups in BlackBerry UEM:
-
CHKP_Status_ Provisioned
When a device is provisioned in the Mobile Security dashboard, this device is placed in the CHKP_Status_Provisioned group.
-
CHKP_Status_Active
After the user has installed and registered to Mobile Security, this device is moved from CHKP_Status_Provisioned group to the CHKP_Status_Active group.
-
CHKP_Status_Inactive
If the device has not connected with Mobile Security for X number of days (configured by the Mobile Security admin), then the device is moved from CHKP_Status_Active group to CHKP_Status_Inactive group.
-
The CHKP_Status user groups are used to determine when to prompt the user to install the Mobile Security Protect app on their device. If none of CHKP_Status user groups are set for a device, then the device has not been synced with Mobile Security dashboard.
-
-
Enable the Tag device risk checkbox.
The Device Risk tag creates these CHKP_Risk groups in BlackBerry UEM:
-
CHKP_Risk_None
-
CHKP_Risk_Low
-
CHKP_Risk_Medium
-
CHKP_Risk_High
The CHKP_Risk user groups are used to determine when to enact certain policies or actions on the device.
If a device is determined to be at High, Medium, or Low risk, the device is placed in the respective group. If the device has no risks, then it is placed in the CHKP_Risk_None group.
For example, if the Mobile Security Protect app indicates that the device is in Low risk, then the device will be moved to CHKP_Risk_Low group.
-
Deployment
In the Deployment section:
-
Copy the token and save it for later to manage the application in Adding the Mobile Security Protect app to your App Catalog.
-
In the Advanced section:
-
Enable options to send email and/or SMS notification to the new users with instructions to download and install the Mobile Security Protect.
Note - This option is required only for UEM-managed devices that are registered manually using QR code. It is not required for automatic or Zero-Touch registration.
-
Click Finish.
When the integration is complete, the BlackBerry UEM pane appears in the Integrations screen.

-