Configuring UEM Integration in Mobile Security Administrator Portal
This section describes the configuration steps in Mobile Security Administrator Portal to enable the integration with Applivery UEM![]() Unified Endpoint Management. An architecture and approach that controls different types of devices such as computers, smartphones and IoT devices from a centralized command point..
Unified Endpoint Management. An architecture and approach that controls different types of devices such as computers, smartphones and IoT devices from a centralized command point..
Prerequisites
You must have these details from your Applivery UEM dashboard:
-
Server Address - Server address from the Integrations page.
-
Username and Password - Username and Password from the Integrations page.
To obtain these values, see Enabling Harmony Mobile Integration in Applivery Dashboard.
Configuring UEM Integration Settings
-
Log in to Check Point Portal and access the Mobile Security Administrator Portal.
-
Go to Settings > Integrations.
-
To create a new integration, click +Add > UEMs.
-
From the UEMs list, select Applivery and click Next.
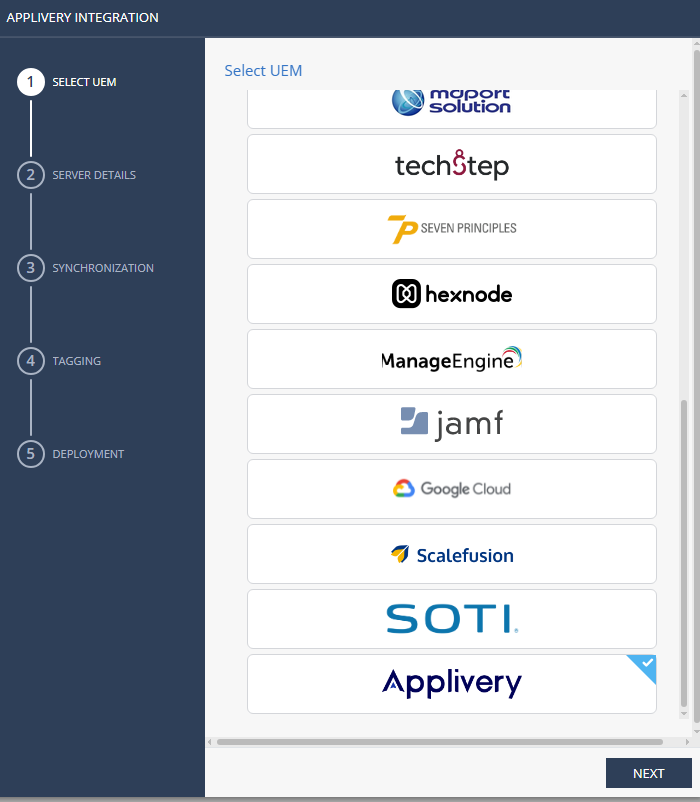
The Applivery integration wizard appears.
-
Configure these settings:
Server Details
In the Server Details section, enter these details:
-
Display Name - Name of your integration.
-
Server Address - Server address from the Integrations page in Applivery dashboard.
-
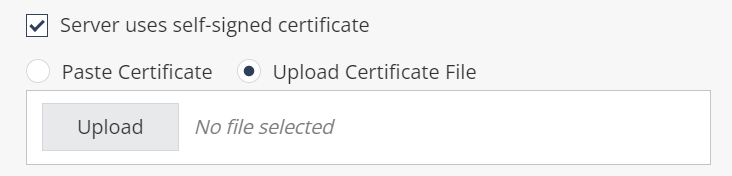
(Optional) If the UEM server uses a self-signed certificate for external communication, select the Server uses self-signed certificate checkbox. Upload the certificate directly (use CER file format base64 [PEM] encoded) or paste the certificate text directly in the box.
-
Username - Username in the Integrations page in Applivery dashboard.
-
Password - Password for the above username.
-
Click Verify.
-
After successful verification, click Next.

Synchronization
Configure device groups in the Applivery UEM that you want to synchronize with Mobile Security Administrator Portal. The system automatically populates the list of device groups from the Applivery portal.

-
From the Groups list, select the device group(s).
-
In the Android Enterprise Groups field, select the groups deployed as part of the Applivery UEM Android Enterprise deployment.
-
(Optional) In the Advanced section, select the relevant Import checkboxes to import Personally Identifiable Information (PII) and set the synchronization intervals.
You can limit the import of the PII devices (users) to Mobile Security.

Note - If you do not select any checkbox to import PII, the placeholder information set for the email address is placed in the device owner's email in this format: UEMDevice UDID@vendor.UEM.
This table describes the different interval configuration settings and their values:
Setting
Description
Values
Device sync interval
Interval to connect with UEM to synchronize the devices.
10-1440 minutes, in 10 minute intervals.
Device deletion threshold
Percentage of devices allowed for deletion after UEM device sync (in %).
0-100%
Note - Use 100% for no threshold.
100% value is recommended for:
-
Evaluation/test usage - When you are adding a small amount of devices.
-
Planned bulk deletion of devices from the UEM (see sk184319). After the devices are deleted from the Mobile Security Admin Portal, set it back to a safer value (such as 5–10%) to prevent accidental mass deletions in the future.
Device deletion after
Delay device deletion after several sync attempts. The device is deleted after this number of sync attempts that confirmed deletion.
1-100 sync attempts.
App sync interval
Interval to connect with UEM to sync the applications.
10-1440 minutes, in 10 minute intervals.
-
-
Click Verify.
-
After successful verification, click Next.
Tagging
In the Tagging section:
-
Select the device characteristics that you want to communicate to the UEM:
-
Tag device status - Device status in Mobile Security Administrator Portal
-
Tag device risk - Device risk level in Mobile Security Administrator Portal

-
-
Click Verify.
-
After successful verification, click Next.
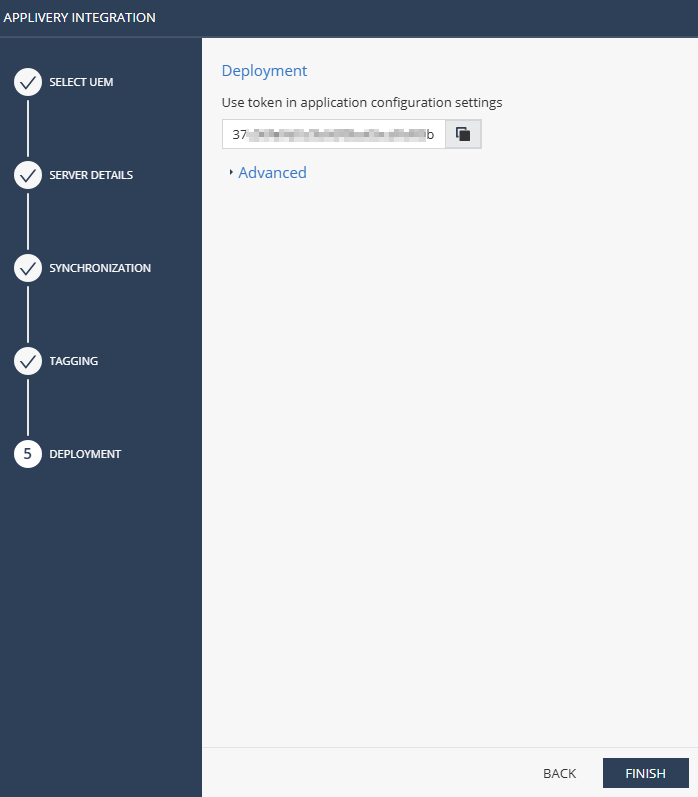
Deployment
In the Deployment section, the system generates a unique token which is the hashed unique identifier of your dashboard. It tells the device to which dashboard it needs to register during the UEM configuration.
-
Click the
 icon to copy the token. Use the token value when you perform the application configuration in the UEM.
 -
In the Advanced section, keep the default settings.
-
Click Finish.
When the integration is complete, the Applivery UEM pane appears in the Integrations page.

Managing the UEM Settings
-
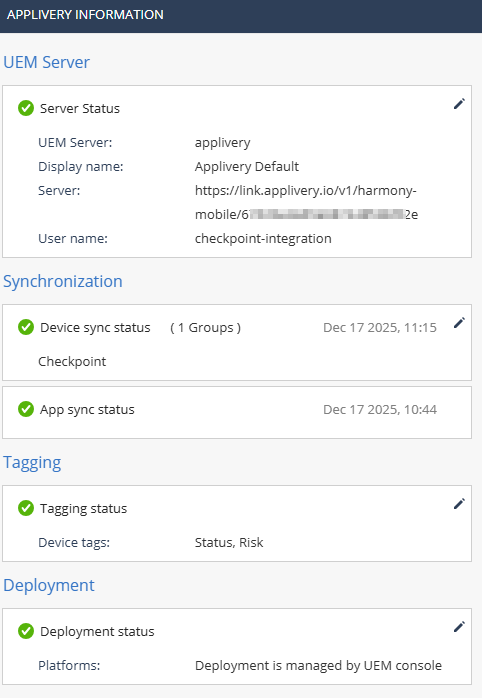
To view information about the integrated UEM, hover over the UEM pane and click the i icon.

It shows:
-
Server Status - Latest UEM server configuration status.
-
Device sync status - Synchronized groups and the device sync status time stamp.
-
App sync status - Last time applications were fetched from the UEM (Applicable for iOS deployment only).
-
Tagging status - Device tag details sent to the UEM.
-
Deployment status - Deployment configuration and deployment status.
-
-
To manage the UEM settings, hover over the UEM pane and click the
 icon.
icon.
-
To edit the UEM settings, click Edit.
-
To force an immediate device sync without waiting for the next auto sync cycle, click Sync Now.
-
To temporarily stop or resume the device sync process, click Pause or Resume.
-
To remove the integration, click Remove.
-