
Configuring a BitLocker Encryption Policy
To manage BitLocker encryption on Endpoint Security clients on Windows, configure the Full Disk Encryption Policy.
You can use the default Full Disk Encryption rule with the default Full Disk Encryption settings for the entire organization, change the action of the rule to Use BitLocker Management, and install the policy. Alternatively, you can create a new rule and configure actions for a specific organizational unit.
Best Practices
-
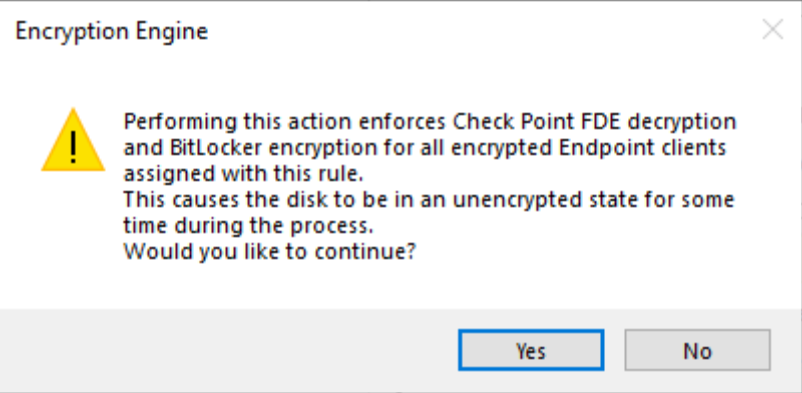
When you change the encryption policy for clients from Check Point Full Disk Encryption to BitLocker Management, the disk on the client is decrypted and then encrypted. This causes the disk to be in an unencrypted state for some time during the process.
-
Do not change the encryption policy for the entire organization in one operation. Change the policy for one group of users at a time.
-
Define the BitLocker policy before you install the Endpoint Security package on the client computers. This makes sure that encryption occurs only one time, with BitLocker. It avoids Check Point Full Disk Encryption encryption, followed by Full Disk Encryption decryption and BitLocker encryption.
Configuring the BitLocker encryption policy for a specific organizational unit
-
Open SmartEndpoint and go to the Policy tab.
-
In the toolbar of the Policy tab, click Create a Rule.
The Create Rule Wizard opens.
-
Click Full Disk Encryption.
-
Click Next.
-
In the Select Entities page, select the computers for which you want to configure BitLocker encryption.
-
Click Next.
-
In the Change rule action settings page, click Encryption Engine, and select Use BitLocker Management.
A warning message shows. Read it carefully.
-
Click Yes.
Two actions remain: Encryption Engine and Access Management.
-
Edit the BitLocker Management policy: Click Use BitLocker Management and select Edit Shared Action.
-
Configure these settings:
Setting
Options
Initial encryption type
-
Encrypt entire drive - Recommended for computers that are in production and already have user data, such as documents and emails.
-
Encrypt used disk space only, to encrypt only the data. Recommended for fresh Windows installations.
Drives to encrypt
-
All drives - Encrypt all drives and volumes.
-
OS drive only - Encrypt only the OS drive (usually, C:\). This is the default.
Encryption algorithm
-
Windows Default - This is recommended. On Windows 10 Build 1507 or later, unencrypted disks are encrypted with XTS-AES-128. On encrypted disks, the encryption algorithm is not changed.
-
XTS-AES-128
-
XTS-AES-256
-
-
Click OK.
-
Click Next.
-
In the Enter rule name and comment page, fill in the details.
-
Click Finish.
-
In the main toolbar, click Save rule
 , and Install the Policy.
Making sure the BitLocker Management policy is installed on the client
-
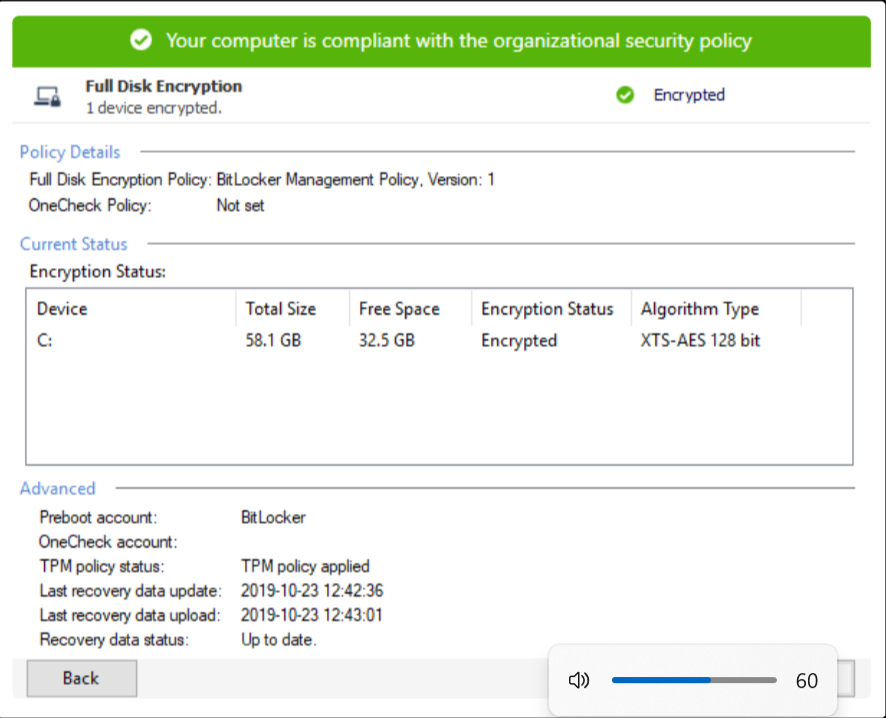
On the Windows client computer, in the system tray, right-click the lock icon of the Endpoint Security client.
-
Select Display Overview and open the Full Disk Encryption page.
-
Make sure the Policy Details show the BitLocker Management Policy.
Switching Between Check Point Full Disk Encryption and BitLocker Management
You can switch the encryption engine for selected clients from Check Point Full Disk Encryption to BitLocker Management, or from BitLocker Management to Full Disk Encryption.
Best Practice - When you change the encryption engine of a client from Check Point Full Disk Encryption to BitLocker Management, or from BitLocker Management to Check Point Full Disk Encryption, the disk on the client is decrypted and then encrypted. This causes the disk to be in an unencrypted state for some time during the process. We recommend that you do not change the entire organization to BitLocker in one operation. Make the change for one group of users at a time.
Switching the encryption engine from Check Point Full Disk Encryption to BitLocker Management
-
Open SmartEndpoint and go to the Policy tab.
-
In the rule for Check Point Full Disk Encryption, in the Actions column, change the Encryption Engine action:
From Use Check Point Full Disk Encryption
To Use BitLocker Management.
-
In the main toolbar, click Save rule, and Install the Policy.
-
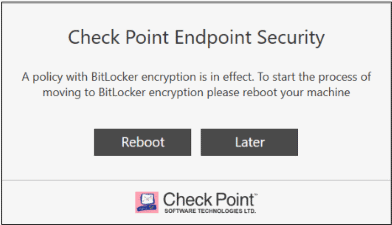
On the client computers of the clients in the rule, this message shows:
-
The user must click Reboot.
Decryption starts on the disk that is encrypted with Check Point Full Disk Encryption.
When the decryption is complete, the message shows a second time on the client computer.
-
The user must click Reboot.
Encryption of the disk starts with BitLocker Management.
BitLocker Management with encryption is now active on the Endpoint Security client computers in the rule.
Switching the encryption engine from BitLocker Management to Check Point Full Disk Encryption
-
Open SmartEndpoint and go to the Policy tab.
-
In the rule for Check Point Full Disk Encryption, in the Actions column, change the Encryption Engine action:
From Use BitLocker Management
To Use Check Point Full Disk Encryption.
-
In the main toolbar, click Save rule ../../Images/Common-Topics-Images/save_rule_icon.png, and Install the Policy ../../Images/Common-Topics-Images/install_policy_icon.png.
Decryption of the BitLocker managed disks starts on the Endpoint Security client computers in the rule.
Encryption with Check Point Full Disk Encryption starts.
-
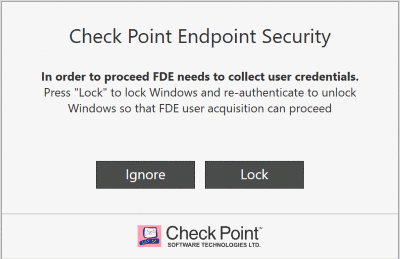
On the client computers this message shows:
-
To allow Full Disk Encryption to collect the credentials of the user, the user must click Lock.
Check Point Full Disk Encryption is now active on the Endpoint Security client computer in the rule.
Taking Control of Unmanaged BitLocker Computers
You can do a takeover of BitLocker-encrypted computers that are not managed by SmartEndpoint, and make them centrally managed. You can do this using either BitLocker Management or Check Point Full Disk Encryption.
Taking control of unmanaged BitLocker computers using BitLocker Management
Define and install a Full Disk Encryption policy with BitLocker Management. Follow the procedure in Configuring a BitLocker Encryption Policy with these guidelines:
-
Define a Full Disk Encryption rule that Applies To either the Entire Organization or only to the entities that need BitLocker Management.
-
In the properties of the Use BitLocker Management action, select Windows Default as the Encryption algorithm.
This is important because it leaves the existing BitLocker encryption algorithm in place. Selecting another algorithm explicitly may result in a re-encryption if the existing algorithm does not match the algorithm in the policy. It is a good idea to avoid re-encryption because it can take a long time. The time it takes depends on the disk size, disk speed and PC hardware.
Taking control of unmanaged BitLocker computers using Check Point Full Disk Encryption
-
Follow the procedure for taking control of unmanaged BitLocker computers using BitLocker Management.
-
After the computers are under BitLocker Management, define a rule with Check Point Full Disk Encryption that Applies To either the Entire Organization or only to the entities that need Check Point Full Disk Encryption. Follow the procedure in Configuring a BitLocker Encryption Policy.
When you change the encryption policy for clients from BitLocker Management to Check Point Full Disk Encryption, the disk on the client is decrypted and then encrypted. This causes the disk to be in an unencrypted state for some time during the process. We recommend that you do not change the encryption policy for entire organization in one operation. Make the change for one group of users at a time.
BitLocker Recovery
BitLocker recovery is the process by which you can restore access to a BitLocker-protected drive in the event that you cannot unlock the drive normally.
In SmartEndpoint you can use the Recovery Key ID for a computer to find the Recovery Key for an encrypted client computer. With the Recovery Key, the user can unlock encrypted drives and perform recoveries.
Important - Treat the Recovery Key like a password. Only share it using trusted and confirmed channels.
To get the Recovery Key for a client computer:
-
Open SmartEndpoint and go to .
The BitLocker Management Recovery window opens.
-
Start typing the Recovery Key ID of the client. The Recovery Key ID is a string of numbers and letters that looks like this:
C9F38106-9E7C-46AE-8E88-E53948F11776After you type a few characters, the Recovery Key ID fills automatically.
-
Optional: If you do not have the Recovery Key ID for the client, you can search for it. For this and other recovery options:
-
Click Advanced.
The BitLocker Management Advanced Recovery window opens.
-
To search for the Recovery Key ID, type the Common Name of the computer, or browse for it.
-
If the disk sectors containing the encrypted keys are damaged or unreadable, you can export to external media a BitLocker Key Package to use for recovery. In Select File name and location, browse to a location. To learn how to use the Microsoft recovery tools to decrypt the disk, see the " format="html" scope="external">Microsoft BitLocker Recovery Guide.
-
Click Close.
-
-
In the BitLocker Management Recovery window, click Get Recovery Key.
The Recovery Key shows. It is a string of numbers that looks like this:
409673-073722-568381-219307-302434-260909-651475-146696 -
On the client computer, type the Recovery Key.