Adding a New Branch Site
Check Point creates the back-end architecture to tunnel the traffic from the branch device to the internet.
To connect a branch office to the large network and successfully manage its security, you must create a site that represents this branch office SD-WAN device, and then route its traffic to the network through Harmony Connect.
To add a new site
-
Sign into Infinity Portal. For more information, see Infinity Portal Administration Guide.
-
Click the Menu button in the top left corner of the Infinity Portal window.
-
From the Harmony group, select Connect.
-
From Assets Menu, select Branches & Data Centres.
-
Click the + Add button in the upper row.
The Add Site wizard opens.
-
Enter this information in the General step and then click Next:
-
Name - A name for the Site.
-
Comments - Optional description of the site.
-
Branch Office Gateway Type - Select Generic Router/ SD-WAN.
-
Number of users (Estimation) - The expected number of users.
-
-
Enter this information in the Connection Details step and then click Next:
-
External IP Addresses - One or more IP addresses of your Branch Office Gateway.

Notes -
-
For the purpose of this guide, we select Static IP Address for the Site.
-
If you have more than one external network interface, use Add another external IP address or Add another Interface Identifier. To secure all the traffic, Check Point recommends to add all your external IP addresses.
-
-
See your Shared Secret, copy it and store in a safe location.
-
Select Monitor branch connectivity using dead peer detection (DPD), if you want to use this method.
-
-
In the Internal Sub-networks step, enter the subnet addresses of your internal networks in the branch office site.
Note - Ensure that the subnet addresses are not in the range 100.64.0.1-100.127.255.254.
Check Point Harmony Connect applies its cybersecurity features to all traffic coming from these network addresses.
-
Click Next.
-
In the Location step, enter this information:
-
Site Address - Physical location of the branch office.
This field is an option to show your site on the world map.
-
Location of the cloud service - Location of the service for this connection. Select from the list of options.
Best Practice - Harmony Connect inspects traffic from your branch office to the internet with a cloud service that resides in one of these locations. To achieve the best performance, you typically select the location of the cloud service that is closest to the location of your site. For some countries, most notably in South America or the Middle East, the best choice for Location of the cloud service might be presence of a strong cross-country internet link.
-
-
Click Next.
Confirm Site Creation page opens.
-
In the last step, Confirm Site Creation, review the site details. If you need to modify the site parameters, use the Back button. If everything is correct, click Finish and Create Site and wait.
It can take Check Point several minutes to create the site.
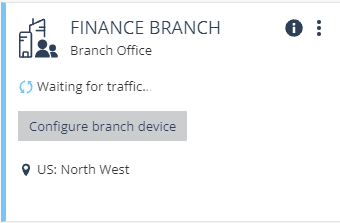
The new site appears in the list of the sites, with the status Generating Site. The status changes to Waiting for traffic when the site is ready.