Integrations
This page allows you to configure third-party integrations, such as streaming of the logs into an AWS S3 bucket, or automatic addition of the user's tagged AWS instances as Application Access of the SSH type.
Exporting Logs using Data Aggregation Tools
Application Access keeps different system logs and access logs. You can read more about its logging strategy in Application Access.
To allow you to integrate the logs into your existing visibility solutions, Harmony Connect offers the option to export the logs to data aggregation tools.

|
Note - To exporting all Harmony Connect logs, including internet access and Application Access, open a support ticket. For more information about opening a support ticket for Harmony Connect, see sk154712. |
Amazon S3 integration allows you to view, filter and monitor access and system logs created by Harmony Connect Application-Level. Before you create the integration, make sure your configuration of a User and Policy is correct.
To prepare your Amazon Environment for S3 integration:
- For Policy, under Actions, make sure the Policy is configured with at least the following access level:
List
Write (no need for CreateJob, UpdateJobPriority, UpdateJobStatus)
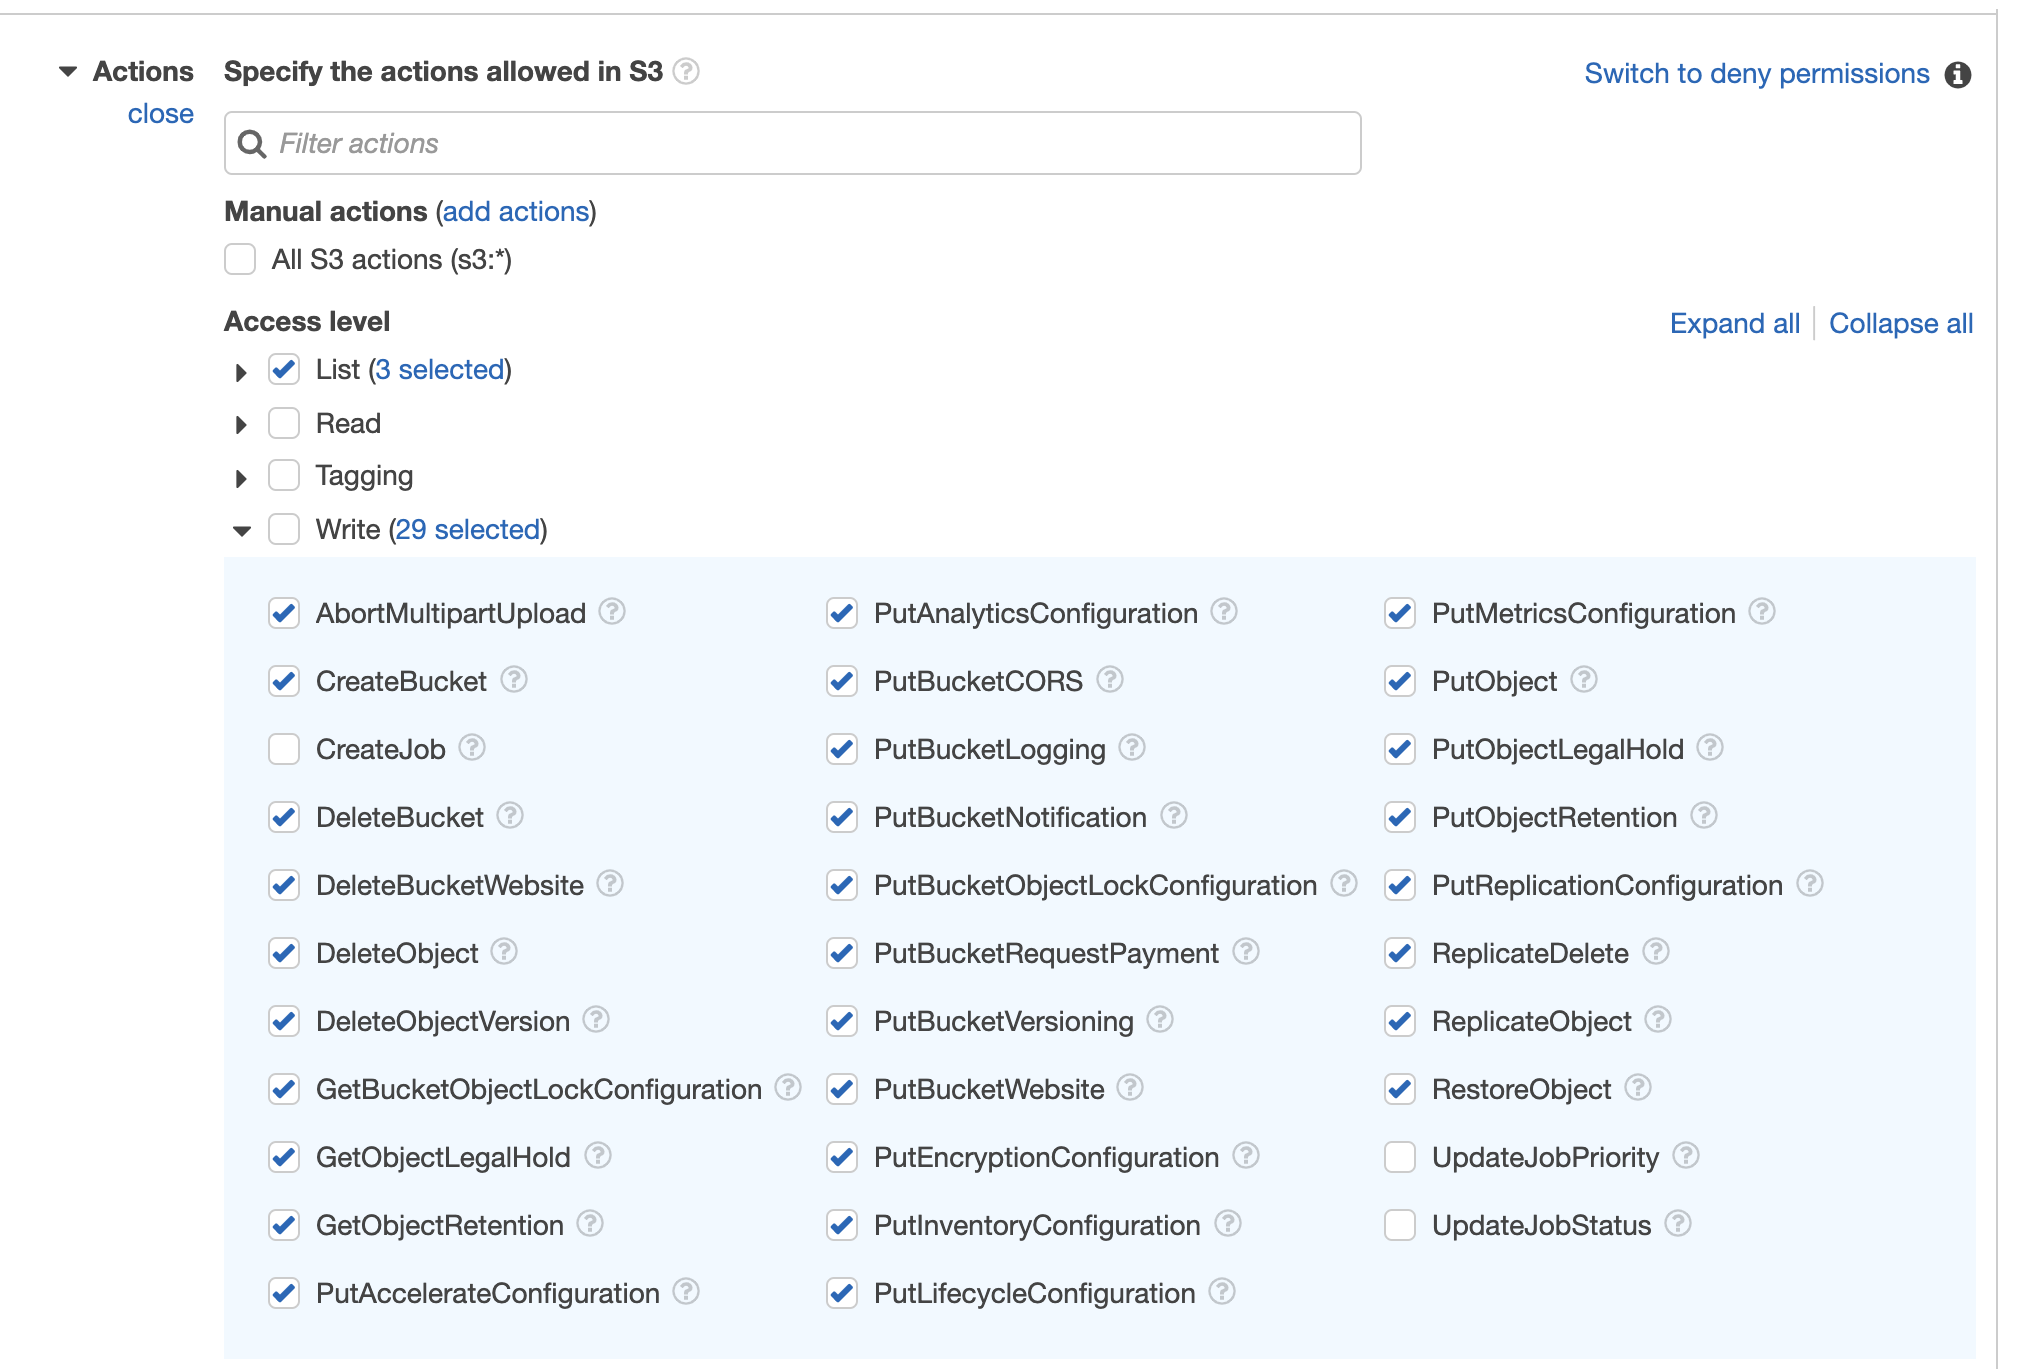
-
In the Resources field, select object with the any option.

-
For a User, set the access type to Programmatic access.
-
Assign the User to the above Policy.

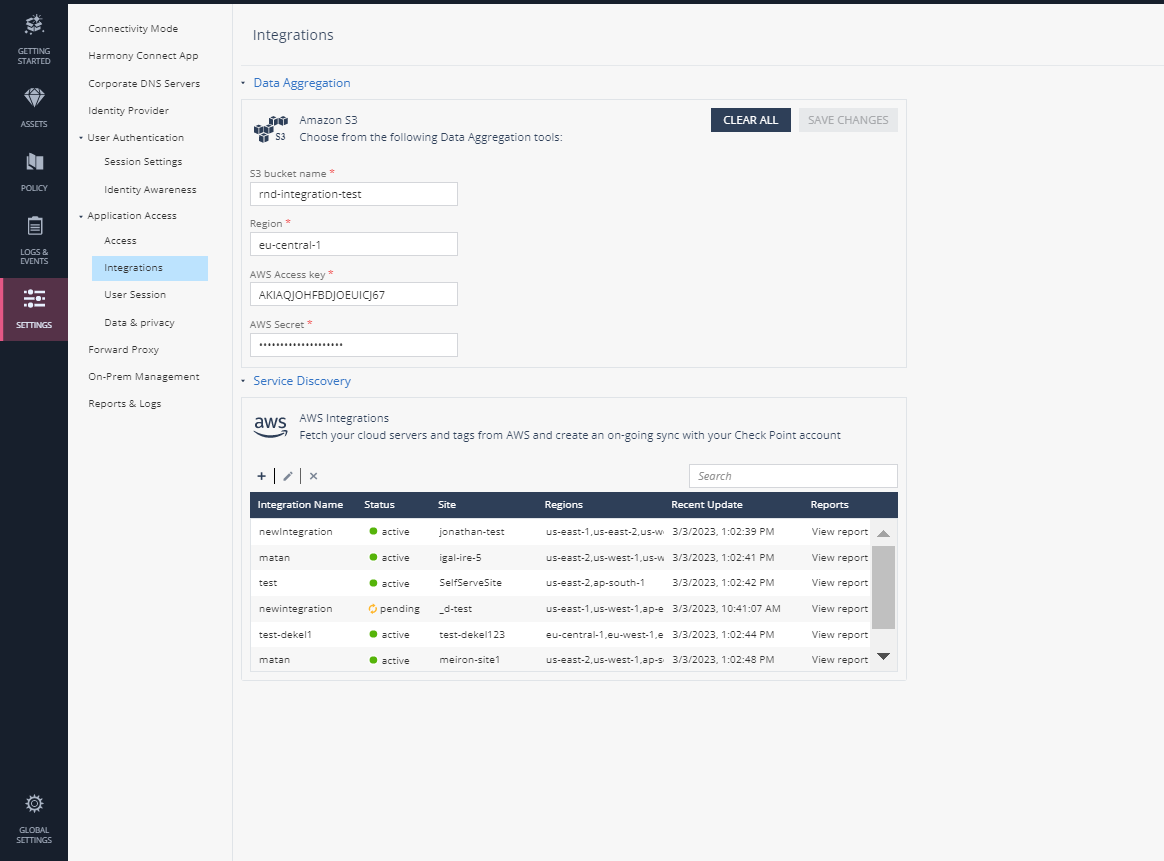
To configure automatic streaming of logs into an AWS S3 bucket:
-
In Harmony Connect, navigate to Settings > Application Access > Integrations.
-
From the Data Aggregation tools, expand the S3 section (
 ) and enter details in these fields:
-
In the S3 bucket name field, enter the name of bucket as appears in your AWS console.
-
In the Region field, enter the region code (for example: us-east-2).
-
In the AWS Access key field, find the value in your user details under Access key ID.
-
In the AWS Secret field, find the value in your user details under Secret access key.

-
-
Click Save Changes.
Automatic Adding Remote Servers with Service Discovery Tools
Harmony Connect Application-Level fetches all your LINUX and Windows servers automatically.
Main purposes for this sync are:
-
Quick and easy onboarding of your AWS instances to Harmony Connect Application-Level
-
Match Harmony Connect Application-Level instances to the associated AWS tags for easier management
-
Create a continuous sync (every 1 minute) with AWS to onboard dynamic instances
Harmony Connect integrates seamlessly with your AWS account, to fetch your AWS Linux and Windows instances and their tags, and create a continuous sync with your Harmony Connect account.
General
Harmony Connect Application-Level fetches your AWS instances through their tags, based on the selected regions and VPCs.
Consider these main rules:
-
Every integration is attached to a Harmony Connect Application-Level site, which means all integrated instances should have network connectivity to the selected site Connector. You can create one integration per site.
-
Integration is done through tags, which means every instance you wish to integrate should hold a designated tag on top of its name tag, and its checkpoint_ssh tag for Linux instances (see below). Tags with 0 assigned instances are not fetched.
-
Harmony Connect AWS discovery is a continuous integration, which means that any change in the assigned instances to a selected tag is synced with Harmony Connect every minute.
Integrating Windows instances
Windows machines are added as RDP applications, in a ‘direct' authentication form: require users to enter their credentials upon accessing the server.
Integrating Linux instances
Linux machines are added as SSH applications, in a managed authentication form: connect users to a specific account without them needing to hold the account credentials.
This is done by tagging the servers with AWS tags of the format:
-
Key:
checkpoint_ssh:<LINUX-USERNANE> -
Value:
<KEY-NAME>.pem
Instances without an checkpoint_ssh tag or without a matching key in Harmony Connect Application-Level system are not uploaded until configuration is complete.
Workflow
AWS discovery includes the following steps:
-
Integrating your AWS account
-
Specifying Linux keys and usernames
-
Choosing VPCs to integrate
-
Choosing tags to integrate
To start the process:
-
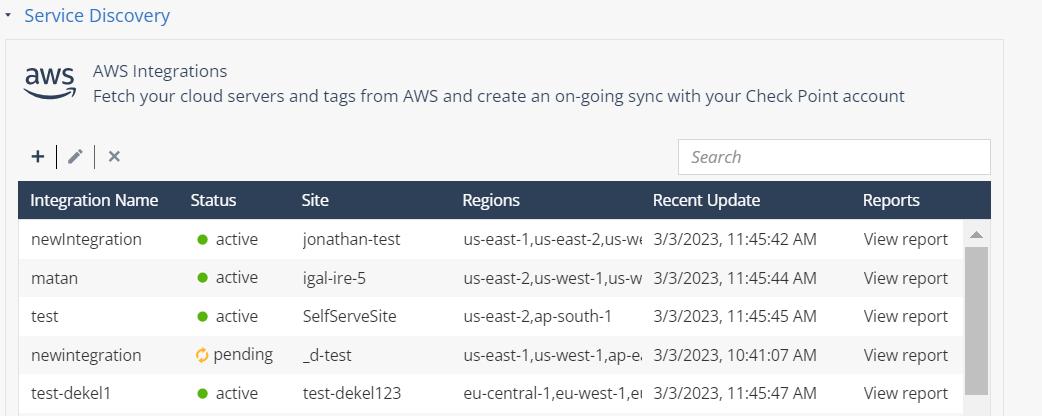
Go to Settings > Application Access > Integrations and select Service Discovery.
The details of the AWS Integration accounts appears in the Service Discovery table.
-
You may select one of these:
-
Click
 to create an integration account.
 -
Click
 icon to add or remove the existing tags.
 -
Click
 to remove an integration account.
 -
Click Search to check for an existing integration account.
-
Click View report to check the details of an active integration account.
-
Integrating the AWS account
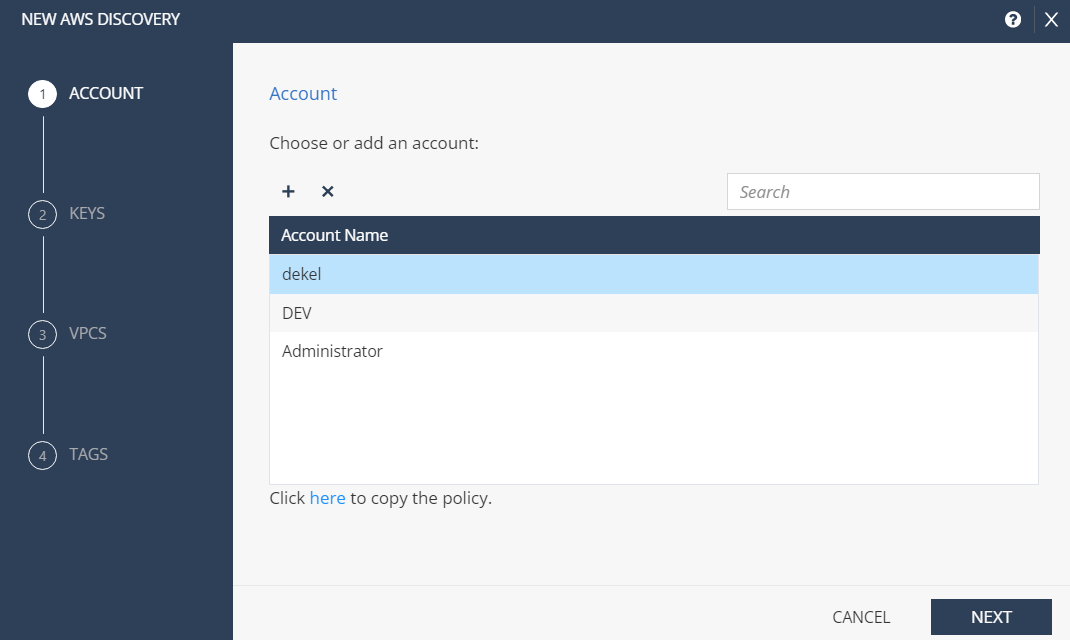
To integrate your AWS account:
-
Choose an existing account.
Use Search to search for an existing account.
or
-
Integrate a new account:
-
Create Policy: Go to your AWS account > IAM > Policies > Create policy and set the JSON:
CopyText
{
    "Version": "2012-10-17",
    "Statement": [
        {
            "Effect": "Allow",
            "Action": [
                "ec2:DescribeInstances",
                "ec2:DescribeTags",
                "ec2:DescribeVpcs",
                "ec2:DescribeRegions"
            ],
            "Resource": "*"
        }
    ]
} -
Make sure the JSON is set correctly. Review this configurations in the Visual editor tab:
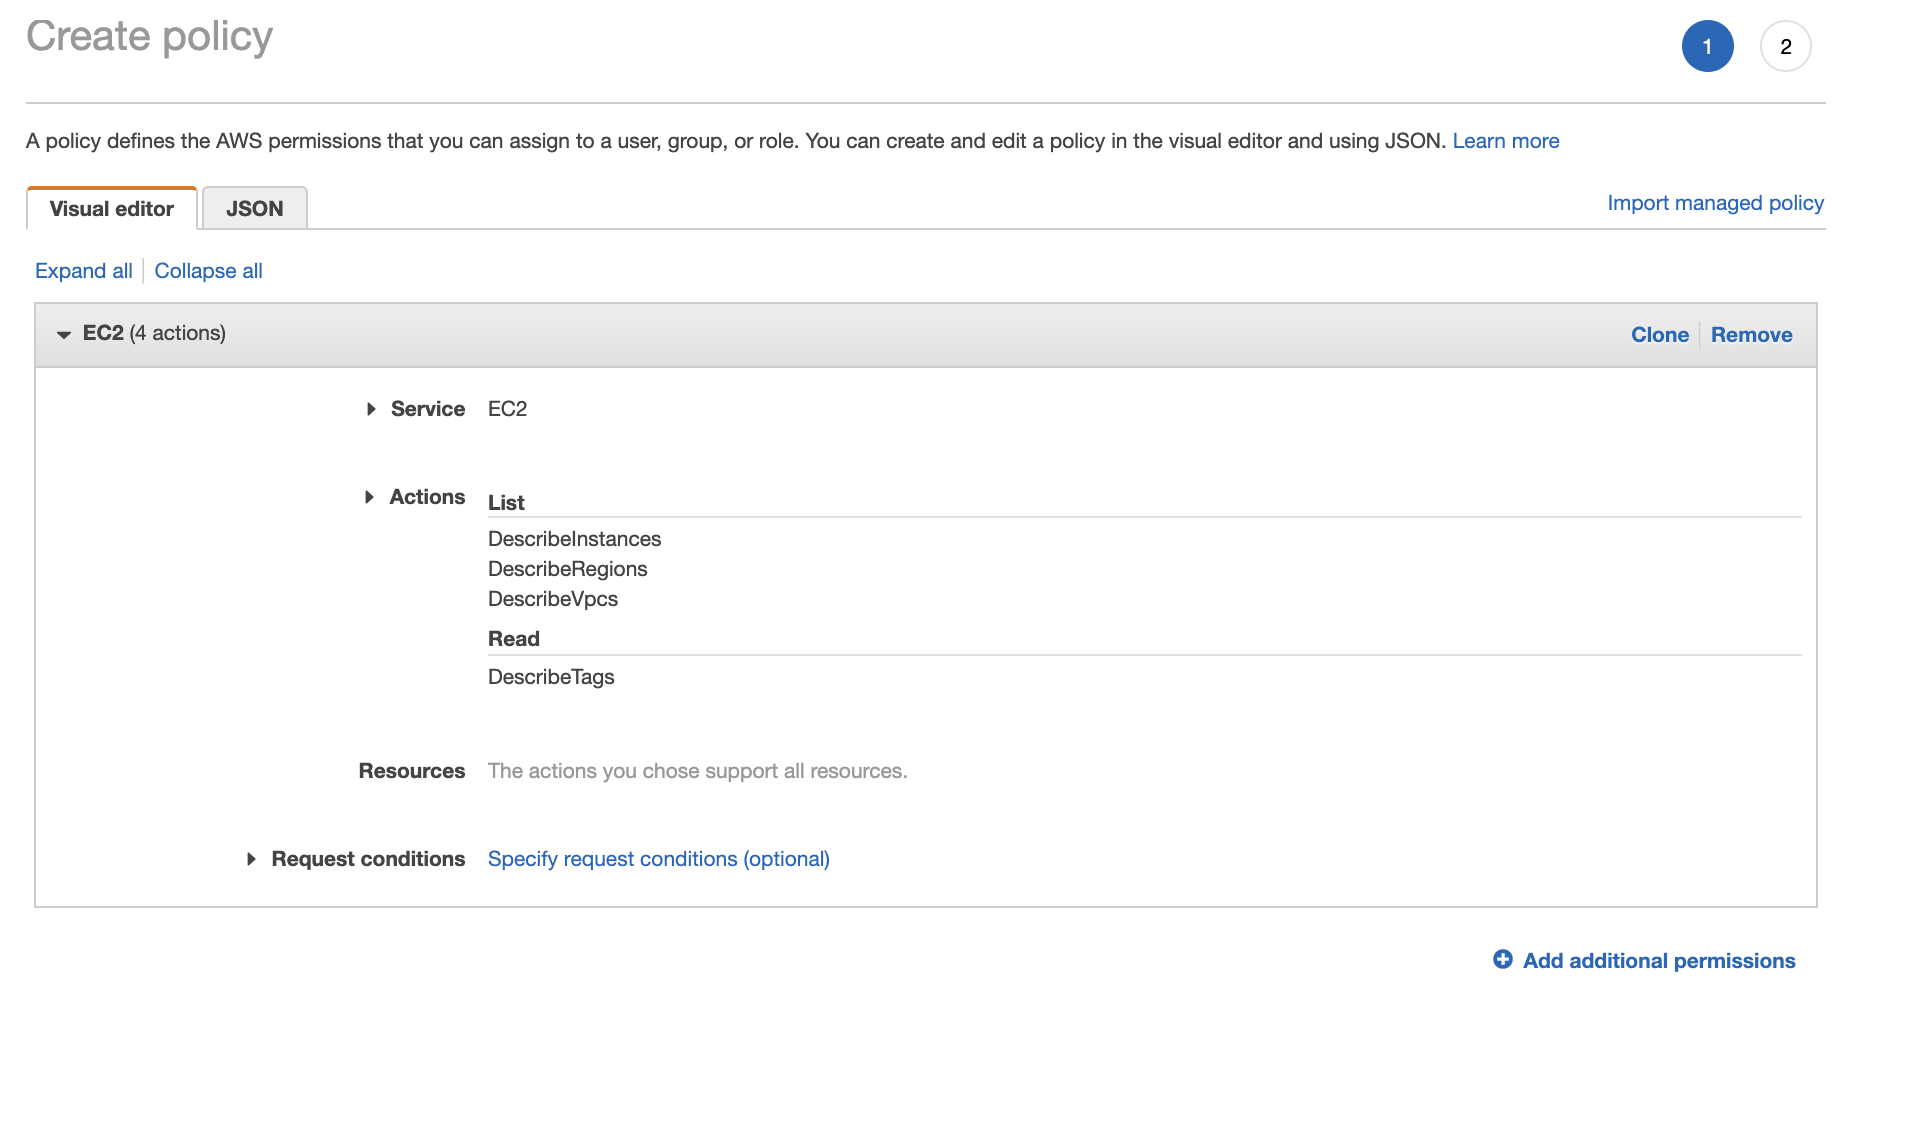
-
Create Role: Go to Roles > Create role and follow these steps:
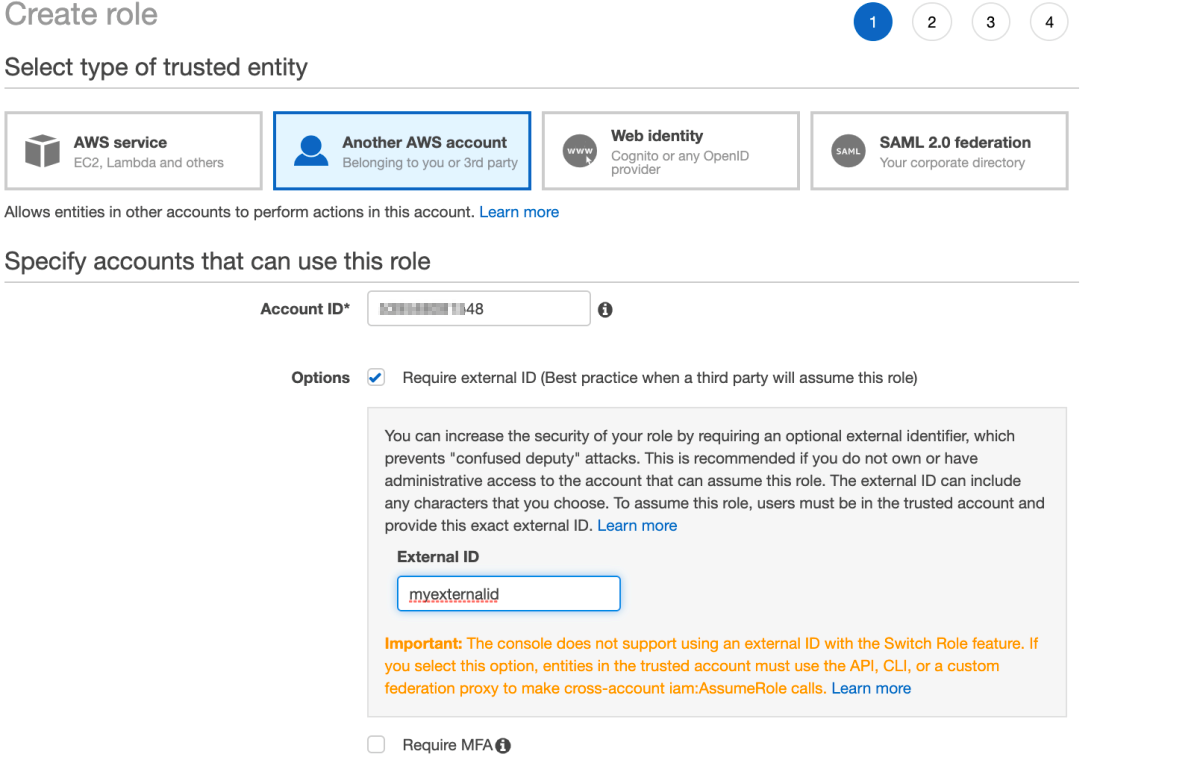
-
Trust: In the menu, select Another AWS Account. For the Account ID input, enter the Trusted Account provided above in the Application Access account configuration step.
For enhanced security, select the Require external ID option and fill in the ID of your choice. Fill the same ID under External ID in Application Access account configurations step.
-
Permissions: In the Attach permissions policies, check the box of the policy created.
-
Tags: Add tags of your choice.
-
Review: Review the role. Make sure the policy is indeed attached.
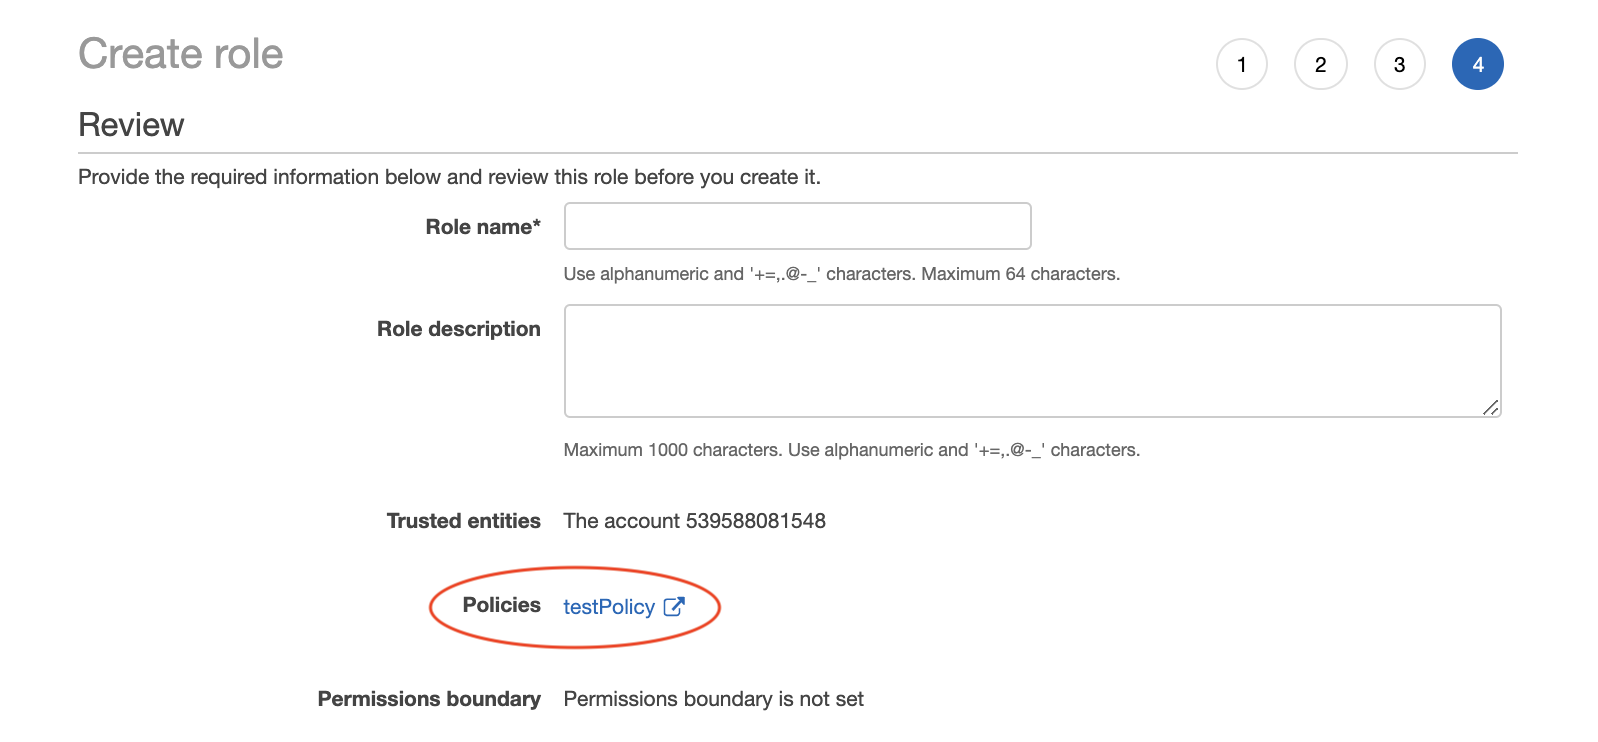
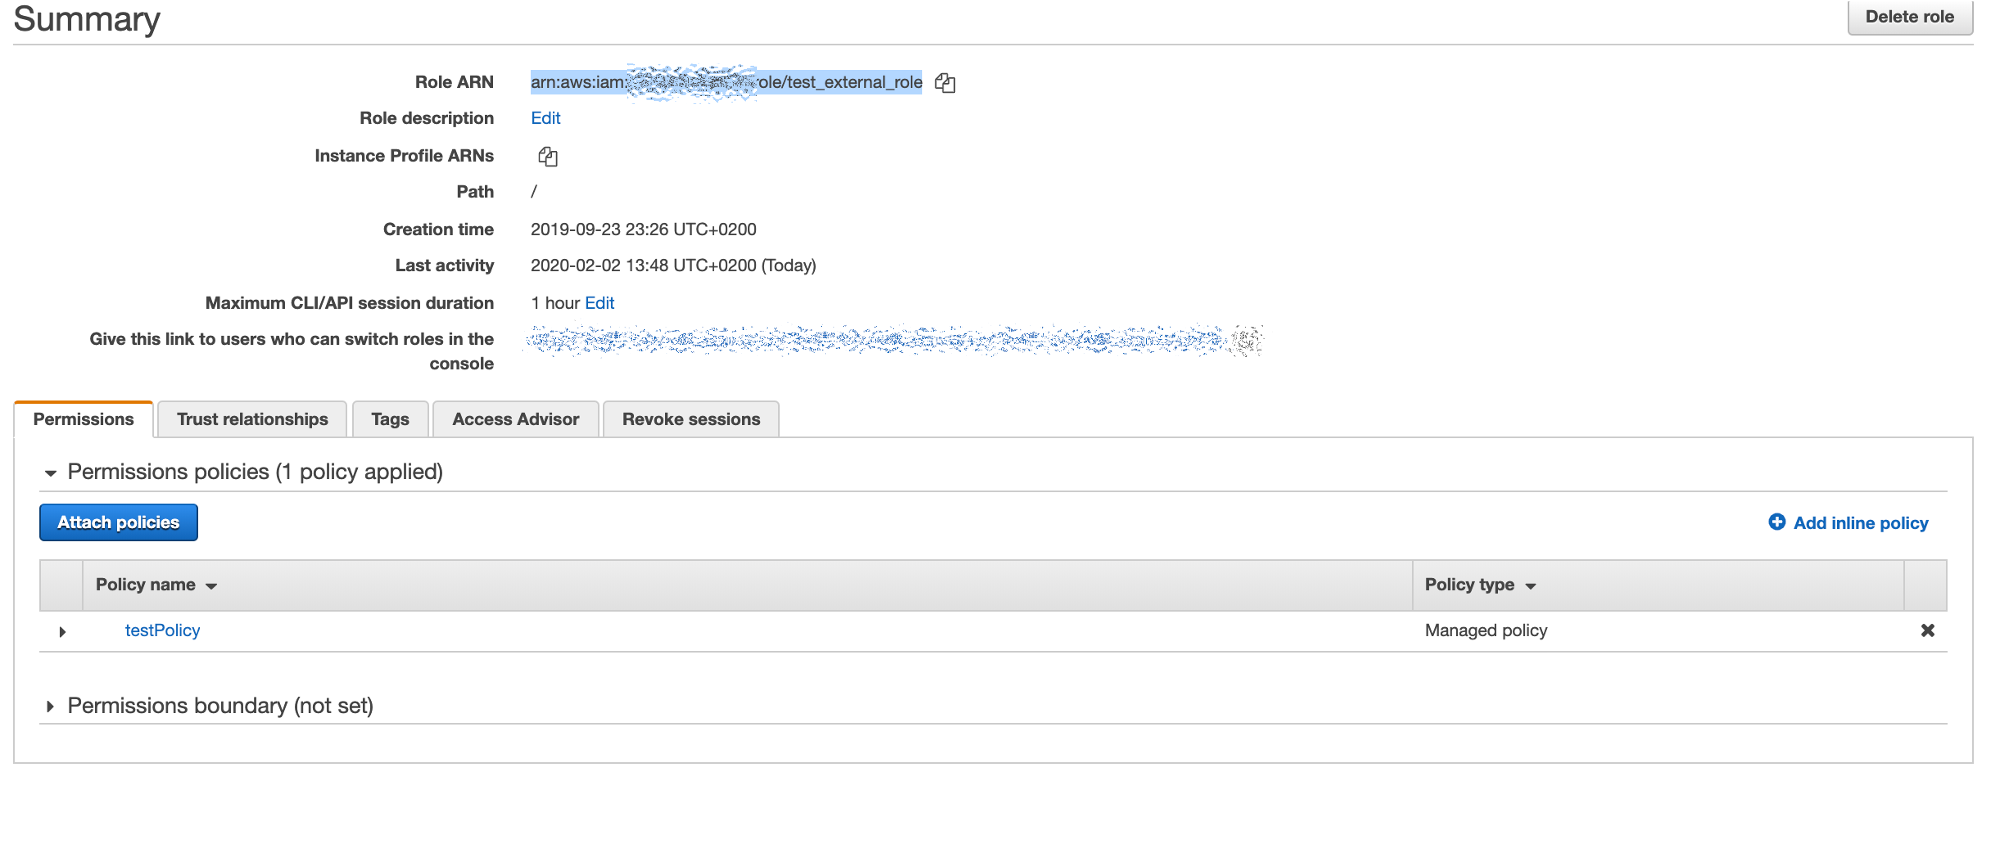
-
Integrate with Harmony Connect: After the role is created, copy the Role ARN to Application Access account configurations step and click Next.
Specify Linux Keys and Usernames
Windows machines are automatically uploaded in "transparent" mode, and Linux computers are automatically uploaded in "managed" mode. This means that in order to add a machine with a specific username (i.e. role), you must specify the machine's username and key. Follow one of these methods:
-
If you have one generic user for all (or most) machines, you upload it as a "default key". This means that if a machine is not explicitly tagged with checkpoint_ssh tag in AWS, the machine is uploaded with the generic username & key.
-
If you have machines that do not use the default username or you would like to upload several users for a machine, then you tag your machine in AWS with a tag of the format:
-
Key: checkpoint_ssh:LINUX-USERNAME
-
Value: KEY-NAME.pem
You tag each machine with such multiple tags, and the machines are uploaded with multiple users.

Choose VPC
-
In the Integration name field, enter an indicative name for this integration.
-
In the Integration site field, choose the Application Access site the integrated instances is connected to. You can create one integration per site.
-
In the Regions field, select the region VPCs you wish to integrate.
-
Click Import VPCs and choose the VPCs you wish to integrate. You may Select All too.
Note - All integrated instances should have network connectivity to the selected site Connector.

Choose Tags
-
Select the tags whose instances you wish to integrate and click Apply.

-
Harmony Connect does not fetch Name tags or checkpoint_ssh tags, which means every instance you wish to integrate should hold a designated tag on top of the two above.
-
Harmony Connect does not fetch tags with 0 associated instances.
-
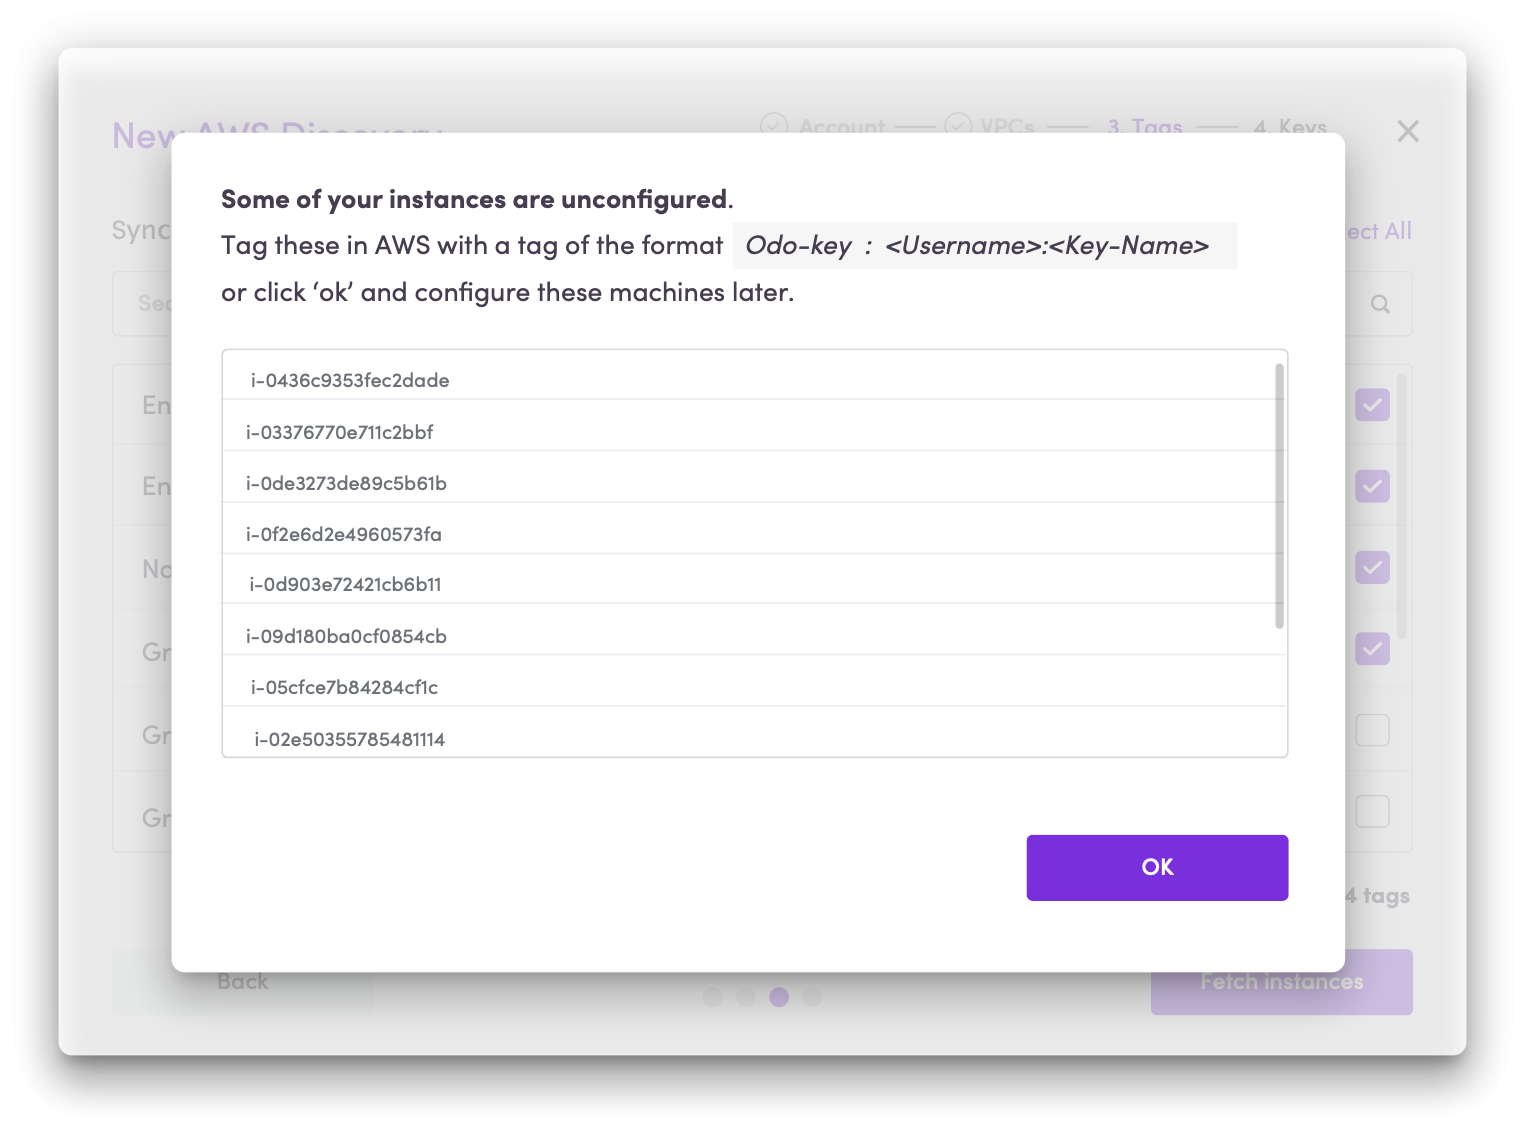
If Harmony Connect detects any unconfigured instances due to no default + missing tag, it notifies you that some computers are left unconfigured and cannot be uploaded. Then you may:
-
Configure them correctly in your AWS account at this point.
-
Ignore it and tag these machines later.
In this case, the computers are not uploaded to Harmony Connect until assigned with the tag.
-
-
When you finish, click OK.
|
|
Notes: |
Linux computers are imported based on the default username, or checkpoint_ssh tag (see Specify Linux Keys and Usernames).