Configuring OneLogin as Identity Provider
Set up your Identity Provider and then use these settings for the Identity Awareness![]() Check Point Software Blade on a Security Gateway that enforces network access and audits data based on network location, the identity of the user, and the identity of the computer. Acronym: IDA. (see Identity Awareness).
Check Point Software Blade on a Security Gateway that enforces network access and audits data based on network location, the identity of the user, and the identity of the computer. Acronym: IDA. (see Identity Awareness).
Use Cases
-
To prevent cyber-attacks, Check Point requires access to your third-party Identity Provider to retrieve and report identity of the users attacked.
-
Administrators can enforce different sets of rules for different users and groups. After you integrate Identity Provider with Harmony Connect, you can select users and groups within the security policy
 Collection of rules that control network traffic and enforce organization guidelines for data protection and access to resources with packet inspection..
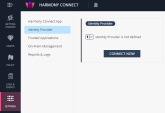
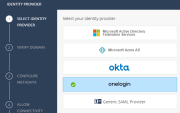
To configure OneLogin as an Identity Provider:
-
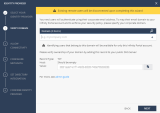
 Verify your domain
-
On the Verify Domain page, enter your organization domain.

Note - You need this step to ensure successful identification for all the users that belong to your organization and connected behind your branch offices. To learn more on the process, see Domain Verification.
-
The DNS record is generated below.
Click to copy this generated DNS record value.
-
Enter this generated DNS record to your DNS server as a TXT record.
-
Click Next on the Verify Domain page.
Check Point makes a DNS query attempt to verify your domain configuration.

Note - It may take some time until the DNS record is propagated and can be resolved.
-
-
 Create an application in the OneLogin Portal
-
Log in to your OneLogin account and select Administration to switch to admin mode.
-
Under the Applications tab, select Application and click Add App.
-
In the search box, search for SAML Test Connector (Advanced), and select it.
-
In the info tab, enter:
Display Name - Check Point Harmony Connect
-
Click Save.
-
-
 Upload the Federation Metadata file
-
In the Configure Metadata page, download the Federation Metadata XML from the OneLogin Portal:
-
Click Next.
Check Point verifies the metadata of your Identity Provider.
-
-
 Allow connectivity
-
In the Allow Connectivity page, copy the Entity ID and the Reply URL.
-
Complete the Settings for the OneLogin application. Go to the Configuration tab and enter this information:
-
Audience (EntityID) - The Entity ID you copied previously in the Check Point Infinity Portal.
-
ACS (Consumer) URL* - The Reply URL you copied previously in the Check Point Infinity Portal.
-
ACS (Consumer) URL Validator* - The Reply URL domain with backslashes. For example,
https:\/\/cloudinfra-gw.portal.checkpoint.com\/
-
-
Click Save.
-
Click Test your configuration to test your Identity Provider configuration.
-
Enter the Identity Provider credentials. This tests the configuration and shows the result:
Test passed:
Test failed:
-
Go back to the Check Point Harmony Connect Portal. In the Allow Connectivity page, click Next.
-
-
 Set user and group claims
-
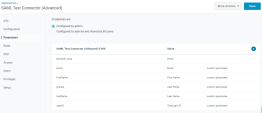
In the OneLogin Portal, go to the Parameters tab, and click Add parameter (+) to enter each value.
-
Filed Name - groups.
-
Select Include in SAML assertion.
-
Click Save.
-
Value - User Roles.
-
Click Save.
-
-
Filed Name - firstName.
-
Select Include in SAML assertion.
-
Click Save.
-
Value - First Name.
-
Click Save.
-
-
Filed Name - lastName.
-
Select Include in SAML assertion.
-
Click Save.
-
Value - Last Name.
-
Click Save.
-
-
Filed Name - userName.
-
Select Include in SAML assertion.
-
Click Save.
-
Value - UserName.
-
Click Save.
-
-
Filed Name - email.
-
Select Include in SAML assertion.
-
Click Save.
-
Value - Email.
-
Click Save.
-
-
Filed Name - userID.
-
Select Include in SAML assertion.
-
Click Save.
-
Value - OneLogin ID.
-
Click Save.
-
-
-
Click Save.
-
-
 Select relevant users and groups
-
Go to Users > Roles, and click New Role to create user roles (groups).

-
Enter the role name and click Save.

-
Click the new created role to edit:
-
-
 Confirm Identity Provider Integration
In the Confirm Identity Provider page, click Add to complete the wizard.
The Identity Provider installation is ready. Follow the steps below to complete the integration of the OneLogin Identification.
-
 Enable Identity Awareness
(Optional) When you configure your Identity Provider and set the list of the excluded IP or network addresses, click Enable Identity Awareness for remote users or Enable Identity Awareness for branch sites or both and click Apply Changes.

Note - After the Identity Awareness update completes, a new notification appears on the Infinity Portal Notifications
.
To disable Identity Awareness, clear the selection.
-
 Bypass Authentication
When you enable Identity Awareness, you can enter one or more IP addresses for Check Point to bypass. The traffic from these IP addresses is not redirected to the Identity Provider authentication page. Use this for devices such as printers, servers, or Internet of Things (IoT).
To add the bypass authentication in the Identity Awareness window:
-
Go to Policy > Identity Awareness > Bypass authentication from these sources.
-
Enter the IP address and click [+] to add it.
-
Click Update.

Note - After the Identity Awareness update completes, a new notification appears on the Infinity Portal Notifications
.
-
-
 Enforce access control rules for specific users and groups
To get policy enforcement for users and groups, add users and groups to the policy:
-
-
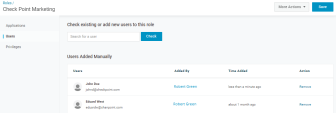
The Name should be the user full name.
-
The User Name should be the user email.
-
-
-
The Name and the Group Identifier should be the same as they appear in the role name in the Roles tab in the OneLogin Portal.
-
-

