Configuring Microsoft AD FS as Identity Provider
Set up your Identity Provider and then use these settings for the Identity Awareness![]() Check Point Software Blade on a Security Gateway that enforces network access and audits data based on network location, the identity of the user, and the identity of the computer. Acronym: IDA. (see Identity Awareness).
Check Point Software Blade on a Security Gateway that enforces network access and audits data based on network location, the identity of the user, and the identity of the computer. Acronym: IDA. (see Identity Awareness).
Use Cases
-
To prevent cyber-attacks, Check Point requires access to your third-party Identity Provider to retrieve and report identity of the users attacked.
-
Administrators can enforce different sets of rules for different users and groups. After you integrate Identity Provider with Harmony Connect, you can select users and groups within the security policy
 Collection of rules that control network traffic and enforce organization guidelines for data protection and access to resources with packet inspection..
To configure Microsoft Active Directory Federation Services as an Identity Provider:
-
Connect to an Identity Provider in the Check Point Infinity Portal
-
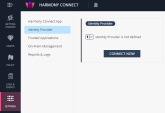
Log in to your Check Point Infinity Portal account. In the Settings tab, go to Identity Provider and click CONNECT NOW.
The Identity Provider wizard opens.
-
Select Microsoft Active Directory
It is a Microsoft directory service that enables Administrators to manage permisssions and network resources. as your Identity Provider.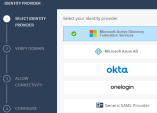
-
Click Next.
-
-
Verify your domain
-
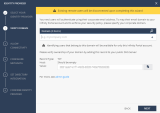
On the Verify Domain page, enter your organization domain.

Note - You need this step to ensure successful identification for all the users that belong to your organization and connected behind your branch offices. To learn more on the process, see Domain Verification.
-
The DNS record is generated below.
Click to copy this generated DNS record value.
-
Enter this generated DNS record to your DNS server as a TXT record.
-
Click Next on the Verify Domain page.
Check Point makes a DNS query attempt to verify your domain configuration.
Note - It may take some time until the DNS record is propagated and can be resolved.
-
-
Upload the Federation Metadata file
-
Download the AD FS Federation Metadata file from:
https://<your-domain>/FederationMetadata/2007-06/FederationMetadata.xml -
In the Configure Metadata page, upload the Federation Metadata XML that you downloaded from your AD FS.
Note - Check Point uses the service URL and the name of your Certificate to identify your users behind the sites. -
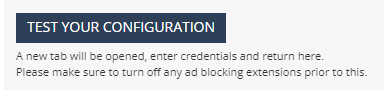
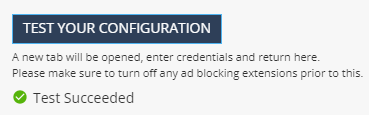
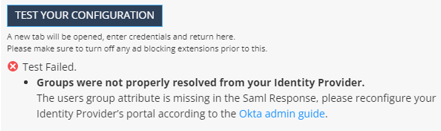
Click Test your configuration to test your Identity Provider configuration.
-
Enter the Identity Provider credentials. This tests the configuration and shows the result:
Test passed:
Test failed:
-
Click Next. Check Point verifies the metadata of your Identity Provider
-
-
Allow Connectivity and Create Relying Party Trust in AD FS
-
In the Allow Connectivity page, copy the Entity ID and the Reply URL.
-
Open the AD FS Management Console.
-
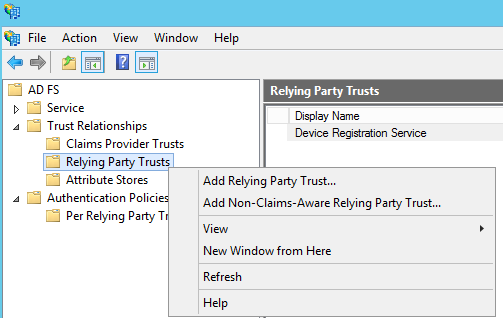
Navigate to AD FS > Trust Relationships > Relying Party Trusts.

-
Right click to select Add Relaying Party Trust….
-
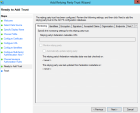
The Add Relying Party Trust Wizard opens. Click Start.
-
Select Enter data about the relying party manually, and click Next.
-
Enter this information:
-
In Display name - Check Point Harmony Connect.
-
In Notes - This is the relying party trust for Check Point Harmony Connect.
-
-
Click Next.
-
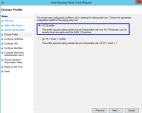
Make sure that the AD FS profile is selected and click Next.
-
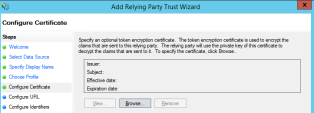
In the Configure Certificate section, do not upload a token encryption certificate. Click Next.
-
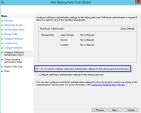
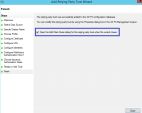
Select the checkbox Enable support for the SAML 2.0 WebSSO protocol.
-
In the Service URL field, enter the Reply URL that you copied from the Check Point Infinity Portal.

-
Click Next.
-
In the Relying party trust identifier textbox, enter the Entity ID that you copied earlier from the Check Point Infinity Portal.
-
Click Add and then click Next.

-
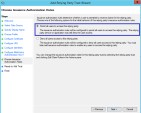
In the next screen, make sure that the option I do not want to configure multi-factor authentication is selected, and click Next.
-
Make sure that Permit all users to access this relying party is selected, and click Next.
-
In the Ready to Add Trust section, click Next.
-
Select the option Open the Edit Claim Rules dialog for this relying party trust when the wizard closes, then click Close.
-
-
Set user and groups claims
-
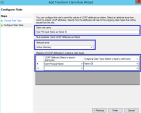
In the Edit Claim Rules for Check Point Harmony Connect panel > Issuance Transform Rules tab, click Add Rule....
-
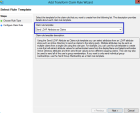
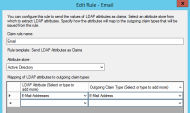
Set the Claim rule template drop-down menu to Send LDAP Attributes as Claims and click Next.
-
Under Configure Claim Rule, enter these settings:
-
Claim rule name - LDAP - User Principal Name as Name ID
-
Attribute store - Active Directory
-
LDAP Attribute - User-Principal-Name
-
Outgoing Claim Type - Name ID
-
-
Click Finish.
-
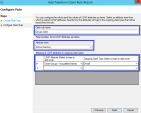
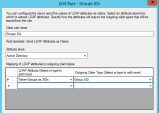
Add another rule
Set of traffic parameters and other conditions in a Rule Base (Security Policy) that cause specified actions to be taken for a communication session. with these settings:-
Claim rule name - Groups Claim
-
Attribute store - Active Directory
-
LDAP Attribute - Token-Groups - Unqualified Names
-
Outgoing Claim Type - Group
-
-
Click Finish.
-
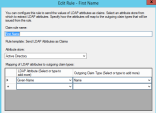
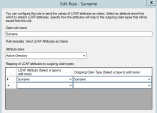
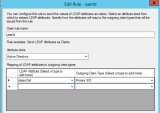
Add the next claims the same way:
-
First Name
-
Surname
-
Email
-
Group IDs
-
userId
-
-
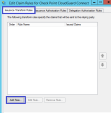
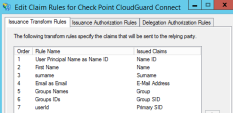
Make sure you have the claims and click OK.
-
Restart the AD FS services or reboot the server to apply the configuration.
-
-
Confirm Identity Provider Integration
-
Go back to the Check Point Harmony Connect Portal. In the Allow Connectivity page, click Next.
-
In the Confirm Identity Provide page, click Add to complete the wizard.
-


The Identity Provider installation is ready. Follow the steps below to complete the integration of the AD FS Identification.
-
Enable Identity Awareness
After you configure your Identity Provider and set the list of the excluded IP or network addresses (Optional), click Enable for Identity Awareness.
Note - It may take several minutes to enable Identity Awareness. When the process is complete, the page status changes to Enabled, and a new notification appears on the Infinity Portal Notifications pane.
To disable Identity Awareness, click Disable.
-
Bypass Authentication
When you enable Identity Awareness, at any stage you can enter one or more IP addresses for Check Point to bypass. This means that the traffic from these IP addresses is not redirected to the Identity Provider Authentication page. This is useful for automatic devices such as printers, servers, or Internet of Things (IoT).
You can add the bypass authentication in the Identity Awareness window. Go to Policy > Identity Awareness > Bypass authentication from these sources and click [+] to add the IP Addresses, then click Update.
Note - It may take several minutes to update Identity Awareness. When the process is complete, the page status changes to Enabled, and a new notification appears on the Infinity Portal Notifications pane.
-
Enforce access control rules for specific users and groups
To get policy enforcement for users and groups, add users and groups to the policy:
-
-
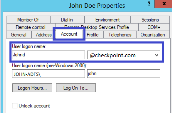
In AD FS, open Active Directory Users and Computers. Select a user to watch its identifiers in the Account tab.
-
The Name must be the full user name.
-
The User Name must be in the format:
<User logon name>@<domain>
-
-
-
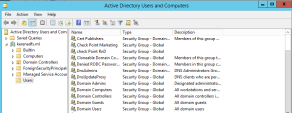
In AD FS, open Active Directory Users and Computers.
-
The Name and the Group Identifier must be the same as they appear in the group name in Active Directory Users and Computers.

-
-


