Threat Prevention
Profile
Harmony Connect supports a single profile Recommended with these Threat Prevention technologies to prevent cyber attacks, secure internet and corporate application access, and secure file sharing over network protocols:
-
Threat Cloud
-
Exploit Protection
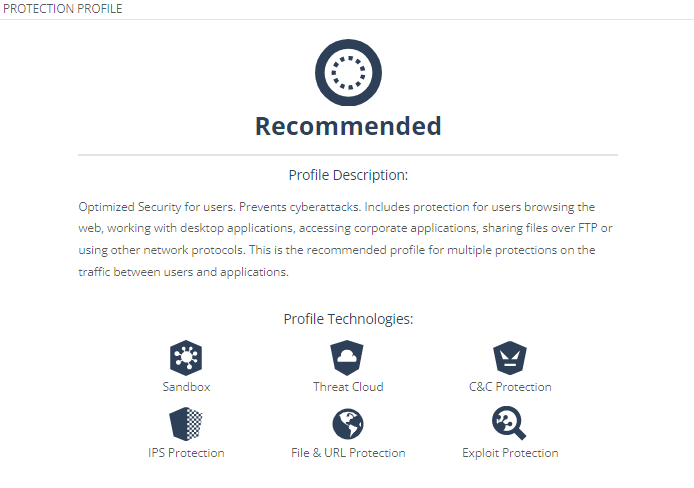
The Threat Prevention profile is applicable to Internet Access (remote and branch users) and Network Access (remote and branch users).
Exceptions
With Harmony Connect, you can add Threat Prevention exceptions to resolve false positives in the system. A false positive occurs when Harmony Connect incorrectly flags traffic for a security vulnerability and blocks it. To identify false positives, review the log for blocked traffic.

Adding an Exception
Note - You must specify either Exclude Protections or Scope. If you fail to do so, the # column shows the icon ( ), which indicates that the exception is null.
-
From the Policy menu, expand Threat Prevention, and click Exceptions.
-
Click
 .
. -
In the Name column, enter a name for the exception.
-
To add the protections to exclude:
-
In the Excluded Protections column, click +.
A pop up window appears.
-
To add protections as an exception, click Protections and select the required protections.
-
To add technologies as an exception, click Technologies and select the required technologies.
-
To add URLs as an exception, click URL Lists and select the required URLs.

Note - To undo a selection, click Protections, Technologies, or URL Lists again.
-
Click x to close the window.
-
-
To add the networks to exclude:
-
In the Scope column, click +.
-
To add a network, click Network Lists.
The Network Lists window appears.
-
Under Network Lists, select the networks.
-
Click Add.
-
-
To add a new network, click New Network List.
The Add New Network window appears.
-
In the Name field, enter a name for the network.
-
In the Network / IP address table, enter the network or IP address and click +. Repeat to add multiple network or IP addresses.
-
(Optional) In the Comments filed, enter comments.
-
Click Add.
-
-
-
To set a reminder to review the exception in the future, in the Reminder column, click No Reminder, and select the date and time.
When the reminder expires, a notification appears on the Notification Indicator (
 ) to review the Threat Prevention exception.
 -
To set an expiry date for the exception, in the Expires On column, click No Expiration, and select the date.
-
Click Install Policy to publish the exceptions to Check Point cloud
 An administrator approved Harmony Connect cloud location that processes the internet and corporate traffic..
Reviewing Changes
To review the policy or exception changes:
-
Click Changes> View Changes. The number on the Changes button indicates the number of changes made that is pending to be installed.
The Changes pane on the right-side of the screen lists the changes made to the Internet Access policy first followed by Exceptions. The changes are listed in the reverse chronological order (most recent first).
-
To undo the changes, click
 .
. -
To revert the last undone change, click
 .
. -
(Optional) Enter comments for the changes in the text field.
Deleting an Exception
-
From the Policy menu, expand Threat Prevention, and click Exceptions.
-
Select the exception you want to delete and click
 .
.
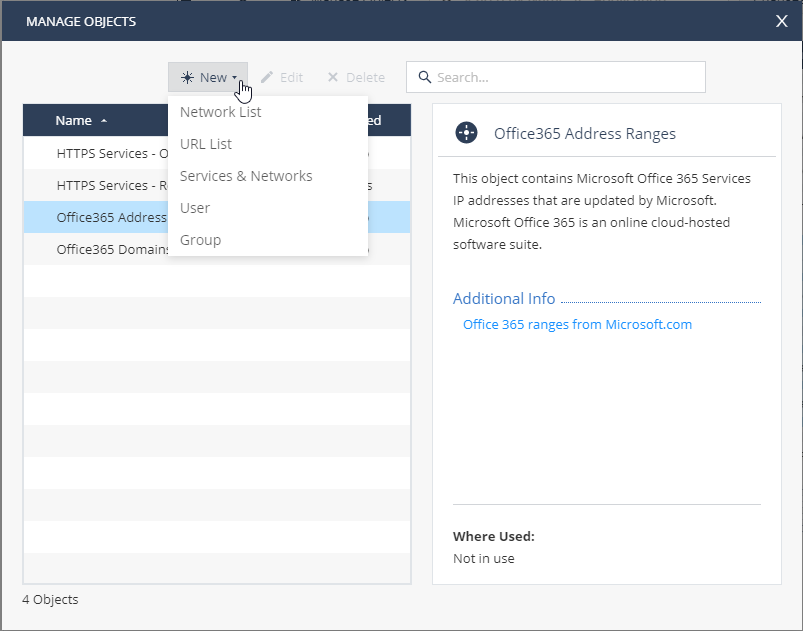
Managing Objects
Create, manage, and delete internet objects to which you apply the rules.
Click Manage Objects in the upper section of the screen.