VPN Logs
VPN Logs show the reason for a failed connection between your branch office's SD-WAN![]() Software-Defined Wide Area Network - A virtual WAN architecture that allows enterprises to leverage any combination of transport services – including MPLS, LTE and broadband internet services – to securely connect users to applications. device and the Harmony Connect Secure Web Gateways.
Software-Defined Wide Area Network - A virtual WAN architecture that allows enterprises to leverage any combination of transport services – including MPLS, LTE and broadband internet services – to securely connect users to applications. device and the Harmony Connect Secure Web Gateways.
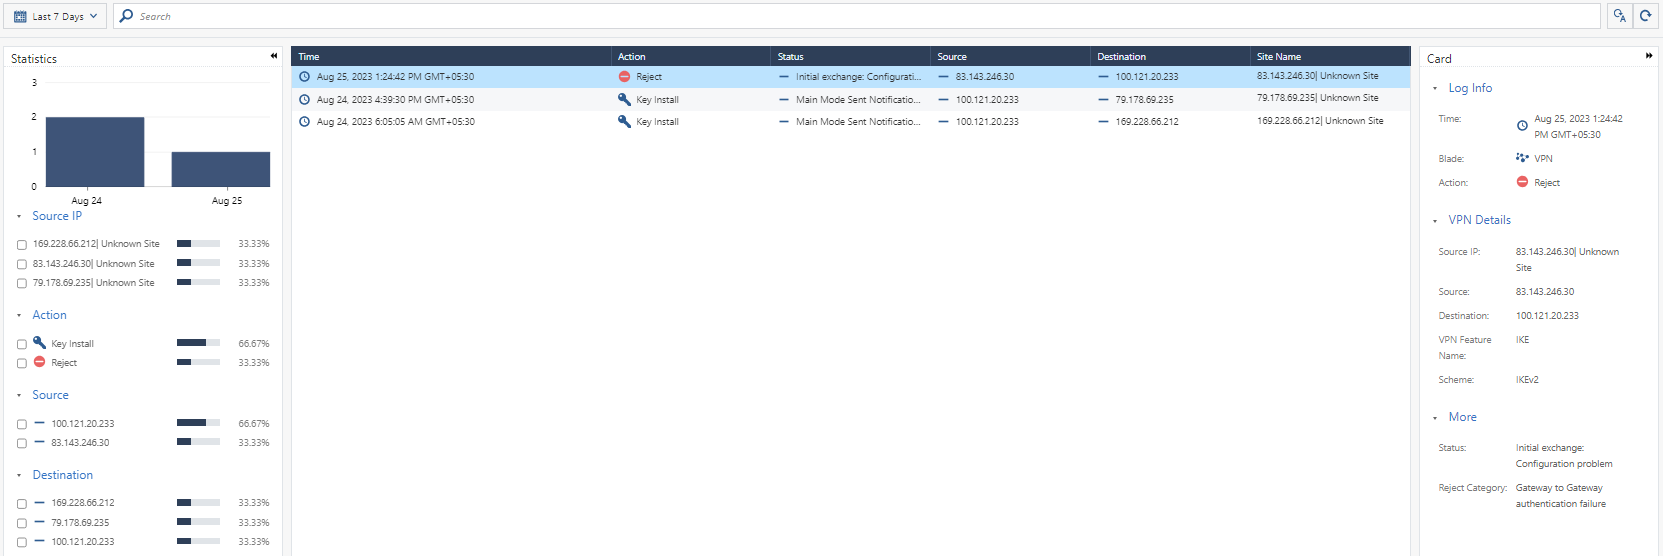
To view the VPN Logs page, go to Logs and Events > Internet and Network Access > VPN Logs.

| Item | Description | ||
|---|---|---|---|
| Time | Date and time when the scan was performed. | ||
| Action |
Reason for the failed connection:
|
||
| Status |
Brief description about the Action. Common errors:
|
||
| Source |
Public IP address of the branch office's SD-WAN device¹. |
||
|
Destination |
Harmony Connect Secure Web Gateway IP address¹. |
||
|
Site Name |
|
¹ For branch sites with dynamic IP address, the system does not resolve the actual IP address and shows either external or internal IP address of the site.
To add, remove, or arrange the order of columns:
-
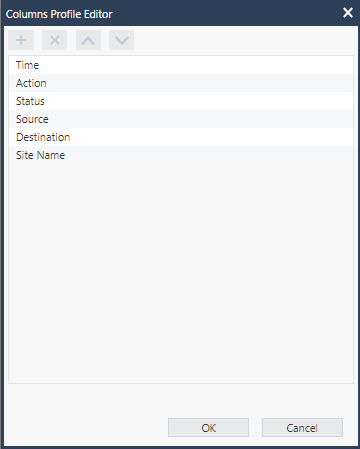
Right-click the header row and click Columns Profile Editor.
The Columns Profile Editor window appears.

-
To add a predefined column to the table, click
.
-
Select the columns and click OK.
-
-
To remove a column from the table, select the column and click
.
-
To arrange the order of the column in the table, select the column and click
or
.
-
Click OK to close the window.
To filter the data in the table:
Right-click any value in the table and click Filter or Filter out. For example, to filter the data for Reject, click Filter Reject under the Action column. To exclude Reject data from the table, click Filter out Reject.


