Deploying Browse Security Clients
|
|
Notes -
|
To download the Browse Security client:
-
Click Overview and then click Download on the top banner.
-
To download the file immediately, click Download for the relevant OS and transfer the file to the endpoint.
Client
OS
Downloaded file
Browse
Windows
BrowserSetup.exe macOS
BrowserSetup.zip
ChromeOS
BrowserSetup_chromeOS_laptop.txt or BrowserSetup_chromeOS_desktop.txt
To install the Browse Security client on Windows using .exe file:
-
Copy the latest
BrowseSetup.exeto the endpoint. -
Double click the
BrowseSetup.exefile to install Browse Security. -
Creating .msi file:
-
Select Start and type CMD.
-
Right-click Command Prompt and select Run as administrator.
-
Run:
cd <path to BrowseSetup.exe file> -
Run:
BrowseSetup.exe /CreateMsiThe system creates the
EPS.msifile.
-
To install the Browse Security client on Windows using .msi file:
-
Copy
EPS.msito the endpoint.
Note - You can install Browse Security extension on the Internet Explorer using the .msi file only.
-
Select Start and type CMD.
-
Right-click Command Prompt and select Run as administrator.
-
Do any of these:
-
Run:
-
msiexec /i EPS.msi -
To install the Windows client with Internet Explorer extension, run:
msiexec /i EPS.msi no_ie=false -
To install the Windows client without the Brave browser extension, run:
msiexec /i EPS.msi brave_extension_disabled=true -
To install the Windows client and setting the virtual group of the client, run:
msiexec /i EPS.msi virtual_group_name="virtual_group_name"
-
To install the Browse Security client on macOS:
-
Copy the zip file to the client.
-
Unzip the file.
-
Run the app file.
-
If you are using Safari, a prompt appears:

Note - If you do not install the extension, the prompt appears every time you open Safari. If you do not want to install the extension and stop the prompt, in the terminal window, run:
sudo defaults write /Library/Preferences/com.checkpoint.harmony.browse.helper mute_all_prompts -bool YES -
Click Open in App Store and install the extension.
After you install the extension, a prompt appears.
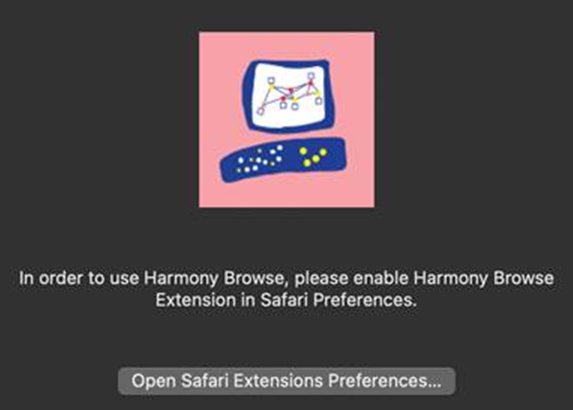
-
Click Open Safari Extensions Preferences.
-
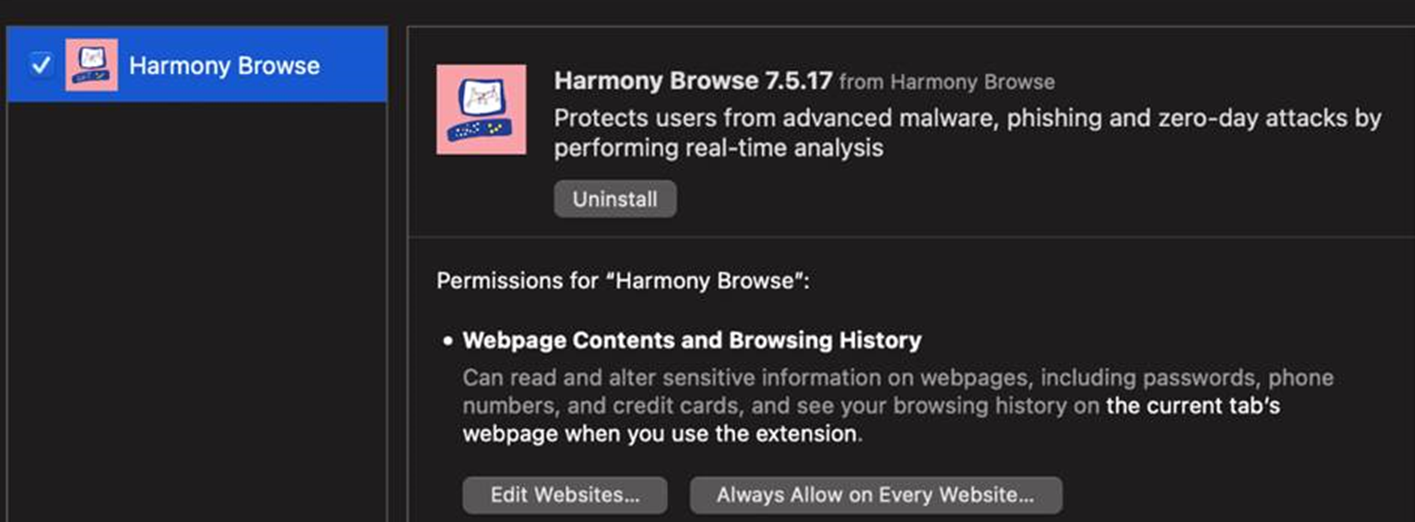
Select the Browse Security checkbox and click Always Allow on Every Website.
-
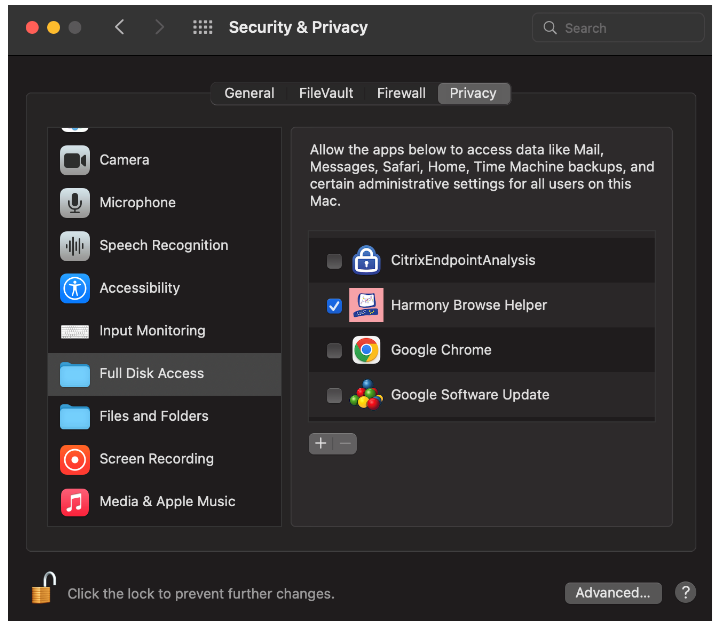
Go to Security & Privacy and click Full Disk Access.
-
Select the Browse Security Helper checkbox.
|
|
Note - To install Browse Security on Chromebook, see sk173974. |
To verify whether the Browse Security client can access the Check Point services and the stores of extensions, see sk179690.