Log in to SmartConsole
Administrators can manage Smart-1 Cloud with one of these options:
-
Web SmartConsole (browser-based)
-
Streamed SmartConsole
-
Desktop SmartConsole (Windows installation)
-
Portable SmartConsole (no administrator rights required for Windows installation)
|
|
Important - Because of port tunneling limitations, you can establish only one connection to a Smart-1 Cloud tenant from a desktop SmartConsole on the same computer. As an alternative, use Web SmartConsole or Streamed SmartConsole. |

|
|
Note - From R82.10, Smart-1 Cloud enforces an automatic idle timeout to enhance security. If SmartConsole is inactive for 10 minutes, the user is logged out automatically. |
On the Smart-1 Cloud page, select Settings > API & SmartConsole > Open Web SmartConsole.
On the Smart-1 Cloud page, select Settings > API & SmartConsole > Open Streamed SmartConsole.
The Streamed SmartConsole automatically opens.
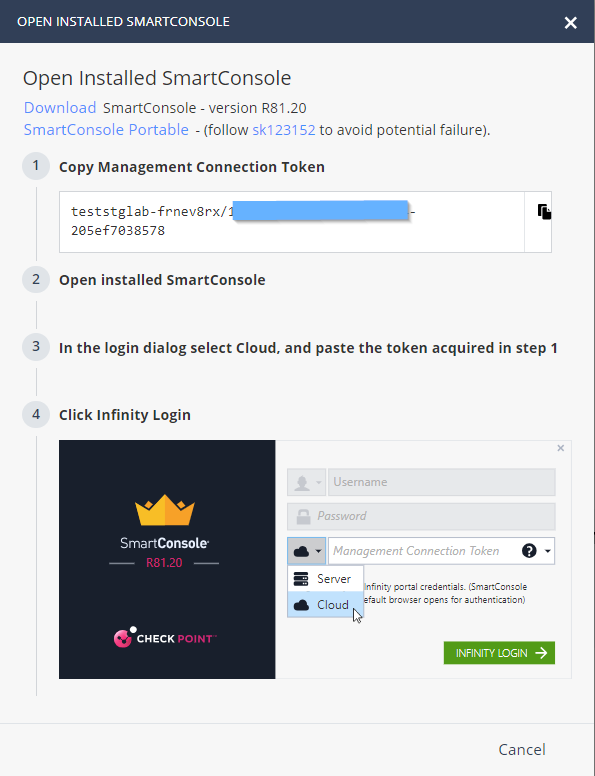
Go to Settings > API & SmartConsole > Instructions for using Installed SmartConsole.
|
|
Note - SmartConsole is available as a Windows installer or as a Portable (ZIP) version. |
-
Download SmartConsole from the Open Installed SmartConsole window.
-
Choose your preferred package:
-
SmartConsole installation.
-
SmartConsole Portable (for more information, refer to sk116158).
-
-
Install SmartConsole.
If you downloaded the EXE file, double-click it and follow the on-screen instructions.
If you downloaded the ZIP file, extract it. Refer to sk116158 for details.
-
Open SmartConsole.
See the R81.20 SmartConsole Online Help Guide for more information about how to use SmartConsole.
-
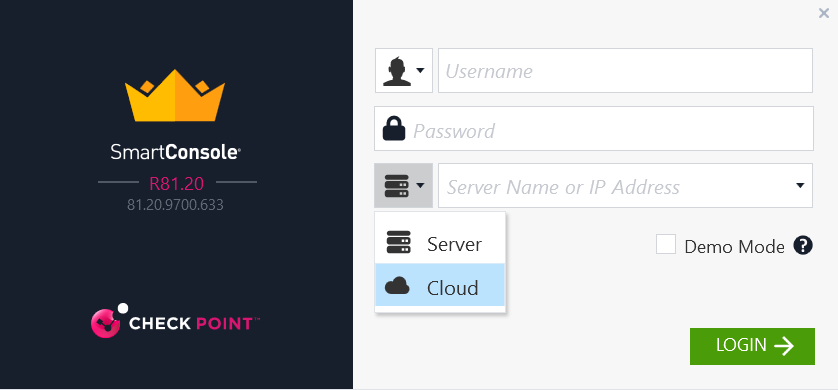
From the server drop-down menu, select Cloud.
-
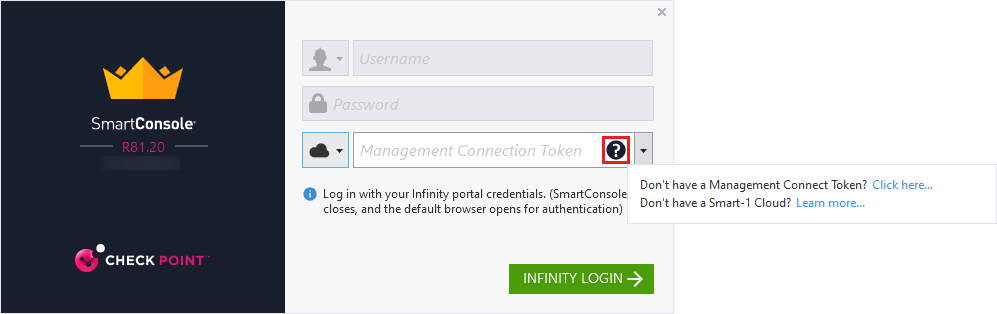
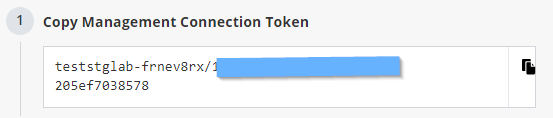
Enter the Management Connection Token.

Notes
-
Hover over the help icon to view the relevant links:
-
Get the Management Connection Token from Settings view > API & SmartConsole > Instructions for using Installed SmartConsole.
-
-
Click Infinity Login.
-
SmartConsole closes and the default browser opens for authentication.
-
Enter your Check Point Portal administrator credentials (the login credentials for
portal.checkpoint.com). -
Click Sign in to authorize SmartConsole.
SmartConsole opens for you to start working.