Deploying Check Point Gateways
This sections explains step-by-step how to provision two Check Point Gateway (one gateway behind each Aviatrix gateway).
|
|
Note - There is an option for customers to deploy more than two Check Pointgateways. |
Step 1: Required Information
This table gives the required information to deploy a Check Point Security Gateway.
|
Device Information |
IP Address |
Credentials |
|---|---|---|
|
Aviatrix Cloud Controller |
|
|
|
Check Point SMS |
|
|
|
Check Point SIC Key |
N/A |
<sic key> |
|
Check Point Gateway Names |
|
<host1/host2…> |
|
GW01 internal router IP |
|
N/A |
|
GW02 internal router IP |
|
N/A |
|
Firewall Interface IP |
FW01: External IP FW01: Internal IP |
FW02: External IP FW02: Internal IP |
|
Internal Test Server |
|
|
For the Internal Router IP, we recommend that you add three return routes, each for a RFC1918 address that points back to the VPC router of the subnet aviatrix*dmz-firewall and or aviatrix*hagw-dmz firewall, if you attach the instance to the back up gateway.
To do this, navigate to the AWS Management Console > VPC > Subnets and filter by "dmz-firewall". This allows you to control the VPC router IP, which is the first host for each subnet.
Example:
Step 2: Deploy the Check Point Gateways
These describe how to deploy Check Point Security Gateways from the Aviatrix Controller.
To deploy a Check Point Gateway:
-
Log in to the Aviatrix Controller.
-
Navigate to Firewall Network > Setup > Launch & Associate Firewall Instance.
-
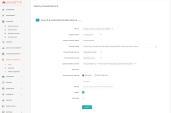
For each field, enter the required information:
-
VPC ID - The Aviatrix Firewall VPC, for a new deployment use only one VPC ID.
-
Gateway Name - The Aviatrix Gateway in which this Check Point Firewall is provisioned for. An Aviatrix best practice is to deploy two Aviatrix Gateways, for which it is necessary to deploy two Check Point Firewalls behind each one.
-
Select these options:
-
Firewall Instance Name
-
Firewall Image Version (If more than two versions are listed, always select the latest one)
-
Firewall Instance Size
-
-
Egress Interface Subnet
-
Select the subnet that pertains to the Aviatrix Gateway above
-
Always select the public fw ingress-egress subnet
-
-
Key Pair Name (Optional) - You can use an existing key from AWS, or a new key is issued after the gateway is deployed.
-
Bootstrap details:
-
Username:
"admin", password "Aviatrix123#", sic "Aviatrix123" -
Router IP address are different between Primary and Secondary gateways because they are located in different AZs.
-
-
-
Verify that each field is correct > click Launch. Aviatrix also verifies if the subnet information is correct for the selected Aviatrix Gateway.
-
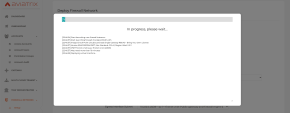
Keep this window open until the gateway provisioning finishes:
-
Deploy the second Check Point Gateway.
-
Note that a change in these fields to reflect the second Aviatrix Gateway.
-
Gateway Name: (such as FireNet-GW-hagw)
-
Firewall Instance Name:
-
Egress Interface Subnet: (as in us-west-2b)
-
Do these steps again for each gateway.


