Configuring Ingress Routing
This section describes the necessary steps to configure ingress routing.
Step 1: Create a Target Group
-
Log into the AWS
 Amazon® Web Services. Public cloud platform that offers global compute, storage, database, application and other cloud services. Management Console.
 -
Navigate to Services > EC2 > Load Balancing > Target Groups > Create target group.
-
Enter these details for the target group:
-
Target Group Name: guo-internal-80 and guo-internal-22
-
Target type: Instance
-
Protocol: TCP
-
Port: 80 and 22
-
VPC: <Where test server resides>
-
-
Click Create.
-
Register targets to the internal target group.
-
Below Create target group, in the Name column, select the target group > click Targets > Edit.
-
Select <Test Server> > Add to registered > Save.
-
For each Target group, repeat steps "a" and "b".
-
Step 2: Create an Internal Load Balancer
-
Navigate to Services > EC2 > Load Balancing > Load Balancer > Create Load Balancer > Create (Network Load Balancer).
-
Enter the required details:
-
Name: Enter a name
-
Scheme: Internal
-
Listeners: Ports 80 and 22
-
VPC: Where the server resides
-
AZ: Select each Availability Zone
-
Step 3: Configure the Security Settings
-
Go to Configure Security Settings > Configure Routing and enter the necessary details.
-
Enter the required details:
-
Target Group: Existing
-
Name: guo-internal-22
-
Next: Register Targets > Review > Create.
-
Listeners: Edit the listener to match the associated port(s)
-
Step 4: Configure the External Load Balancer
To configure the AWS External Load Balancer, do these steps:
-
Log into the AWS Management Console
-
Navigate to Services > EC2 > Load Balancing > Target Groups > Create target group.
-
Create the target groups
-
Enter the necessary details:
-
Target Group Name: example-external-5080 and guo-internal-5022
-
Target type: Instance
-
Port: 5080 and 5022
-
VPC: <Where firewall resides>

-
-
Click Create.
-
Repeat steps 2 and 3 for each target group.
-
Add firewalls to both external target groups.
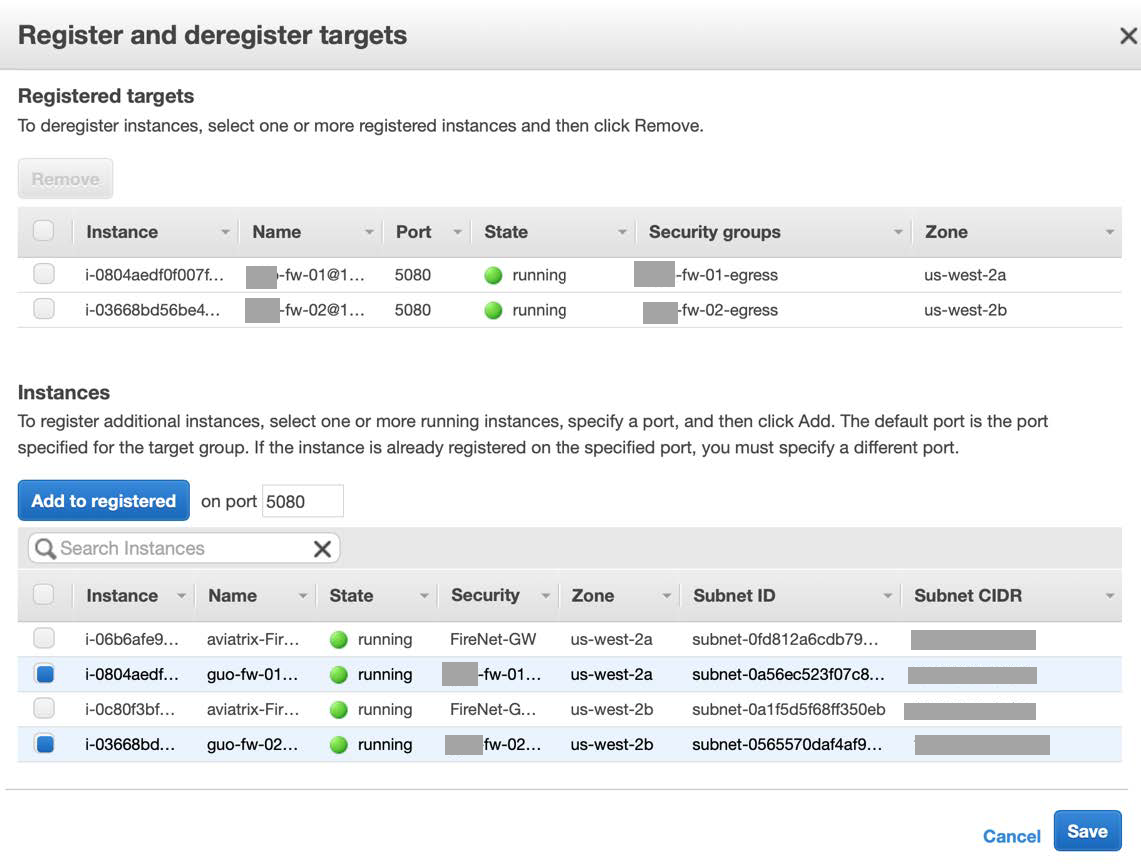
-
-
Create an External Load Balancer.
-
Navigate to Services > EC2 > Load Balancing > Load Balancer > Create Load Balancer > Create (Network Load Balancer).
-
Enter the necessary details:
-
Name:
-
Scheme: internet-facing
-
Listeners: 80 and 22
-
VPC: Where server resides>
-
AZ: Select each AZ
-
-
-
Configure the Security Settings:
-
Go to Configure Security Settings > Configure Routing, enter the necessary details:
-
Target Group: Existing
-
Name: example-external-5022
-
-
Click Next > Register Target > Review.
-
Click Create.
-
-
Edit Listeners to match the associated port.
-
Below Listeners, select Add listener.
-
Select the checkboxes for TCP : 22 and TCP : 80.
-
Step 5: Configure the Security Policy to Allow Ingress Traffic
To allow ingress traffic, do these steps:
-
Create a Dynamic object:
-
Go to Object > New > More > Network Object > Dynamic Objects > Dynamic Objects.
-
In the Name field, give the object this name: LocalGatewayInternal
-
Repeat steps "a" and "b" for the second Dynamic object.
-
-
Create a dummy host object:
-
Go to Object > New > Host.
-
Enter the necessary details:
-
Name: DummyHost
-
IP:
169.254.1.1
-
-
-
Create a dummy object group
-
Go to Objects > New > Network Group.
-
In the Name field, enter DummyGroup.
-
Add the DummyHost to this DummyGroup.
-
-
Create two Logical Servers.
-
Go to Object > New > More > Network Object > More > Logical Server.
-
In the Name field, enter the DNS name provided by the AWS Internal Load Balancer.
Example:
fw01 = internal-InternalELB-1087819072.us-east-1.elb.amazonaws.com_1)
fw02 = internal-InternalELB-1087819072.us-east-1.elb.amazonaws.com_2
-
In the IPv4 Address field, enter the external IP address associated with the gateway instance.
-
For Server's type, select Other. Note - Select Other even if you work with HTTP.
-
Select the checkbox Persistent server mode and keep the default option Persistency by service.
-
Below Balance Method, select Domain.
-
Repeat steps "a" through "f" for each gateway. Remember, put "_<Number>" at the end of the Logical server name, as in this example:

-
-
Create an Access Rule
Set of traffic parameters and other conditions in a Rule Base (Security Policy) that cause specified actions to be taken for a communication session.:
-
Create a NAT rule:

-
Push the policy.
-
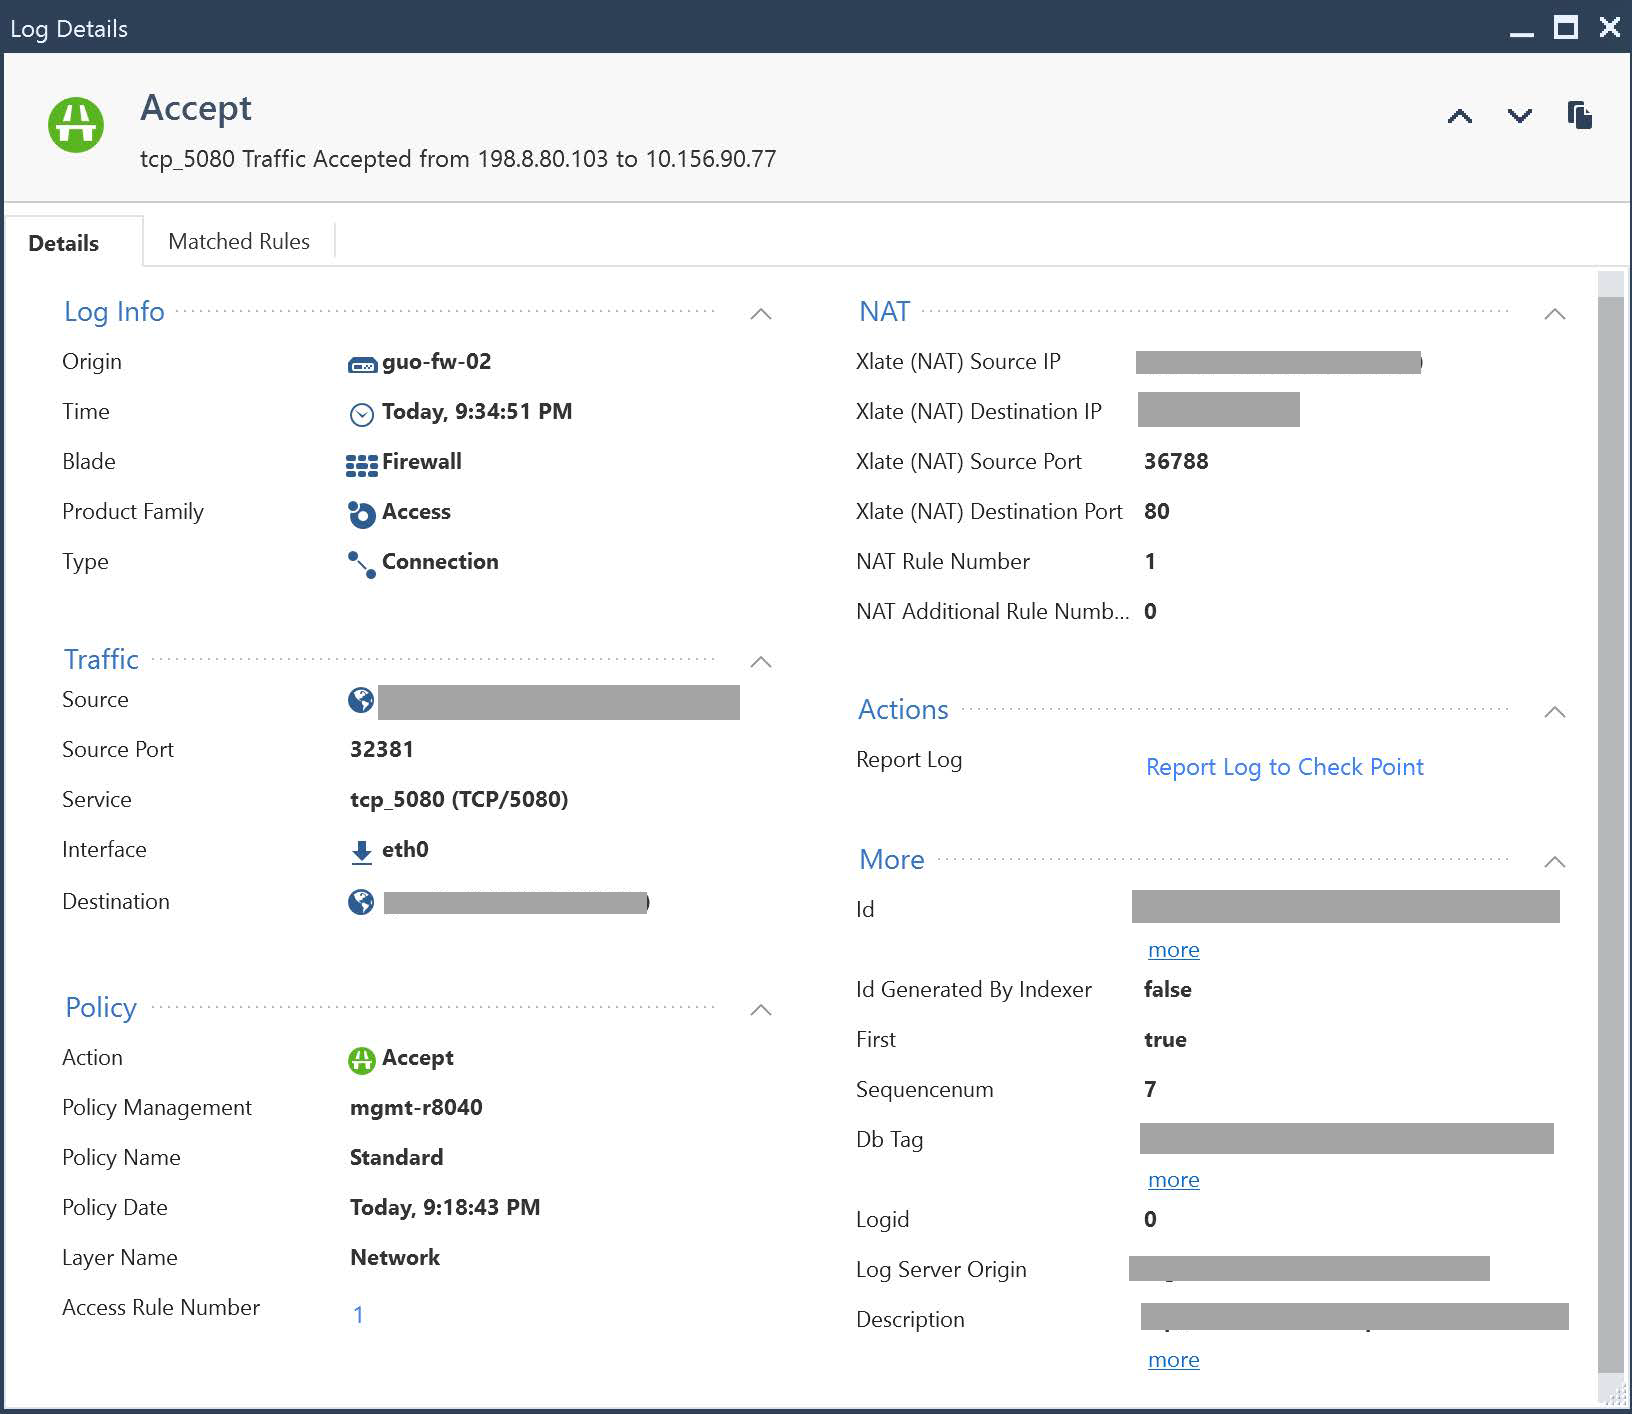
Verify the connection
-
Copy the DNS name of the External Load Balancer.
-
Open a browser and paste the External Load Balancer's DNS name.
-
Verify the log entry.
-