SIEM / SOAR Integration
Harmony Email & Collaboration allows to integrate with multiple Security Information and Event Management (SIEM) platforms and Cortex XSOAR by Palo Alto Networks.
Encryption - For SIEM, unless configured otherwise, all events are forwarded over HTTPS.
Source IP Address
Harmony Email & Collaboration can be deployed in one of several geographic regions. The security events get forwarded from a unique static IP for each region.
The static IP address for different regions:
-
Australia -
52.63.125.59 -
Canada -
35.182.23.24 -
Europe -
54.247.106.52 -
India -
15.207.123.24 -
United Arab Emirates -
51.112.39.93 -
United Kingdom -
3.9.211.100 -
United States -
34.192.247.192
Configuring SIEM Integration
To configure SIEM integration from the Infinity Portal:
-
Click Security Settings > Security Engines.
-
Click Configure for SIEM Integration.
-
Select the required Transport method and enter the relevant details.
 Supported Transport methods
Transport Method
Required Fields
Splunk HTTP Event Collector (HEC)
HTTP Event Collector Host / URI
HTTP Event Collector Token
(Optional) To use Indexer acknowledgment, select the checkbox and enter the Channel ID.
(Optional) To use Splunk Index, select the checkbox and enter the Splunk index name.
HTTP Collector
HTTP Collector URL (HTTP/HTTPS)
For example, https://myconnector.mycompany.com
AWS S3
AWS IAM Role ARN
AWS S3 Bucket Name
AWS S3 Bucket Region
AWS S3 Bucket Directory Path
(Optional) To use External ID, select the checkbox and enter the External ID.
AWS SQS
AWS SQS Queue URL
Azure Log Workspace
Azure Log Workspace ID
Azure Log Workspace Shared Key
TCP
TCP Host
TCP Port
Google Chronicle
Customer ID - Unique identifier (UUID) corresponding to your Chronicle instance.
Account Region - Region where your Chronicle instance is created.
Credentials JSON - Google Service Account credentials.

Note - If the Credentials JSON is not available, contact Google support.
Ingestion API - Google Chronicle Ingestion API type
-
Unified Data Model (UDM) event
-
Unstructured log
Crowdstrike NG-SIEM
CrowdStrike Event Collector Host / URL
Bearer Token
-
-
Select the required log Format.
-
JSON (Splunk HEC/CIM compatible)
-
JSON (CIM compatible)
-
JSON
-
JSON Flat (dot notation)
-
JSON (Rapid7, <8k characters)
-
JSON (Elastic ECS compatible)
-
JSON (Crowdstrike ECS compatible)
-
JSON (Google UDM compatible)
-
Syslog (See Forwarding Logs in Syslog Format)
-
Google Chronicle Unstructured logs
-
-
(Optional) If you need to add custom fields to every event forwarded from Harmony Email & Collaboration to your SIEM platform:
-
Select the Add custom field checkbox.
-
Enter the required Custom field name.
-
Enter the required Custom field value.

Note - You can add only up to five custom fields.
-
-
Click Save.
|
|
Note - After you configured the SIEM integration, Harmony Email & Collaboration starts sending logs. You have to configure your SIEM platform to receive Harmony Email & Collaboration logs. |
Forwarding Logs in Syslog Format
-
Syslog messages are RFC 5424 compliant.
-
If you need to limit the syslog message size, select the Limit syslog message format checkbox, and under Limit syslog message length (bytes), enter the message limit in bytes.
-
If you need to add authentication token to all the syslog messages, enter the token under Token (optional).
-
You can configure TLS when using TCP transport. To define the certificate, contact Check Point Support.
-
Supported certificate types:
-
CA certificate:
-
Use the CA certificate for our servers to validate the remote server that forwards events.
-
Ensure the certificate includes all necessary components: Root CA, Intermediate Certificates, and Server Certificate, all in .pem format.
-
List the certificates in the following order: Server Certificate, Intermediate Certificates, Root CA.
-
The Common Name (CN) of the server certificate must match the domain or IP address specified in the SIEM configuration.
-
-
Client certificate:
-
Use the Client certificate when the remote server needs to validate the client (our SIEM server) for TLS.
-
The certificate must be in .pem format and include two parts: the client certificate and the unencrypted private key.
-
-
-
Supported Security Events for SIEM
Harmony Email & Collaboration supports to send these security events to the integrated SIEM platforms.
-
Phishing
-
Suspected Phishing
-
User Reported Phishing
-
Malware
-
Suspected Malware
-
Malicious URL
-
Malicious URL Click
-
DLP
-
Anomaly
-
Shadow IT
-
Spam
|
|
Notes:
|
SIEM Integration Field Mapping Reference
This table provides a comprehensive reference for fields that can be mapped during SIEM integrations. Each entry includes the field name and its corresponding description, enabling accurate alignment of data between your security tools and the SIEM platform.
|
Field Name |
Description |
||
|---|---|---|---|
| Event Time | Timestamp when the event occurs. | ||
| Event ID | Unique identifier of the event. | ||
| Entity Type | Type of the entity (for example, security_event). | ||
| Event Subtype | Subtype of the event (for example , shadow_it). | ||
| Customer Domain | Domain of the affected organization. | ||
|
Customer Region |
Region of the customer. | ||
|
OEM |
Security OEM vendor (for example, Check Point). |
||
|
SaaS Product |
SaaS product involved (for example, Google Mail, Office 365 Mail). |
||
|
Severity |
Severity level of the event. |
||
|
Current State |
Current processing state of the event (for example, new, remediated). |
||
|
Event Category |
Category of the event (for example, shadow_it). |
||
|
Description |
Description related to the event. |
||
|
Confidence Level |
Confidence score assigned to the event. |
||
|
Confidence Indicator |
Indicator used for confidence assessment. |
||
|
Sender Address |
Email address of the sender. |
||
|
Matched Security Tool |
Security engine or tool that detected the issue. |
||
|
Policy Rule ID |
ID of the policy rule that triggered the event. |
||
|
User Email |
Email address of the affected user. |
||
|
User Department |
Department of the affected user. |
||
|
User Title |
Title or role of the affected user. |
||
|
User Full Name |
Full name of the affected user. |
||
|
Subject |
Subject of the suspicious email. |
||
|
Malicious URL |
The malicious URL that the user clicked.
|
||
|
Clicking IP |
IP address from which the user accesses the malicious URL.
|
||
|
User Agent |
The user agent string of the device used to access the malicious URL.
|
||
|
Attachment Name |
Name of the file detected as malicious.
|
||
|
Attachment MD5 |
MD5 hash of the malicious attachment.
|
||
|
Verdict |
Security tool verdict for the attachment.
|
||
|
AV Verdict |
Final verdict from AV engine.
|
||
|
Detection Reasons |
Reasons the system detects the issue (for example, text obfuscation, link patterns and more).
|
||
|
Application Domain |
Domain of the detected application.
|
||
|
App Category |
Category of the application (for example, Collaboration, HR Software, Search Engine, Financial, Transcription, Software Source Control, Online Data Storage, Graphic Design, Application Development, Remote Access, Event Management ,File Transfer, Single Sign On, Social Network, Project Management, CRM, Scheduling, Expense Reports, Electronic Signature, Construction Software, Password Keeper, Cloud Computing, Time Tracking).
|
||
|
App Display Name |
User-friendly display name of the application.
|
||
|
App Risk Level |
Risk level assigned to the application.
|
Forwarding Events to AWS S3
Configuring AWS S3 to Receive Harmony Email & Collaboration Logs
-
Go to AWS IAM: https://console.aws.amazon.com/iam/home#/home.
-
 Create a new user.
To create a new user:
-
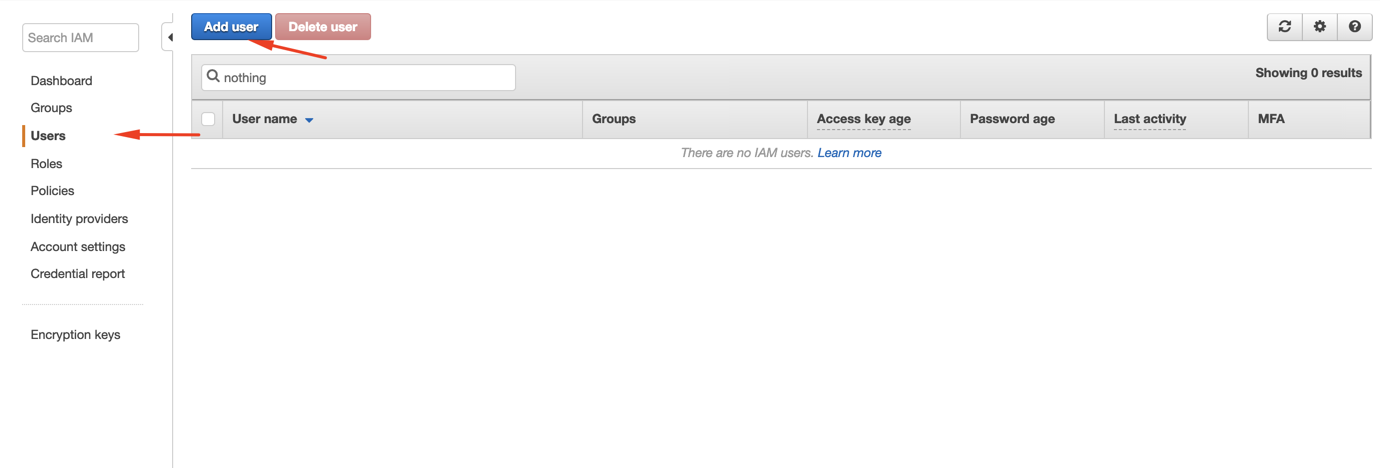
Click on Users > Add user.
-
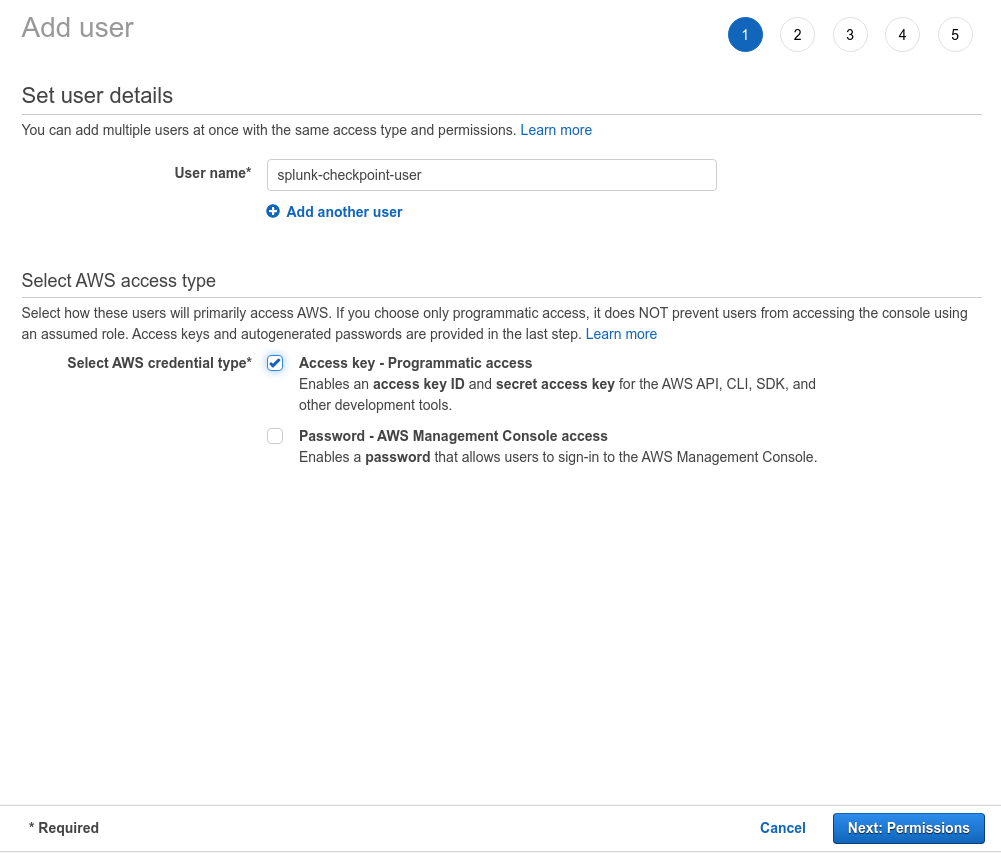
Select a user name, enable Access Type as Programmatic access and click Next: Permissions.
-
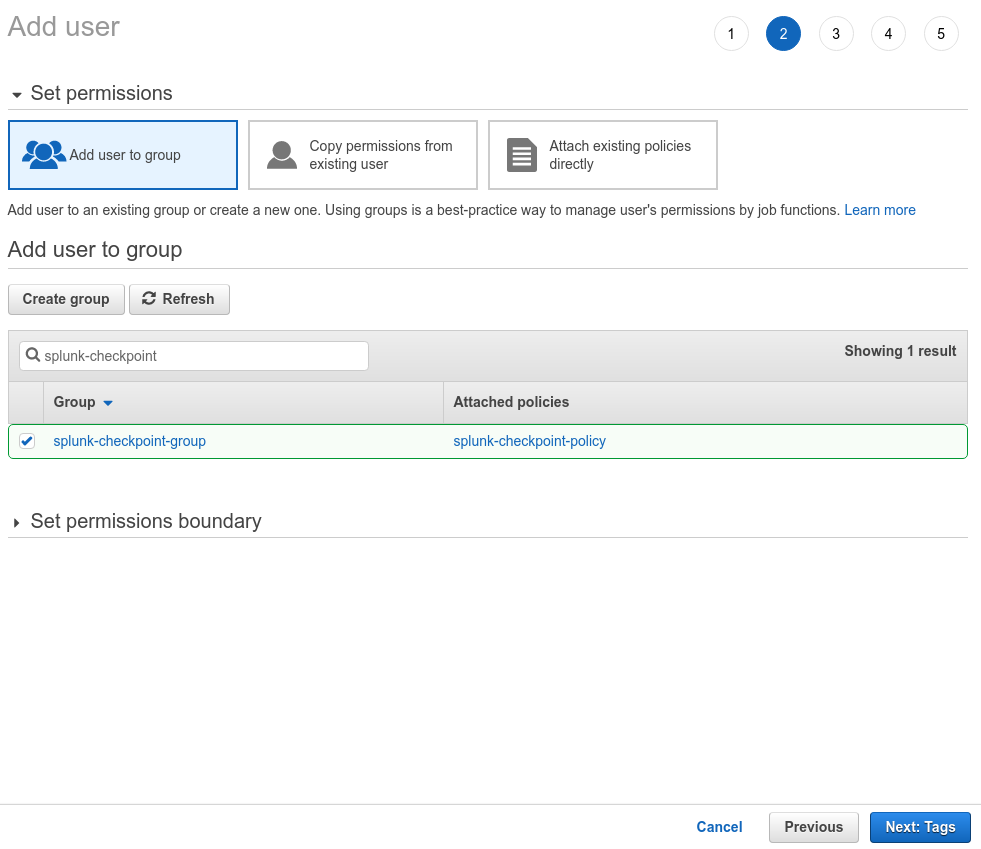
Click Create Group or select the group if already created.
-
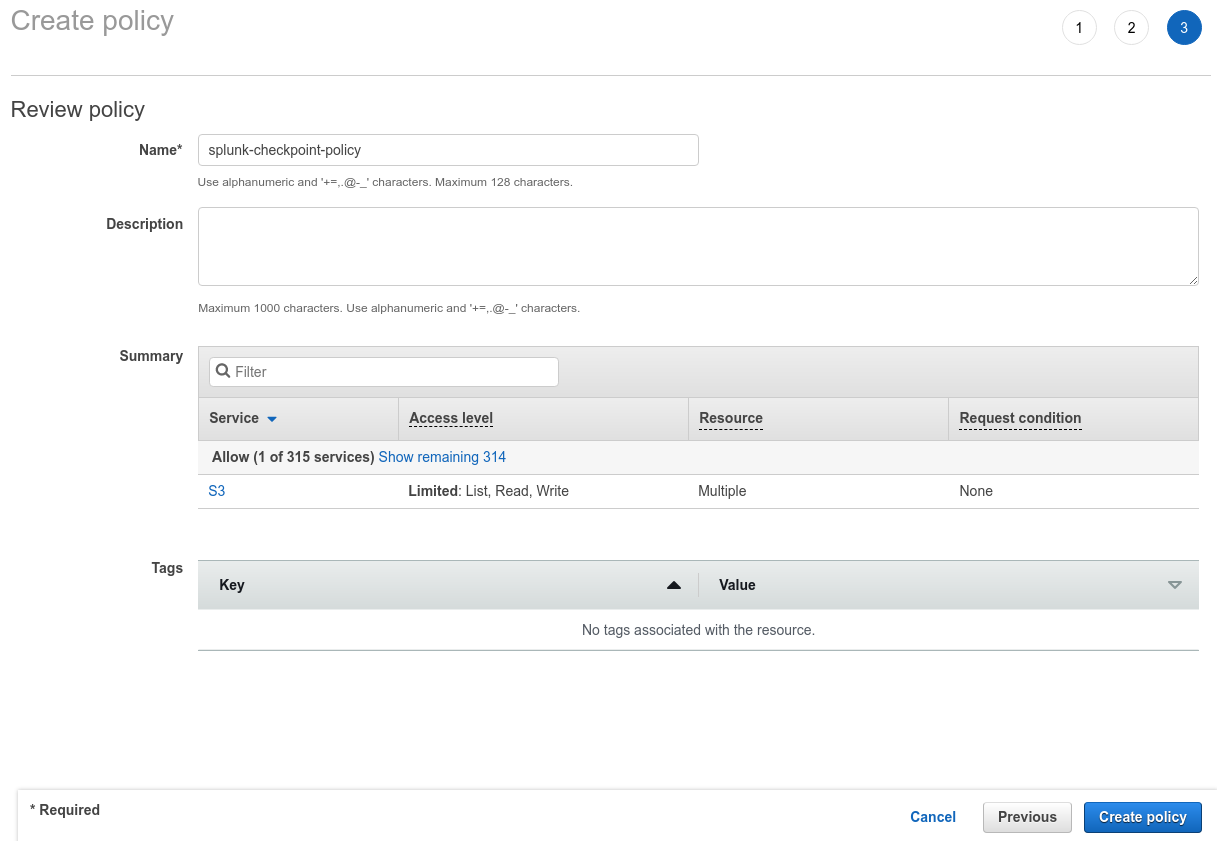
Click Create policy or select the policy if already created.
-
On the new tab, click JSON and copy this over.
Copy{
"Version": "2012-10-17",
"Statement": [
{
"Effect": "Allow",
"Action": [
"s3:ListBucket"
],
"Resource": [
"arn:aws:s3:::YOUR_S3_BUCKET"
]
},
{
"Effect": "Allow",
"Action": [
"s3:GetObject",
"s3:GetObjectAcl",
"s3:PutObject"
],
"Resource": [
"arn:aws:s3:::YOUR_S3_BUCKET/THE_LOG_FOLDER_IF_ANY/*"
]
}
]
} -
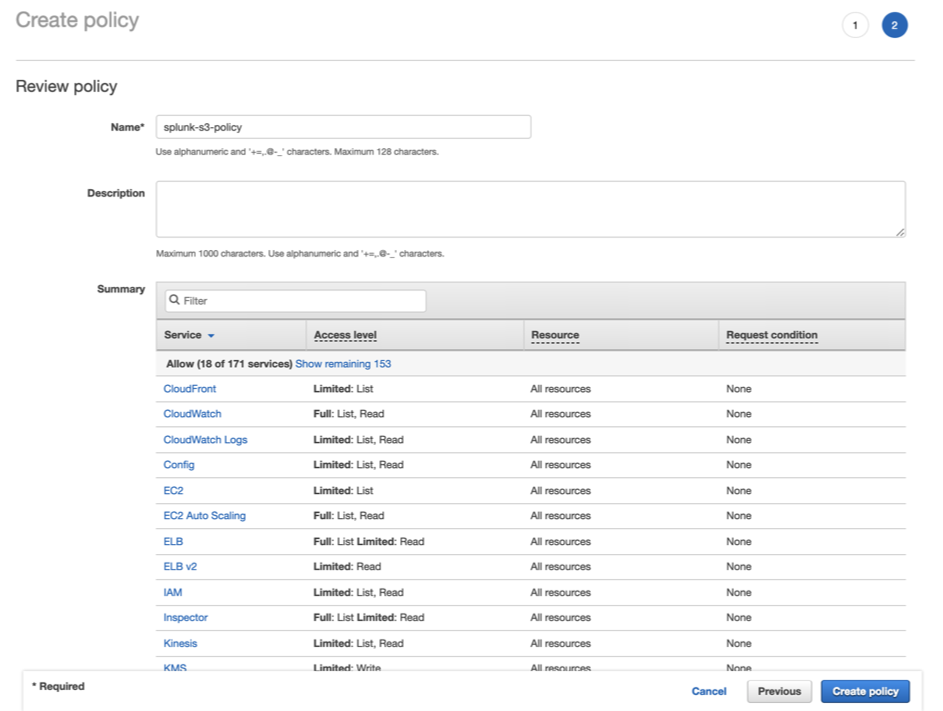
Click on Review Policy and select the policy you just created.
-
Enter the required name to the policy and click Create policy.
-
After the policy is created, go back to the previous tab and click Refresh.
-
On the next screen, select the policy name you created and click Create Policy.
-
Go back to the Add user screen and confirm that the group you created is selected and then click Next: Tags.
- Add the necessary Tags (in accordance with your environment directives) and click Next: Review.
-
Confirm all the configurations and click Create user.
Note - Download the CSV file or copy the Access Key and Secret access key to a safe location. This information won’t be available again.
- Click Close.
-
-
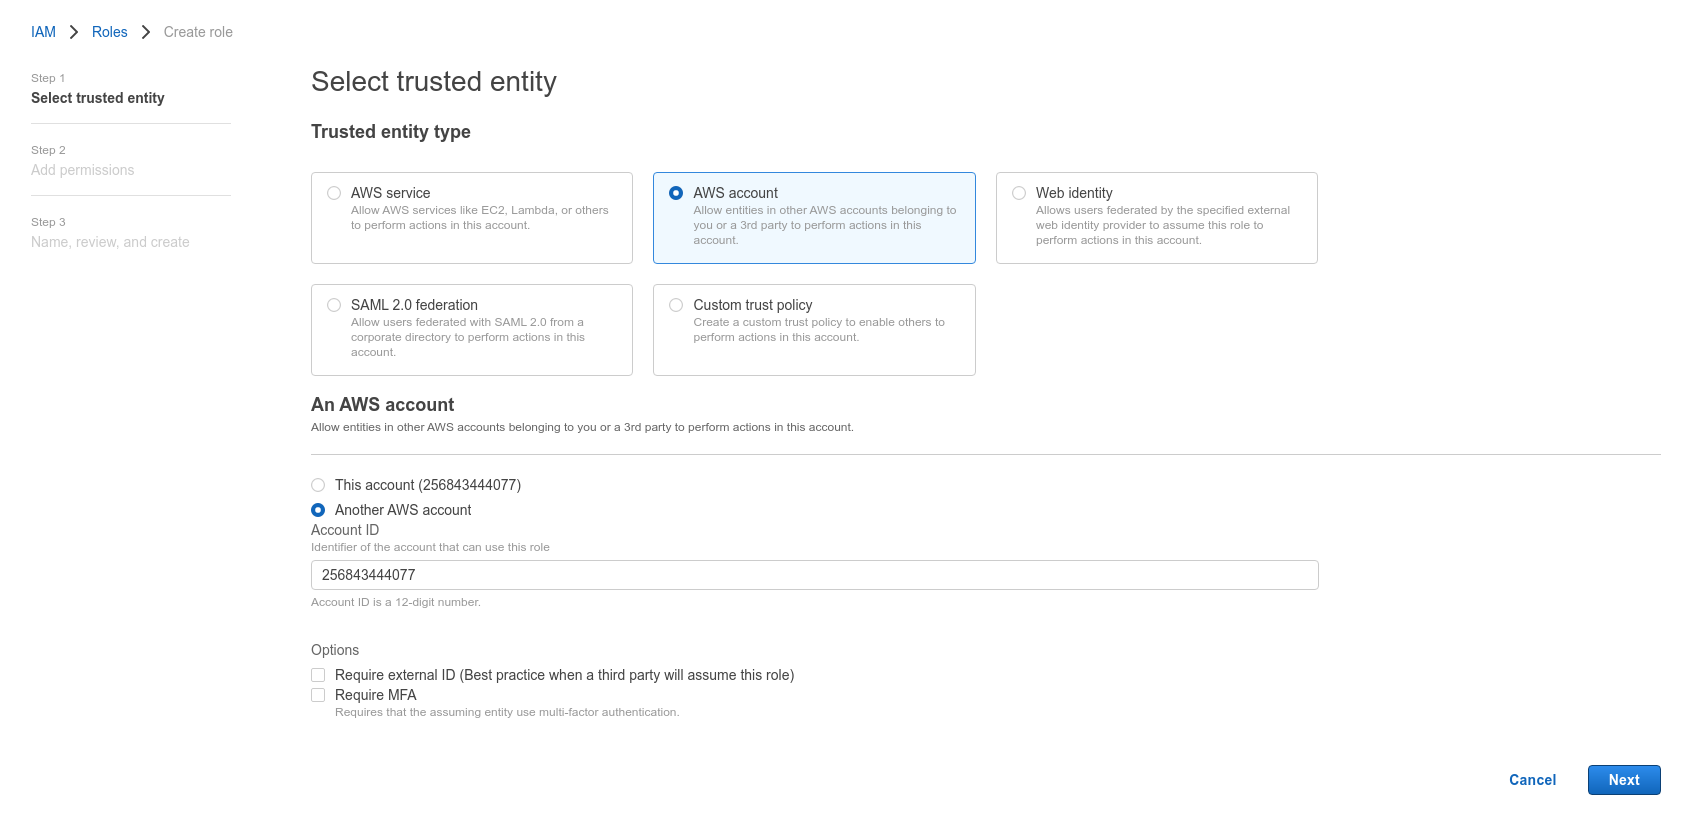
Click Roles > Create role.
-
Select Another AWS Account.
-
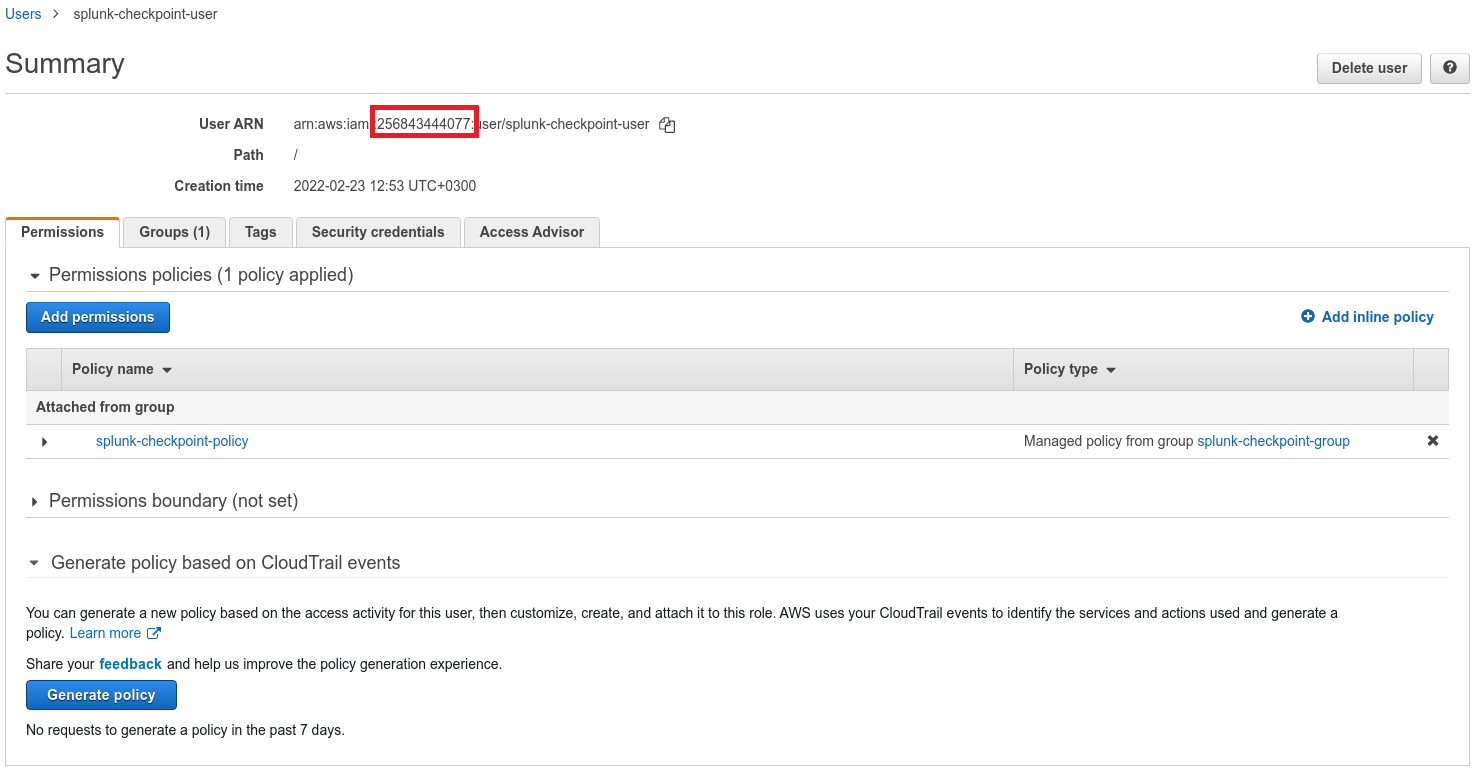
Insert the 12 digit number of the user created in step 2 and click Next: Permissions.
Note - To find the 12 digit number, open the user on another screen.
-
Select the policy created and click Next: Tags.
-
Add the necessary Tags (in accordance with your environment directives), select a role name and click Create Role.
-
Search for the role you created and click on its name.
-
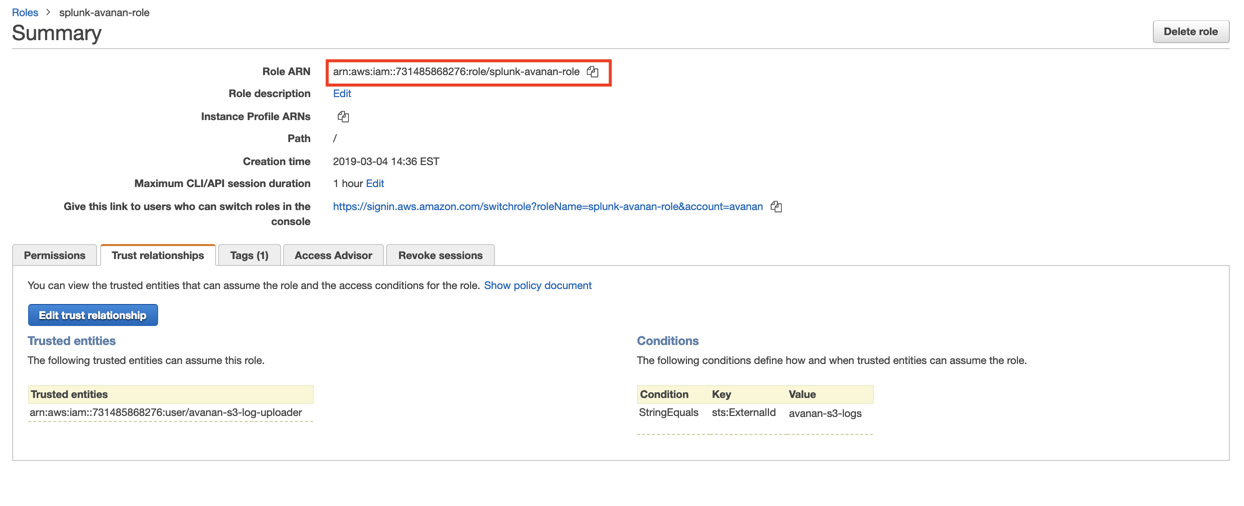
Select Trust relationships and click Edit trust relationship.
-
Copy the following JSON code and click Update Trust Policy.
Copy{
"Version": "2012-10-17",
"Statement": [
{
"Effect": "Allow",
"Principal": {
"AWS": "arn:aws:iam::731485868276:user/checkpoint-s3-log-uploader"
},
"Action": "sts:AssumeRole",
"Condition": {
"StringEquals": {
"sts:ExternalId": "checkpoint-s3-logs"
}
}
}
]
} -
Copy the Role ARN.
Note - This Role ARN is used while configuring SIEM Integration in the Harmony Email & Collaboration.
-
Log in to Harmony Email & Collaboration and complete SIEM integration. For more details, see Configuring SIEM Integration.
Note - After this integration, Harmony Email & Collaboration starts sending the logs to the AWS S3 bucket. You have to configure your SIEM platform to receive logs from the AWS S3 bucket.
Configuring AWS S3 to Send Harmony Email & Collaboration Logs to Splunk
-
Go to AWS IAM: https://console.aws.amazon.com/iam/home#/home.
Note - To limit Harmony Email & Collaboration’s access to your AWS S3 bucket, you have to create a new user, group, policy, and role to use.
-
 Create a new user.
To create a new user:
-
Click Users > Add User.
-
Select a name, enable Programmatic access, and click Next: Permissions.
-
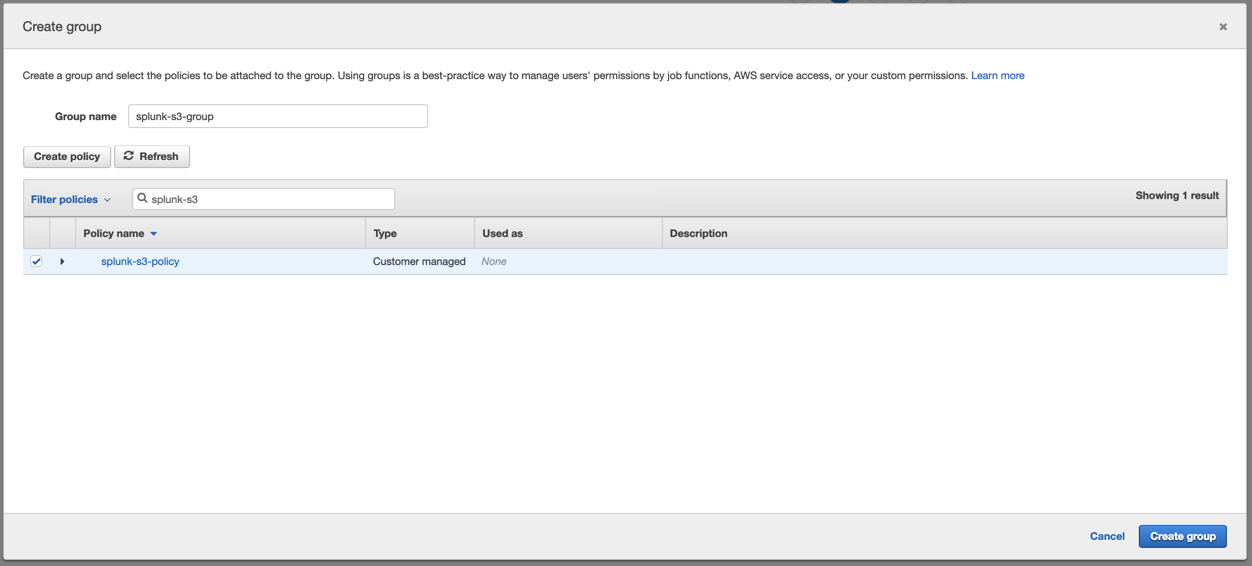
Click Create group or select the group if already created.
-
On the new tab, click JSON and copy this over.
Copy{
"Version": "2012-10-17",
"Statement": [
{
"Effect": "Allow",
"Action": [
"s3:ListBucket",
"s3:GetObject",
"s3:ListAllMyBuckets",
"s3:GetBucketLocation",
"kms:Decrypt"
],
"Resource": "*"
}
]
} -
Click Review Policy, select the policy name and click Create Policy.
-
Go back to the previous tab and click Refresh.
-
Select the policy created, give a group name and click Create group.
-
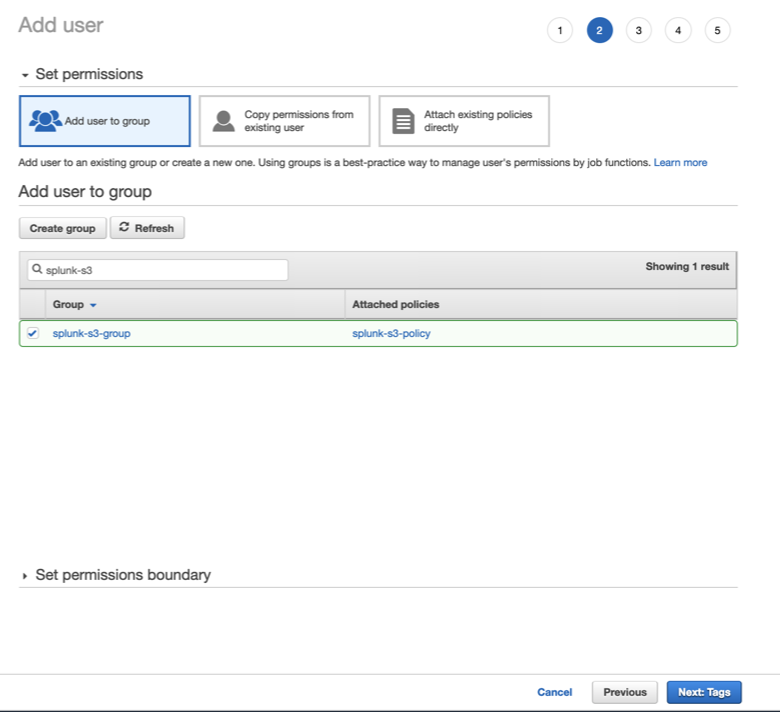
Go back to the Add user screen, confirm that the group you just created is selected and click Next: Tags.
-
Add the necessary Tags (in accordance with your environment directives) and click Next: Review.
-
Confirm all the configurations and click Create user.
Note - Download the CSV file or copy the Access Key and Secret access key to a safe location. This information won’t be available again.
-
Click Close.
-
-
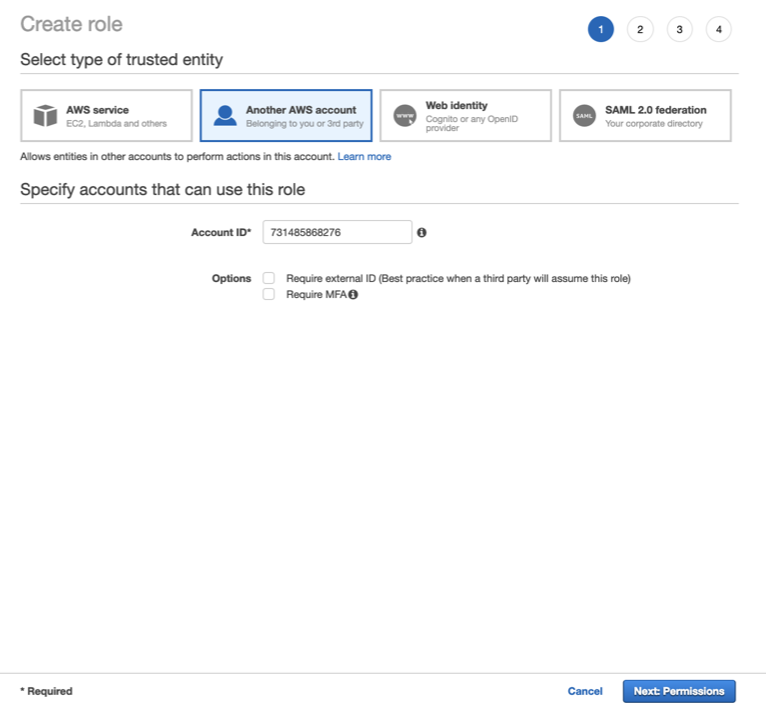
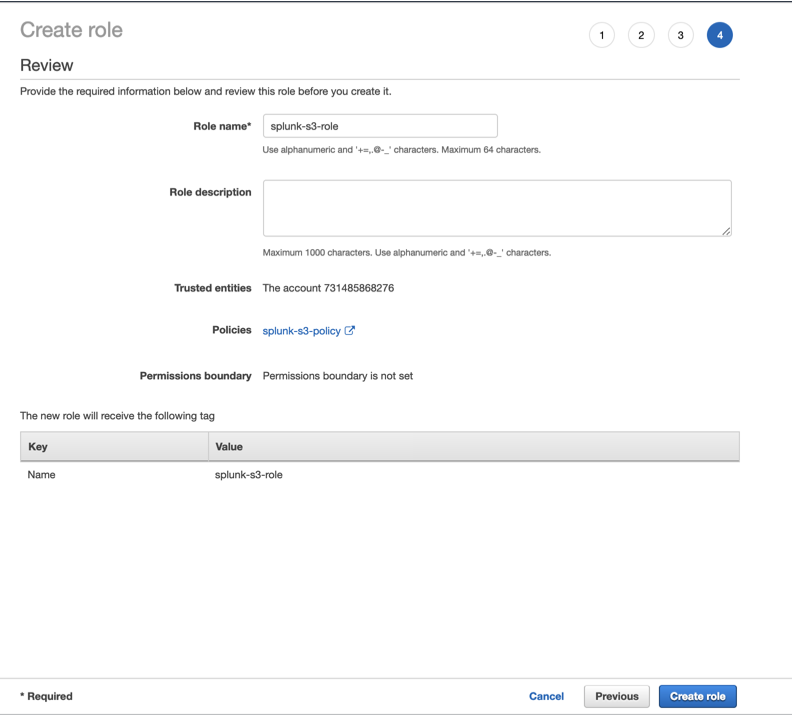
Click Roles > Create Role.
-
Select Another AWS Account.
-
Insert the 12 digit number of your account and click Next: Permissions.
Note - To find the 12 digit number, open the user on another screen.
-
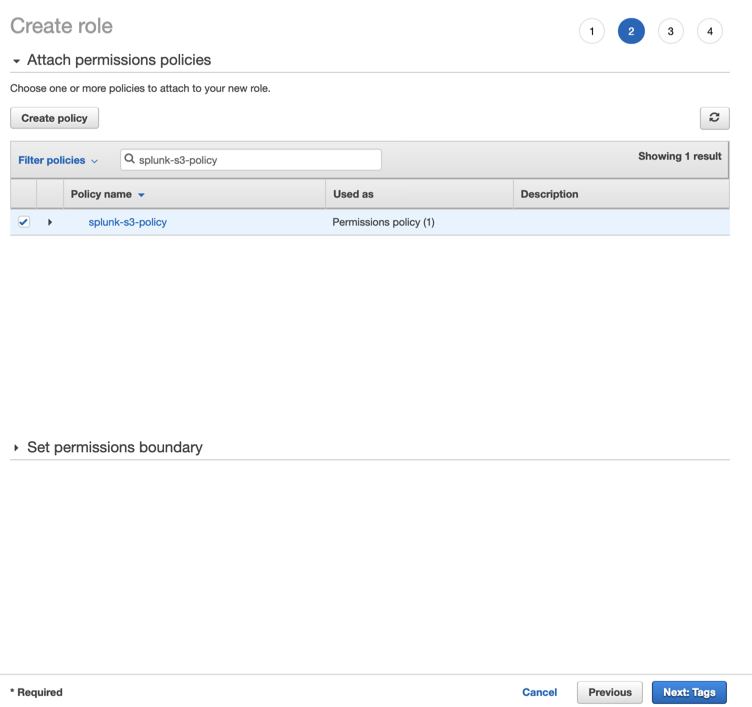
Select the policy created, and click Next: Tags.
-
Add the necessary Tags (in accordance with your environment directives) and click on Next: Review.
-
Select a role name and click Create Role.
-
Search for the role you created and click on its name.
-
Copy the Role ARN.
-
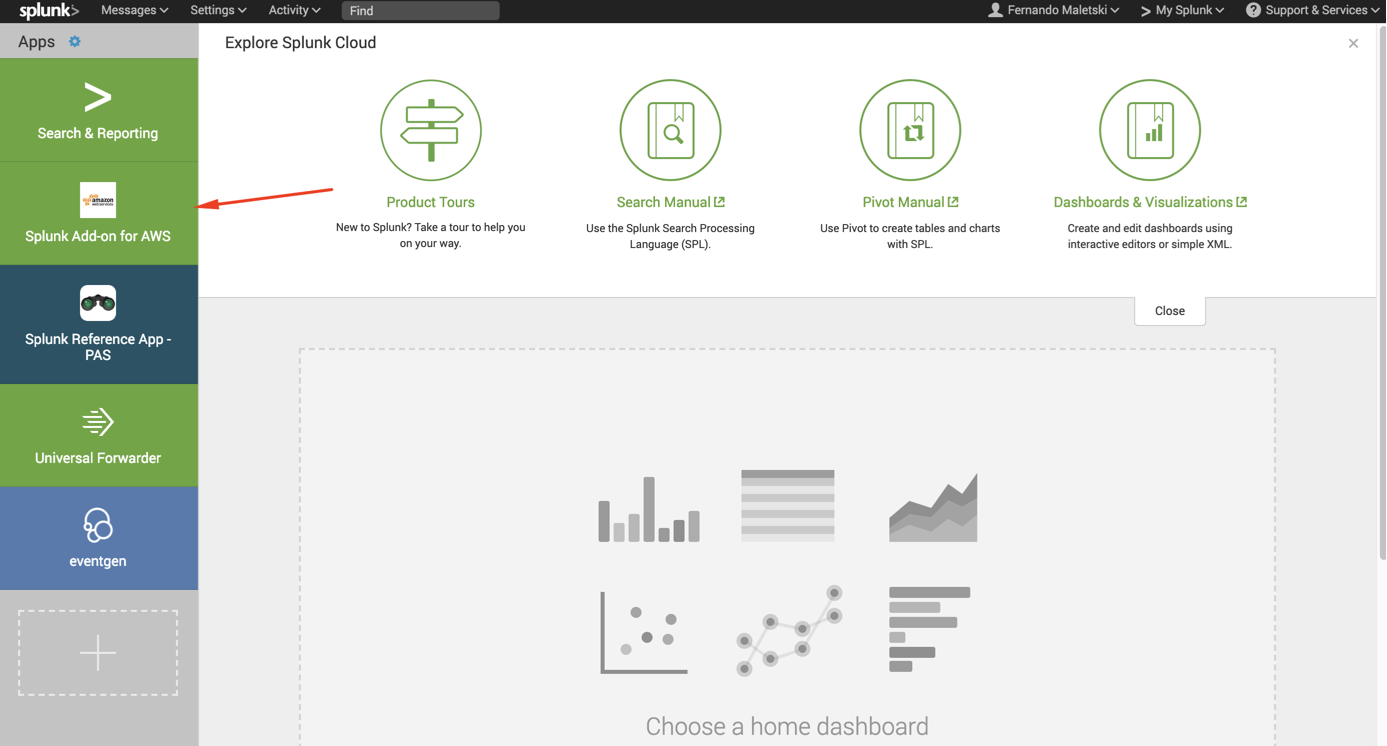
Open Splunk and install the Splunk Add-on for Amazon Web Services, if not already installed.
-
Open Splunk Add-on for AWS.
-
Click Configuration > Account > Add and enter the Key ID and Secret Key generated when the user was created and click Add.
-
Click IAM Role > Add and enter the Role ARN.
-
Click Inputs > Create New Input > Custom Data Type > Generic S3.
-
Select a name for the Input, the AWS Account and the Assume Role you configured above, the S3 Bucket Harmony Email & Collaboration is uploading the logs, a start datetime (ideally, a few minutes before you enabled Splunk on Harmony Email & Collaboration).
-
Under Advanced Settings, set the Polling Interval to 900 s (15 minutes) as Harmony Email & Collaboration uploads the logs every 15 minutes.
Note - By default, Harmony Email & Collaboration uploads the logs even before the polling interval when they reach 5 MB.
-
Click Save.
Now, Splunk reads the logs from the S3 bucket while Harmony Email & Collaboration uploads them to the S3 bucket.
Recommended Configuration for known SIEM Platforms
Harmony Email & Collaboration can integrate with a large number of SIEM platforms.
|
|
Note - If you need help in configuring your SIEM platform to integrate with Harmony Email & Collaboration, contact Check Point Support. |
These are the recommended configuration for some of the SIEM platforms.
|
SIEM Platform |
Transport Method |
Log Format |
|---|---|---|
|
Splunk |
Splunk HTTP Event Collector (HEC)
|
JSON (Splunk HEC/CIM compatible) |
|
Rapid7 |
AWS SQS
|
JSON (Rapid7, <8k characters) |
|
Sumo Logic |
HTTP Collector
|
JSON |
|
Azure Log Workspace |
Azure Log Workspace
|
JSON |
|
LogRhythm |
AWS S3 For the fields required for AWS S3, see Supported Transport methods. If a new S3 Bucket is needed, you should follow specific instructions while configuring the S3 bucket. For more details, see Configuring AWS S3 to Receive Harmony Email & Collaboration Logs. |
JSON |
|
McAfee SIEM |
AWS S3 For the fields required for AWS S3, see Supported Transport methods. If a new S3 Bucket is needed, you should follow specific instructions while configuring the S3 bucket. For more details, see Configuring AWS S3 to Receive Harmony Email & Collaboration Logs. To receive the logs from S3 bucket to McAfee SIEM, refer to Configuration of Amazon S3 upload feature and McAfee Documentation. |
JSON |
|
Other |
Harmony Email & Collaboration can integrate with any SIEM platform. If you need help in configuring your SIEM platform to integrate with Harmony Email & Collaboration, contact Check Point Support. |
|
Configuring Integration with Cortex XSOAR by Palo Alto Networks
Harmony Email & Collaboration allows to integrate with Cortex XSOAR to automatically trigger playbooks based on detected security events and other criteria.
For more information about the integration, see Cortex XSOAR documentation.


