Managing Restore Requests
Quarantine Restore Requests
In the Restore Request page you can view all the requests from users to restore quarantined or clean emails.
You may review the items the users asked to restore by clicking on the subject line, sender and recipient links, as well as reviewing the restore request.
To view Restore Request page, go to User Interaction > Restore Requests.

Requesting a Restore from Quarantine - End-User Experience
Using the link in the email end-users can request to release the quarantined email or attachment if a false positive is suspected.
|
|
Note - This procedure is applicable only when the email is sent to individual recipients or distribution lists. For the procedure to request to restore a quarantined email sent to groups, see Restore Requests for Emails Sent to Groups - End-User Experience. |

-
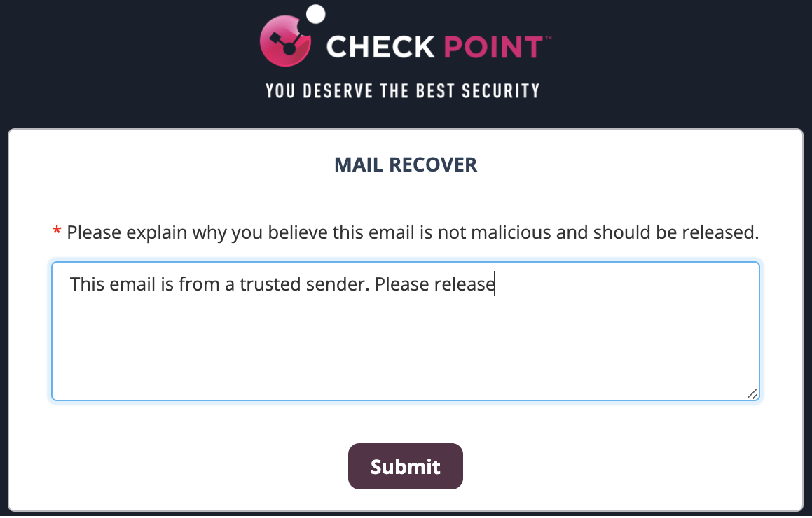
Click on the link in the email you received.
-
Enter the reason for your request to release the email from quarantine and click Submit.

You will receive a notification that the request is sent to the administrator.

-
If the request is approved by the administrator, the original message gets delivered to all the recipients of the restored email.

Restore Requests for Emails Sent to Groups - End-User Experience
This procedure is applicable when these conditions are met:
-
Threat detection policy the email is matched on is in Prevent (Inline) protection mode.
-
Email is sent to groups containing multiple users (not individual recipients or distribution lists).
-
Email is quarantined or its attachments are cleaned.
-
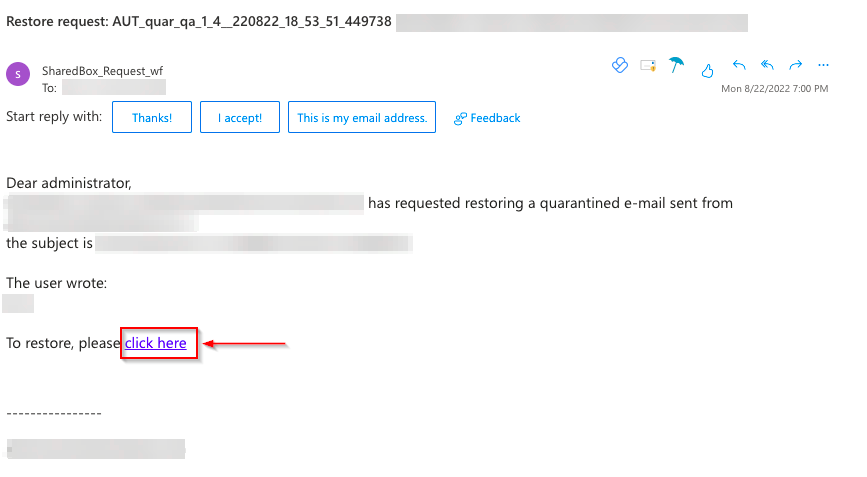
Click on the link in the email notification you received for the quarantined/cleaned email.
-
On the User Verification page, enter your email address and click Submit.
Harmony Email & Collaboration sends a verification code to your email address.
-
Enter the verification code you received and click Submit.
-
Enter the reason for your request to restore the original email and click Submit.
Admin Quarantine Release Process
When the end-user requests to release an email, the administrator is notified via email to the configured Restore requests approver email address. The email contains a direct link to the email profile in the Infinity Portal. The administrator can do a full security review of the malware from the Infinity Portal and can restore the email or decline the release request.

Cleaned Attachments Restore Requests
To view all the user requests currently pending to restore original email attachments:
-
Go to User Interaction > Restore Requests.
-
Select Clean Attachments tab.
|
|
Note - For emails in Office 365 that are quarantined, the senders flagged with a red icon are external users. |
To approve or decline a request, do one of these.
-
Click the
 icon in the last column of the request table and select Send Original/Decline.
 -
To approve or decline multiple requests at a time, select the request and click Send Original/Decline at the top-right corner of the page.
|
|
Note - When the original email is sent, it replaces the previously modified email in the user's mailbox. |
Restoring Quarantined Emails - End-User Experience
After the administrator approves an end-user request to restore an email from quarantine, Harmony Email & Collaboration performs these actions:
-
Removes the quarantine/clean email notifications received for the quarantined email from the end-user mailbox.
-
Adds the original email to the end-user mailbox, where the email received time is the restore time of the email from quarantine, but not the original email sent time.
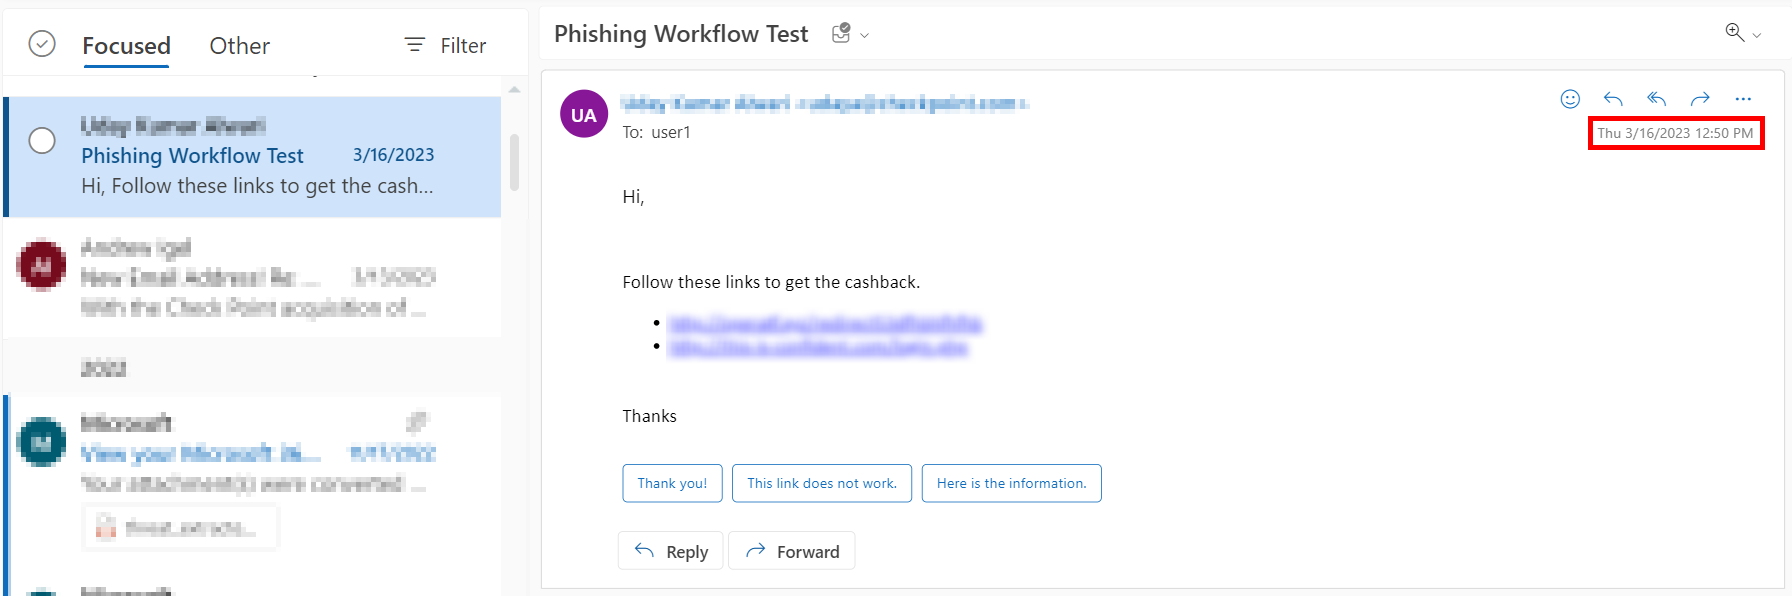
This example shows the initial email received by the end-user.

This example shows the same email received by the end-user after the administrator approved the restore request.
|
|
Note - The initial email received by the end-user is removed and the restored email gets delivered as a new email to the end-user mailbox. The email received time is the restore time of the email by the administrator, but not the original email sent time. |
Who Receives the Emails Restored from Quarantine
-
Emails quarantined by Check Point:
-
Depending on the configured workflow, Harmony Email & Collaboration delivers the email only to the requesting user or to all the original recipients.
-
If the user restores the email without administrator approval, Harmony Email & Collaboration delivers the email only to the requested user.
-
If the administrator releases the email from quarantine, Harmony Email & Collaboration delivers the email to all the original recipients of the email.
-
-
-
Emails quarantined in Microsoft:
-
Harmony Email & Collaboration delivers the restored emails to all the original recipients regardless of whether it is restored by the user or the administrator.
-
Notifying End Users about Rejected Restore Requests
To notify end users when their quarantine restore requests are rejected:
-
Go to Security Settings > User Interaction > Quarantine.
-
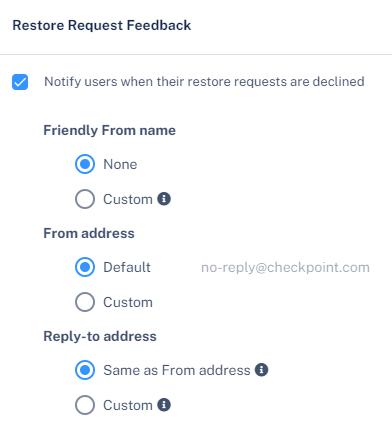
In the Restore Request Feedback section, select the Notify users when their restore requests are declined checkbox.

-
Click Save and Apply.
|
|
Note - This will also enable end user notifications for approved and rejected phishing reports. See Reviewing User Reported Phishing Emails. |
To configure the notification subject and body:
-
Go to Security Settings > SaaS Applications
-
To configure the notification for Office 365 Mail, click Configure for Office 365 Mail.
-
To configure the notification for Gmail, click Configure for Gmail.
-
Scroll-down to Advanced and edit these templates:
-
Decline message subject
-
Decline message body
-