Sync Times with Microsoft
-
If you change the policy protection mode from Monitor Only or Detect and Remediate mode to Prevent (Inline) mode, it takes time to start protecting in Prevent (Inline) mode. It could take up to an hour, depending on the number of protected users in the Email Security account.
-
When adding a user to the scope of a Prevent (inline) policy that is not set to All Users and Groups, it may take up to 1 hour for emails from this user to be inspected inline.
-
When a new user is added to Microsoft 365, administrators can include them in the policy scope within 10 minutes or it might take up to 24 hours.
Enhanced DLP Policy using Microsoft Purview Sensitivity Labels
Email Security allows administrators to define Data Loss Prevention (DLP) policies using Microsoft Purview Sensitivity Labels, enabling effective management of sensitive data shared through emails, messages, attachments or files.
-
Relevant SaaS Applications: Office 365 Mail, OneDrive, SharePoint, and Microsoft Teams.
-
Supported file formats: Emails, DOCX, XLSX, PPTX, PDF.
To define Data Loss Prevention (DLP) policies using Microsoft Purview Sensitivity Labels:
-
Go to Policy.
-
Open an existing DLP policy or create a new one.
-
Go to the DLP Criteria section.
-
Enable the Microsoft sensitivity labels toggle button and from the list, select one of these:
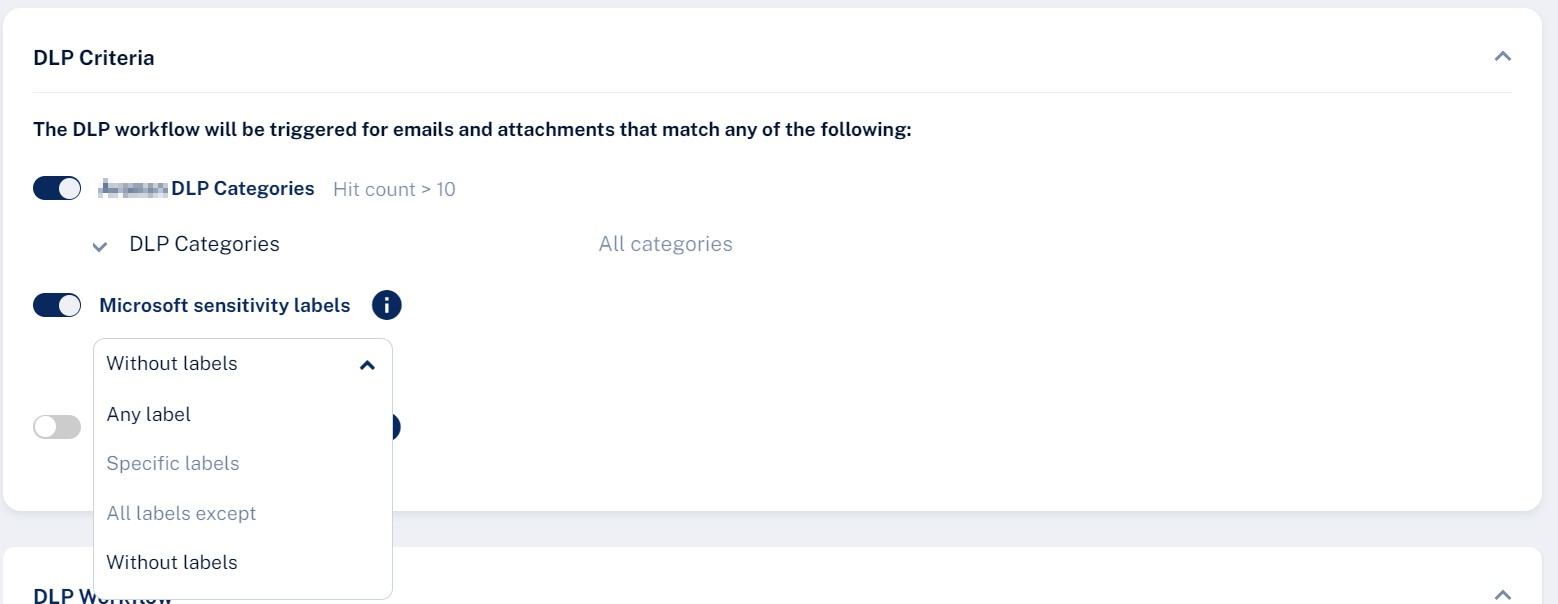
-
Any label
-
Specific labels and then enter the label name
-
All labels except and then enter the label name
-
Without labels

Note - After enabling Microsoft sensitivity labels for the first time, an administrator must reauthorize the
-
-
To include the email and attachment without labels, select the Include emails/attachments without labels checkbox.
-
Click Save and Apply.
Configure DLP Policy with File Type Criteria
You can configure a DLP policy to detect and act on messages that include specific file types as attachments.
To add file type in DLP criteria:
-
Go to Policy.
-
Open an existing DLP policy or create a new one.
-
Go to the DLP Criteria section and enable the File Type toggle button.

-
Enter the required file type and select from the predefined list.
If you select multiple file types, the text box expands accordingly.
Note - When file type criteria are configured, the system updates Send Email Alert To section to include placeholders for the selected file types. This allows administrators to see which file types triggered the alert.
-
Click Save and Apply.
Configuring Misdirected Email Prevention
The Outlook Add-In performs real-time checks during user actions such as Send, Reply, Reply All, and Forward. When a potential risk is detected, the system displays an on-screen warning to the user before the email is sent.
To view the supported devices for the Outlook Add-In, see Outlook Add-In - Supported Outlook Types and Platform.
Misdirected Email Prevention requires a DLP license (either the DLP add-on or the Complete Package).
To configure misdirected email notifications:
-
Access the Email Security Administrator Portal.
-
From the left navigation panel, go to User Interaction > Misdirected Emails.
-
Enable the required categories toggle buttons and click Save Changes. See Misdirected Emails Categories.

Responding to Misdirected Email Warnings in Outlook - End-User Experience
If an administrator has configured the misdirected email notifications in the Outlook Add-In, it performs real-time checks during actions such as Send, Reply, Reply All, and Forward.
When a potential risk is detected, an on-screen warning banner appears in Outlook before any action, allowing a user to review the details.
For more information about the permissions requested during Outlook Add-In sign-in, see Outlook Add-In Permissions.
To respond to a misdirected email:
When the warning banner appears, review the email details shown in the alert.
-
If the information entered is correct, select Send Anyway to proceed.
-
If the suggested correction is correct, select Replace & Send to apply the change and send the email.

This ensures emails are sent to the intended recipients while reducing the risk of accidental data exposure.
Outlook Add-In Processing Message During Email Send
In some cases, when the user clicks Send, Outlook may display the following message:
One or more add-ins couldn’t complete processing your email.
This issue occurs when the user performs another action that moves them away from the message being sent before the Outlook Add-In finishes processing the email.
Examples include:
-
Clicking another email
-
Switching to a different Outlook folder
-
Navigating away from the compose window
-
Changing focus before the add-in completes its processing
When this occurs, Outlook interrupts the send process and prompts the user to select an action, such as Wait or Save as Draft.
Recommended User Action:
The user should click Wait and allow the Email Security Outlook Add-In to complete processing the email before continuing to work in Outlook.
Misdirected Emails Categories
|
Category and Name |
Description |
Enabled by Default? |
|---|---|---|
|
Misdirected Recipients |
||
|
Incorrect Recipient Address |
Notifies users when emailing an external contact for the first time. |
Yes |
|
Lookalike Domain |
Warns users when the recipient’s domain closely resembles a trusted domain. |
Yes |
|
External Contact |
Alerts users when an email address may contain typographical errors. |
No |
|
Incoming Email from External Sender |
Displays alerts for incoming emails (label/description placeholder shown) from external senders. |
No |
|
Fundamentals |
||
|
Sender Domain Created Recently |
Detects emails whose sender domain was created recently. |
No |
|
Reply-to Domain Recently Created |
Detects incoming emails with a reply-to domain that was created recently and differs from the sender domain. |
No |
|
Sender Name Differs from Address |
Detects emails where the display name significantly differs from the actual email address. |
No |
|
Sender SPF Failed |
Detects emails that fail Sender Policy Framework (SPF) authentication. |
No |
|
Impersonation |
||
|
Sender Resembles Internal Employee |
Detects emails from a first-time sender whose display name matches an employee within the organization. |
No |
|
First-time Sender |
Detects emails from senders with whom the recipient has never communicated. |
No |
| Business Email Compromise | ||
| Payroll Information Update Request |
Detects emails requesting payroll information updates from external senders. |
No |
|
Invoice from a New Vendor |
Detects invoices received from vendors with no prior communication history. |
No |
|
Sender Resembles Contact |
Detects email senders that closely resemble, but are not identical to, known contacts. |
No |
|
Request to Update Payment Details |
Detects vendor requests to change payment details. |
No |
|
Financial Transaction Requests |
||
|
Emails with Invoices / POs |
Detects emails that contain payment requests such as invoices or purchase orders. |
No |
| Payment Request via Payment Service | Detects payment requests via third-party services (for example, PayPal or Venmo). | No |
|
Avoiding Inspection |
||
|
Emails with Links to Restricted Resources |
Detects emails that contain links to restricted-access resources. |
No |
|
Emails Appearing to Be from an E-Sign Service |
Detects emails that contain potentially malicious e-signature links. |
No |
Configuring the Maximum Alerts shown to the End Users
When the maximum number of alerts is reached, the system displays only the highest priority alerts to users, based on the prioritized list.
To configure the maximum number of alerts shown to end users:
-
Go to User Interaction > Misdirected Emails.
-
From the Max alerts shown to end user dropdown in the top-right corner, select the required number alerts to display.
-
Click Save Changes.