Configure CloudGuard SSO with Okta
Use the Okta Administrator Dashboard to add an application and view the values that are specific for your organization.
Then you can log in to CloudGuard as a super user, configure SSO![]() Single Sign-On (SSO) - A session/user authentication process that permits a user to enter one name and password in order to access multiple applications. and redirect the login requests to the Okta login page so that your administrative users can log in using SSO.
Single Sign-On (SSO) - A session/user authentication process that permits a user to enter one name and password in order to access multiple applications. and redirect the login requests to the Okta login page so that your administrative users can log in using SSO.
Okta Configuration for SSO
-
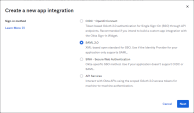
Log in to Okta as an Administrator, go to Applications and click Create App Integration.

The App integration wizard opens.
-
In the Create a new app integration wizard, for the Sign-in method, select SAML 2.0 and click Next.
-
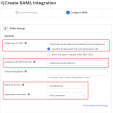
In the General Settings section of the Create SAML Integration window, set these values:
-
App name: Select the app name, for example, CloudGuard
-
App logo: Optionally, upload the CloudGuard logo
-
Make sure to clear the options under App visibility
-
-
Click Next. The Configure SAML page opens.
-
In the General section of SAML Settings, set these values:
-
Single sign on URL: Enter https://secure.dome9.com/sso/saml/yourcompanyname, where yourcompanyname is the Account ID string used in the CloudGuard SSO configuration. Make sure to select the option to Use this for Recipient URL and Destination URL.
-
Audience URI (SP Entity): Enter https://secure.dome9.com
-
Name ID format: Select EmailAddress
-
Application username: Select Okta username
-
Leave default values for Advanced settings
-
-
Click Next.
-
Click Finish.
In your newly created application, complete the configuration of the SAML 2.0 settings.
-
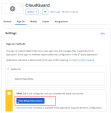
On the Sign On tab of your Application, under Settings, find the SAML 2.0 section and click View Setup Instructions.
The Setup Instructions open in a separate window.
-
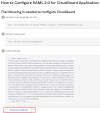
Copy and save for future use the values under 1 and 2: Identity Provider Single Sign-On URL and Identity Provider Issuer.
-
To get the X.509 Certificate under 3, click Download certificate and save the file on your computer.
-
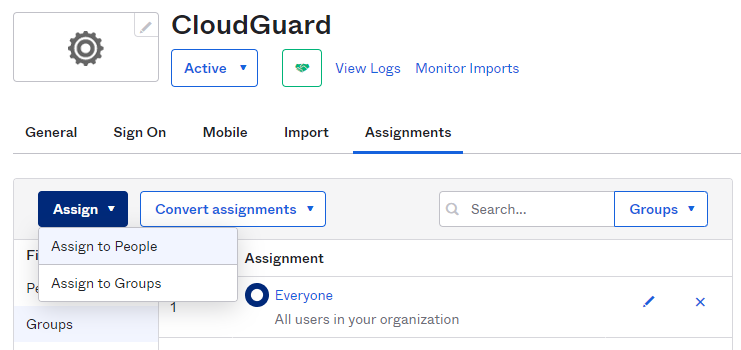
Go back to your application and open the Assignments tab to assign users or groups of users to the application. This enables the users to log in to CloudGuard with SSO.
-
Click Assign and select Assign to People to add individual users or Assign to Groups to add groups of users.
CloudGuard Configuration for SSO
-
Log in to CloudGuard with a super user account.
-
Navigate to Settings > Security & Authentication.
-
In the SSO section, select Enabled.
-
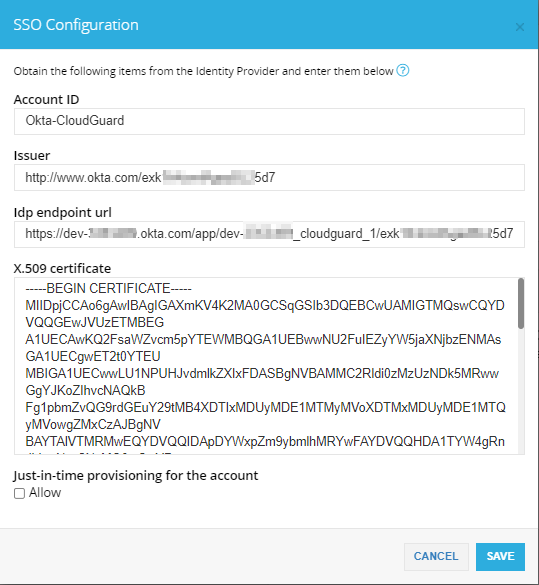
In the SSO Configuration window that opens, enter the below values and click Save.
-
Account ID - enter a name without spaces that can serve as your company name identifier
-
Issuer - enter the URL that you saved from the Setup Instructions, step 9 above, item 2 Identity Provider Issuer
-
Idp endpoint url - enter the URL that you saved from the Setup Instructions, step 9 above, item 1 Identity Provider Single Sign-On URL
-
X.509 certificate - paste the contents of the file that you saved from the Setup Instructions, step 10 above, item 3 X.509 Certificate
-
|
|
Note - SP-initiated flows and IdP-initiated flows are supported. |

