Use Case - Deploying One Security Gateway Using First Time Configuration Wizard
A customer with five Security Gateways needs to deploy one of them.
The Security Gateway has factory default settings in a new location.
Zero Touch![]() Allows users to manage the initial configurations of "Small Office" and "Gaia Gateways" easily and remotely. Settings from the Zero Touch Server replace the First Time Configuration Wizard. The Zero Touch Cloud Service runs a Web Portal and supports REST API. All actions are available through API calls. deployment of Security Gateway with First Time Configuration
Allows users to manage the initial configurations of "Small Office" and "Gaia Gateways" easily and remotely. Settings from the Zero Touch Server replace the First Time Configuration Wizard. The Zero Touch Cloud Service runs a Web Portal and supports REST API. All actions are available through API calls. deployment of Security Gateway with First Time Configuration![]() In Zero Touch, the initial settings for new gateways or for gateways at factory default settings. These initial settings include the gateway's Time Zone, Administrator password, and network settings. Wizard is supported starting from the R80.20 version.
In Zero Touch, the initial settings for new gateways or for gateways at factory default settings. These initial settings include the gateway's Time Zone, Administrator password, and network settings. Wizard is supported starting from the R80.20 version.
For appliances that run the versions R80.20 and R80.30, deployment with the First Time Configuration Wizard is the only supported Zero Touch solution.
Use the Zero Touch Web Portal to fetch settings for one Security Gateway.
Part 1 - Zero Touch Web Portal
-
Connect to the Check Point Zero Touch Portal.
-
Enter your User Center account username (usually an email address) and password.
-
Choose the Account ID for the purchase of the Security Gateway from the drop-down list on the top line of the window.
-
Navigate to the Inventory page to find the Security Gateway's MAC address to identify it.
If this page shows Security Gateways of two types (Gaia Gateway and ), then use the Type action to select Security Gateways only of type Gaia Gateway.

Note - If this page shows Security Gateways of two types - Gaia Gateway and , then use the Type action to select Security Gateways only of type Gaia Gateway.
Example:

-
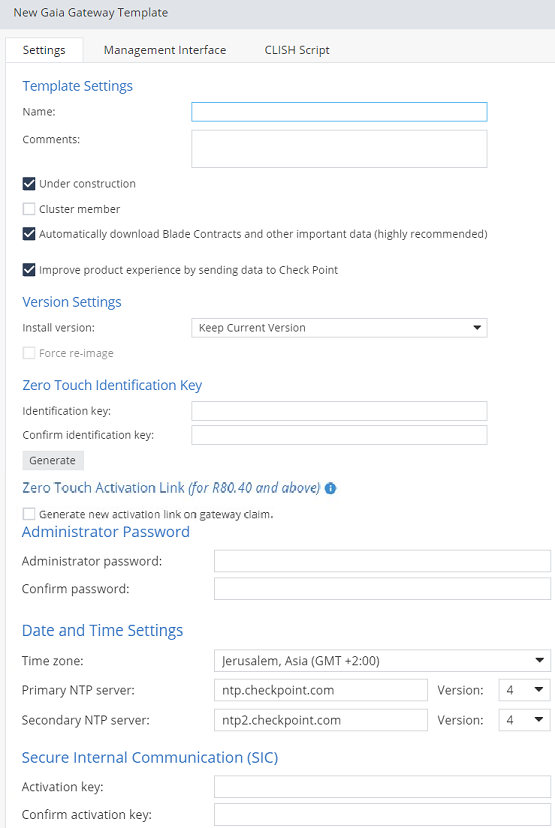
Navigate to the Templates page to create a Gaia Gateway template:
-
Click New > Gaia Gateway.
Example:

-
Complete all the fields in the template form.
-
Select Under construction to prevent the deployment of this template until you make the final changes.
-
Make sure to create or generate a Zero Touch Identification Key.
You use it later on the Security Gateway in the Gaia First Time Configuration Wizard.
Example:
-
-
Navigate to the Inventory page to claim the Security Gateway:
-
Select the Security Gateway.
-
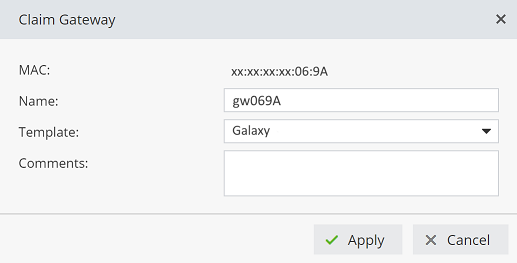
Click Claim.
The Claim Gateway window opens.
Example:

-
-
In the Claim Gateway window:
-
In the Name field, enter a name for the Security Gateway.
-
In the Template field, choose your new template from the drop-down list.
-
In the Comments field, enter an applicable text.
-
Click Apply.
Example:
-
-
Navigate to the Claimed Gateways page:
-
Select the Security Gateway - select the checkbox in the leftmost column.
Example:

-
If it is necessary to configure or change settings, click Edit.
-
Click
 (Actions) > Unmark as Under Construction to start the deployment.
 -
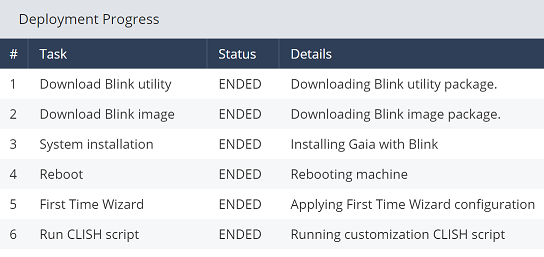
Optional: Select the Security Gateway and click Deployment Progress to see details about the installation.
Note - When you do not use Gaia Fast Deployment
 Placing gateways into business operation with their chosen configurations. Redeployment is the return to factory default settings to deploy again. images and Gaia Clish scripts, the Deployment Progress window shows the tasks First Time Wizard, Reboot, and the Run CLISH script (even if the script is empty).
Example:
-
The Deployment Status column shows Finished when the configuration is complete on the Security Gateway.
-
Part 2 - Security Gateway
Note - This is a separate action which can be performed by another user on the remote site.
-
Connect to Gaia Portal on the deployed Security Gateway.
-
Enter your Gaia login credentials.
-
The Gaia First Time Configuration Wizard starts.
-
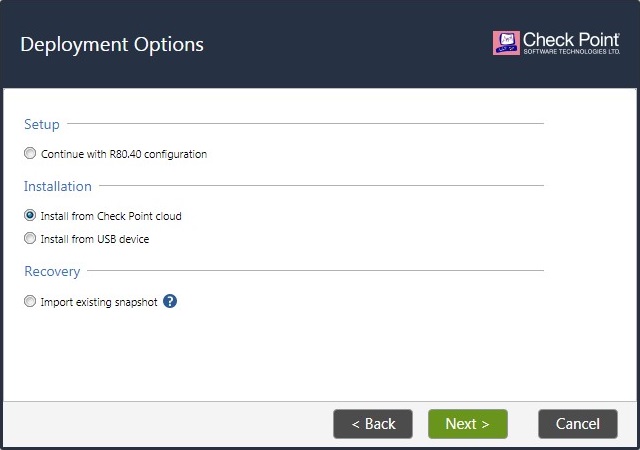
On the Deployment Options page, select the option Install from Check Point cloud and click Next.
Example:
-
On the Connect to Check Point Cloud page, enter the network settings which allow connection to the Internet and click Next.
-
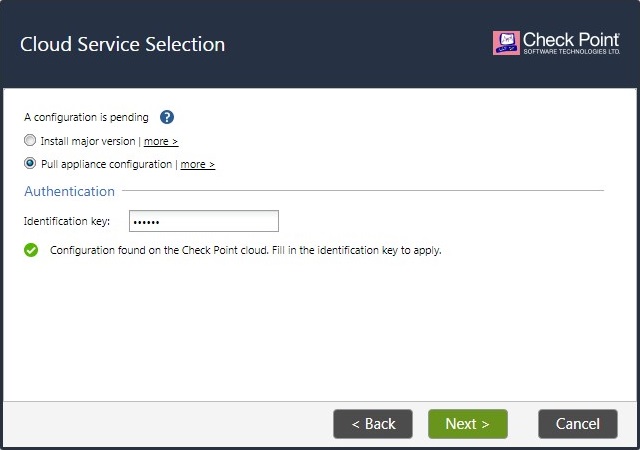
On the Cloud Service Selection page, select the option Pull appliance configuration.
-
In the Identification key field, enter the Zero Touch Identification Key you configured in the Zero Touch template and click Next.
The deployment procedure starts.
Example: