About This Guide
This guide explains how to set up IPsec tunnels and service chain traffic from a VeloCloud appliance to the Check Point Network Security as a Service.
These instructions refer to VeloCloud Orchestrator of version 3.2.0 and above.
It consists of 7 steps:
- Create a Site at Check Point's Infinity Portal
- Create a Site at VeloCloud Orchestrator and receive VeloCloud Cloud Gateway IP address
- Update the IP address at Check Point
- Activate the Site at VeloCloud Orchestrator
- Define routes for traffic from your branch office to Check Point's Network Security as a Service
- Monitor end-to-end traffic with VeloCloud Monitor pages
- Monitor cybersecurity events at the Check Point Infinity Portal
About Check Point Network Security as a Service
Check Point's Network Security as a Service is a cloud security platform that provides Check Point's latest Threat Prevention and Access Control for branch offices. Customers can connect their existing routing equipment or SD-WAN device to Network Security as a Service without additional dedicated hardware by Check Point.
Network Security as a Service is a full software-as-a-service solution, eliminating the need for maintenance by the customer.
Check Point's security product line includes: Preventing known attacks using reputation services, signatures and bot communication prevention, preventing unknown attacks using cloud-based sandboxing, an Access Control policy including Content Awareness, HTTPS Inspection and Application Control, and a web-based management for security events and log monitoring, policy and site configuration.
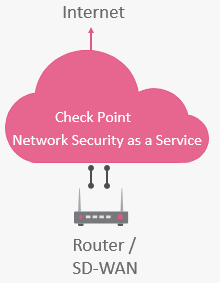
Figure 1: Check Point's Network Security as a Service.
About VeloCloud
VMware SD-WAN by VeloCloud simplifies branch WAN networking by automating deployment and improving performance over private, broadband Internet and LTE links for today’s increasingly distributed enterprises, as well as service providers.
VMware SD-WAN by VeloCloud is built on the principles and flexibility of SDN, and expands VMware’s virtualization vision and networking portfolio even further to address end-to-end automation, application continuity, branch transformation, and security from the data center to cloud to the edge.
Create a Site at Check Point's Infinity Portal
Protecting sites with IPsec tunnels
Sign in to the Check Point Infinity Portal at https://portal.checkpoint.com/signin/cloudguardnsaas
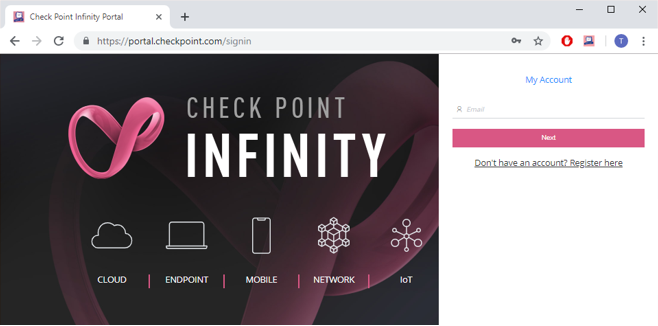
Figure 2: Check Point Infinity Portal sign-in page.
If you don't have an account yet, you can register for one.
Note: Upon registration, make sure that the "Network" sign is colored in Pink and that the text says Create your Infinity account to access Network Security as a Service, otherwise you might end up subscribing to a different security product.
Network Security as a Service is dependent on a purchased software license. For more about licensing, contact your Check Point Sales representative, or check for updates at Check Point’s User Community.
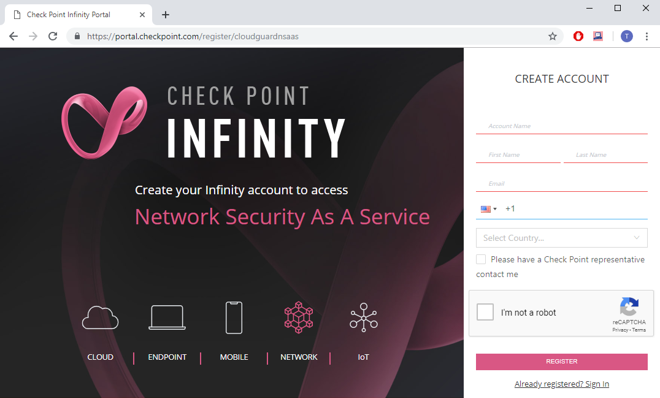
Figure 3: Registering a new account for Network Security as a Service. It is important to notice that the name of the application on the left side says Network Security as a Service.
Once you are logged into the Check Point Infinity Portal, make sure that you are currently looking at the Network Security as a Service application.

Figure 4: The title says Network Security as a Service.
If the title says a name of a different application, click the application switcher icon at the top-left corner (
 ) and select Network Security as a Service.
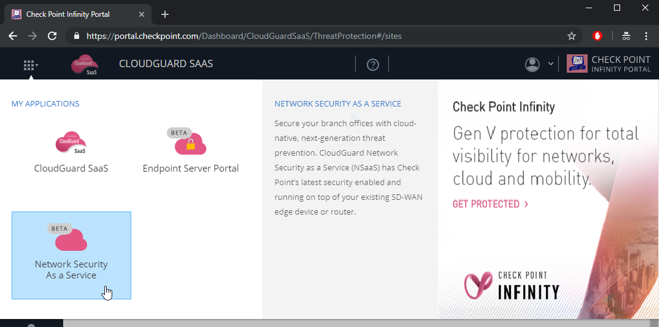
Figure 5: Changing between different applications at the Check Point Infinity portal to Network Security as a Service.
Navigate to Sites.
The Sites screen displays.
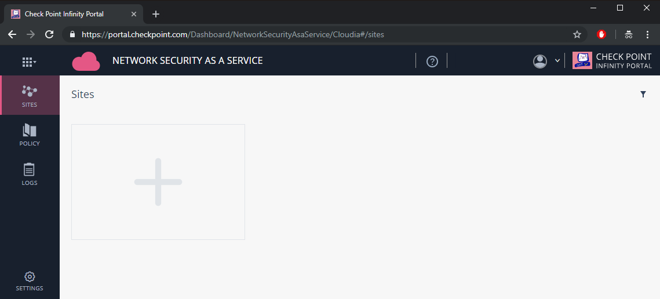
Figure 6: Create a Check Point site.
Select the + button to create a new site.
• A site represents your VeloCloud Cloud Gateway.
The CREATE NEW SITE screen displays.
- In the Site Name field, enter a name for the Site.
- In the Location of the cloud service field, select a location that suits your site. Check Point's Network Security as a Service inspects traffic from your branch office to the Internet with a cloud service that resides in one of these locations. So typically you would want to select the location of the cloud service with an option that is closest to the location of your site, in order to achieve the best performance. For some countries, most notably South America or the Middle East, the best choice for Location of the cloud service might be presence of a strong cross-country Internet link.
In the Comments field, enter an optional description of the site.
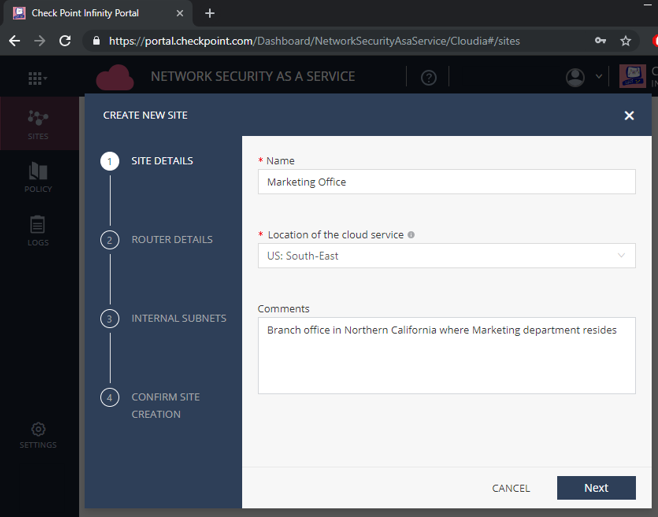
Figure 7: Configuring Site Details.
- Click Next.
- For the purpose of this guide we will choose IPsec – Pre-Shared Key as Tunnel Type.
In the External IP field, define a random valid IP address. In the later steps, we will create a configuration at the VeloCloud Orchestrator and only then edit this site and change the External IP to the desired external IP address of the VeloCloud Cloud Gateway.
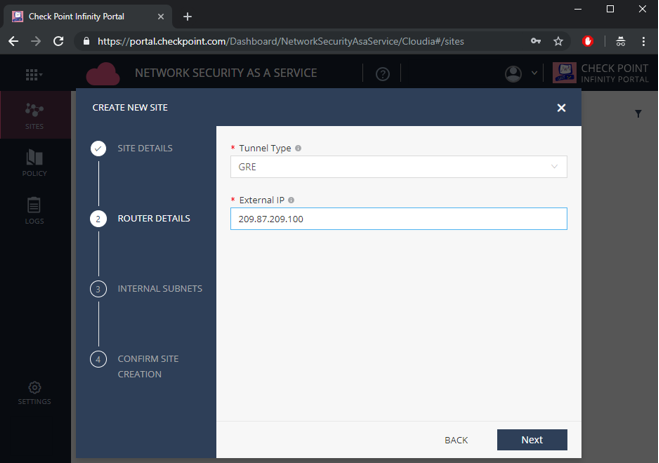
Figure 8: Configuring Router Details.
- Click Next.
In the Internal Subnets page, enter the IP address of your internal networks in the branch office site.
Check Point's Network Security as a Service applies its cybersecurity features on any traffic coming from these network addresses.
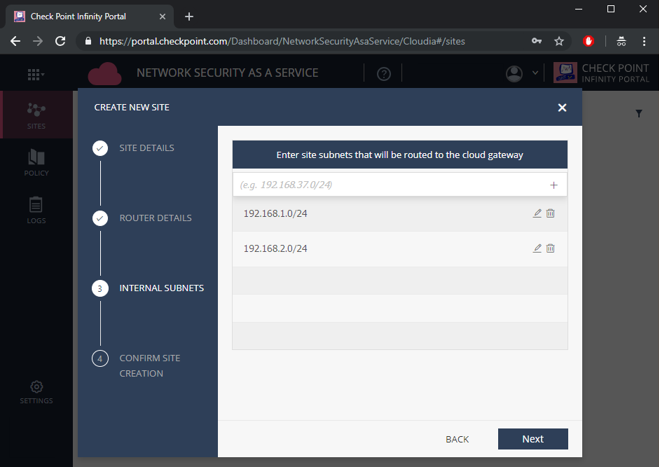
Figure 9: Configuring site internal subnets.
Click Next.
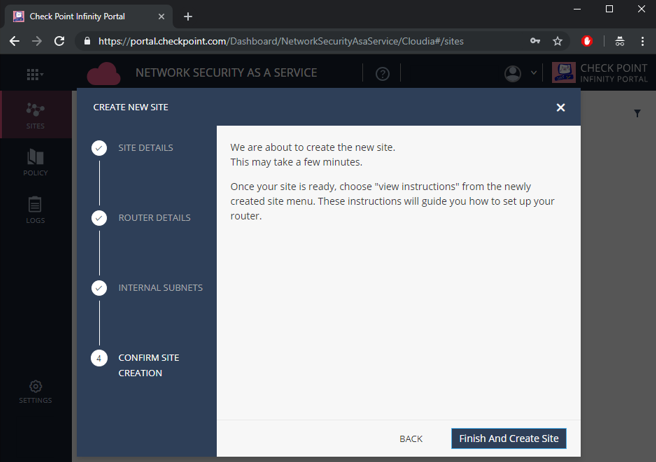
Figure 10: Confirm Site Creation step.
Select Finish and Create Site.
Check Point might take a few minutes to create the site.
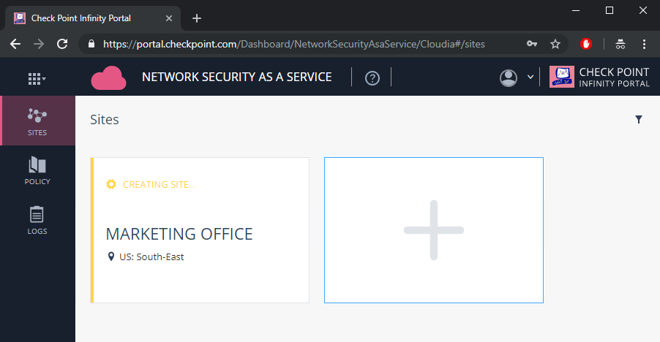
Figure 11: Site is being created.
Configure your router or SD-WAN device to route traffic through Check Point Network Security as a Service
- Select the card that represents your site.
Select Menu > View Instructions.
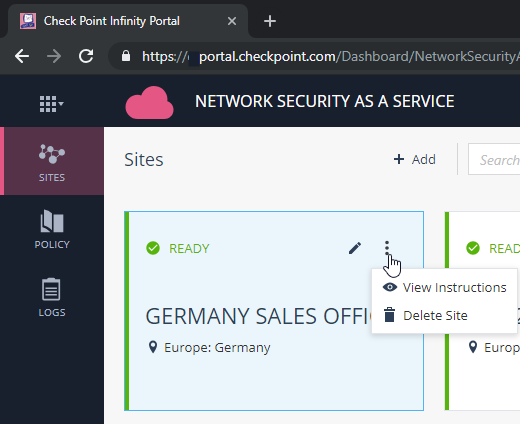
Figure 12: Get to Site Instructions.
Get the IPsec configuration properties, pre-shared key, tunnel addresses, and the traffic routes by viewing the instructions.
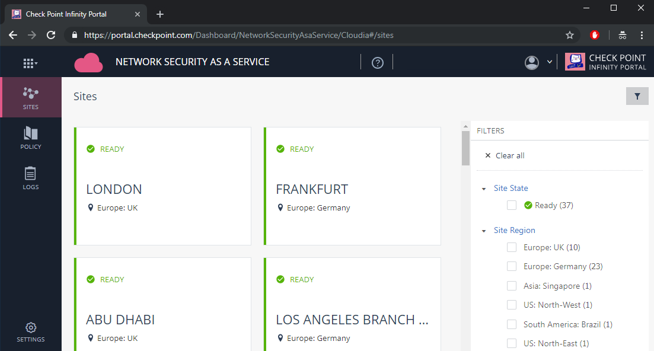
Figure 13: Check Point sites.
Get the IP address of the IPsec tunnel.
Check Point's IPsec tunnel addresses are FQDN domains. For VeloCloud, you will need to get the IP address of the tunnel. We will use this IP in the next step:
nslookup <Check Point cloud tunnel #1>
nslookup <Check Point cloud tunnel #1> The current values are:Note: Check Point by default does not guarantee preservation of the IP address behind its tunnel addresses. In case you need to use fixed IP addresses of the Check Point tunnels in production, please open a support ticket to Check Point with the current tunnel destination address. Fixed IP addresses are not available for trial customers.
Create a Site at VeloCloud Orchestrator
Create a Check Point connection
Log into VeloCloud Orchestrator.
- Navigate to Configure > Network Services.
- Scroll down to Non-VeloCloud Sites.
Click on New...
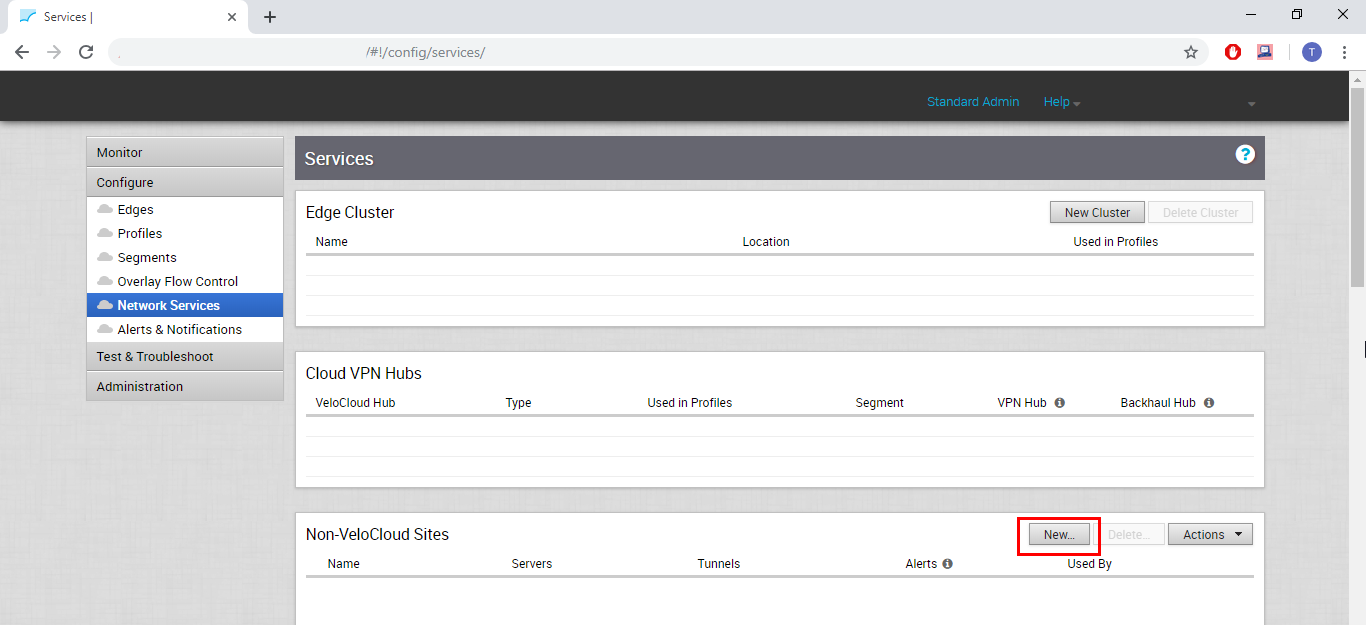
Figure 14: Non-VeloCloud Sites section at VeloCloud Orchestrator.
- Name should be an alias for this tunnel. In this case, we will name it to_check_point.
- Type should be Generic IKEv1 Router.
- Primary VPN Gateway should be the current IP address of your first tunnel from the previous section.
- Secondary VPN Gateway should be the current IP address of your second tunnel from the previous section.
Click Next.
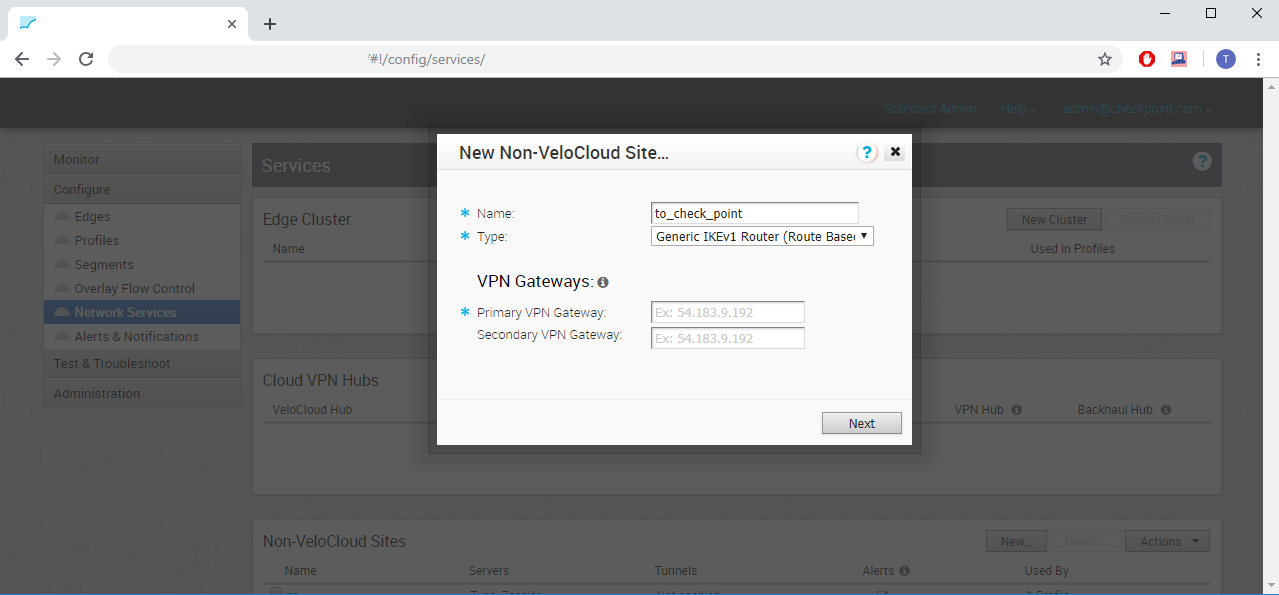
Figure 15: Configuring Check Point as a Non-VeloCloud Site.
Configure additional settings for the Check Point Service.
- Enable Tunnel(s) should be checked.
- Authentication should be set to None.
- Disable Site Subnets should be checked. This means that Internet access is protected by Check Point.
Click Next.
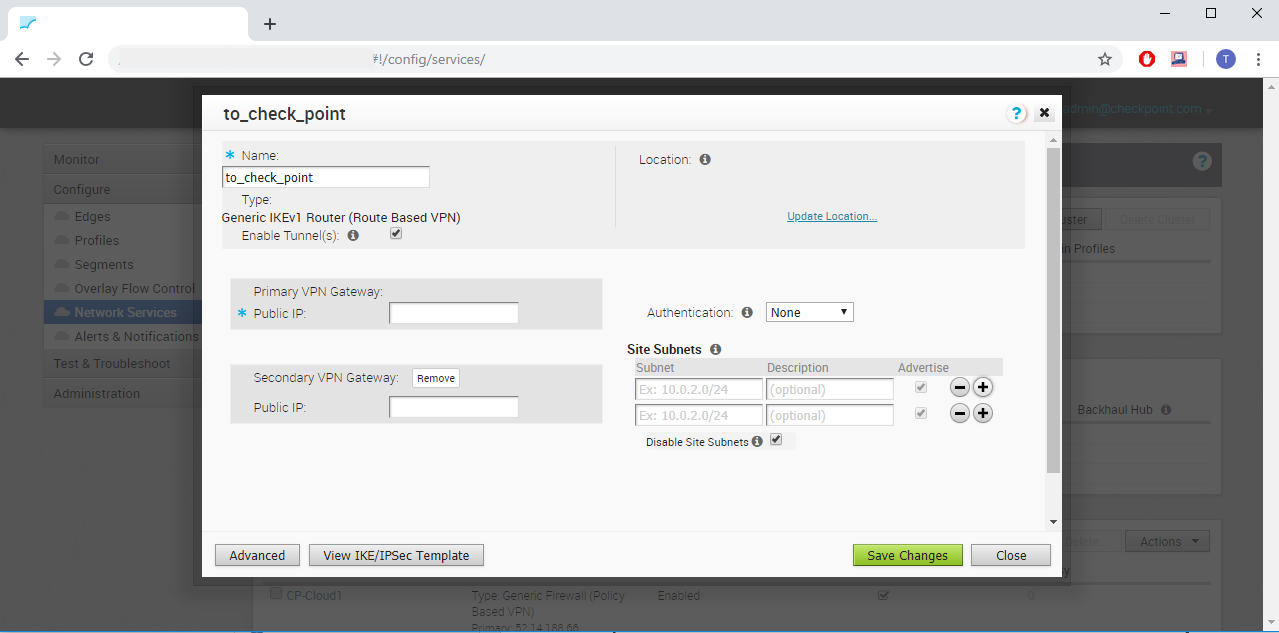
Figure 16: VeloCloud Non-VeloCloud Site additional settings.
Edit the advanced settings
Set the Tunnel Settings for Primary VPN Gateway:
- PSK should be set to the Pre-Shared Key from the Check Point instructions at the previous steps.
- Encryption should be set to AES 256.
- DH Group should be set to 2.
- FPS should be set to disabled.
Set the Tunnel Settings for Secondary VPN Gateway:
- PSK should be set to the Pre-Shared Key from the Check Point instructions at the previous steps.
- Encryption should be set to AES 256.
- DH Group should be set to 2.
- FPS should be set to disabled.
- Redundant VeloCloud Cloud VPN should be unchecked.
Click Save Changes.
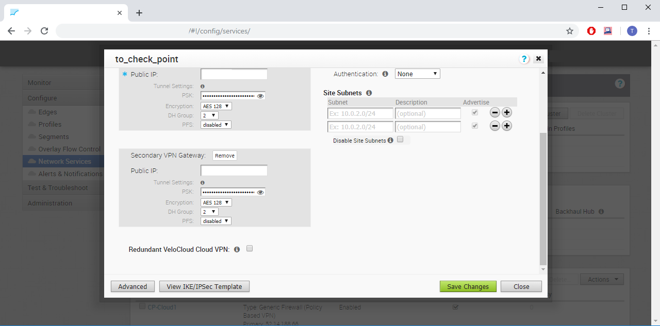
Figure 17: VeloCloud Non-VeloCloud Site advanced settings.
- Click View IKE/IPsec Template to go over command-line description of your settings so far.
- Copy the IP address of the VeloCloud Gateway. We will use this IP address at Check Point in the later steps.
- Click Close.
- Your Check Point configuration should appear under Non-VeloCloud Sites.
Update the IP address at Check Point
Return to Check Point Infinity Portal.
- Navigate to Sites.
- Edit your Check Point Site.
- Navigate to Router Details.
- Set the External IP to the IP address of the VeloCloud Gateway from the previous section.
Click Apply.
Check Point might take a couple minutes to update the IP address of the site.
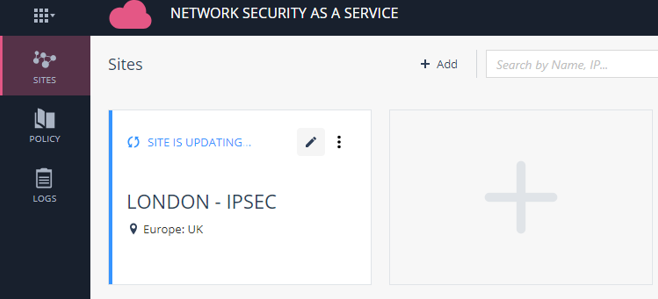
Figure 18: Site configuration is being updated.
Activate the Site at VeloCloud Orchestrator
Return to VeloCloud Orchestrator.
- Navigate to Configure > Profiles.
- Click the Profile which relates to the VeloCloud Edges you would like to connect to Check Point’s Network Security as a Service. We will edit this profile and set it to use the Non-VeloCloud Site that we configured in the previous sections.
- Navigate to Device.
Scroll down to the Cloud VPN section, and edit the following at the Branch to non-VeloCloud Site:
- Select the Check Point Non-VeloCloud Site that you configured in the previous sections.
- Enable should be checked.
- Cloud VPN should be checked.
Click Save Changes.
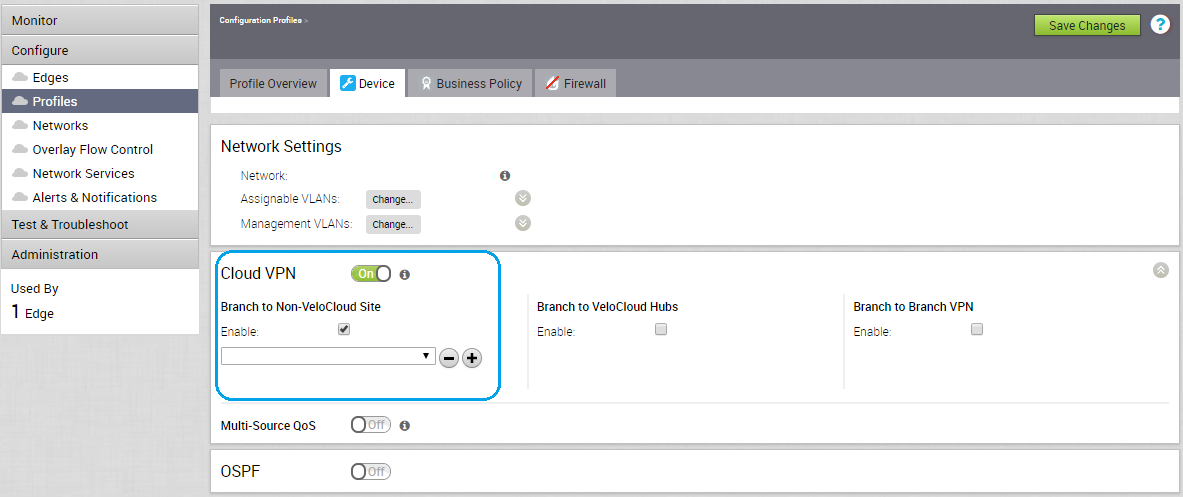
Figure 19: Enabling Cloud VPN and setting the Check Point Non-VeloCloud Site.
Test the tunnel status
- Navigate to Monitor > Network Services
Locate your Check Point configuration under Non-VeloCloud Sites. Check its Tunnel Status and events.
Note: It takes several minutes for the changes from the previous steps to get applied.
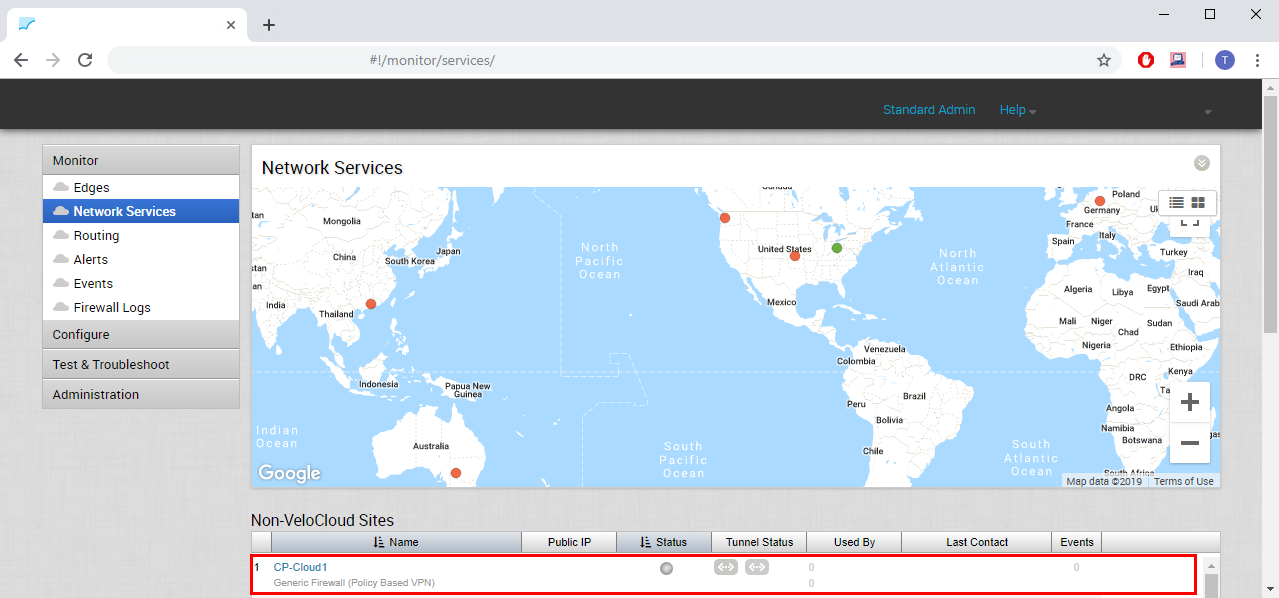
Figure 20: Waiting for Tunnel Status.
Define routes for traffic from your branch office to Check Point's Network Security as a Service
Continue the following steps at the VeloCloud Orchestrator:
- Navigate to Configure > Profiles.
- Click the Profile which relates to the VeloCloud Edges.
- Navigate to Business Policy.
Click New Rule...

Figure 21: Business Policy.
Define a rule:
- Name should be a short description of the rule, such as Traffic to Check Point.
- Destination should be set to Internet.
- Scroll down to Action.
- Network Service should be set to Internet Backhaul.
- Non-VeloCloud Site should be checked.
- Select the Check Point Site that you defined as a non-VeloCloud site in the previous sections.
- NAT should be disabled.
- Click OK.
Click Save Changes.
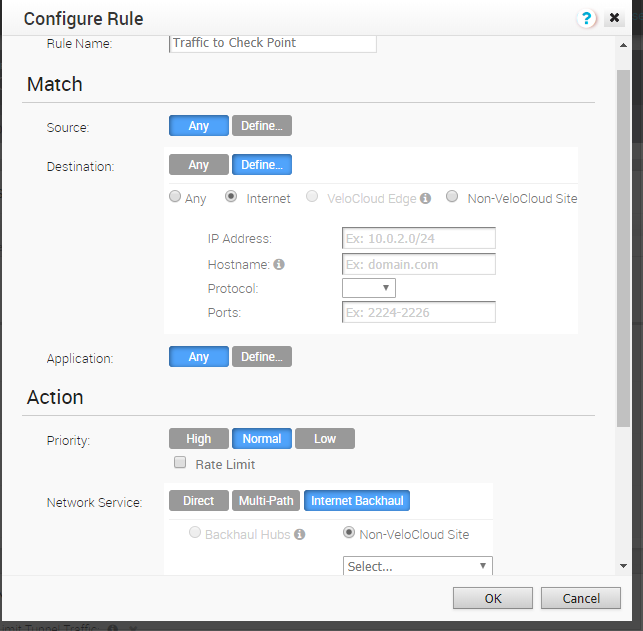
Figure 22: Configure Business Policy Rule
Monitor end-to-end traffic with VeloCloud Monitor pages
- Send traffic from behind your Site into the Internet.
- Navigate to Monitor > Edges
- Click the Edge where you sent the traffic from.
- Check that the traffic is displayed.
Monitor Cybersecurity Events at the Check Point Infinity Portal
In the previous step we confirmed that end-to-end connectivity is working as expected. In this step we will observe which attacks were prevented by Check Point’s various cybersecurity engines.
Sign in to the Check Point Infinity Portal at https://portal.checkpoint.com/signin/cloudguardnsaas
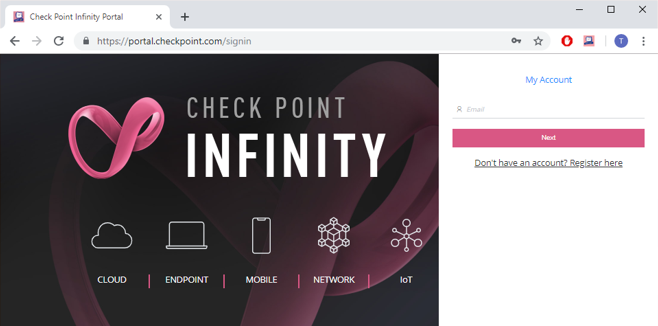
Figure 23: Check Point Infinity Portal.
Once you are logged into the Check Point Infinity Portal, make sure that you are currently looking at the Network Security as a Service application.

Figure 24: The title says Network Security as a Service.
If the title says a name of a different application, click the application switcher icon at the top-left corner (
 ) and select Network Security as a Service.
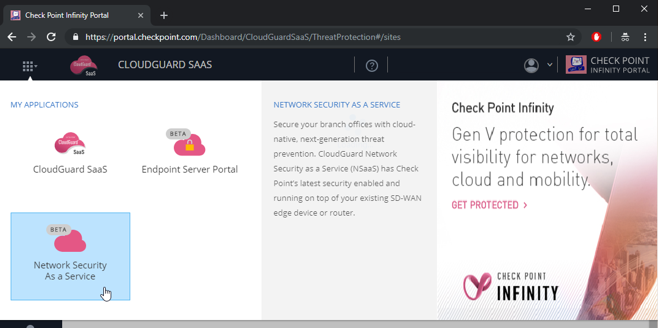
Figure 25: Changing between different applications at the Check Point Infinity portal to Network Security as a Service.
Navigate to Logs.
The Logs screen displays with 4 different tabs.
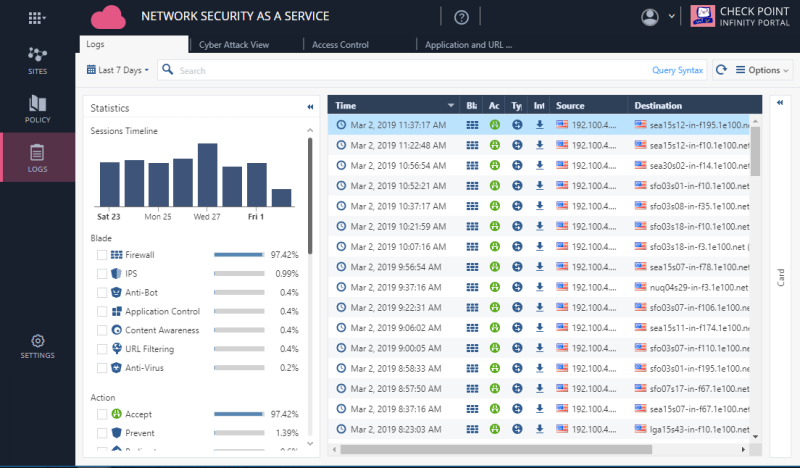
Figure 26: Check Point Logs view.
- Click the Cyber Attack View tab to observe attacks that were prevented by Check Point.
- Click the Access Control tab to observe malicious applications that were prevented by Check Point, as well as total consumed traffic and visibility at the applications that were access the most by your end-users.
- Click the Application and URL Filtering tab to generate a real-time report of your branch office cybersecurity posture. You can export this report to PDF by clicking the Menu at the top-right.
Navigate to Policy to view and change your security policy for Access Control, Threat Prevention and HTTPS Inspection.
Note: Changes to security policies are not applied until clicking Install Policy.
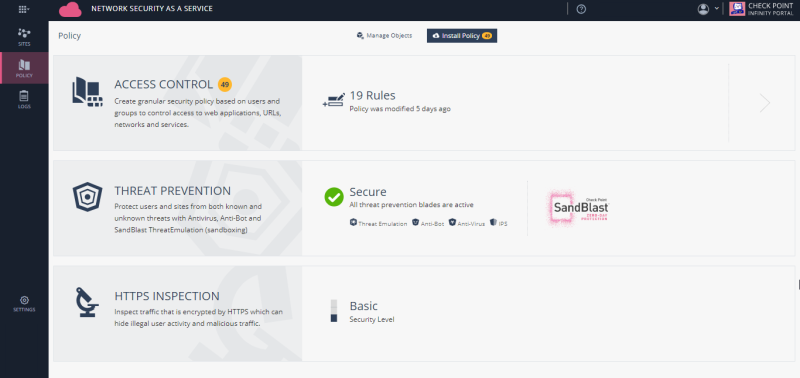
Figure 27: Check Point Policy view.
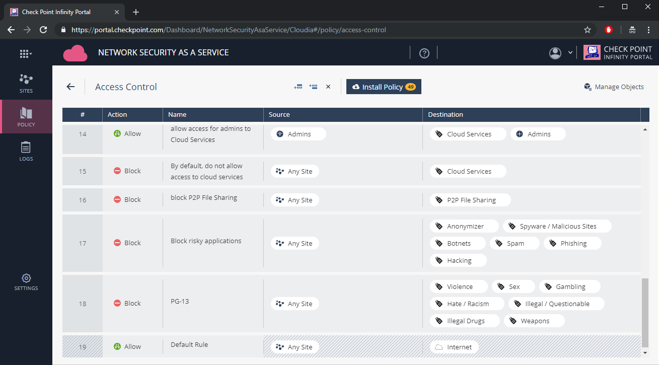
Figure 28: Check Point Access Control Policy view.
Summary
In this guide, we integrated VeloCloud's networking expertise with Check Point's cybersecurity expertise. We used IPsec protocol to connect a VeloCloud device to a cloud service managed by Check Point, in order to apply Check Point’s cybersecurity for branch office users. We used Check Point's Network Security as a Service web-based management and VeloCloud Orchestrator.