Demo Steps
If you do not have an Infinity account, open one and register for the Smart-1 Cloud application.
|
Step |
Instructions |
|---|---|
|
1 |
Navigate to Create Account |
|
2 |
Enter your company's name (e.g : Smart-1-cloud-demo-<FirstName>-<LastName>-<CompanyName>), email address, phone number, and country. |
|
3 |
Select storage location. |
|
4 |
Select Industry and Business Size. |
|
5 |
Select the account type (Customer is the default type). It is possible to change the account type after the account is created. |
|
6 |
Select these checkboxes:
|
|
7 |
Follow the activation instructions in the email sent to your account. To go back to the sign-in page, click Back to sign in and sign in. |
|
Step |
Instructions |
||
|---|---|---|---|
|
1. |
Login to Infinity Portal and make sure to select the new account. |
||
|
2. |
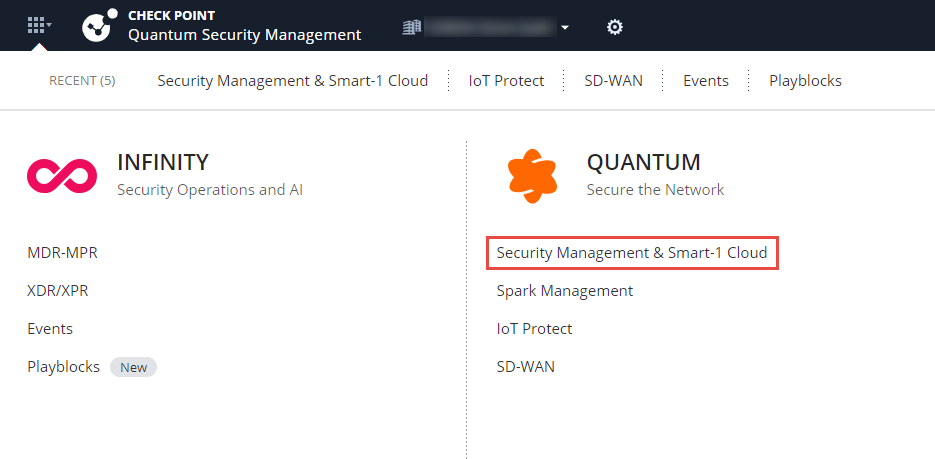
On the Infinity Portal home page, click the Menu button in the top left corner. |
||
|
3. |
From the drop-down list, select Security Management & Smart-1 Cloud.
|
||
|
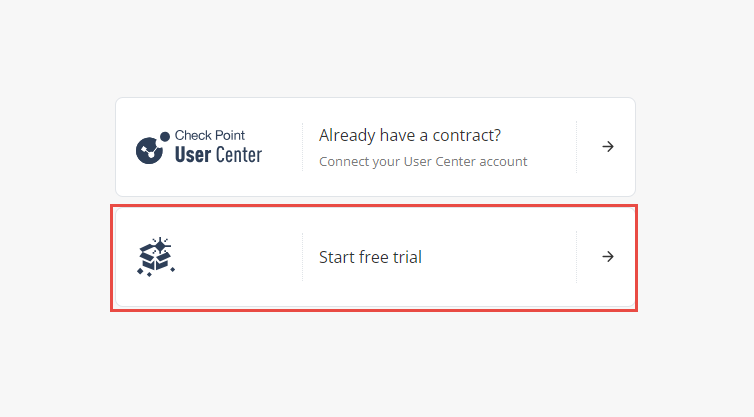
4. |
Click Start free trail.
|
||
|
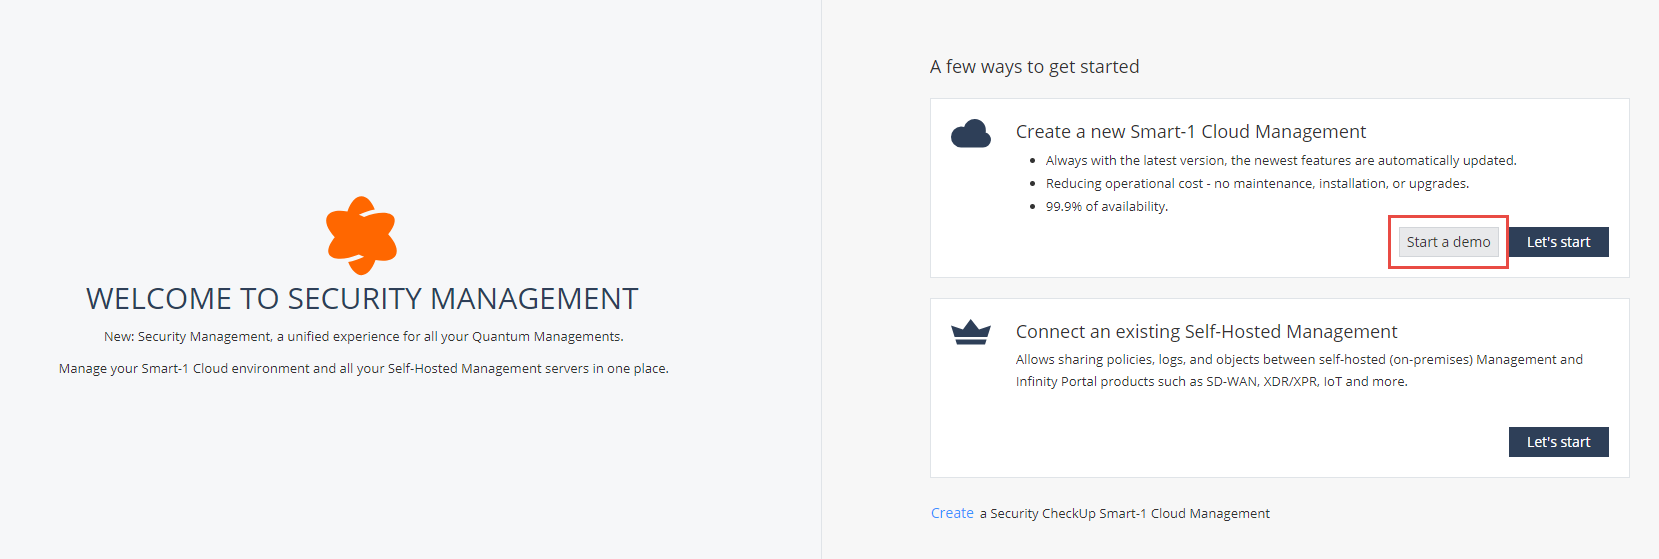
5. |
Click Start a demo.
|
||
|
6. |
The Creating your Smart-1 Cloud Environment window opens. It takes 1-2 minutes to create a new service. After the process is complete, an email is sent to your account. |

|
Step |
Instructions |
|---|---|
|
1. |
Go to Security Management & Smart-1 Cloud
|
|
2. |
Create a New Gateway From the left navigation panel, click Gateways & Servers > New Gateway |
|
3. |
Configure Gateway Details Fill in the required fields:
You can configure the Security Gateway object in Smart-1 Cloud with a static IP address as the primary IP address. This configuration is similar to setting up a Security Gateway from an on-premises Security Management Server. When the Security Gateway is configured with a Tunnel IP address, management traffic, control connections, and Smart-1 Cloud tenant communications use this main static IP address through the maas_tunnel interface. |
|
4. |
Connect the Device In the Device section, click Connect. The Connect Device window will open. |
|
5. |
Copy the Connection Command In the Security Gateway section, select Appliance/Open Server > copy the provided connection command.
|
|
6. |
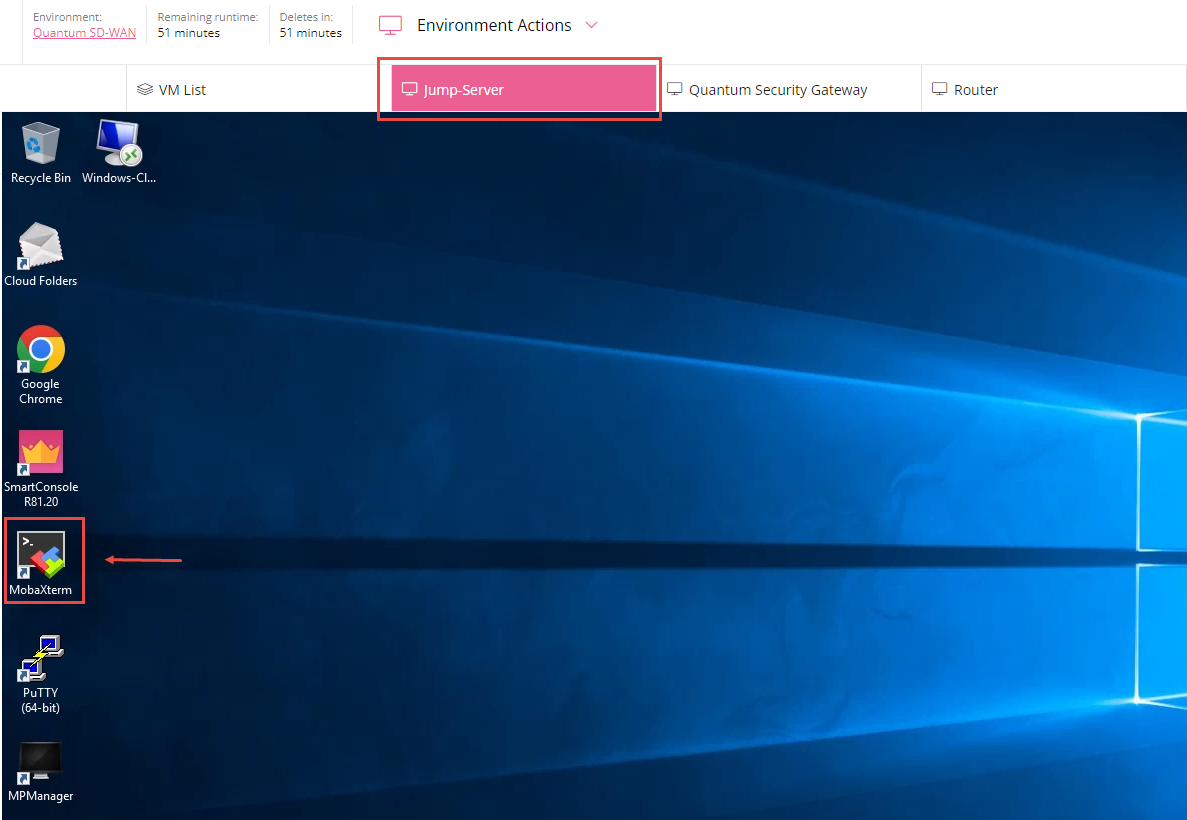
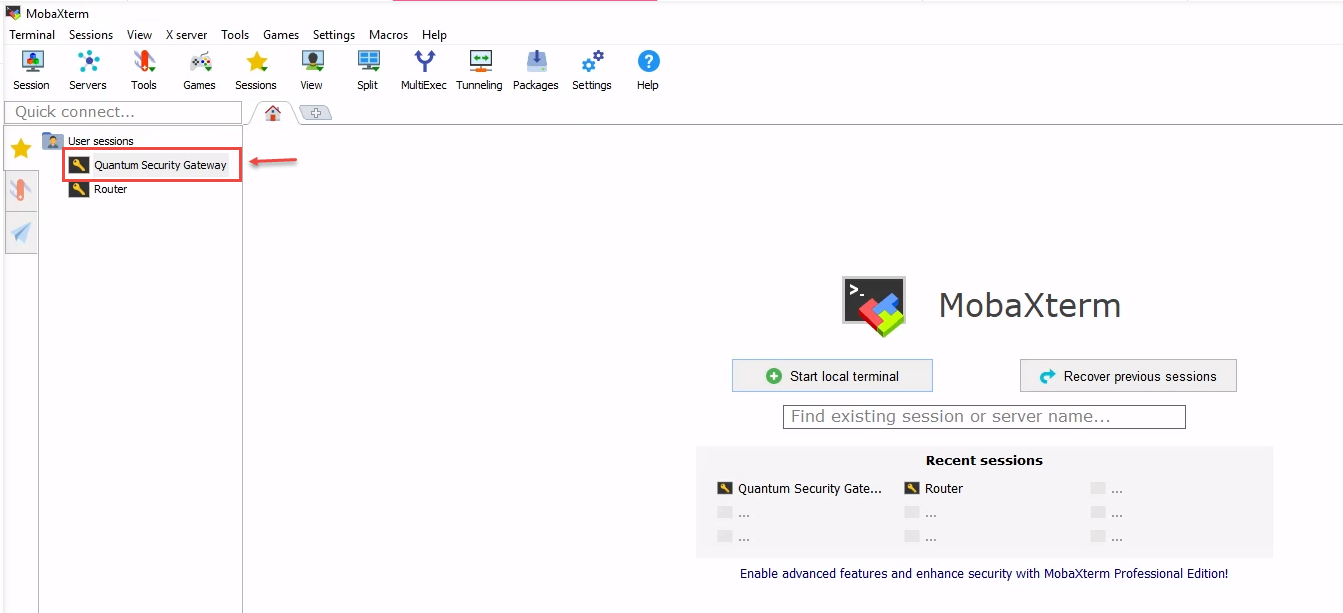
Open the MobaXterm app on the JumpServer VM > Double-click the Gateway’s name to open an SSH connection > Switch to Clish mode (if not already set) > Paste the copied command to set the authentication token.
|
|
7. |
Establish SIC (Secure Internal Communication) Back in Smart-1 Cloud, click Next to proceed. Enter the one-time password set on the Security Gateway and click Next.
|
|
8. |
Configure Interfaces in Gateway Menu
|
|
9. |
Update Security Policy Go to Security Policy in the left menu > Select the policy > Double-click the MyGateways group object > Add your Gateway object to this group.
|
|
10. |
Configure NAT and Install Policy Go to Gateways & Servers > double-click your Gateway > Open the NAT menu > check Hide internal networks > Close the menu and Install Policy.
|


|
Step |
Instructions |
|---|---|
|
1. |
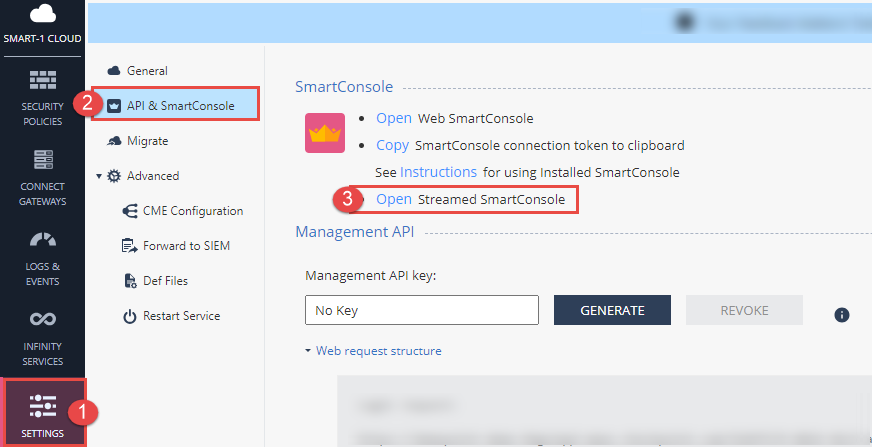
Log in to Streamed SmartConsole Open the Smart-1 Cloud application page > Navigate to Settings > API & SmartConsole > Click Open Streamed SmartConsole
|
|
2. |
Enable Configuration Sharing In the left menu panel, click Infinity Services > Click the hamburger menu (three horizontal lines) in the top-right corner > Toggle the Enable switch to On Click OK to confirm |
|
3. |
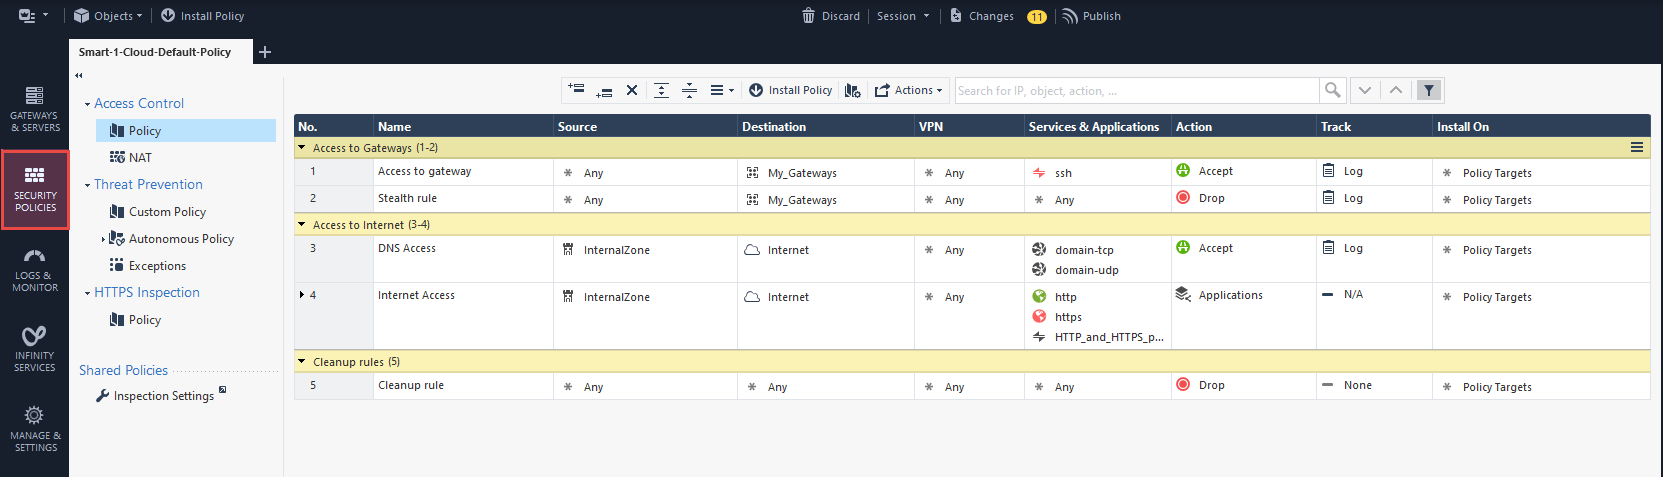
Click on Security Polices .
|
|
4. |
Change the source on Rule # 1 (Access to gateway) to Any and add https service.
|
|
5. |
Change the log type on Rule # 4.3 to Extended Log.
|
|
6. |
Click Publish.
|
|
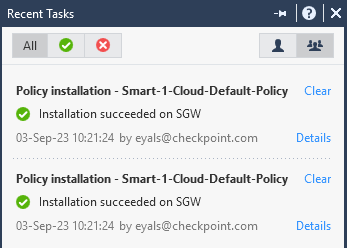
7. |
Click Install Policy and wait for the policy installation success messages.
|


|
Step |
Instructions |
||
|---|---|---|---|
|
1 |
In Infinity Portal, in the top left corner, click the Menu button. |
||
|
2 |
From the drop-down list, in the section Quantum, click SD-WAN.
|
||
|
3 |
Click Evaluation.
|
||
|
4 |
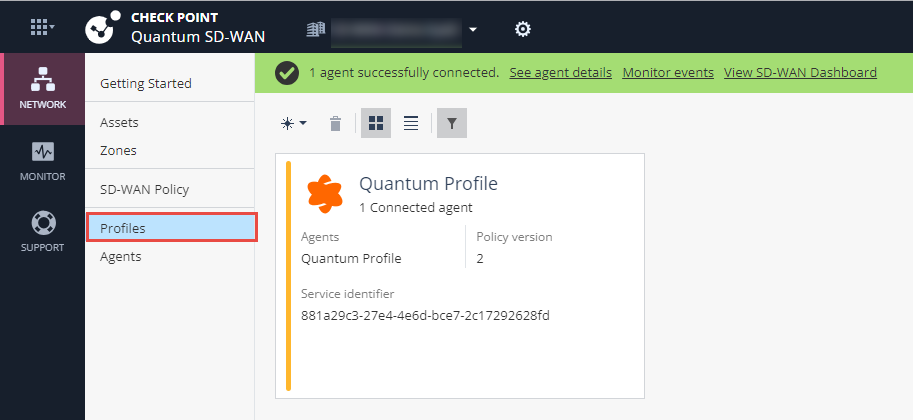
In the middle section, click Profiles.
|
||
|
5 |
Click Quantum Profile to open it.
|
||
|
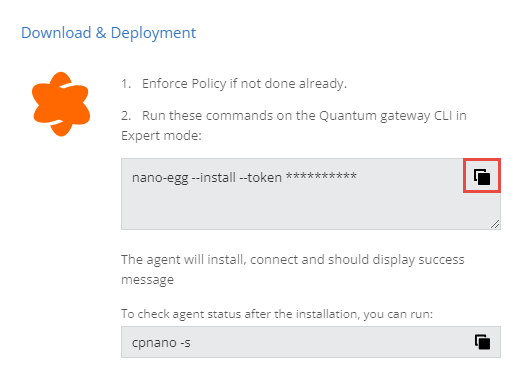
6 |
Follow the instructions in the Download & Deployment section to install the Agent on the Security Gateway:
|


|
Step |
Instructions |
|---|---|
|
1 |
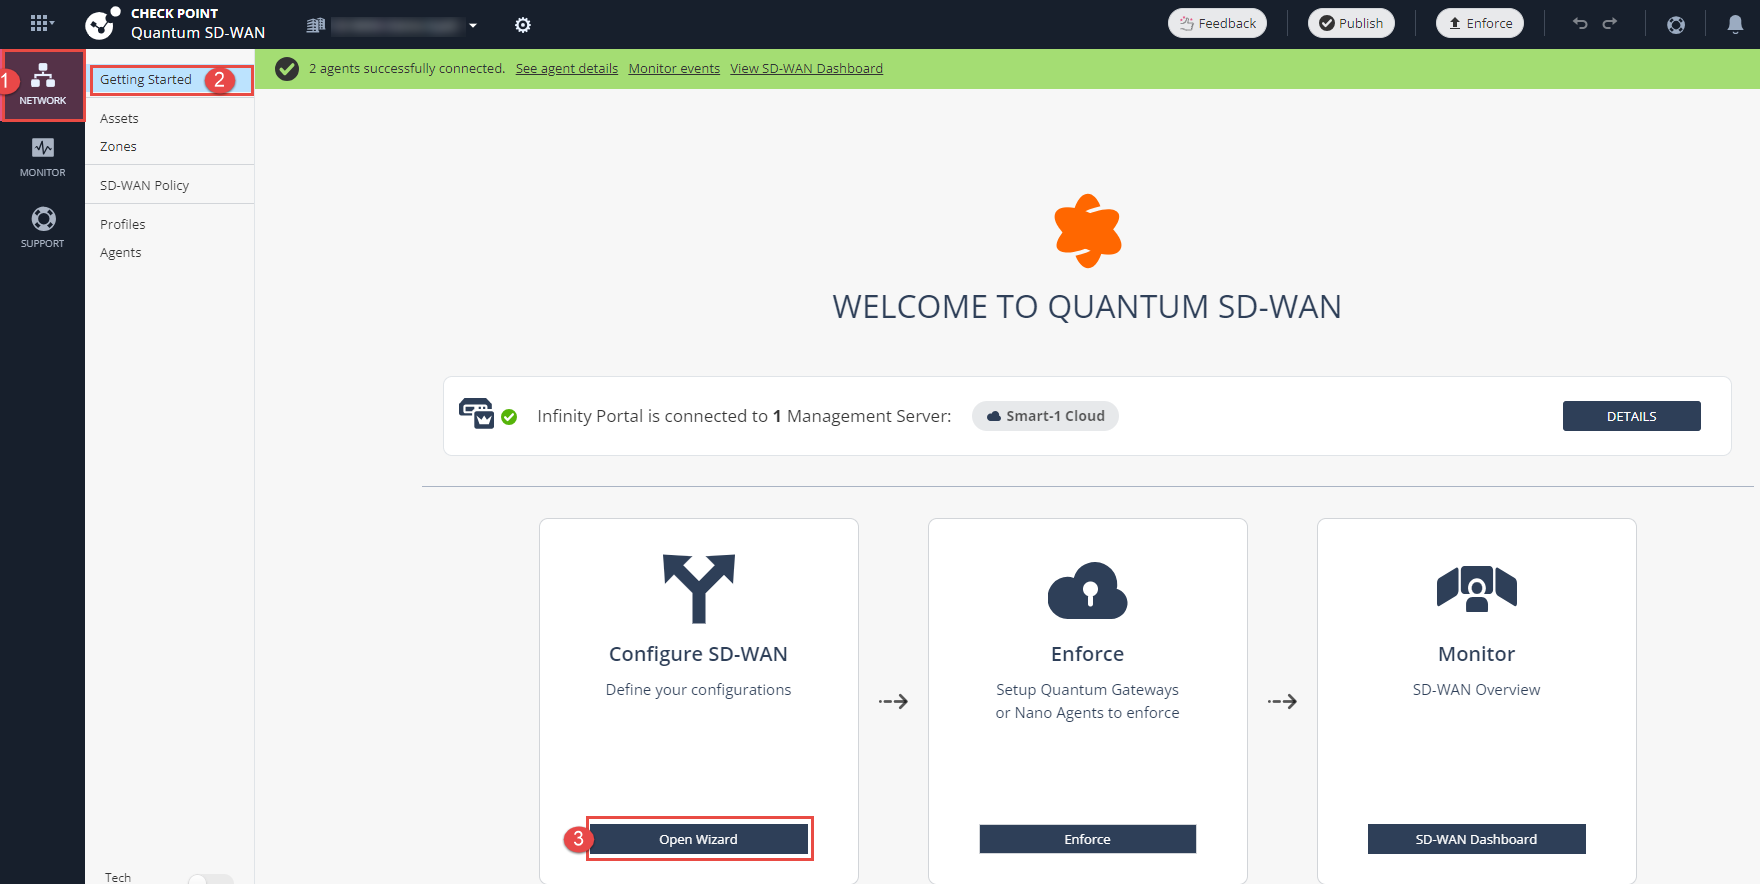
In Infinity portal > SD-WAN application, From the left navigation panel, click Network. |
|
2 |
In the middle panel, click Getting Started. |
|
3 |
In the Configure SD-WAN section, click Open Wizard.
|
|
4 |
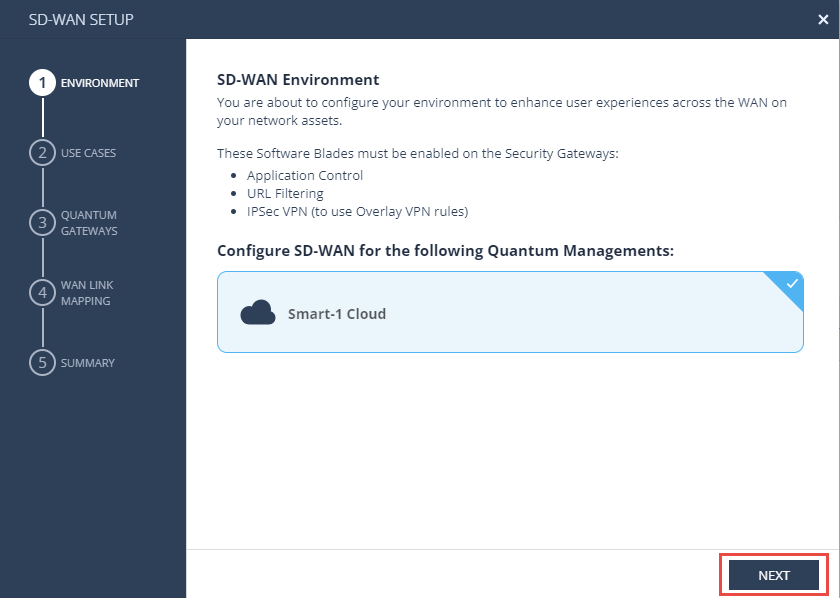
In Step (1) Environment, click Next.
|
|
5 |
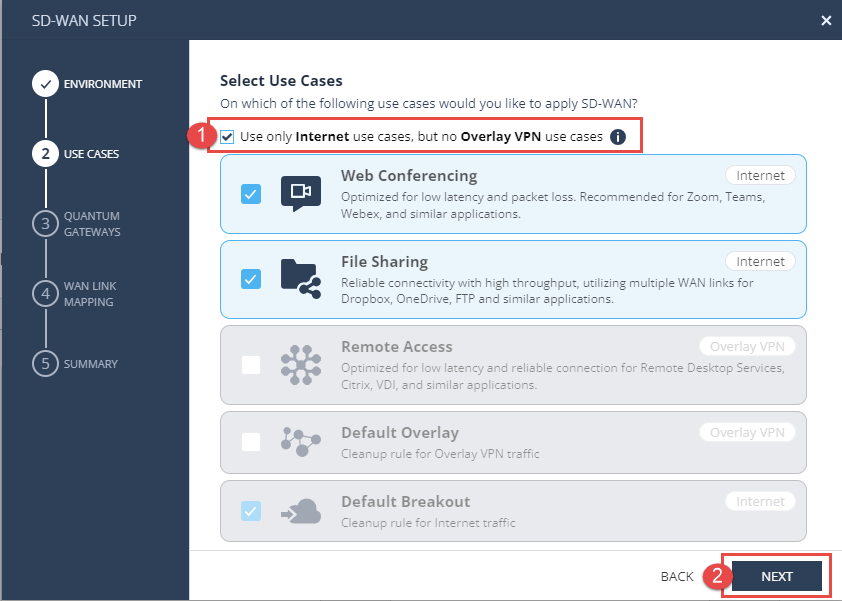
In Step (2) Uses Cases:
|
|
6 |
In Step (3) Quantum Gateways:
|
|
7 |
In Step (4) WAN Link Mapping:
|
|
8 |
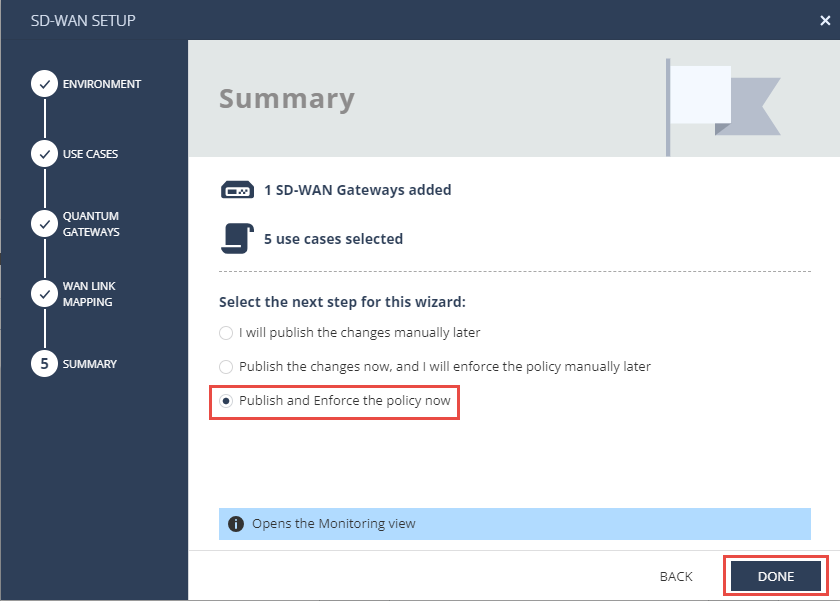
In Step (5) Summary:
|


|
|
Note - it will take several minutes until you will be able to see data on the Monitor Dashboard. |
The events in the below screenshots are only an example and may vary from your demo environment.
|
Step |
Instructions |
|---|---|
|
1 |
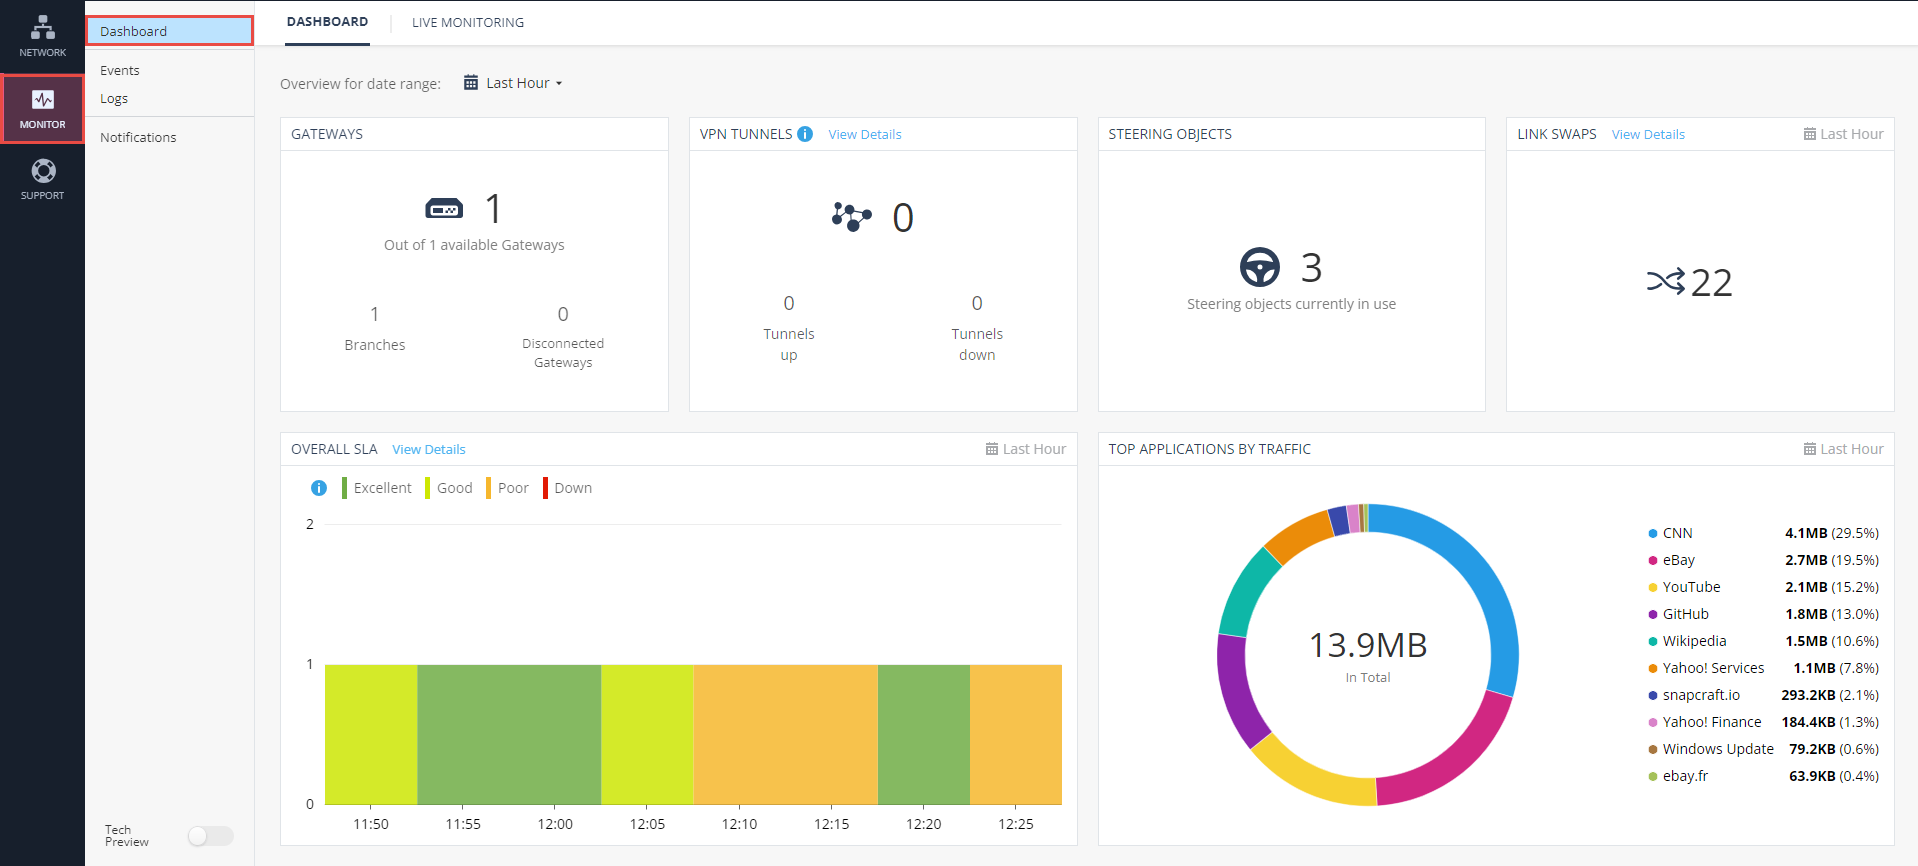
From the left navigation panel, click on Monitor > Dashboard
|
|
2 |
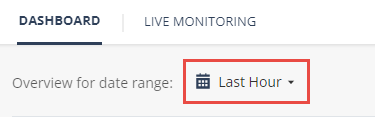
In the top left corner, Select the time range of Last Hour :
|
|
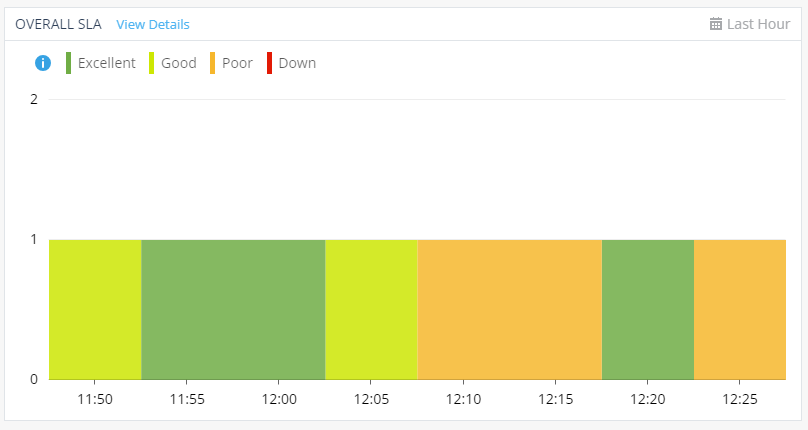
3 |
Review the following widgets:
|
|
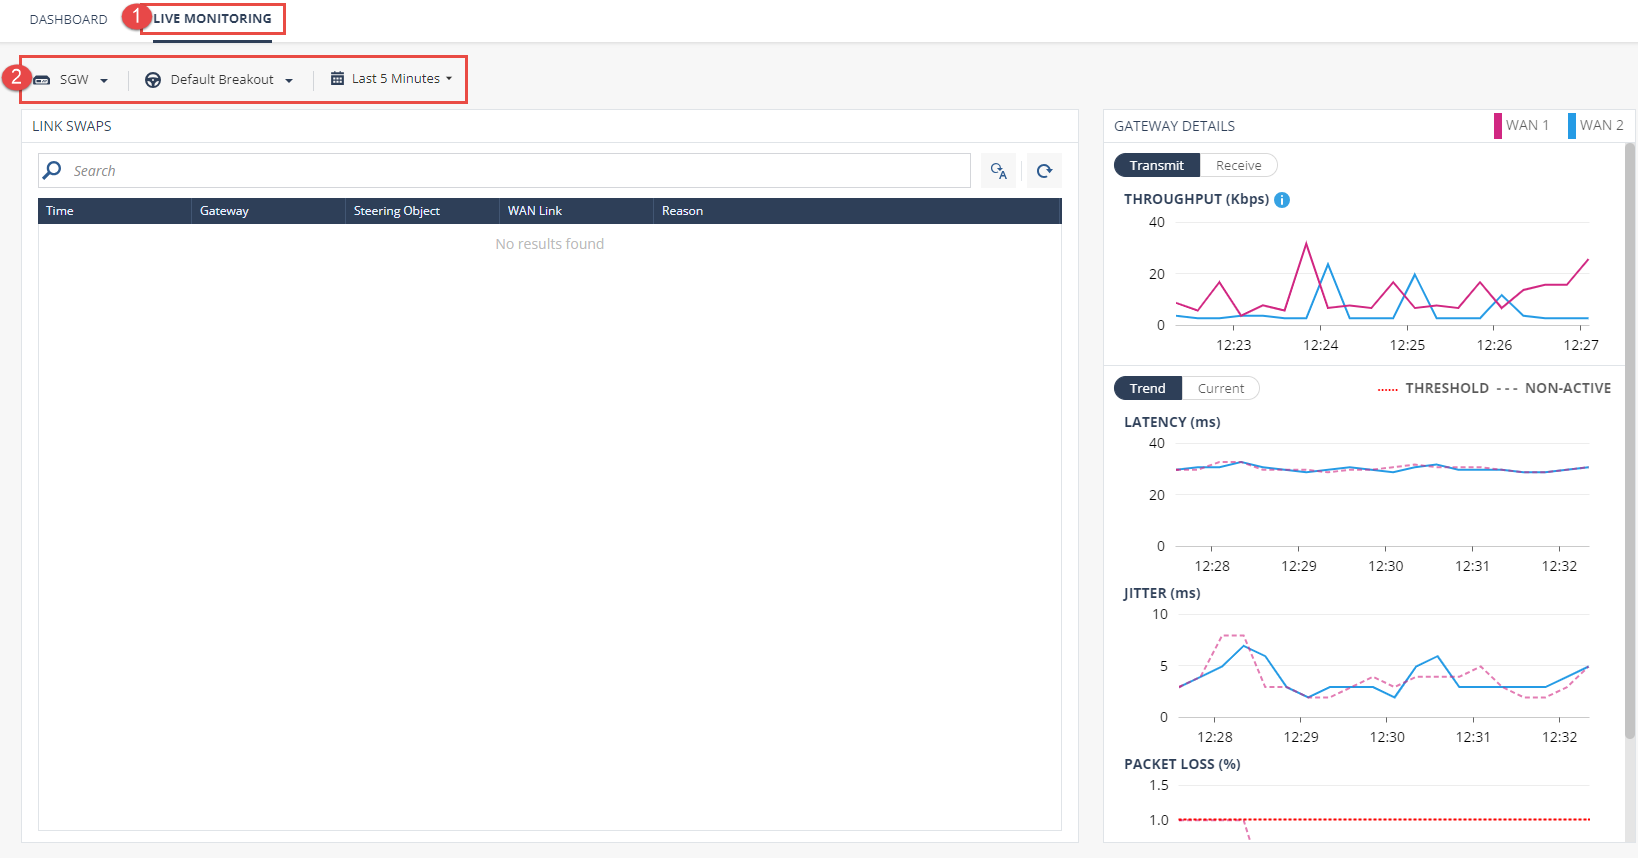
4 |
Click on the 'Live Monitoring' tab and select the following :
|
|
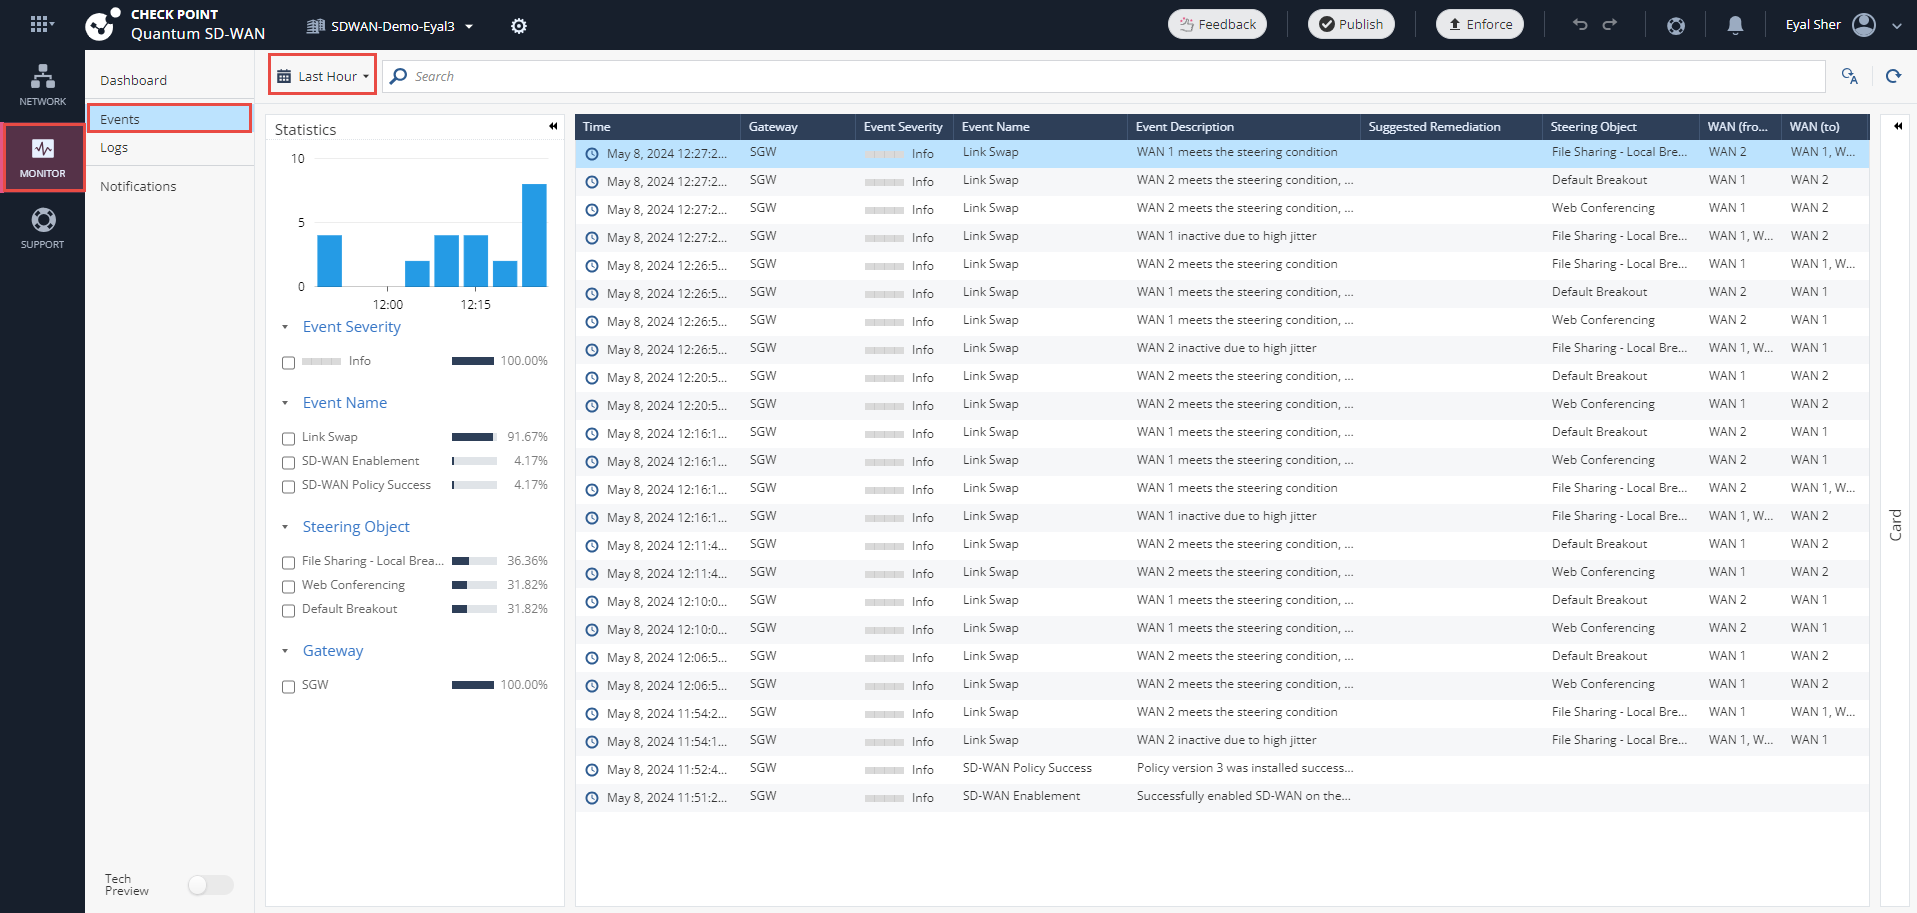
5 |
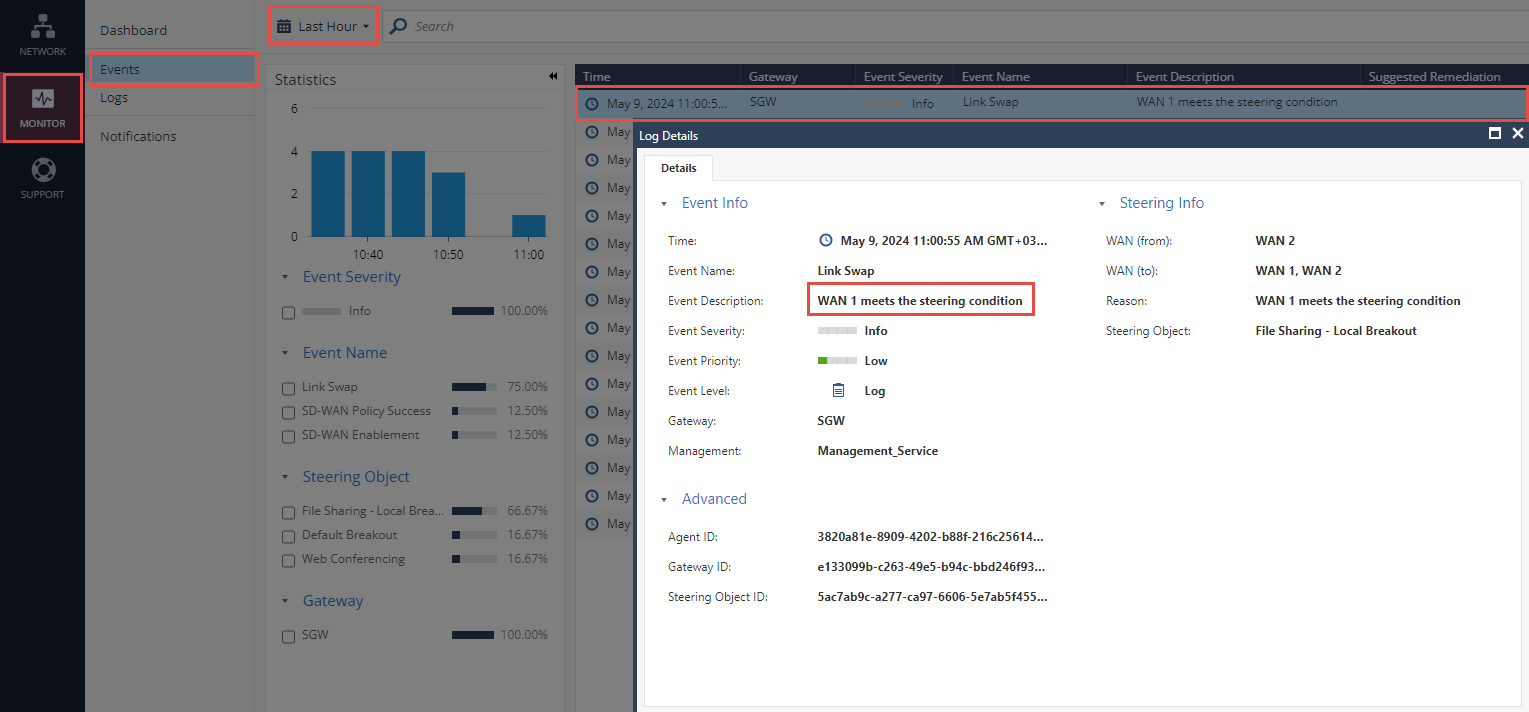
In Events view you will be able to review the steering events.
|
|
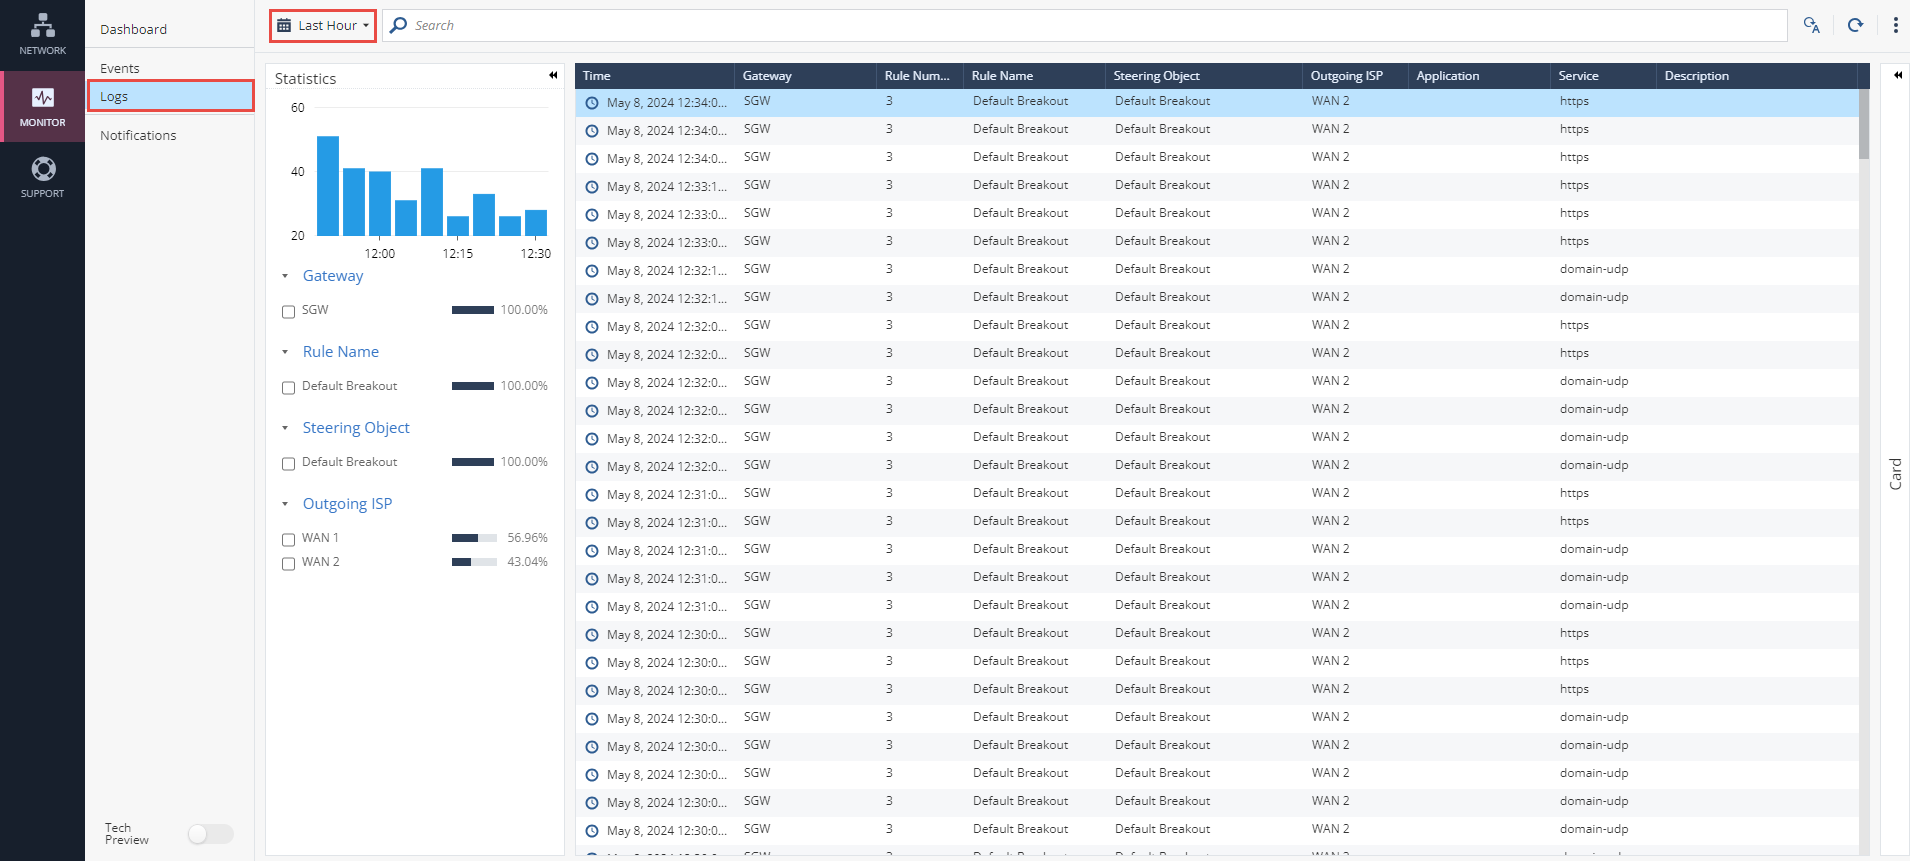
6 |
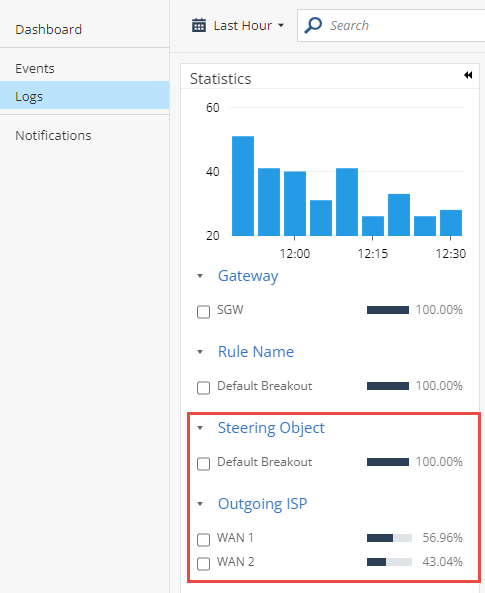
In Logs view you will be able to review the traffic logs.
|
|
7 |
You can filter the logs per Steering Object or Outgoing ISP.
|

|
Step |
Instructions |
||
|---|---|---|---|
|
1 |
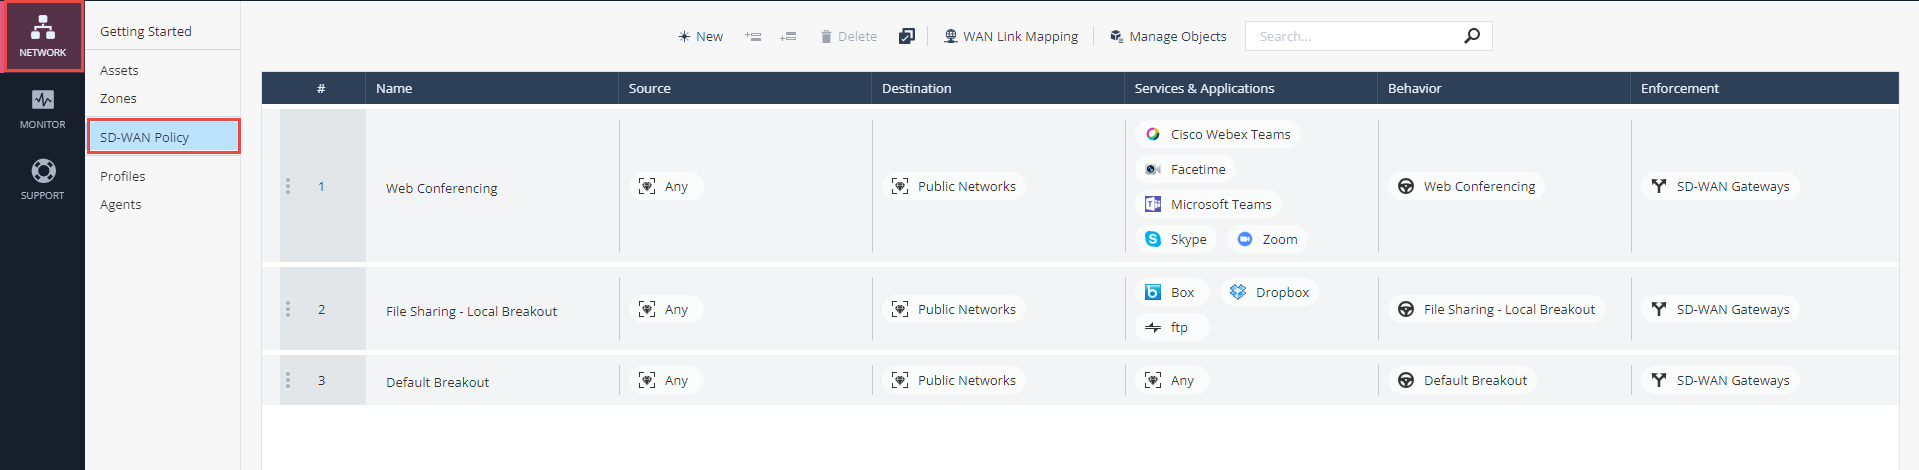
On The Network view, Click on SD-WAN Policy to review the pre-configured rules for steering the traffic.
|
||
|
2 |
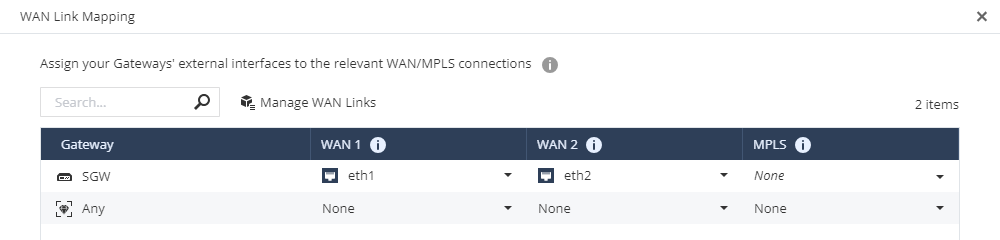
From the top toolbar, Click WAN Link Mapping to review the configured mapping on the SD-WAN gateway. The WAN Link Mapping section shows this table for our SD-WAN demo Gateway :
|
||
|
3 |
Return to the SD-WAN Policy view and review the pre-configured rules and behaviors. The active component making the steering decisions in our SD-WAN policy is the Steering Behavior object. Each rule may apply a different Steering Behavior object, based on the different needs
|
||
|
4 |
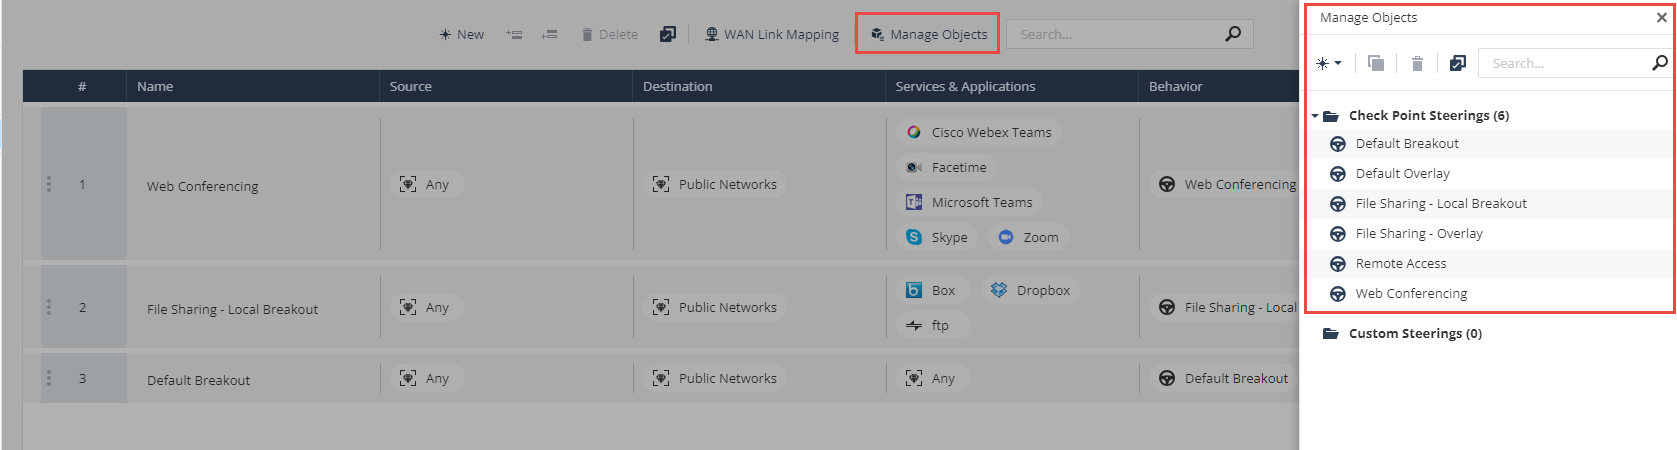
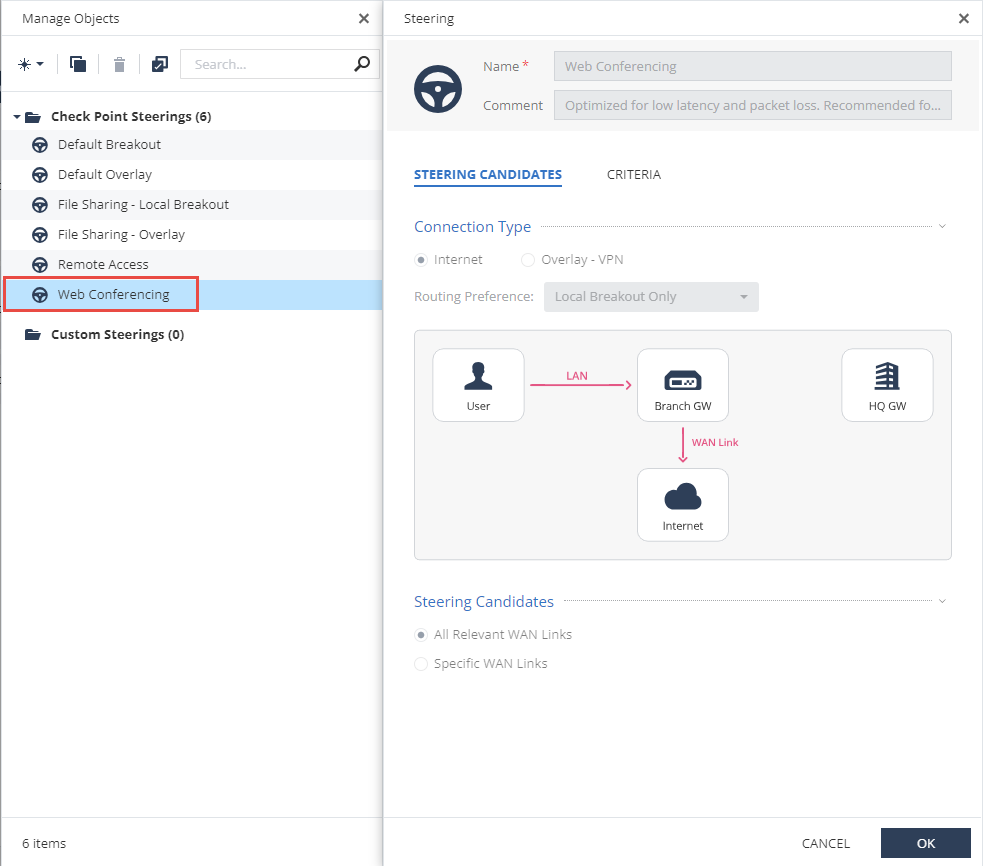
Click on Manage Objects to review the pre-configured Steering Behaviors:
|
||
|
5 |
Review the Steering Candidates options of Web Conferencing Steering Object:.
|
||
|
6 |
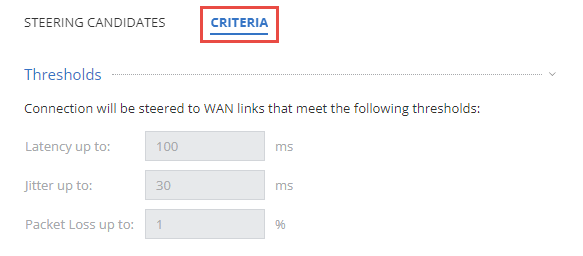
Click on Criteria to review the criteria Thresholds settings:
Security Gateway uses only WAN Links that have characteristics below the configured maximums.
If all ISP Links perform beyond the threshold, the SD-WAN Policy selects the first ISP in the alphabetical order of its name. |
||
|
7 |
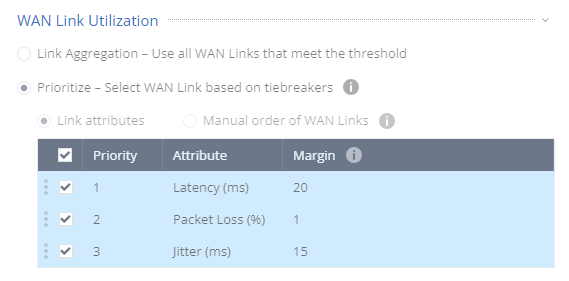
Click the WAN Link Utilization heading to expand this section and review the applicable settings:
|
||
|
8 |
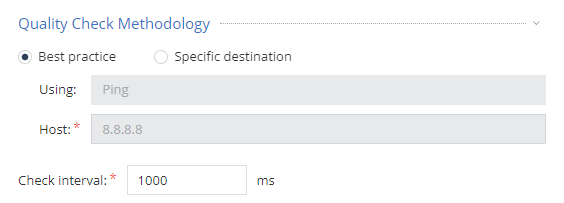
Click the Quality Check Methodology heading to expand this section and configure the applicable settings. These settings determine how the Security Gateway measures the ISP link quality.
|

|
Step |
Instructions |
|---|---|
|
1 |
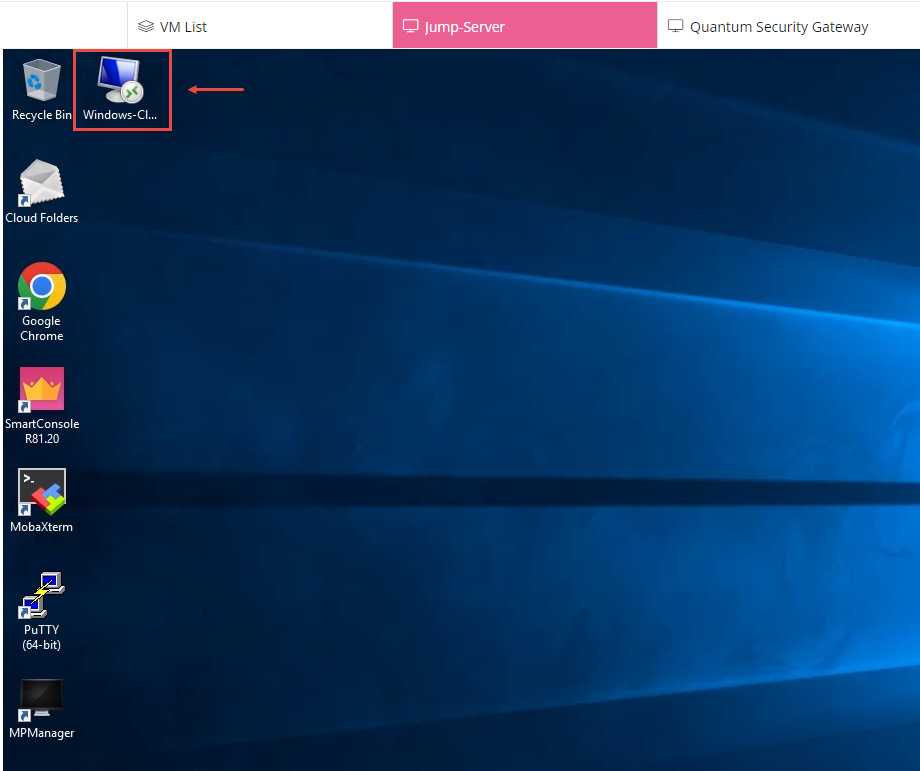
From the Jump-Server VM, Connect to the Windows-Client VM via the RDP shortcut on the desktop.
|
|
2 |
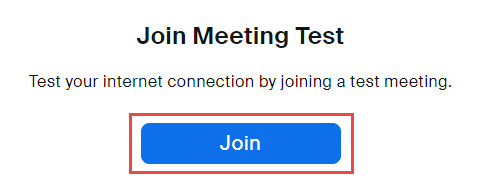
Open Chrome Browser and click on the save bookmark : "Join a Test Meeting | Zoom".
|
|
3 |
Click Join.
|
|
4 |
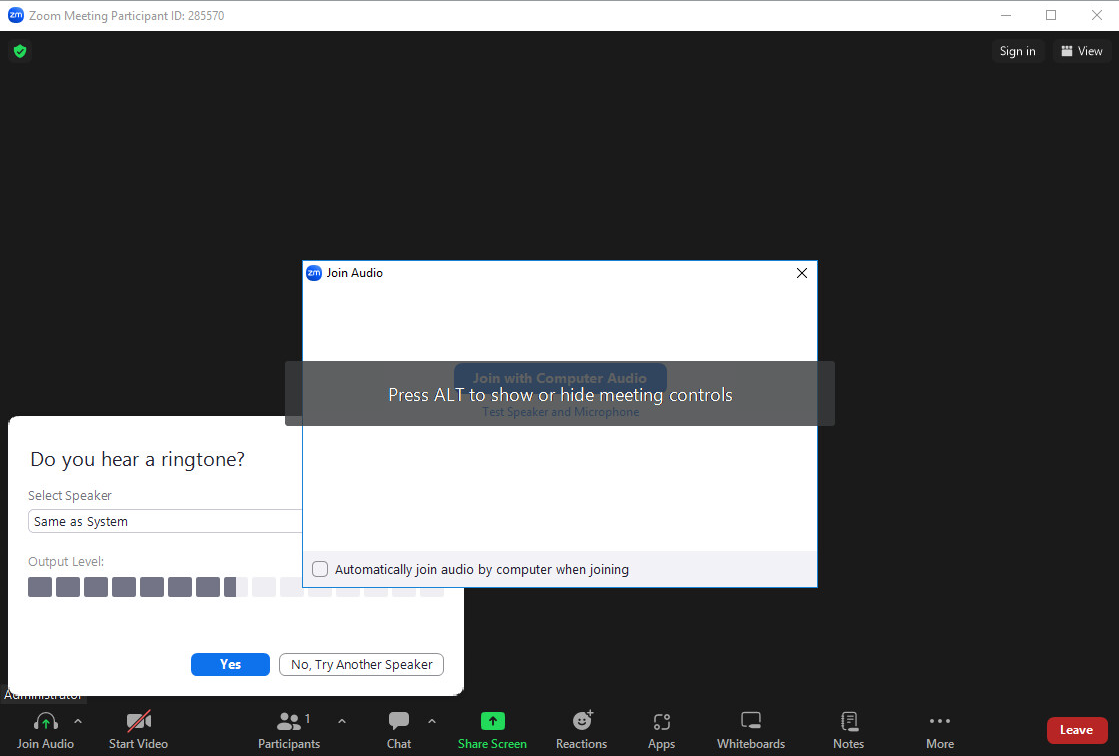
Wait for the Zoom application to open.
You can close the audio windows in the Zoom application. |
|
5 |
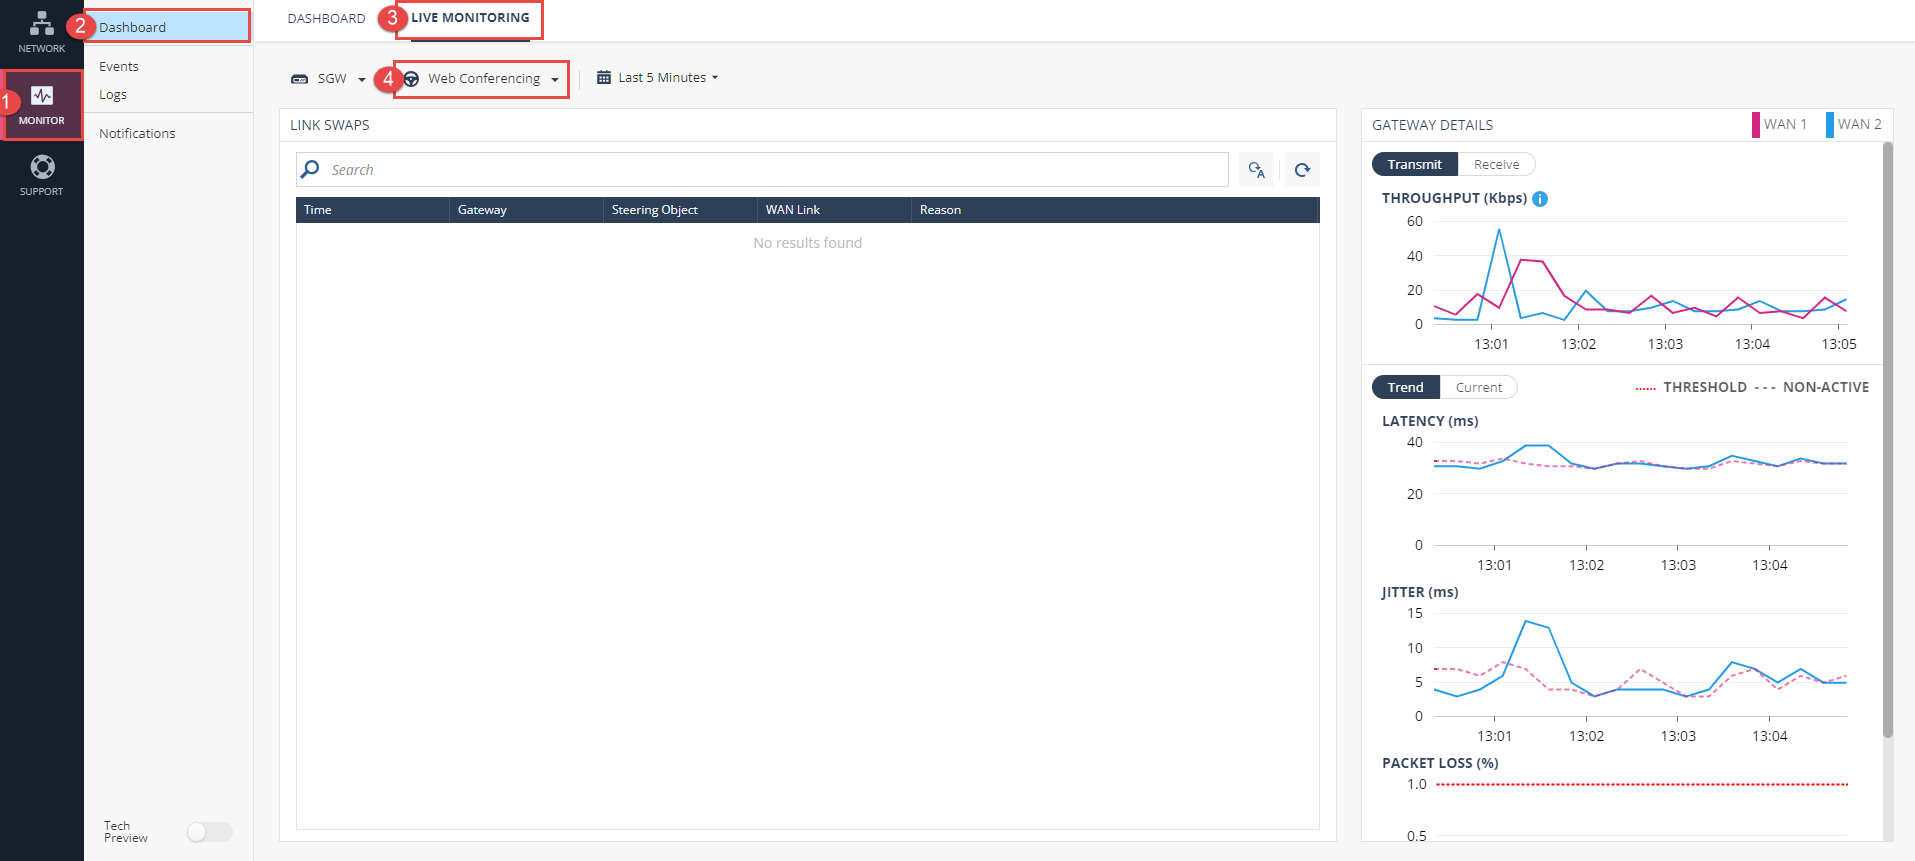
Return to Infinity portal in and navigate to SD-WAN > Monitor > Dashboard > Live Monitoring.
|
|
6 |
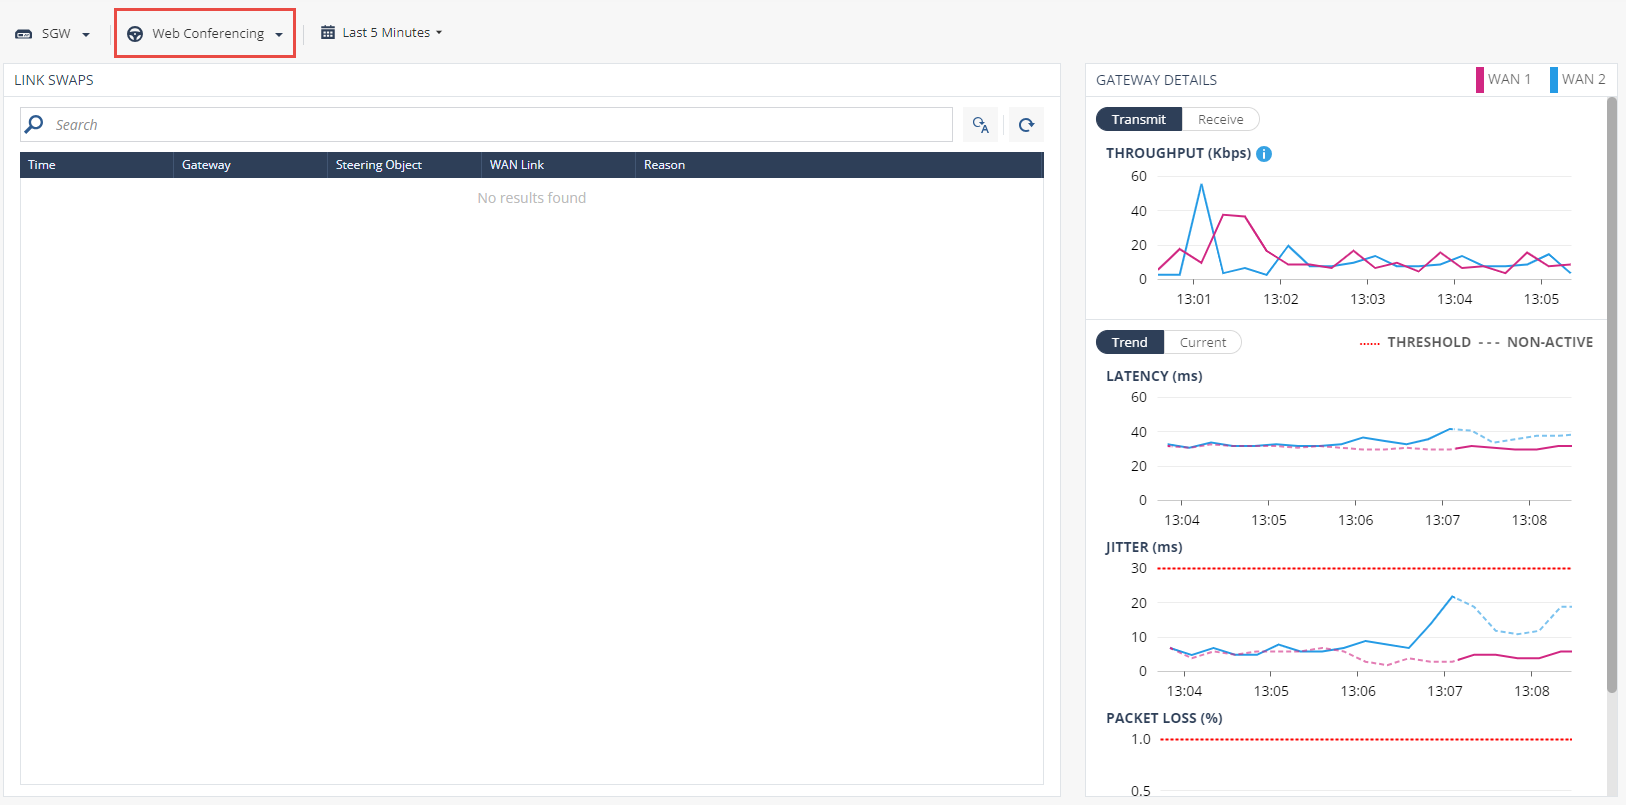
Select the Web Conferencing Steering Object and review the Gateway Details values.
|
|
7 |
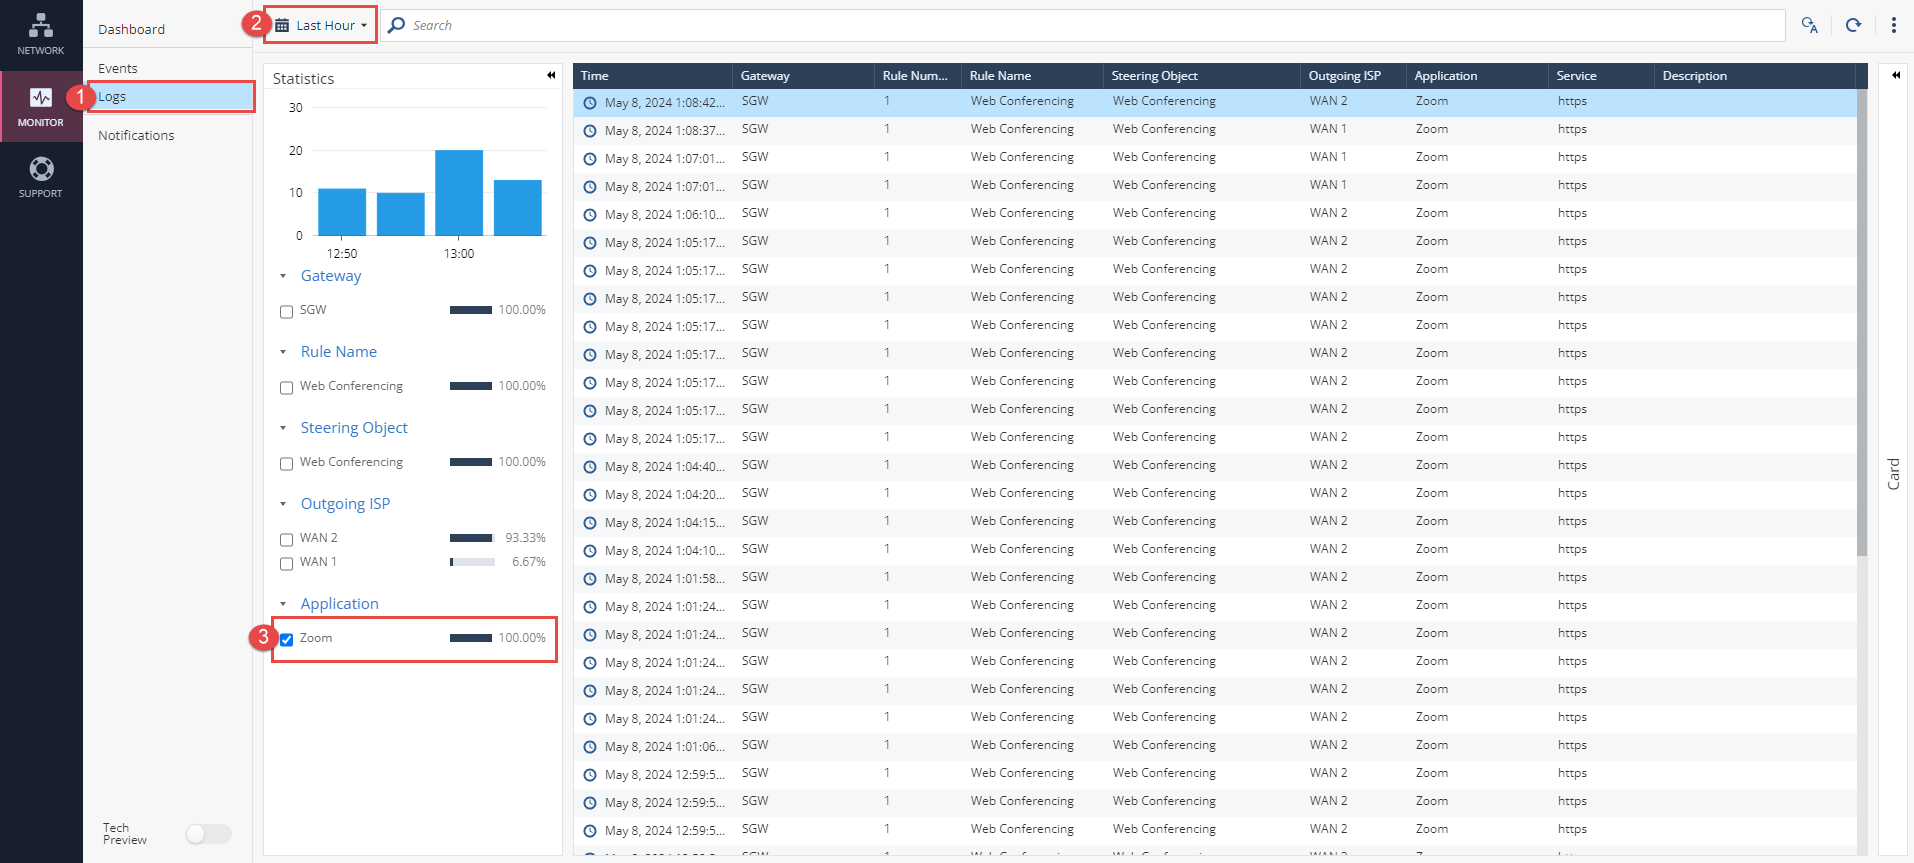
Click on Logs to review the logs for Zoom application session (Filter for Zoom).
|

|
|
Note - You can also run speed tests from the Windows-Client VM and review the Live Monitoring in SD-WAN application in Infinity Portal.
|

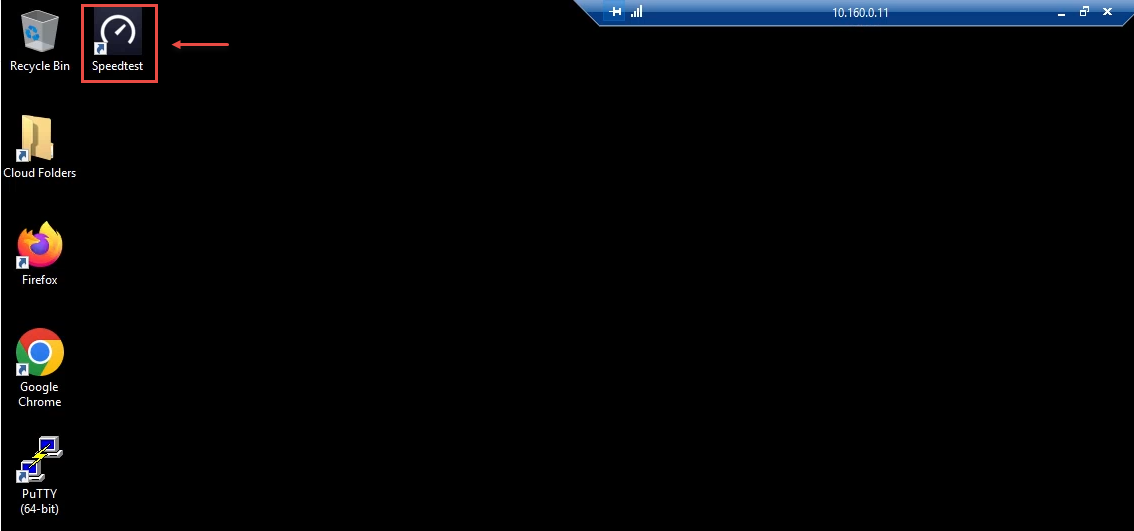
The below instructions are for WAN1 link but you can also run the same for WAN2 (depends on the active link).
|
Step |
Instructions |
||
|---|---|---|---|
|
1 |
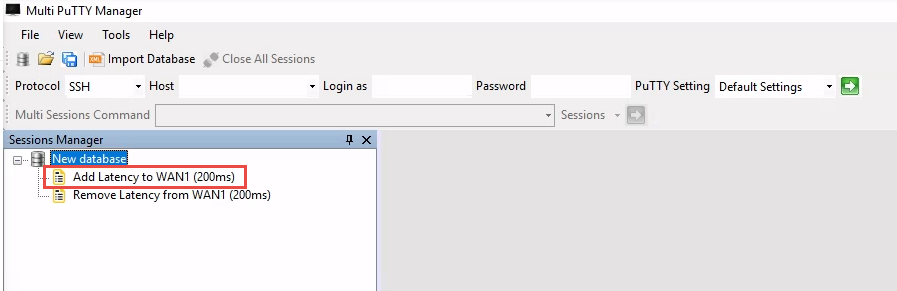
From the Jump-Server VM, Open the MPManager application from the desktop shortcut.
|
||
|
2 |
Run the saved session 'Add Latency to WAN1..."
|
||
|
3 |
The session will run the following:
|
||
|
4 |
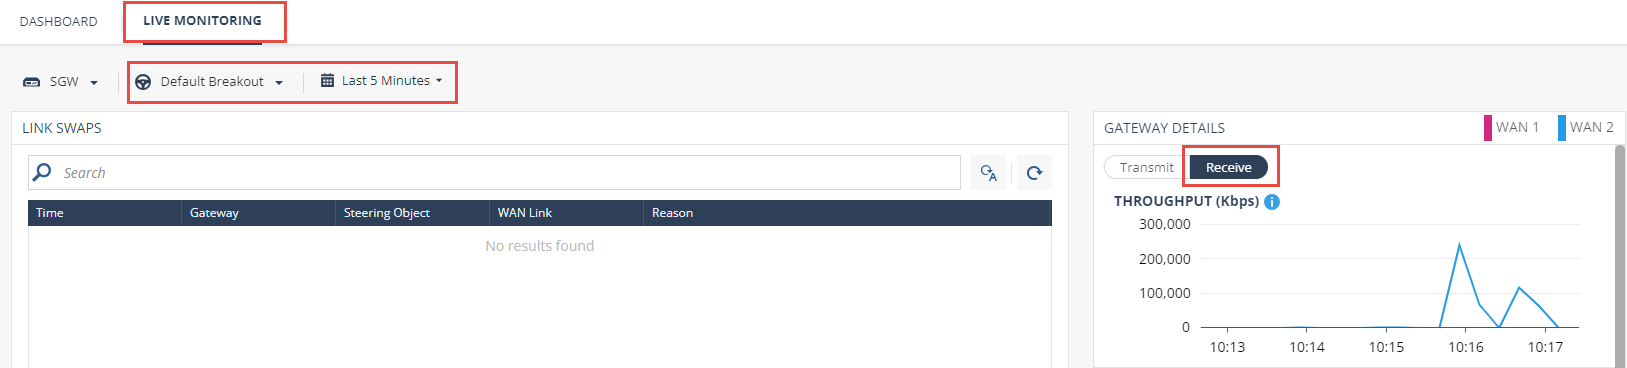
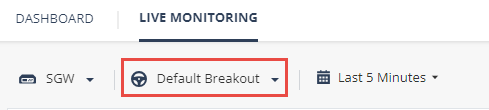
Return to Infinity portal > SD-WAN > Monitor > Dashboard > Live Monitoring.
|
||
|
5 |
Select the Default Breakout.
|
||
|
6 |
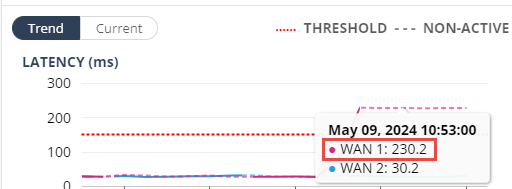
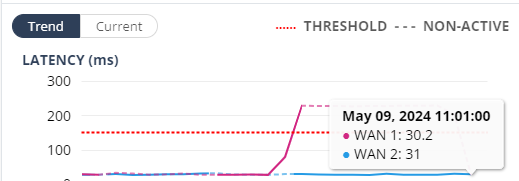
Review the Link Swap Event & Latency Graph.
|
||
|
7 |
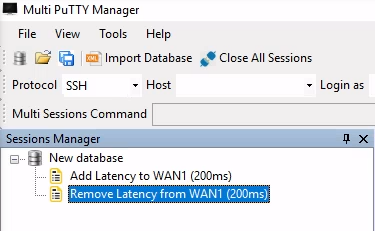
Return to the MPManager application on the Jump-Server VM. |
||
|
8 |
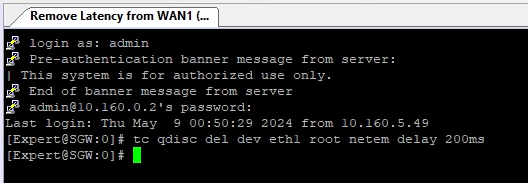
Run the saved session 'Remove Latency from WAN1..".
|
||
|
9 |
The session will run the following:
|
||
|
10 |
The Latency of WAN1 will decrease.
|
||
|
11 |
Link Swap Event will be generated: WAN 1 meets the steering condition.
|


|
|
To improve this document, we ask you to fill in this survey. |
