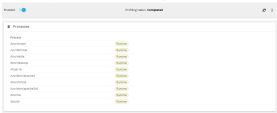
Runtime Protection
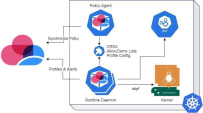
CloudGuard Runtime Protection for Kubernetes aims to analyze running Kubernetes workloads and detect malicious, unwanted, or abnormal behavior.
The protection is based on near real-time monitoring of Kernel system calls performed by workload containers and is implemented as a combination of two engines:
-
Signatures - compare the observed behavior of a workload with known signatures potentially indicating malicious behavior (e.g., execution of processes associated with crypto-mining software)
-
Profiling - detect anomalies in behavior compared to a 'baseline' profile created during a dedicated profiling phase (e.g., execution of sub-process not observed during regular workload operation, which may indicate an RCE attack). Detection of unwanted, malicious, or anomalous behavior results in security events reported in the CloudGuard portal.
Architecture
Instructions
|
Step |
Instructions |
||
|---|---|---|---|
|
1 |
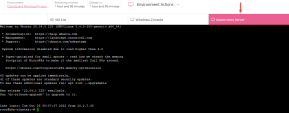
Connect to the Kubernetes Server VM via SSH Client via one of the following options: |
||
|
2 |
In the SSH window, execute the following command to shorten the Runtime Protection Daemon from 5 minutes to 30 seconds. Copy
|
||
|
3 |
Check the status of the agent using the following command: Copy
Kubernetes redeploys the agents with the new setting, and that may take a few seconds. |
||
|
4
|
To set up the website, execute the following commands: Copy
The output should look like this: |
||
|
5 |
Run the following commands to receive the link for the shop-cpx-sushi website: Copy
Copy
|
||
|
6 |
From the Windows-Console VM , Open Chrome browser and navigate to the address received on Step 5. |
||
|
7 |
From the CloudGuard Portal: Navigate to the Protected Assets section in the Assets tab and filter for your Kubernetes environment by adding an Environment filter and choosing your environment name. |
||
|
8 |
Add filter for Asset Type: Kubernetes Deployment and Search for the shop-cpx-sushi Kubernetes deployment.
|
||
|
9 |
Click on the shop-cpx-sushi Kubernetes deployment object and you will be redirected to it under the protected assets tab. |
||
|
10 |
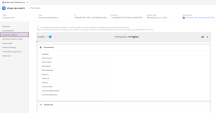
Navigate to the Runtime protection section and check that the relevant processes have been added to the profile and the protection is enabled: |
||
|
11 |
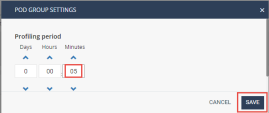
Open the profile settings, and change the timer from 1 day to 5 minutes and press SAVE: If you change the profile time to a smaller value than the time that has already passed, it will immediately finalize the current profile.
|
||
|
12 |
Let’s trigger a signature alert, execute the following commands on the Kubernetes Server: Copy
OR if curl doesn’t exist Copy
The execution command will fail but it will trigger an alert event even though the profile learning period has not been completed. |
||
|
13 |
Navigate to the 'Threats & Security Events' tab to view the alert (it can take several minutes until the event will appear). If you are unsure if all the processes have been observed, restart the Pod. You can observe the startup processes by executing the following command: Copy
|
||
|
14 |
Refresh the website and click on a few links to show additional details. |

