3. Demo for Linux Environment
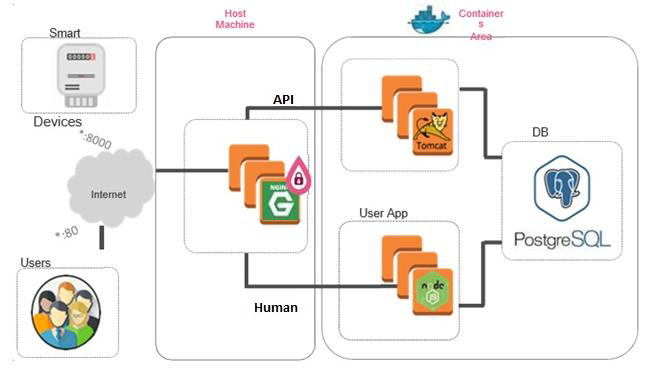
The demo application includes a smart meter simulator that connects over API to a server (Ingestion App) and reports power consumption, and a web application (user app) that allows subscribers to see their meter readings. The website is vulnerable to SQL injections and the smart meter simulator can be hacked to send negative values to the server so that the power company would owe money to the subscriber.
We will demonstrate the attacks and how the product can protect against them with CloudGuard AppSec.
|
Step |
Instructions |
|---|---|
|
1 |
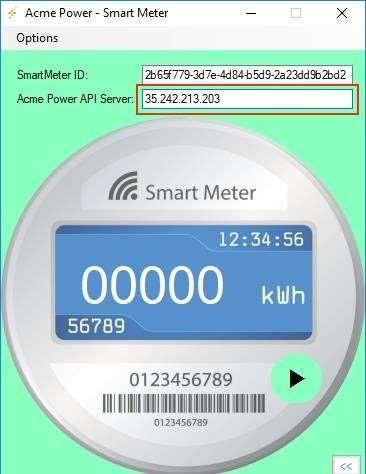
Run the AcmePower_SmartMeter Windows application from the desktop |
|
2 |
Enter the <IP> in the Acme Power API Server field:
|
|
3 |
Click Play to start the smart meter. |
|
4 |
Navigate to http://<IP> and Login (you can ignore the credentials – just click ‘Sign in’):
|
|
5 |
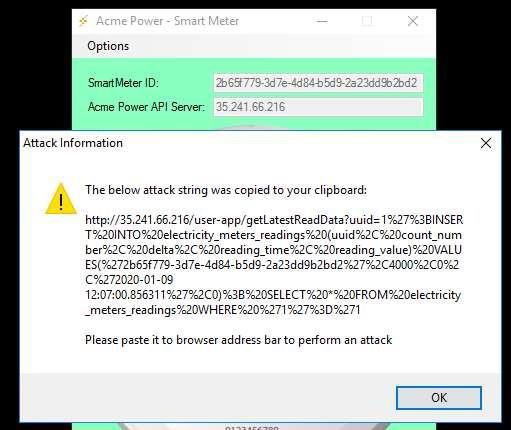
An attacker found a way to do an SQL injection against the Acme web application and reset his bill to $0. To obtain the SQL attack string: a. Go to the smart meter Options menu and select the option Create Web Attack String. (A real smart meter will obviously not have this feature.) b. The attack string is now on your clipboard.
|
|
6 |
Paste the attack string into a new Tab / Window in the browser (Nothing should happen) |
|
7 |
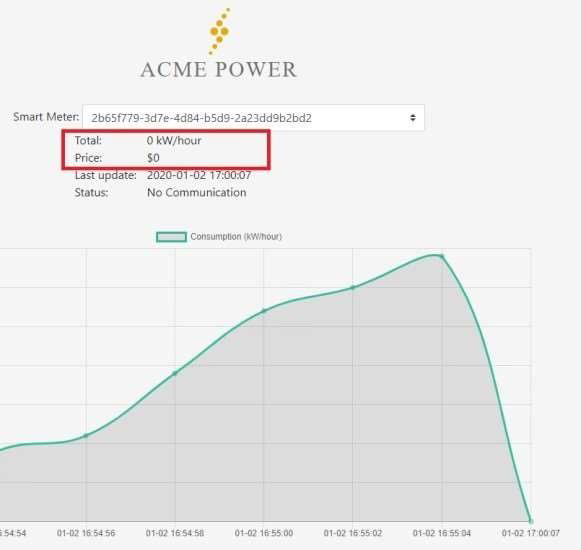
Now look at the web application smart meter-reading graph - you should see that it’s 0. (It might take a few seconds until the page will be refreshed.)
|
|
8 |
Being even greedier, the attacker wants Acme Power to pay him money. He hacked into the smart meter and is going to send negative Watt/ Hour values. To start the attack: a. Go to the smart meter Options menu and select Attack Mode. The meter will become red. b. Click on the Skull icon. |
|
9 |
Look at the smart meter reading graph. You should see that it goes either below 0 or back to 0. |
|
10 |
Click on the Pause icon again to stop the attack for now. |
|
11 |
Go to the smart meter Options menu and select Normal Mode. |

Now let’s implement a protection mechanism to protect Acme Power against these attacks!
|
Step |
Instructions |
|---|---|
|
1 |
Login to Portal |
|
2 |
Enter your credentials (available only for customers and partners). |
|
3 |
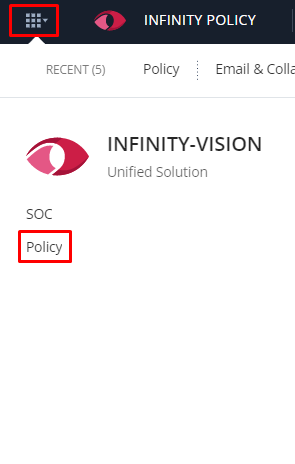
If you have had an Infinity Portal account, you have to switch the tenant you created: Select the INFINITY-VISION->Policy App in the applications menu in the top right corner.
You are now logged in and can familiarize yourself with the management portal |
|
4 |
We are starting our Demo journey by creating two Assets. Each Asset represents a dedicated application you wish to protect. In our demo we have two types of applications: 1. Web Application – To protect the application accessible by the browser 2. API Application – To protect the APIs the ACME applications expose |
|
Step |
Instructions |
|---|---|
|
1 |
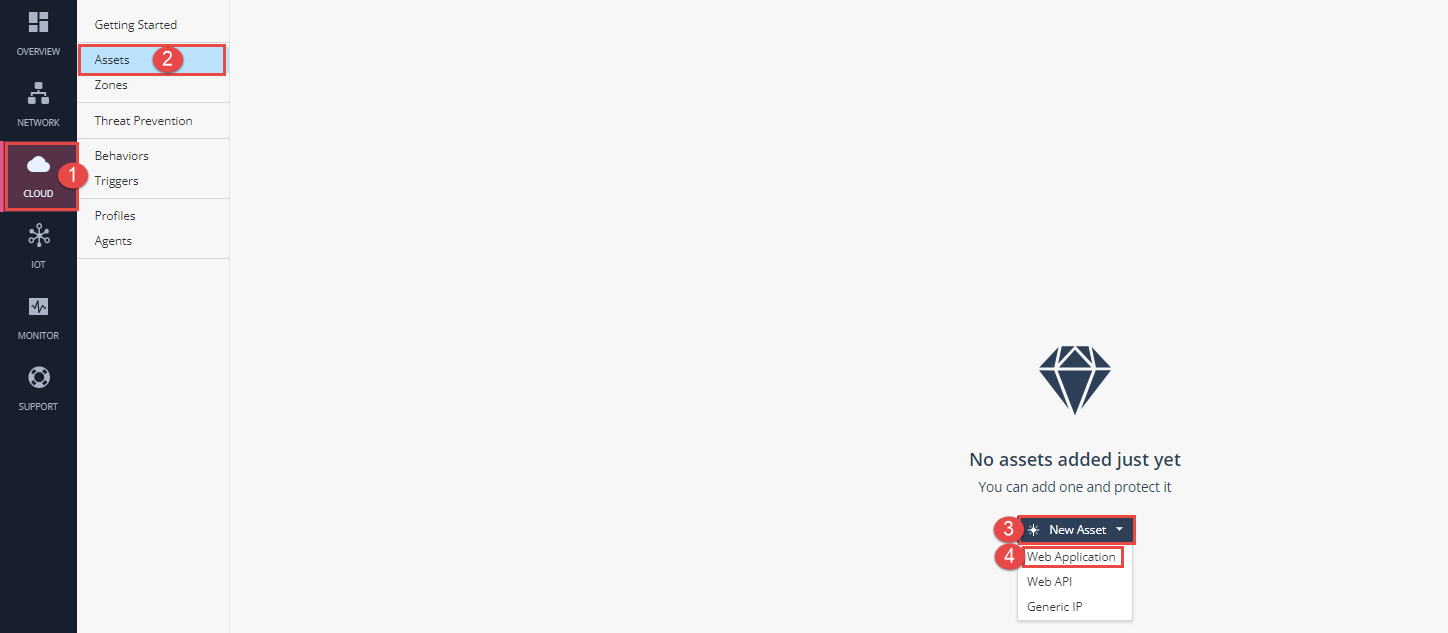
Create Web Application Asset via a dedicated Wizard: Navigate to CLOUD > Assets > New Asset > Web Application:
|
|
2 |
Configuring Web Application Asset via a dedicated Wizard:
|
|
3 |
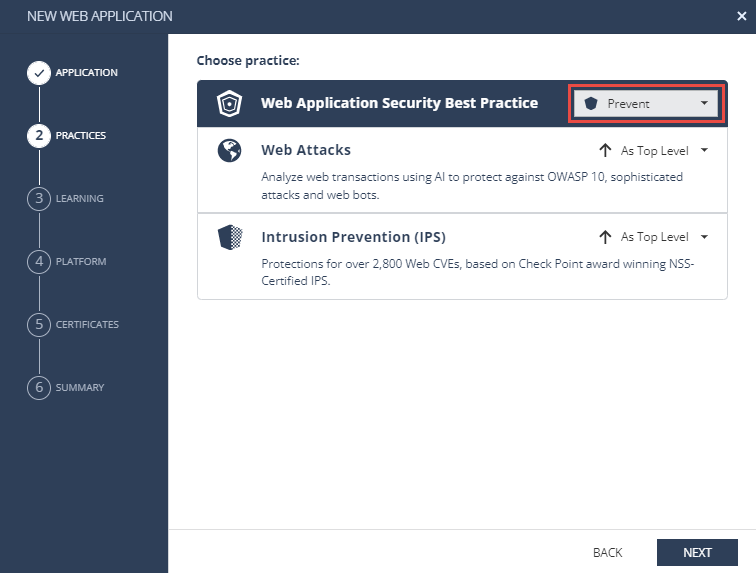
View the active security practices suggested and change their action to Prevent (for the purpose of this demo), then click NEXT:
|
|
4 |
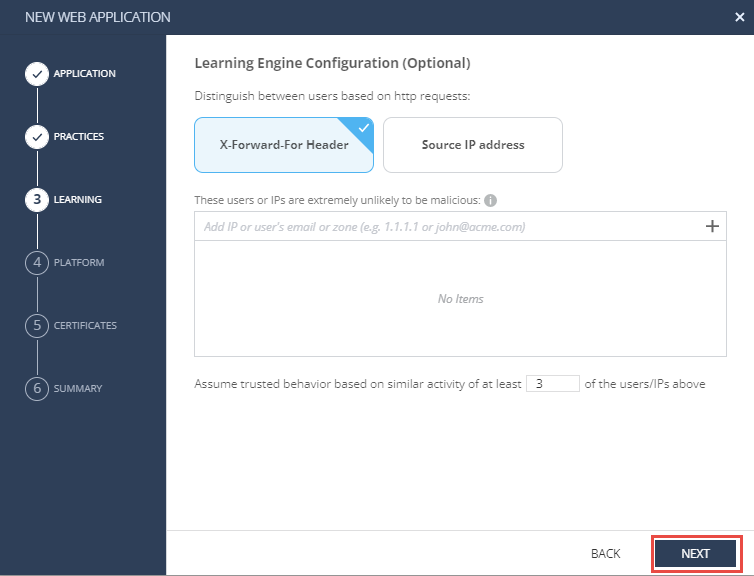
You can configure to distinguish between users based on XFF or Source IP. In our demo leave the default configuration and click NEXT:
|
|
5 |
Infinity Next supports different deployment methods in Public Cloud (AWS, Azure), Private Cloud (VMware), Linux, Containers and Kubernetes. Our demo based on Linux installation. Please select the appropriate deployment model as in the picture below and click NEXT:
|
|
6 |
Click NEXT on the Certificates step:
|
|
7 |
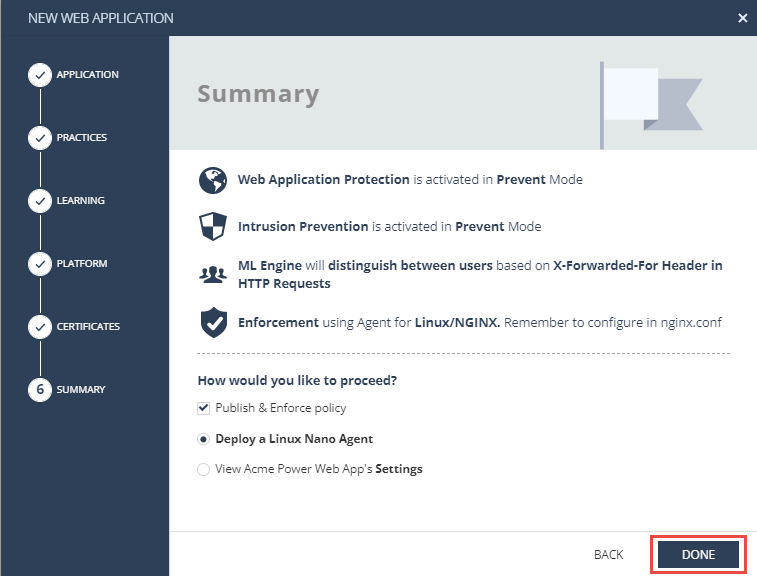
Click DONE. This will also publish & enforce the new configuration, as well as automatically take you to the agent profile page and deployment instructions (We will look at it after we create the Web API asset):
|
|
8 |
Return to Cloud > Assets on the portal. |


|
Step |
Instructions |
||
|---|---|---|---|
|
1 |
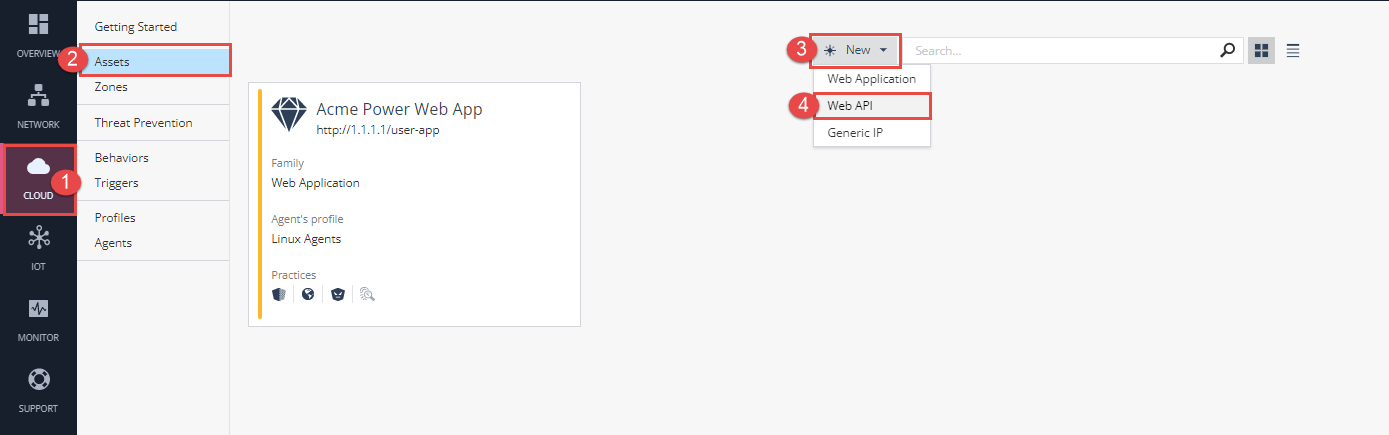
Create the Web API Asset, New > Web API:
We will repeat steps from the Web Application configuration but with different Asset Family type (API) and a different address as described below:
Set Web API Security Best Practice to Prevent and Click NEXT:
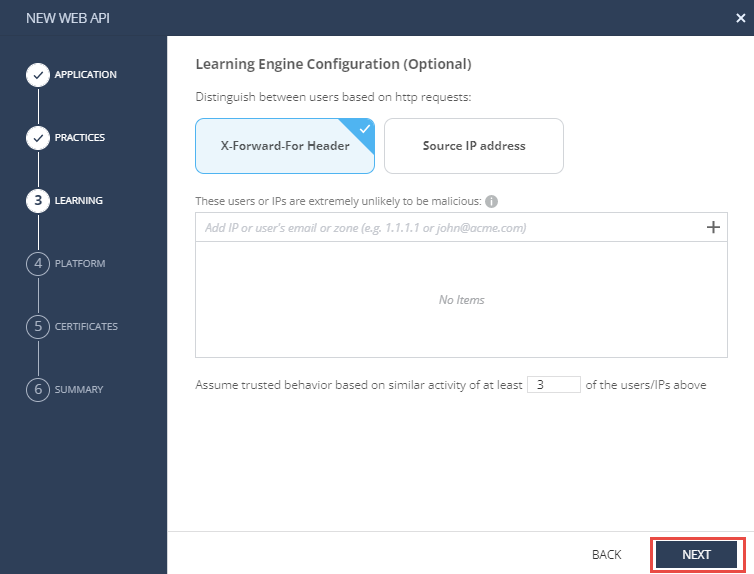
Leave the default Learning Engine Configuration and click NEXT :
|
||
|
2 |
We will use the already configured Profile that been created in our Web Asset creation:
|
||
|
3 |
Click NEXT on the Certificates step :
|
||
|
4 |
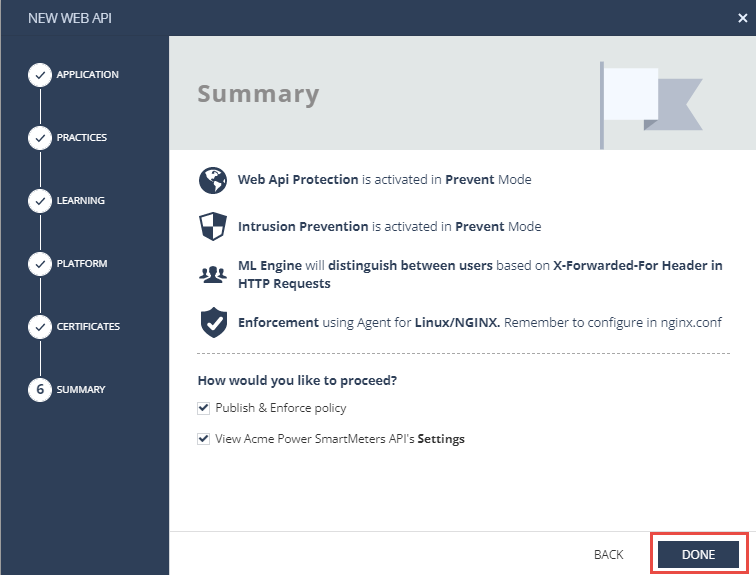
Complete the Summary Step of the Wizard by clicking DONE:
|
||
|
5 |
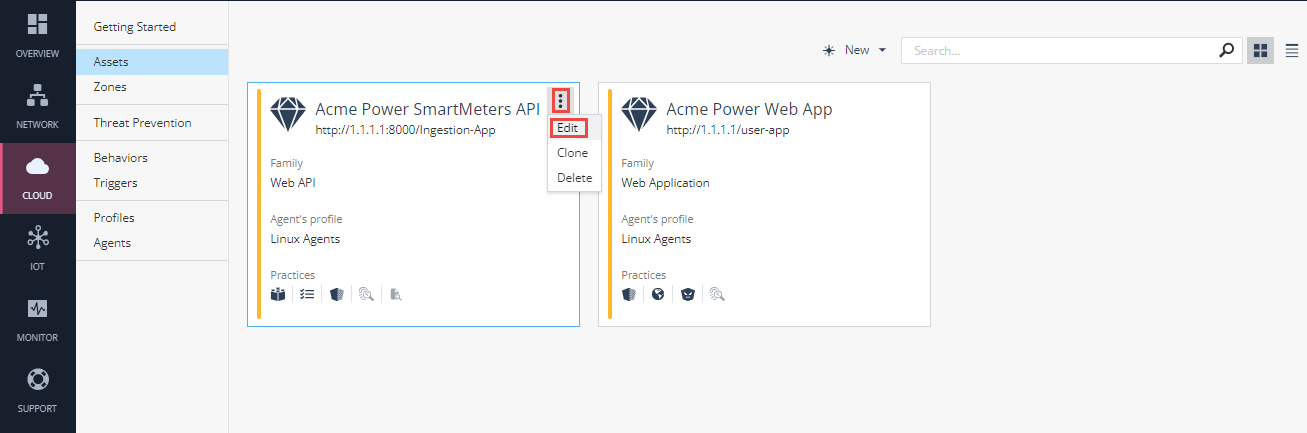
Now you have configured two assets that represent the applications you wish to protect with CloudGuard AppSec. You can also navigate to the advanced settings of the Acme Power SmartMeter API object by clicking the relevant asset object from the Cloud > Assets screen.
|
||
|
6 |
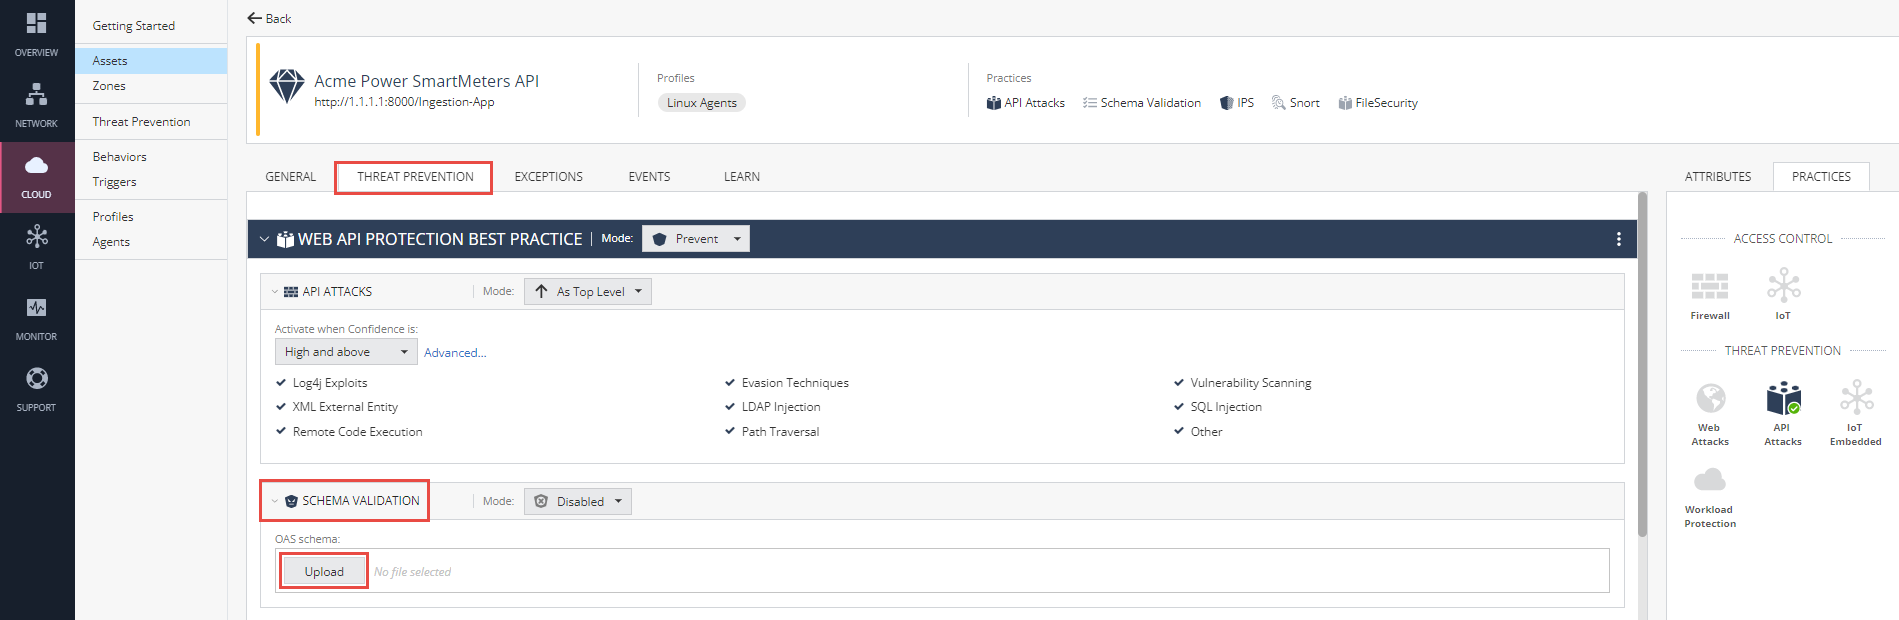
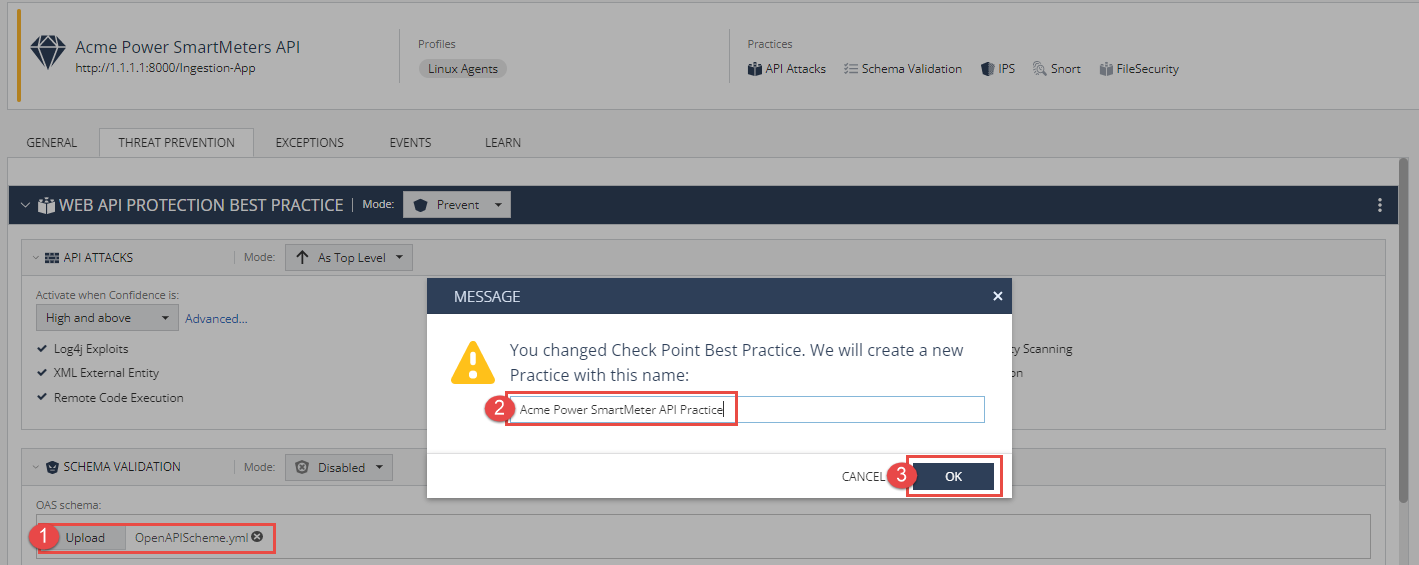
If you have not done so yet, Navigate back to the API asset – Acme Power SmartMeters API – in order to activate the API schema validation security: a. Navigate to the “Threat Prevention” Tab. b. Upload the OpenAPI Scheme to enforce the APIs being sent to your application, In SCHEMA VALIDATION > Click Upload The file is located at the Windows machine under the Documents folder: OpenApiScheme.yml:
This action prompts a Popup that says that as we are changing the default settings, We are in essence creating a new practice object. Give this new practice a name "Acme Power SmartMeter API Practice" and Click OK.
|
||
|
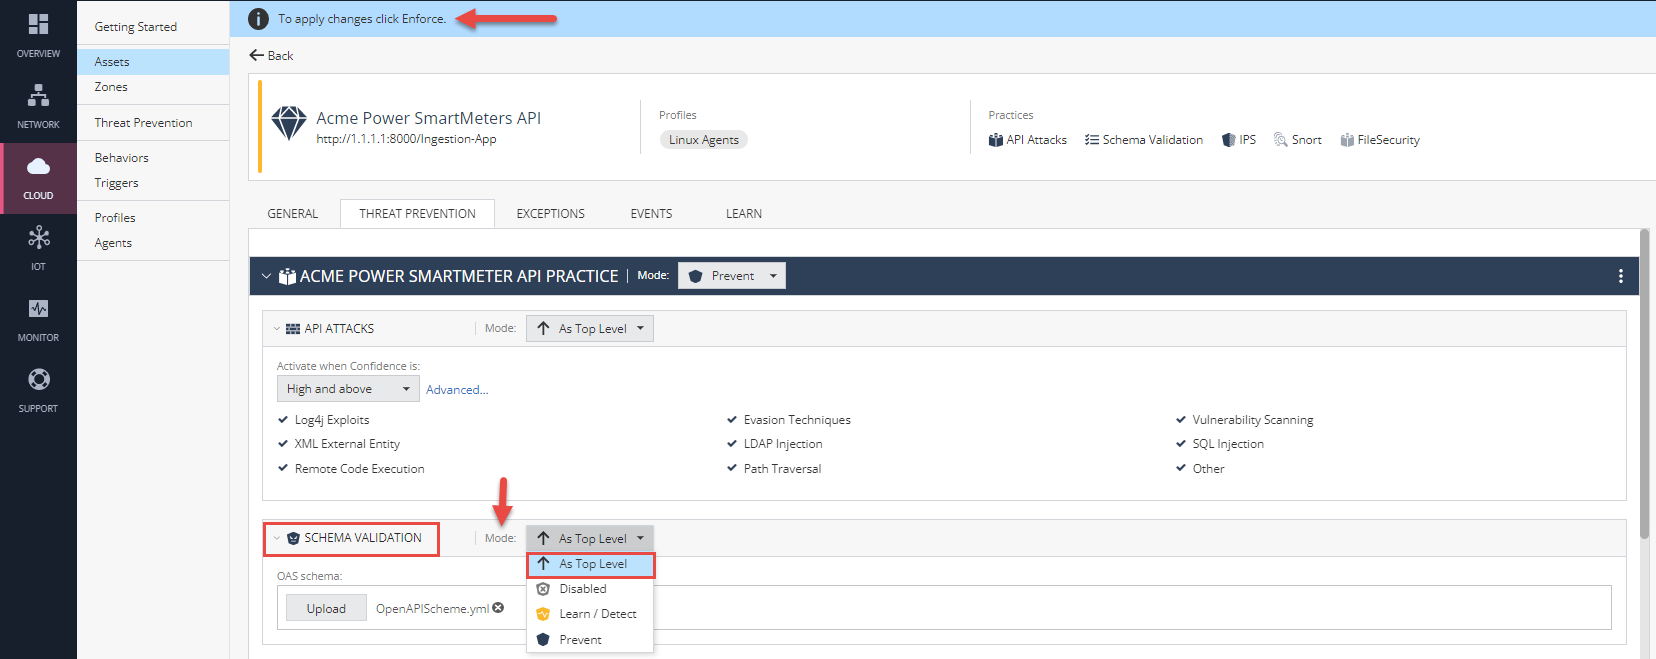
7 |
Change the Mode of the Schema Validation to be “As Top Level”. You will also notice a blue bar at the top of the screen reminding you that you have pending configuration changes which need to be published and enforced.
|
||
|
8 |
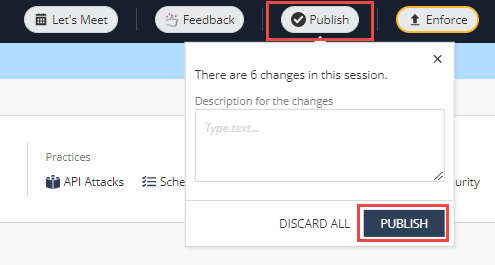
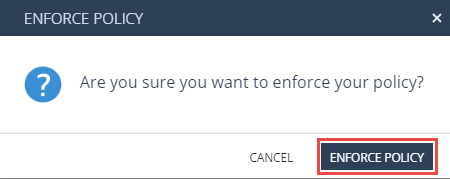
In order for the database to be updated with our entire recent configuration, We will need to PUBLISH our changes. Navigate to the top bar of the web page and you will find indication that there are changes not published:
Click PUBLISH & Click Enforce in the top toolbar.
|


|
Step |
Instructions |
||||
|---|---|---|---|---|---|
|
1 |
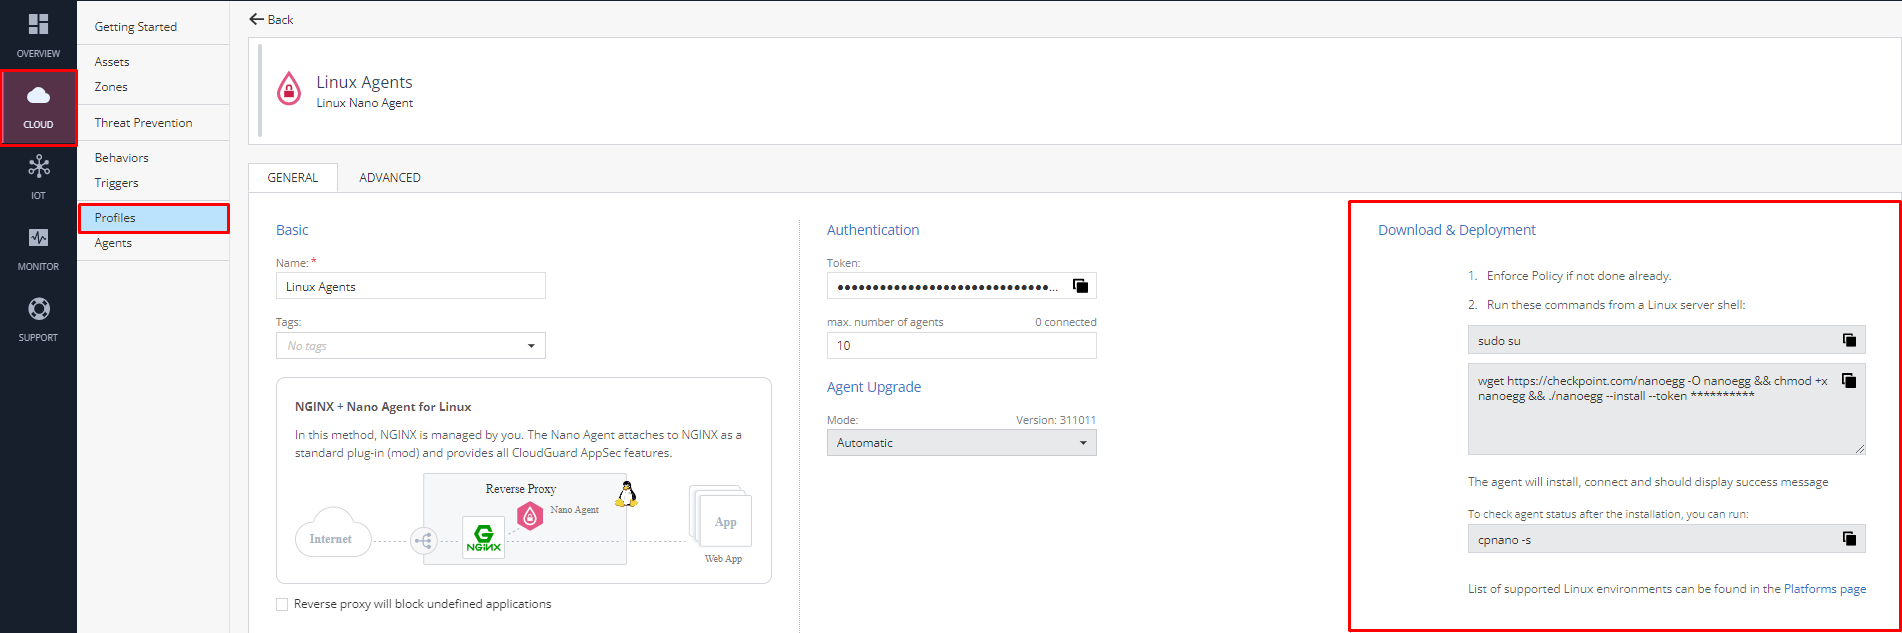
Navigate to Cloud > Profiles. You will find the Profile created. Since there is only one object it will already be open and the settings shown. You will notice that the profile screen also includes deployment instructions at the right side.
|
||||
|
2 |
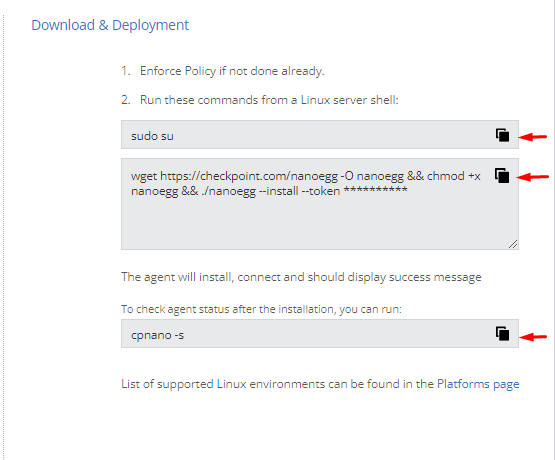
Copy using the Copy buttons and run the commands in your SSH window to the Acme Server VM. Don’t forget that the credentials to accessing the machine are: User: waap password: A$317UHF9Wb!
|
||||
|
3 |
As written, the agent will install and obtain the policy, and start enforcing the policy within about 1 minute and to check the agent status during and after the installation, Please run
|
We will now perform the attack scenarios again, but this time they will be prevented.
|
Step |
Instructions |
|---|---|
|
1 |
If not already running, run the AcmePower_SmartMeter.exe Windows application. |
|
2 |
Go to the SmartMeter Options menu and select Reset Demo Environment |
|
3 |
Enter the <IP> in the Acme Power API Server field. |
|
4 |
Click Play to start the smart meter |
|
5 |
Navigate to http://<IP> and login (you can ignore the credentials) |
|
6 |
You should see the meter readings in a graph on your screen. If you don’t see them, refresh the page in the browser. |
|
7 |
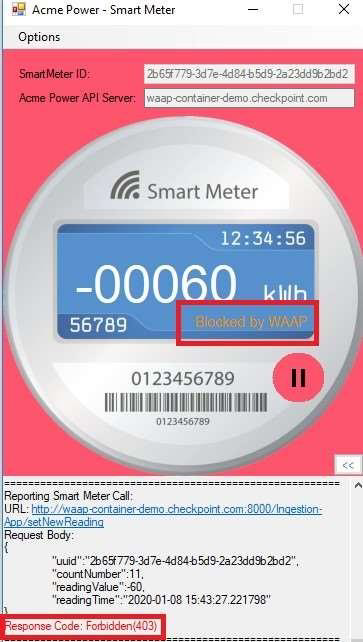
The attacker wants Acme Power to pay him money. He hacked into the smart meter and is going to send negative Watt/ Hour values.
To start the attack:
|
|
8 |
Look at the meter reading graph. You should see that it continues as usual and doesn’t go below 0. Also notice that the smart meter got a 403 forbidden response from the application.
|
|
9 |
An attacker found a way to do an SQL Injection against the Acme Web Application and reset his bill to $0. To obtain the SQL attack string: a. Go to the SmartMeter Options menu and select the option Create Web Attack String. (A real s mart meter will obviously not have this feature.) b. The attack string is now on your clipboard. |
|
10 |
Paste the attack string into a new Tab/ Window in the browser. |
|
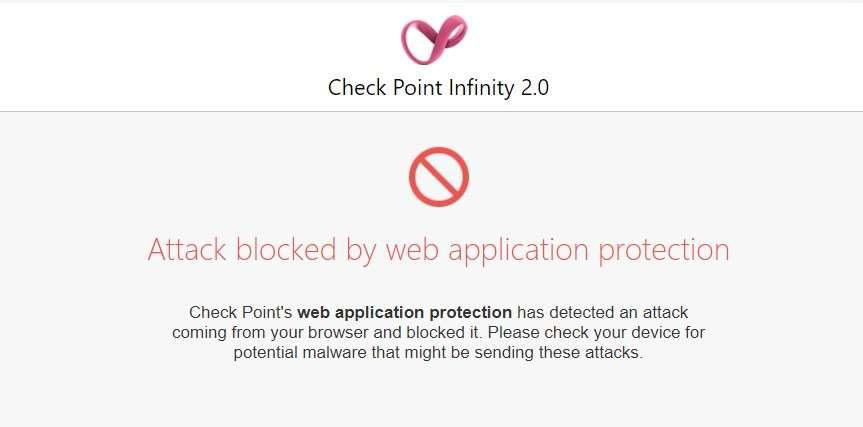
11 |
You should be getting a Block Page in your browser
|
|
12 |
Look at the web application smart meter reading graph - you should see that it continues as usual and doesn’t reset to 0. |
|
13 |
In the Infinity Next Web Portal navigate to Monitor > AppSec Dashboard. You should see a dashboard with data. |
|
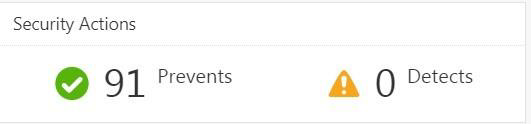
14 |
Double click on the number next to “Prevents” – you will be able to see the logs and drill down to the details of the attack.
|
|
15 |
|