Exception Rules
If necessary, you can add an exception directly to a rule![]() Set of traffic parameters and other conditions in a Rule Base (Security Policy) that cause specified actions to be taken for a communication session..
Set of traffic parameters and other conditions in a Rule Base (Security Policy) that cause specified actions to be taken for a communication session..
An exception sets a different Action to an object in the Protected Scope from the Action specified Threat Prevention rule.
In general, exceptions are designed to give you the option to reduce the level of enforcement of a specific protection and not to increase it.
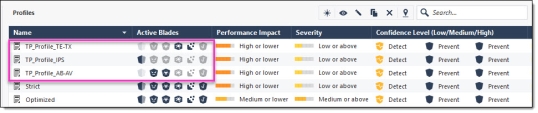
The Research and Development (R&D) network protections are included in a profile with the Prevent action.
You can define an exception which sets the specific R&D network to Detect.
For some Anti-Bot![]() Check Point Software Blade on a Security Gateway that blocks botnet behavior and communication to Command and Control (C&C) centers. Acronyms: AB, ABOT. and IPS
Check Point Software Blade on a Security Gateway that blocks botnet behavior and communication to Command and Control (C&C) centers. Acronyms: AB, ABOT. and IPS![]() Check Point Software Blade on a Security Gateway that inspects and analyzes packets and data for numerous types of risks (Intrusion Prevention System). signatures only, you can define exceptions which are stricter than the profile action.
Check Point Software Blade on a Security Gateway that inspects and analyzes packets and data for numerous types of risks (Intrusion Prevention System). signatures only, you can define exceptions which are stricter than the profile action.
You can add one or more exceptions to a rule. The exception is added as a shaded row below the rule in the Rule Base![]() All rules configured in a given Security Policy. Synonym: Rulebase..
All rules configured in a given Security Policy. Synonym: Rulebase..
It is identified in the No column with the rule's number plus the letter E and a digit that represents the exception number.
For example, if you add two exceptions to rule number 1, two lines will be added and show in the Rule Base as E-1.1 and E-1.2.
You can use exception groups to group exceptions that you want to use in more than one rule. See the Exceptions Groups Pane.
You can expand or collapse the rule exceptions by clicking on the minus or plus sign next to the rule number in the No. column.
|
Step |
Instructions |
|---|---|
|
1 |
In the Policy pane, select the rule to which you want to add an exception. |
|
2 |
Click Add Exception. |
|
3 |
Select the Above, Below, or Bottom option according to where you want to place the exception. |
|
4 |
Enter values for the columns. Including these:
|
|
5 |
Install the Threat Prevention Policy. |
|
|
Note - You cannot set an exception rule to an inactive protection or an inactive blade. |

Disabling a Protection on One Server
Scenario: The protection Backdoor.Win32.Agent.AH blocks malware on windows servers. How can I change this protection to detect for one server only?
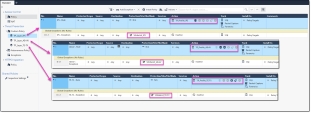
In this example, create this Threat Prevention rule, and install the Threat Prevention policy:
|
Name |
Protected Scope |
Protection/Site |
Action |
Track |
Install On |
|---|---|---|---|---|---|
|
|
|
A profile based on the Optimized profile. Edit this profile > go to the General Policy pane> in the Activation Mode section, set every Confidence to Prevent. |
Log |
Policy Targets |
|
|
Exclude |
Server_1 |
|
Detect |
Log |
Server_1 |
|
Step |
Instructions |
||
|---|---|---|---|
|
1 |
In SmartConsole |
||
|
2 |
Click the rule that contains the scope of Server_1. |
||
|
4 |
Right-click the rule and select New Exception. |
||
|
5 |
Configure these settings:
|
||
|
6 |
Install the Threat Prevention Policy. |
Software Blade Exceptions
You can configure an exception for an entire blade.
|
Step |
Instructions |
|---|---|
|
1 |
In the Policy, select the Layer rule to which you want to add an exception. |
|
2 |
Click Add Exception. |
|
3 |
Select the Above, Below, or Bottom option according to where you want to place the exception. |
|
4 |
In the Protection/Site column, select Blades from the drop-down menu. |
|
5 |
Select the Software Blade |
|
6 |
Install the Threat Prevention Policy. |
You can create a rule or exception for a specific blade for a specific website/URL because the Security Gateway![]() Dedicated Check Point server that runs Check Point software to inspect traffic and enforce Security Policies for connected network resources. is always the destination in non-transparent proxy mode.
Dedicated Check Point server that runs Check Point software to inspect traffic and enforce Security Policies for connected network resources. is always the destination in non-transparent proxy mode.
In a transparent proxy mode, or while the traffic is inspected by a Security Gateway, this setup is not a challenge because the destination is configured in the Destination column, and the excluded blade is configured in the Protection/Site/File/Blade column. This is not possible in non-transparent mode because the destination is always the Security Gateway itself.
-
Create a separate layer with a separate profile for each blade or a pair of blades (for example: Anti-Virus
 Check Point Software Blade on a Security Gateway that uses real-time virus signatures and anomaly-based protections from ThreatCloud to detect and block malware at the Security Gateway before users are affected. Acronym: AV. and Anti-Bot, or Threat Emulation Check Point Software Blade on a Security Gateway that monitors the behavior of files in a sandbox to determine whether or not they are malicious. Acronym: TE. and Threat Extraction Check Point Software Blade on a Security Gateway that removes malicious content from files. Acronym: TEX.):
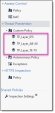
-
Create a separate profile for each layer and enable only the specific blade:
-
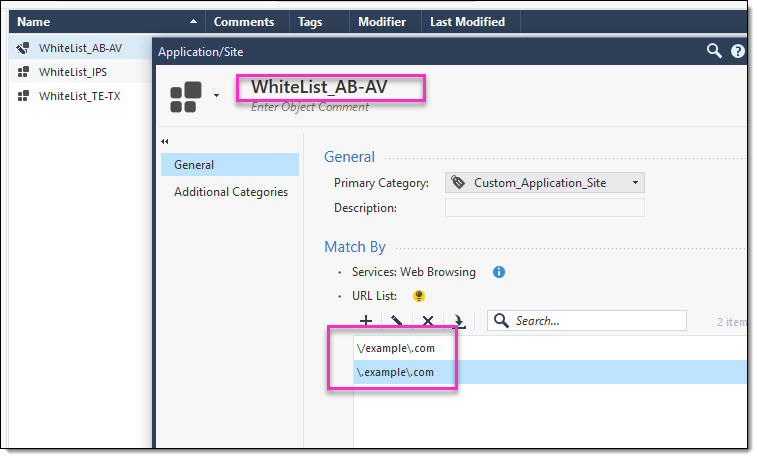
Create a custom Application/Site for each layer. For instructions, refer to sk165094:

-
Create a Rule Base for each layer, and a different exception rule with the created Custom Application/Site in Protection/Site/File/Blade:
-
In the Action column, select Detect or Inactive to disable the applicable Threat Prevention Blade for the applicable websites/URLs.


|
|
Notes -
|
Creating Exceptions from IPS Protections
|
Step |
Instructions |
|---|---|
|
1 |
Go to Security Policies > Threat Prevention > Custom Policy > IPS Protections. |
|
2 |
Right-click a protection and select Add Exception. |
|
3 |
Configure the exception rule. |
|
4 |
Click OK. |
|
5 |
Install the Threat Prevention Policy. |
Creating Exceptions from Logs or Events
In some cases, after evaluating a log or an event in the Logs & Monitor view, it may be necessary to update a rule exception in the SmartConsole Rule Base.
You can do this directly from within the Logs & Monitor view.
You can apply the exception to a specified rule or apply the exception to all rules that appear below Global Exceptions.
|
Step |
Instructions |
|---|---|
|
1 |
Click Logs & Monitor > Logs tab. |
|
2 |
Right-click the log and select Add Exception. |
|
3 |
Configure the settings for the exception. |
|
4 |
In the New Exception Rule window:
|
|
5 |
Install the Threat Prevention Policy. |
Exception Groups
An exception group is a container for one or more exceptions. You can attach an exception group to all rules or only to some rules. With exception groups, you can manage your exceptions more easily, because you can attach the same exception group to multiple rules, instead of manually define exceptions for each rule.
The Exception Groups pane shows a list of exception groups that were created, the rules that use them, and any comments related to the defined group.
|
Option |
Meaning |
|---|---|
|
New |
Creates a new exception group. |
|
Edit |
Modifies an existing exception group. |
|
Delete |
Deletes an exception group. |
|
Search |
Search for an exception group. |
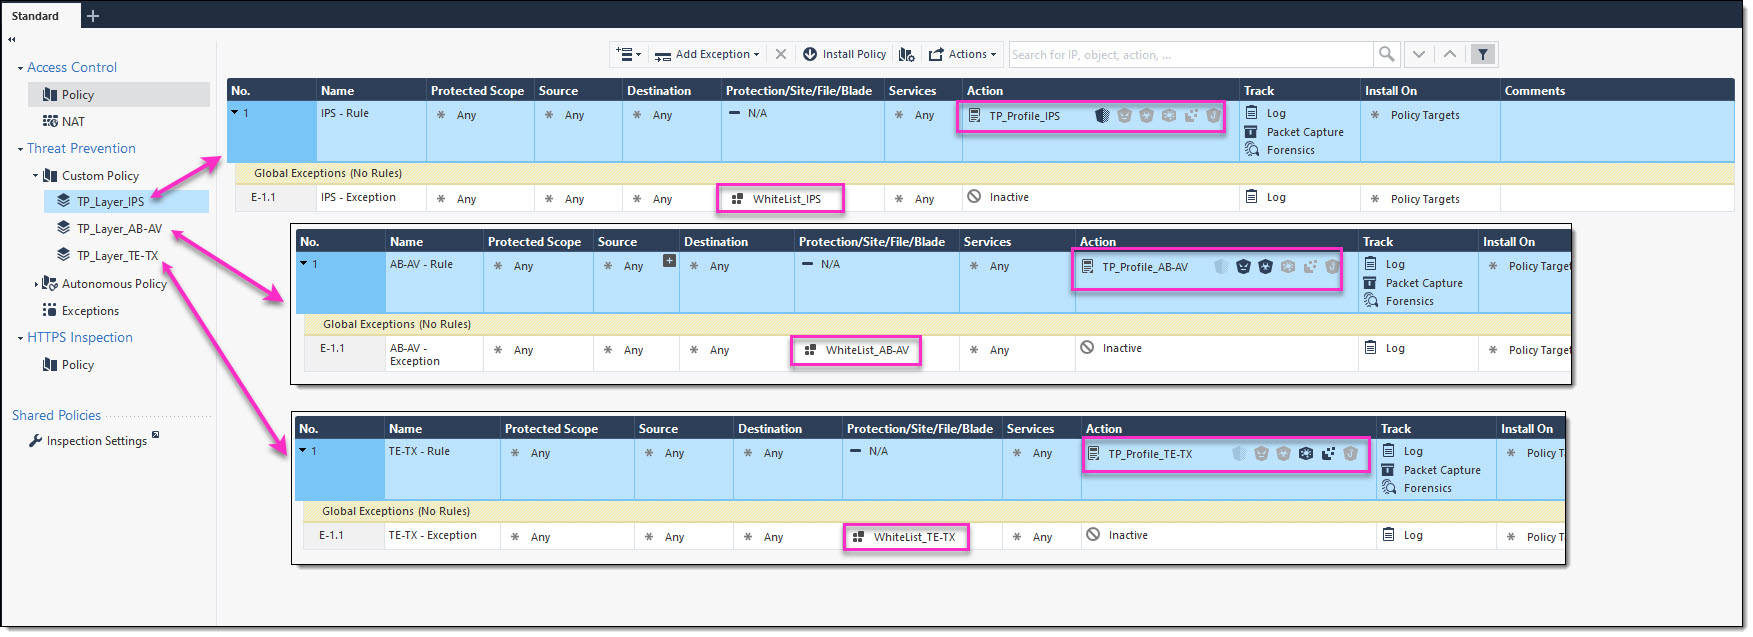
Global Exceptions
The system comes with a predefined group named Global Exceptions. Exceptions that you define in the Global Exceptions group are automatically added to every rule in the Rule Base. For other exception groups, you can decide to which rules to add them.
Exception Groups in the Rule Base
Global exceptions and other exception groups are added as shaded rows below the rule in the Rule Base. Each exception group is labeled with a tab that shows the exception group's name. The exceptions within a group are identified in the No column using the syntax: E - <rule number>.<exception number>, where E identifies the line as an exception.
If there is a Global Exceptions group that contains two exceptions, all rules show the exception rows in the Rule Base No column as E-1.1 and E-1.2. Note - that the numbering of exception varies when you move the exceptions within a rule.
To view exception groups in the Rule Base:
Click the plus or minus sign next to the rule number in the No. column to expand or collapse the rule exceptions and exception groups.
Creating Exception Groups
When you create an exception group, you create a container for one or more exceptions. After you create the group, add exceptions to them. You can then add the group to rules that require the exception group in the Threat Prevention Rule Base.
|
Step |
Instructions |
|---|---|
|
1 |
In SmartConsole, select Security Policies > Threat Prevention > Exceptions. |
|
2 |
In the Exceptions section, click New. |
|
3 |
In Apply On, configure how the exception group is used in the Threat Prevention policy.
|
|
4 |
Click OK. |
|
5 |
Install the Threat Prevention policy. |
To use exception groups, you must add exception rules to them.
|
Step |
Instructions |
|---|---|
|
1 |
In SmartConsole, select Security Policies > Threat Prevention > Exceptions. |
|
2 |
In the Exceptions section, click the exception group to which you want to add an exception. |
|
3 |
Click Add Exception Rule. |
|
4 |
Configure the settings for the new exception rule. |
|
5 |
Install the Threat Prevention policy. |
Adding Exceptions to Exception Groups
To use exception groups, you must add exception rules to them.
|
Step |
Instructions |
|---|---|
|
1 |
In SmartConsole, select Security Policies > Threat Prevention > Exceptions. |
|
2 |
In the Exceptions section, click the exception group to which you want to add an exception. |
|
3 |
Click Add Exception Rule. |
|
4 |
Configure the settings for the new exception rule. |
|
5 |
Install the Threat Prevention policy. |
Adding Exception Groups to the Rule Base
You can add exception groups to Threat Prevention rules.
This only applies to exception groups that are configured to Manually attach to a rule.
|
Step |
Instructions |
|---|---|
|
1 |
Click Security Policies > Threat Prevention > Custom Policy. |
|
2 |
Right-click the rule and select Add Exception Group > <Group Name>. |
|
3 |
Install the Threat Prevention policy. |