Configuring Autonomous Threat Prevention
Watch the Video
To configure Autonomous Threat Prevention in your environment, follow these steps:
-
 Enable Autonomous Threat Prevention on the Security Gateway
Step
Instructions
1
In SmartConsole, go to Gateways & Servers.
2
Right-click the Gateway and click Edit.
3
Go to the Threat Prevention tab (right-lower section of the window) and select Autonomous Threat Prevention.
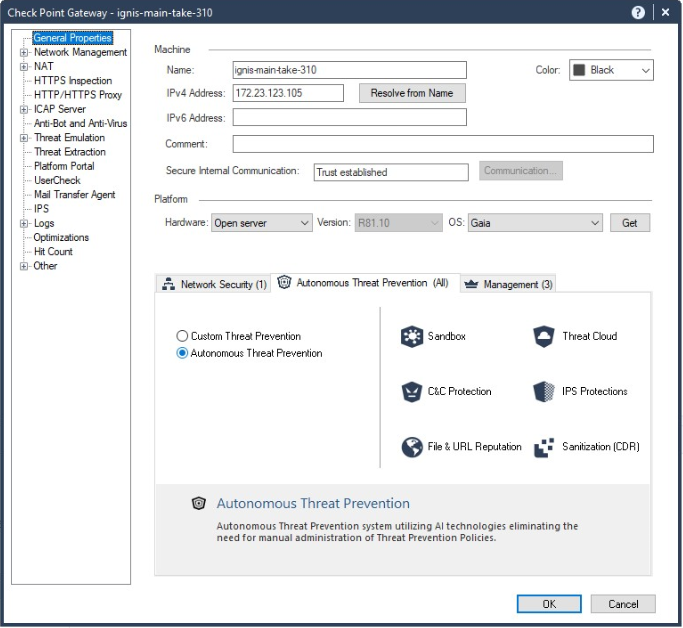
4
Click OK.
-
Create an Autonomous Threat Prevention Policy
Step
Instructions
1
In SmartConsole
Check Point GUI application used to manage a Check Point environment - configure Security Policies, configure devices, monitor products and events, install updates, and so on., go to Security Policies > Autonomous Threat Prevention > Policy.2
Click the default profile name to see the list of profiles, and select the required profile.
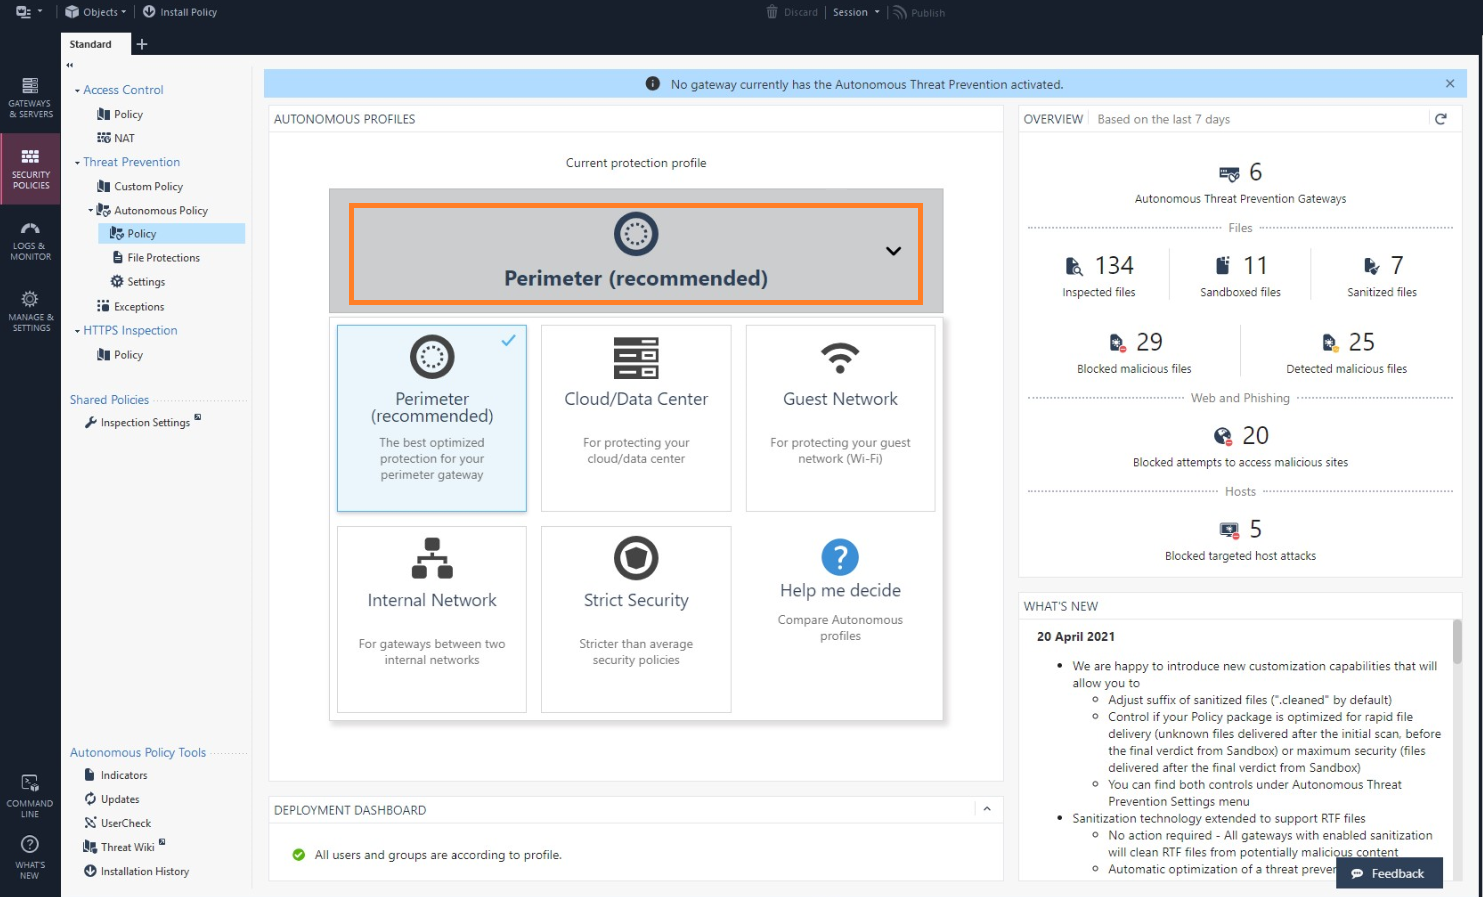
If you are not sure which profile to select, click the Help me decide button from the drop-down list:

A table which specifies the differences between the profiles opens:
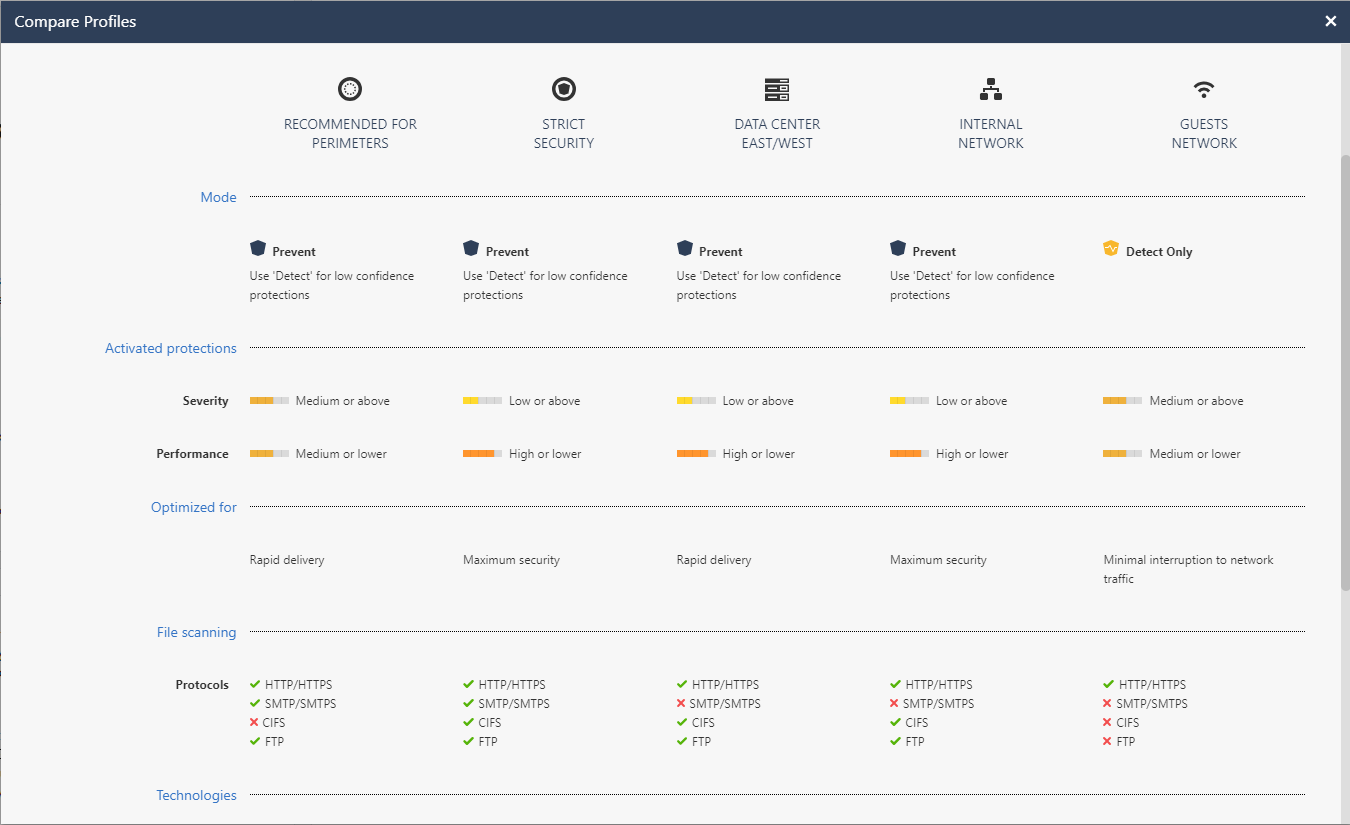
Based on the table, select the profile which best suits your needs.
3
Click OK.

Note - Each profile shows a list of the technologies that it uses.
-
Install the Autonomous Threat Prevention Policy
Step
Instructions
1
In SmartConsole, from the toolbar, select Install Policy.
The Install Policy window opens.
2
Select Threat Prevention.
3
Select the gateway targets for Policy installation.
Note - The Autonomous Threat Prevention Policy will be installed on gateways with Autonomous Threat Prevention enabled. Gateways with no Autonomous Threat Prevention enabled will receive the traditional Threat Prevention Policy.
4
Click Install.
-
Using different Autonomous Threat Prevention profiles on different Security Gateways
Step
Instructions
1
In SmartConsole, create a new policy package.
From the main menu, click the drop-down arrow and select Manage policies and layers. The Manage policies and layers window opens.
Click New and configure the new policy package.
For more information on policy packages, see the R81.10 Security Management Administration Guide.
2
Enable the Autonomous Threat Prevention.
See Enable Autonomous Threat Prevention on the Security Gateway.
3
Select the required Autonomous Threat Prevention profile.
4
Install the Threat Prevention policy on the applicable Security Gateway
Dedicated Check Point server that runs Check Point software to inspect traffic and enforce Security Policies for connected network resources..
|
|
Note - - MTA ( Mail Transfer Agent |
Deployment Dashboard
The Deployment Dashboard lets you gradually deploy Threat Prevention policy in your networks. The Deployment Dashboard includes three protection modes: No Protection, Detect Only and According to Profile.
According to profile - The settings of the Threat Prevention profile apply to the object. By default any traffic is protected according to Profile and this is the recommendation. If gradual deployment is needed, you can put specific network objects in "Detect![]() UserCheck rule action that allows traffic and files to enter the internal network and logs them. only". We recommend to move these object to According to Profile after a short trial period.
UserCheck rule action that allows traffic and files to enter the internal network and logs them. only". We recommend to move these object to According to Profile after a short trial period.
No Protection - The object is not protected by the selected Threat Prevention profile. Traffic is allowed and is not logged.
Detect only - Traffic is allowed, but it is logged according to the Threat Prevention profile settings.
|
|
Note - You can easily drag and drop objects from any of the protection modes to any other protection mode. |
By default, the No Protection and Detect Only columns are empty, and the According to Profile column has one object: Any. When you add an object to the No Protection column or the Detect Only column, the object in the According to Profile column changes from Any to All Other.
File Protections
In the File Protections page, you can:
-
View the protected file types and protection types for the selected Autonomous Threat Prevention profile.
-
Override the recommended file protections according to profile and select different protections.
To configure file protections
-
Go to Threat Prevention > Autonomous Threat Prevention > File Protections
-
Click on the + sign and configure the required protection.
These are the available protections:
-
Inspect - These technologies are operated: File Reputation, ThreatCloud
The cyber intelligence center of all of Check Point products. Dynamically updated based on an innovative global network of threat sensors and invites organizations to share threat data and collaborate in the fight against modern malware. and Sandbox. You can see Sandbox is enabled in the Sandbox column. -
Inspect & Clean - These technologies are operated: File Reputation, ThreatCloud, Sandbox and Sanitization (CDR). You can see Sandbox is enabled in the Sandbox column.
-
Block - Block the file.
-
Bypass - Do not inspect the file.
You cannot override the protections for file types which are not on the list. File types which are not on the list will be inspected in all profiles.
-
Settings
Sanitized File Settings - By default, this option is selected:
-
Allow end-users to access the original files that are not malicious according to Sandbox - After a file is cleaned/sanitized, a banner with a link to original file is added to the document. An access to original file will be allowed only if the original file is found to be benign by all Threat Prevention engines, including Sandbox. If you clear this option, you will not be able to access the original file even if it is determined as non-malicious.
-
Modify the name of the cleaned file - Select this option to modify the name of the cleaned file.
Advanced Settings - If needed, you can turn off Sandbox and/or Sanitization and/or Archives deep scan. We recommend to keep Sandbox, Sanitization and Archives deep scan On.