


|
|
|
How to configure SIEM applications to optimally receive logs.
ArcSight
ArcSight recommends that you name the certificate syslog-ng.
To name the certificate:
Convert the key to p12 format:
openssl pkcs12 -inkey syslogServer.key -in syslogServer.crt -export -out syslog-ng.p12 -name "syslogng-alias" -password pass:changeit
To make sure the environment variable ARCSIGHT_HOME is the connector install directory:
ARCSIGHT_HOME/current/bin/arcsight agent keytoolgui$ARCSIGHT_HOME/current/jre/lib/security/cacerts (password "changeit").Ca.pem and save it.To edit the agent.properties file to enable mutual authentication:
Use vi $ARCSIGHT_HOME//current/user/agent/agent.properties:
syslogng.mutual.auth.enabled=false -> true
syslogng.tls.keystore.file=user/agent/syslog-ng.p12
syslogng.tls.keystore.alias=syslogng-alias
/etc/init.d/arc_connector_name restartSplunk
cat syslogServer.crt syslogServer.key RootCA.pem > splunk.pem
inputs.conf file on the Splunk server:vi /opt/splunk/etc/apps/search/local/inputs.conf
[SSL]
serverCert = /etc/ssl/my-certs/splunk.pem
sslPassword = <challenge password>
requireClientCert = true
[tcp-ssl://<port>]
index = <index>
server.conf file on the Splunk servervi /opt/splunk/etc/system/local/server.conf
[sslConfig]
sslRootCAPath = /etc/ssl/my-certs/RootCA.pem
/opt/splunk/bin/splunk restart
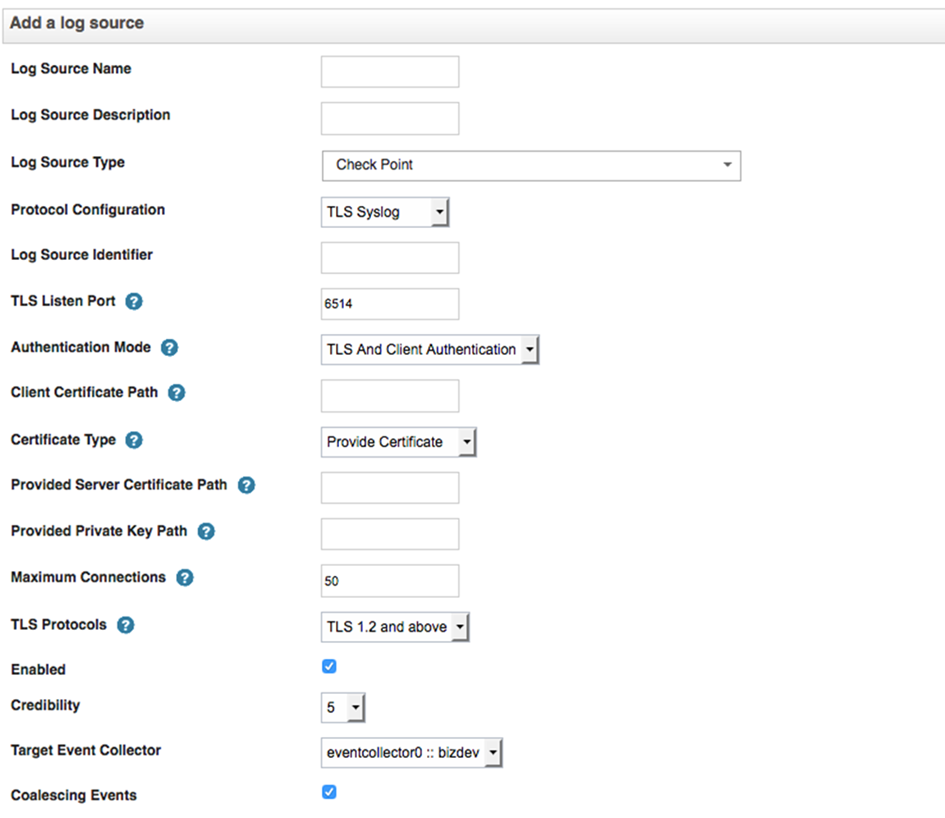
QRadar
When you use Client Authentication, you must provide the absolute path to the client certificate.

