SIP Security Rules
Define security rules to allow bidirectional calls, incoming or outgoing calls. The examples that follow show you how to define bidirectional rules.
Important - You must configure anti-spoofing on the Check Point gateway interfaces for VoIP.
- Do not define special network objects to allow SIP signaling. Use regular network objects. The firewall dynamically opens pinholes for data connections (RTP/RTCP and others). The Rxx and higher Security Gateways support up to four different media channels per SIP SDP message.
- When using , you must include the hidden IP address in the destination of the SIP rule.
- When using , you must include the hidden IP address in the destination of the SIP rule. When you include the hidden IP address, this allows the initiation of the TCP handshake from the external network to the hidden IP.
- For NAT on SIP entities, we strongly recommended that you enable the Inspection Settings , see.
- For Automatic configuration for , you must add a NATed object to the column in the Rule Base.
- Make sure to check if you do not want in-progress calls to drop every time you .
- Double-click your gateway.
The window shows.
- From.
Note - Rematch connections is selected by default.
Note – The old policy rules are still intact for calls already in-progress and they will not be dropped.
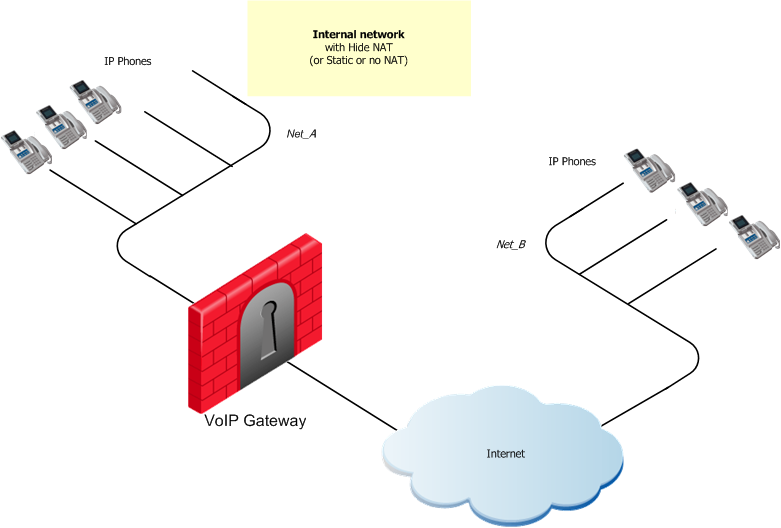
SIP Rules for a Peer-to-Peer No-Proxy Topology

VoIP rules for this scenario:
Source
|
Destination
|
Services & Applications
|
Action
|
Comments
|
Net_A
Net_B
|
Net_B
Net_A
|
UDP:sip
|
Accept
|
SIP over UDP
Bidirectional Calls
|
OR
Source
|
Destination
|
Services & Applications
|
Action
|
Comments
|
Net_A
Net_B
|
Net_B
Net_A
|
SIP over TCP service
|
Accept
|
SIP over TCP
Bidirectional Calls
|
To configure SIP rules for this type of peer-to-peer topology.
- Define a rule that allows IP phones in Net_A to call Net_B and the reverse.
- Choose SIP over UDP
OR
- SIP over TCP
- Define Hide NAT or Static NAT for the phones in the internal network. Edit the network object for Net_A.
- From SmartConsole, in the tab > at the right, select the network object and double-click.
The window opens.
- Select > .
- Check the box .
- Select the , or .
If you select :
- Create a node object with the Hide NAT IP address
- Select the .
- Add the service to the column.
- Add the node object to the of the rule.
- Install the Security Policy.
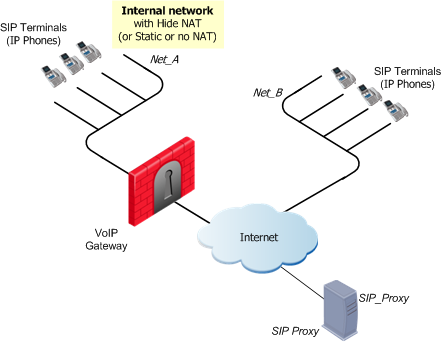
SIP Rules for a Proxy in an External Network
This illustration shows a SIP topology with a proxy in an external network.

VoIP rules for this scenario:
Source
|
Destination
|
Services & Applications
|
Action
|
Comments
|
SIP_Proxy
Net_A
|
Net_A
SIP_Proxy
|
UDP:sip
|
Accept
|
SIP over UDP
Bidirectional Calls
|
OR
Source
|
Destination
|
Services and Applications
|
Action
|
Comments
|
SIP_Proxy
Net_A
|
Net_A
SIP_Proxy
|
SIP over TCP
service
|
Accept
|
SIP over TCP
Bidirectional Calls
|
To allow bidirectional calls between SIP phones in internal and external networks:
- Define network objects (nodes or networks) for IP phones that are:
- Managed by the SIP Proxy or Registrar
- Permitted to make calls, and those calls inspected by the gateway. In the image, these are .
- Define the network object for the SIP Proxy (
SIP_Proxy).If the proxy is on a server that has one IP address, define only one object. If the proxy and server are on the same server but have different IP addresses, define an object for each IP address.
- From SmartConsole, in the tab > at the right, select the network object and double-click.
- The window opens.
- Select > .
- Check the box .
- Select the , or .
If you select :
- Create a node object with the Hide NAT IP address
- Select the .
- Add the service to the column.
- Add the node object to the of the rule.
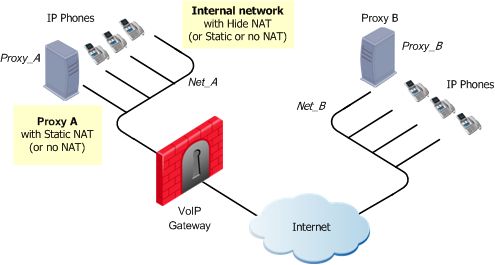
SIP Rules for a Proxy-to-Proxy Topology
The image illustrates a Proxy-to-Proxy topology with Net_A and Net_B on opposite sides of the gateway.

VoIP rules for this scenario:
Source
|
Destination
|
Services & Applications
|
Action
|
Comments
|
Proxy_A
Proxy_B
|
Proxy_B
Proxy_A
|
UDP:sip
|
Accept
|
SIP over UDP
Bidirectional calls
|
OR
Source
|
Destination
|
Services & Applications
|
Action
|
Comment
|
Proxy_A
Proxy_B
|
Proxy_B
Proxy_A
|
SIP over TCP
|
Accept
|
SIP over TCP
Bidirectional calls
|
To allow bidirectional calls between phones:
- Define the network objects (nodes or networks) for the phones permitted to make calls, and the calls subject to gateway inspection.
In the image above, Net_A represents these phones.
- Define the network object for the proxy objects (Proxy_A and Proxy_B).
- Define the VoIP rule.
- Define Hide NAT or Static NAT for the phones in the internal network. Do this by editing the network object for the internal network (Net_A).
- From SmartConsole, in the tab > at the right, select the network object and double-click.
The window opens.
- Select > .
- Check the box .
- Select the , or .
If you select :
- Create a node object with the Hide NAT IP address
- Select the .
- Add the service to the column.
- Add the node object to the of the rule.
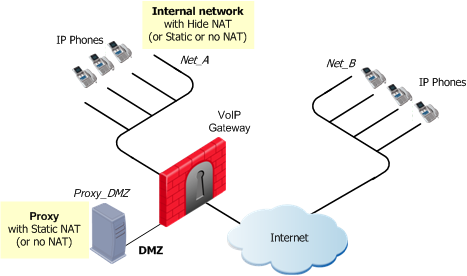
SIP Rules for a Proxy in DMZ Topology
The image illustrates a SIP-based VoIP topology where a proxy is installed in the DMZ.

VoIP rules for this scenario:
Source
|
Destination
|
Services & Applications
|
Action
|
Comments
|
Proxy_DMZ
Net_A
Net_B
|
Net_A
Net_B
Proxy_DMZ
|
UDP:sip
|
Accept
|
SIP over UDP
Bidirectional Calls
|
OR
Source
|
Destination
|
Services & Applications
|
Action
|
Comments
|
Proxy_DMZ
Net_A
Net_B
|
Net_A
Net_B
Proxy_DMZ
|
SIP over TCP
Service
|
Accept
|
SIP over TCP
Bidirectional Calls
|
Allow bidirectional calls between phones in internal and external networks (Net_A and Net_B) and define NAT for the internal phones and the proxy in the DMZ (Proxy_DMZ).
- Define network objects (nodes or networks) for phones that are permitted to make calls and for calls inspected by the gateway. These are Net_A and Net_B.
- Define the network object for the proxy (Proxy_DMZ).
- Configure the VoIP rules.
- Define or for the phones in the internal network.
- From SmartConsole, in the tab > at the right, select the network object and double-click.
The window opens.
- Check the box .
- Select the , or .
If you select :
- Create a node object with the Hide NAT IP address
- Select the .
- Add the service to the column.
- Add the node object to the of the rule.


