
Check Point's Single Domain Security Management Integration with TEM
Overview
Check Point's Single Domain Next-Generation Firewall (NGFW) delivers advanced threat prevention and traffic inspection within a centralized management domain. It supports application control, identity awareness, and integrated threat intelligence, allowing administrators to enforce security policies efficiently across their network. Threat Exposure Management (TEM) also delivers advanced capabilities such as Protection Hardening, Attack Analysis, Security Hygiene, Business Disruption, Indicators, and Custom Protections (Snorts) to strengthen overall security posture.
Administrators must enable Intrusion Prevention System (IPS) enforcement and configure local logging on each Single Domain Security Management device to ensure effective integration.
-
IPS Enforcement
IPS enforcement enables the firewall to detect and block known threats using signature-based inspection. In a Single Domain NGFW, it plays a key role in identifying malicious traffic and leverages IPS configurations and traffic to harden the security posture.
Traffic-Based Insights
-
IPS logs capture real-time threat activity, including intrusion attempts, exploit signatures, and suspicious payloads.
-
TEM uses these logs to correlate traffic patterns and surface risk-based exposures.
Log Requirements
-
Enable IPS and actively log events.
-
Retain logs for at least 7 days and ensure TEM can continuously access them for analysis.
To verify IPS Enforcement logs, see Verifying IPS Enforcement Logs for TEM.
-
-
Managing API Access
Management API Access allows the TEM Virtual Machine (VM) to securely query the Management Server through its API, enabling centralized retrieval of configuration data, policy information, and security events. Within a single domain security management framework, this access supports automated monitoring, threat analysis, and streamlined policy enforcement across network assets.
To verify API access, see Verifying API Access.
-
Trusted Client Permission
Defining the TEM VM as a trusted GUI client allows it to securely interact with the Single Domain Security Management Server.
To verify trusted client permissions, see Verifying Trusted Client.
-
Access Policy Rules for TEM - For All Supported Single Domain Security Management Deployments
Source
Destination
Port
Protocol
Purpose
Check Point
TEM VM
Management Server
TCP/22
TCP/443
SSH
HTTPS
Configuration Fetch / Remediations
Log Server Management
TEM VM
TCP/30030
TCP
Logs Fetch
Firewalls / Clusters
TEM VM
TCP/30003
TCP
Indicators of Compromise (IoC) Enforcement
TEM VM
Firewalls / Clusters
UDP/161
SNMP
CPU and RAM
Supported Capabilities
TEM supports the following capabilities as part of its integration with Single Domain Security Management:
-
Protection Hardening - Controlled Transition of IPS protections to Block mode strengthens security while minimizing operational impact.
-
Attack Analysis - Uses machine learning to identify real attacks and provides one-click remediation to quickly contain threats.
-
Security Hygiene - Keeps systems up to date with the latest patches and security updates to reduce vulnerabilities.
-
Business Disruption Prevention - Detects and mitigates security events that could disrupt operations, helping maintain continuity.
-
Indicators - Manages threat intelligence across all integrated security controls, ensuring consistent alignment and protection across the organization.

Notes -
-
Supported indicator types include IP Addresses, File Hashes, and Domains.
-
For Security Management Server running R81.10 or older indicators will be enforced only if Anti-Virus and Anti-Bot are enforced. In the Security Management Server R81.20 and later, even if these security products are unavailable, it is possible to configure an External Network Feed as described here.
-
-
Custom Protections (Snorts) - This feature allows the use of custom Snort-based protections.
Note - Automatic support is not available in High Availability (HA) environments. Manual configuration is required in such setups.
Integrating Single Domain Security Management with TEM
Step 1: Configuring a New Management API Profile for a Super User
To configure a new Management API Profile for a Super user:
-
Log in to the SmartConsole.
-
From the left navigation panel, click Manage & Settings.
-
In the Permissions & Administrators section, click Permission Profiles, and click New.
The New Profile pop-up appears.
-
Enter a name for the profile.
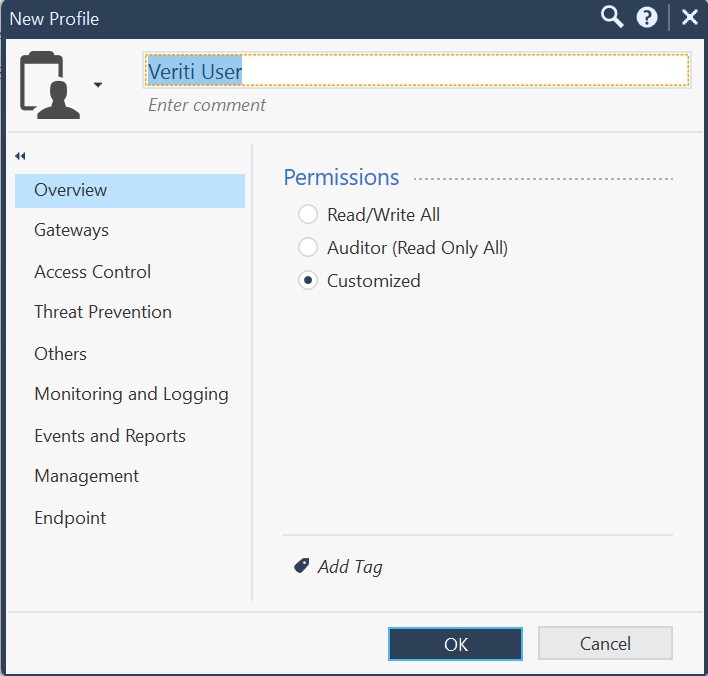
-
Configure the permissions as follows:
-
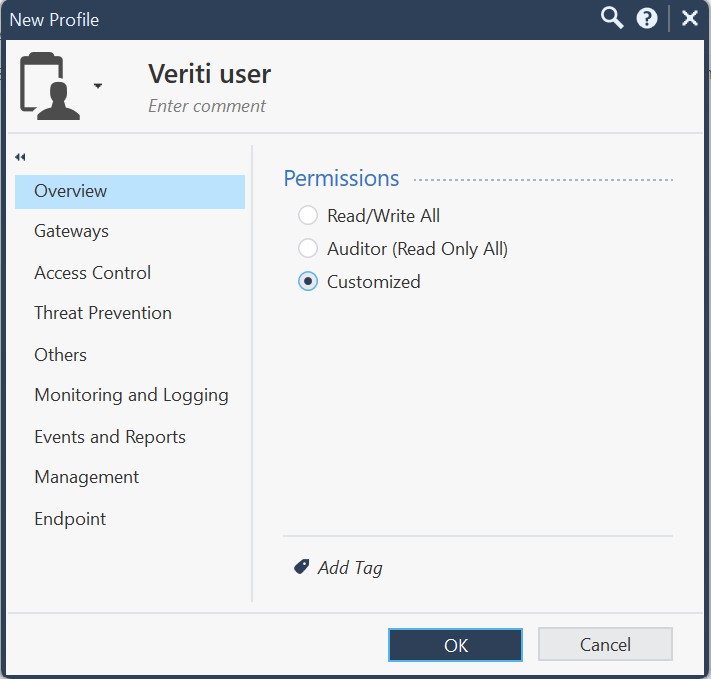
In the Overview tab, select Permissions as Customized.
-
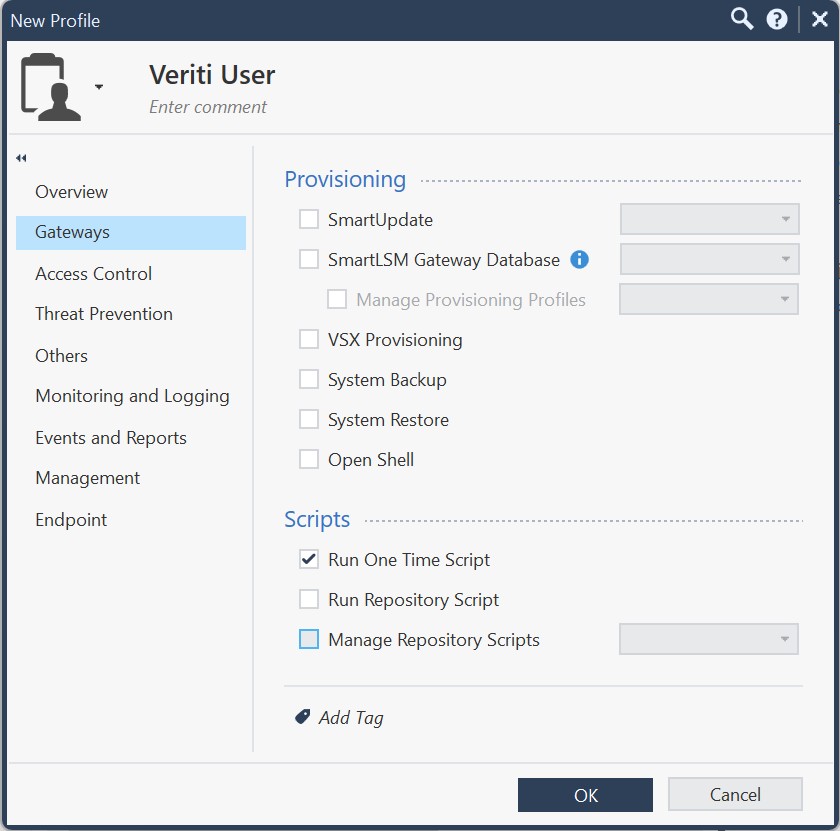
In the Gateways tab, navigate to Scripts and enable the Run One Time Script checkbox.
-
Configure the Access Control tab.

-
In the Policy section, enable the Show Policy checkbox.
-
Select the Edit layers by Software Blades option and enable the Firewall, Application Control and URL Filtering checkboxes.
-
In the Additional Policies section, enable the NAT Policy checkbox and select Read from the dropdown.
-
In the General section, enable the Access Control Objects and Settings checkbox and select Read from the dropdown.
-
-
Configure the Threat Prevention tab.

-
In the Policy section, select the following options:
-
Policy Layers: Read
-
Policy Exceptions: Write
-
-
In the Permissions section, select the following options:
-
Profiles: Read
-
Protections: Write
-
Settings: Write
-
-
In the Actions section, enable the Install Policy checkbox.
-
-
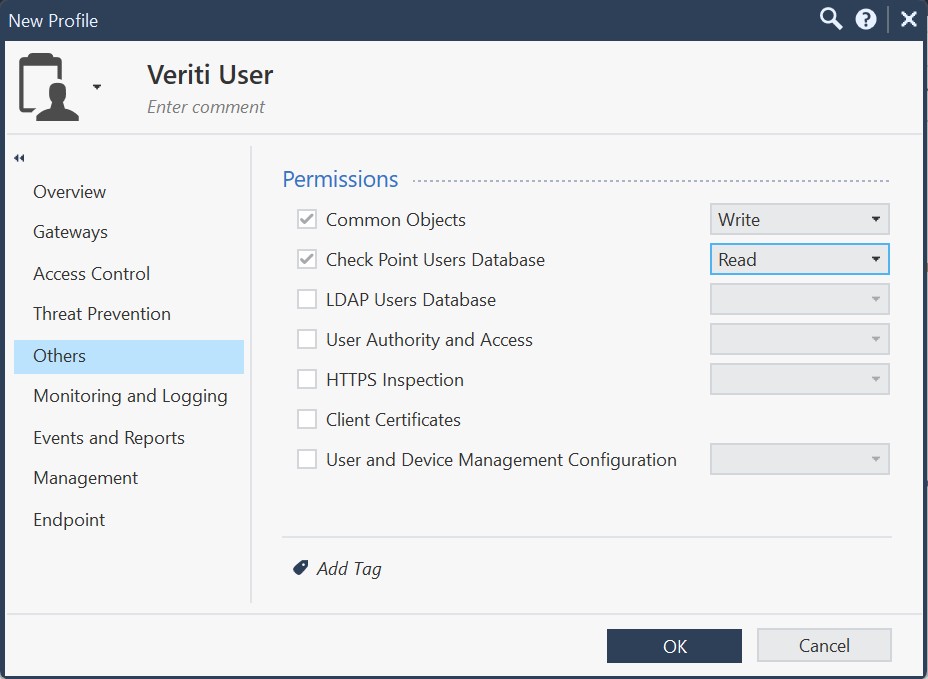
In the Others tab, configure the following Permissions.
-
Common Objects: Write
-
Check Point Users Database: Read
-
-
In the Monitoring and Logging tab, configure the Monitoring and Logging section as follows:

-
Monitoring: Read
-
Management Logs: Read
-
Track Logs: Read
-
Select the Application and URL Filtering Logs checkbox.
-
Select the HTTPS Inspection Logs checkbox.
-
-
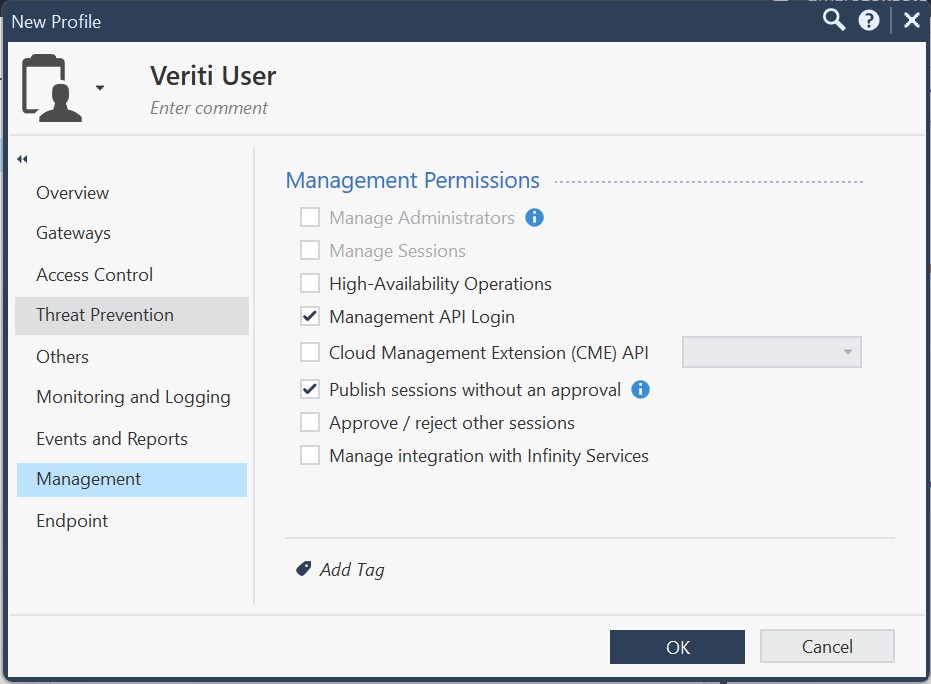
In the Management tab, enable the following Management Permissions.
-
Management API Login
-
Publish sessions without an approval
-
-
Click OK.
-
Step 2: Configuring the TEM Portal
-
Log in to the TEM portal.
-
Navigate to Settings > Integrations > Catalog > Single Domain Next-Generation Firewall (NGFW).

-
In the Single Domain Next-Generation Firewall (NGFW) pop-up that appears, navigate to the Connection tab.
-
Choose a User Configuration Method:
-
 Option A: Create a new user on your own
In the User Configuration section, choose Create a new user on your own option and click Next.

In the Connection Details section, enter the following details and click Next.
-
In the Connection Name field, enter a unique name to identify this integration.
-
In the SmartConsole (Management API) Username field, enter the username of your Check Point admin account.
Note - The user must have the Super User profile and be authorized to access the Management API.
-
In the Password field, enter a secure password for the specified username.
-
In the Management IP Address field, enter the IP address of the Check Point management server.
-
In the Management API Port field, enter the port number used for the connection.

-
(Optional) In the Configuration section, enable Backfill Indicators to import existing indicators into the integration.

-
Click Connect to establish a connection.
-
-
Option B: Allow Veriti to create a new user
In the User Configuration section, choose Allow Veriti to create a new user option and click Next.

In the Connection Details section, enter the following details and click Next.
-
In the Connection Name field, enter a unique name to identify this integration.
-
In the Gaia Username field, specify the username of a Gaia account that has the Super User role assigned.
-
In the Password field, enter a secure password for the specified username.
-
In the Management IP Address field, enter the IP address of the Check Point management server.
-
In the Management API Port field, enter the port number used for the connection.

-
(Optional) In the Configuration section, enable Backfill Indicators to import existing indicators into the integration.

-
Click Connect to establish a connection.
-
-
Limitations
-
SMB Restrictions:
Due to limitations in the Check Point API, fetching license / version information and configuring SNMP are not supported on Spark Firewall deployments.
Impact: Capabilities related to Security Hygiene, such as automated license checks and SNMP-based monitoring, will not be available.
-
High Availability (HA):
HA environments are not supported for this deployment.
Impact: Features that rely on failover or redundancy cannot be implemented in this setup.
-
IPv6:
IPv6 addresses are not supported.
Verifying IPS Enforcement Logs for TEM
Prerequisite:
User Creation Requirements:
Manual User Creation requires a Management API user with the Super User profile.
|
|
Note - The Management API permission is required only for the initial integration (one-time use). After the initial setup, you can create a dedicated profile instead of the Super User profile. |
Setting the Log Retention Rate for TEM
-
Log in to the SmartConsole.
-
From the left navigation panel, click Logs & Events > Logs.
-
In the search bar:
-
Set the time range to Last 7 Days.
-
Enter blade:IPS and protection_type:IPS
-
|
|
Note - If IPS logs are unavailable, create a dedicated IPS profile set to Detect mode only. This allows TEM to collect traffic data and generate insights without blocking traffic, ensuring complete visibility into potential exposures while keeping business operations uninterrupted. |
Verifying API Access
To verify API Access for the TEM VM:
-
Log in to the SmartConsole.
-
From the left navigation panel, click Manage & Settings > Blades.
-
In the Management API section, click Advanced Settings.
-
In the Management API Settings dialog box that appears, ensure that one of these options is selected:
- All IP addresses
-
All IP addresses that can be used for GUI clients
-
Click OK.
Verifying Trusted Client
To verify or configure a trusted client in Supported Single Domain Security Management:
-
Log in to the SmartConsole.
-
From the left navigation panel, click Manage & Settings.
-
Go to the Permissions & Administrators section and click Trusted Clients.
-
Click the
 icon.
icon. -
In the New Trusted Client pop-up, enter a name for the profile. In the IPV4 Address field add the TEM VM IP address as a permitted client.
-
Click OK.