Microsoft 365 Defender XDR Integration with TEM
Overview
Threat Exposure Management (TEM) integrates with Microsoft 365 Defender Extended Detection and Response (XDR) to retrieve security alerts and incident data. This integration enhances visibility into detected threats and enables risk-based prioritization within the TEM platform.
The integration uses Microsoft Entra ID application credentials (Client ID, Tenant ID, and Client Secret) to securely connect to Microsoft Graph APIs.
Supported Capability
Security Alerts - Retrieves threat intelligence indicators from Microsoft Defender XDR security alerts and incidents. These indicators are reflected across all integrated security controls within TEM to maintain a unified and consistent threat posture.
Integrating Microsoft 365 Defender XDR with TEM
Step 1 - Registering an Application in Microsoft Entra
-
Log in to Microsoft Entra ID admin center.
-
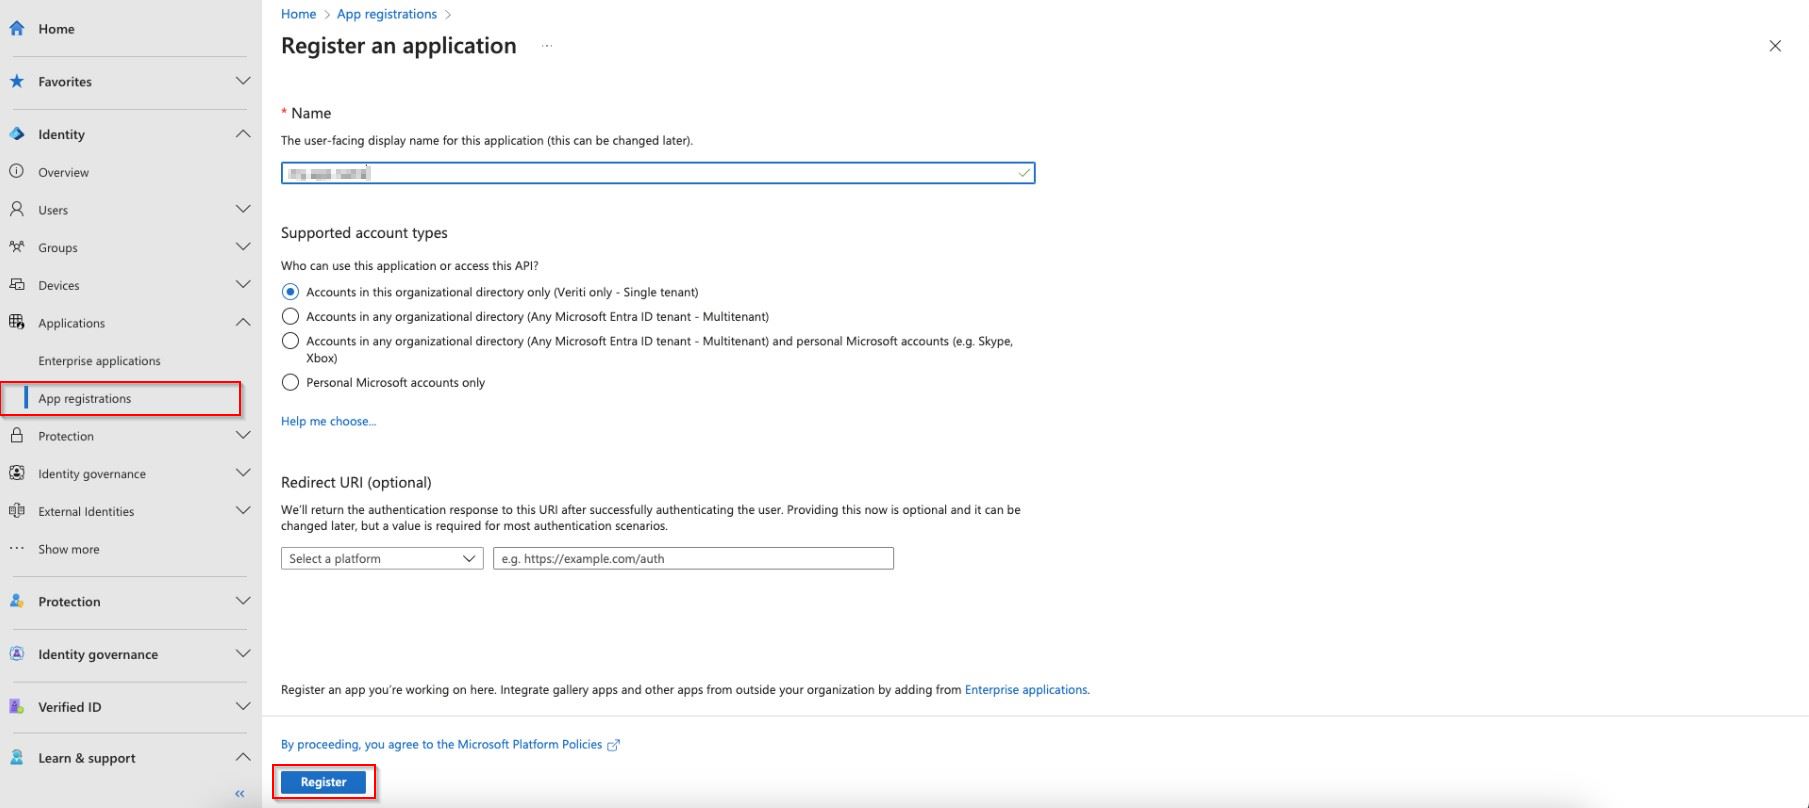
Navigate to Identity > Applications > App registrations, and select New Registration.

-
In the Register an application section that appears, enter the following details:
-
In the Name field, enter a name for the app.
-
Select the Supported account types from the list.
-
(Optional) Select the Redirect URI option.
-
-
Click Register.
Step 2 - Creating a Client Secret
-
Open the newly registered application.
-
Navigate to Certificates & secrets > New client secret.

-
In the Add a client secret pop-up that appears, enter a description and expiration.
-
Click Add.


Note - Copy and securely store the Client Secret before closing the pop-up. Once the pop-up is closed, the details cannot be retrieved later.
Step 3 - Assigning API Permissions
-
In the registered application, go to API permissions > Add a permission.

-
Select Microsoft Graph > Application Permissions.
-
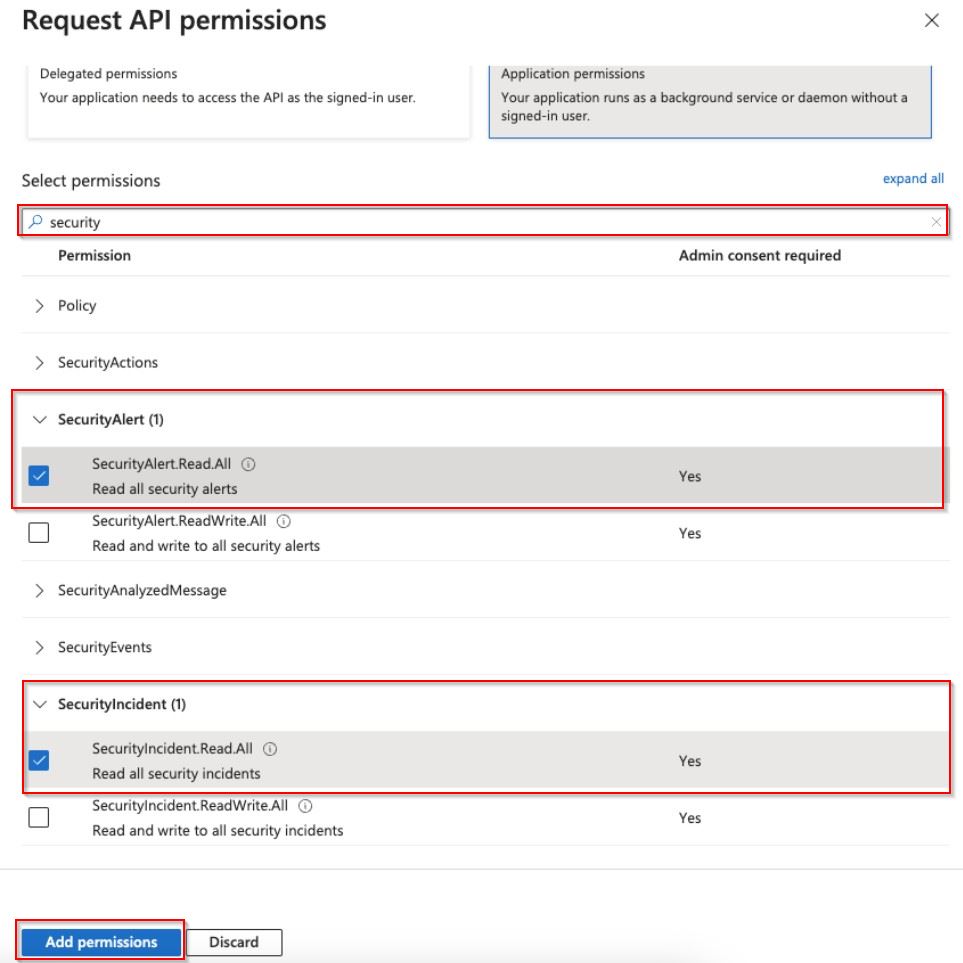
In the search box, type security.
-
In the SecurityAlert field, enable SecurityAlert.Read.All permission.
-
In the SecurityIncident field, enable SecurityIncident.ReadAll permission.
-
Click Add permissions.
-
Click Grant admin consent for Veriti to approve the permissions.

-
Navigate to the Overview page, copy and save the Application (client) ID and Directory (tenant) ID for further use in configuring the integration.

Step 4 - Configuring the TEM Portal
-
Log in to the TEM portal.
-
Go to Settings > Integrations > Catalog > Microsoft 365 Defender.

-
In the Microsoft 365 Defender pop-up that appears, navigate to the Connection tab and enter the following details.

-
In the Connection Name field, enter a name for this connection.
-
In the Client ID field, enter the Client ID from the Microsoft Entra application.
-
In the Client Secret field, enter the Client Secret generated under Certificates & secrets in Microsoft Entra.
-
In the Tenant ID field, enter the Tenant ID from the Microsoft Entra application.
-
(Optional) Enable the Customer Proxy checkbox if the integration traffic must be routed through your organization’s proxy server.
-
-
Click Connect to establish a connection.