CloudFlare WAF Integration with TEM
Overview
Threat Exposure Management (TEM) integration with Cloudflare WAF enables organizations to enhance their security posture by providing advanced visibility into threats, reducing exposure to risks, and streamlining security operations.
This allows security teams to leverage Cloudflare’s infrastructure in combination with TEM’s analytics and automation capabilities, ensuring that exposures are identified and mitigated efficiently.
By integrating Cloudflare WAF with TEM, organizations benefit from centralized management, improved detection of malicious activity, and automated response workflows, helping to safeguard critical assets and maintain compliance with security policies.
Supported Capabilities
-
Indicators - Manages threat intelligence across all integrated security controls, ensuring consistent alignment and protection across the organization.

Note - Supported indicator types include IP Addresses.
-
Protection Hardening - This capability focuses on strengthening the security posture of the Cloudflare Web Application Firewall (WAF) by recommending and enforcing best-practice configurations. It helps reduce vulnerabilities by ensuring that WAF rules, security policies, and settings are up-to-date and properly configured to defend against emerging threats.
Integrating CloudFlare WAFwith TEM
Step 1 - Configuring Cloudflare WAF for TEM Connectivity
To configure the Cloudflare WAF integration for TEM:
-
Log in to the Cloudflare dashbaord.
-
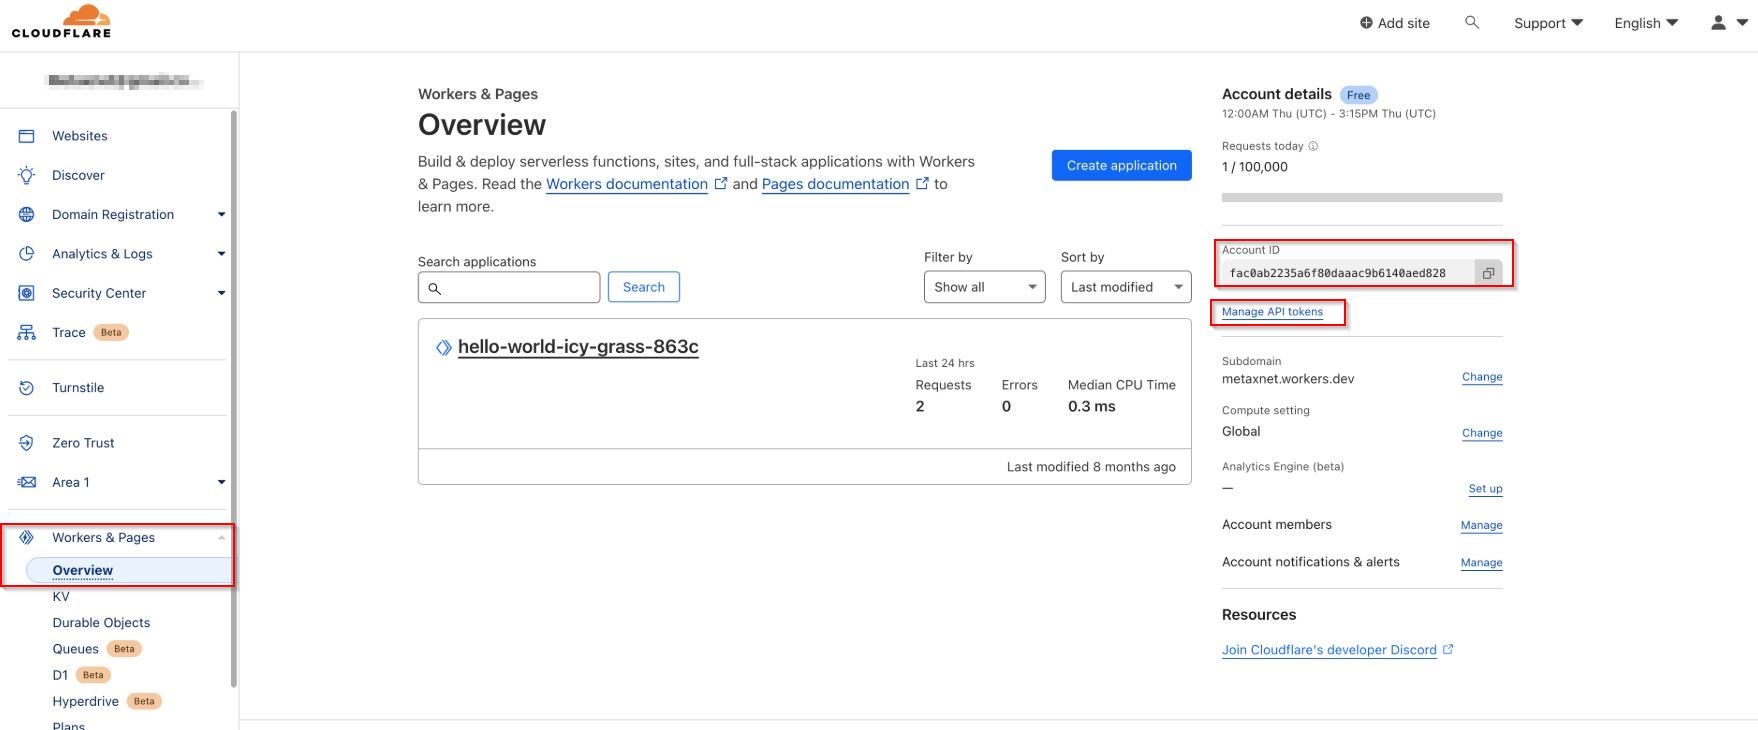
From the left navigation panel, click Workers & Pages > Overview.
-
From the Account details section, copy the Account ID for later use.
-
Click Manage API Tokens.
-
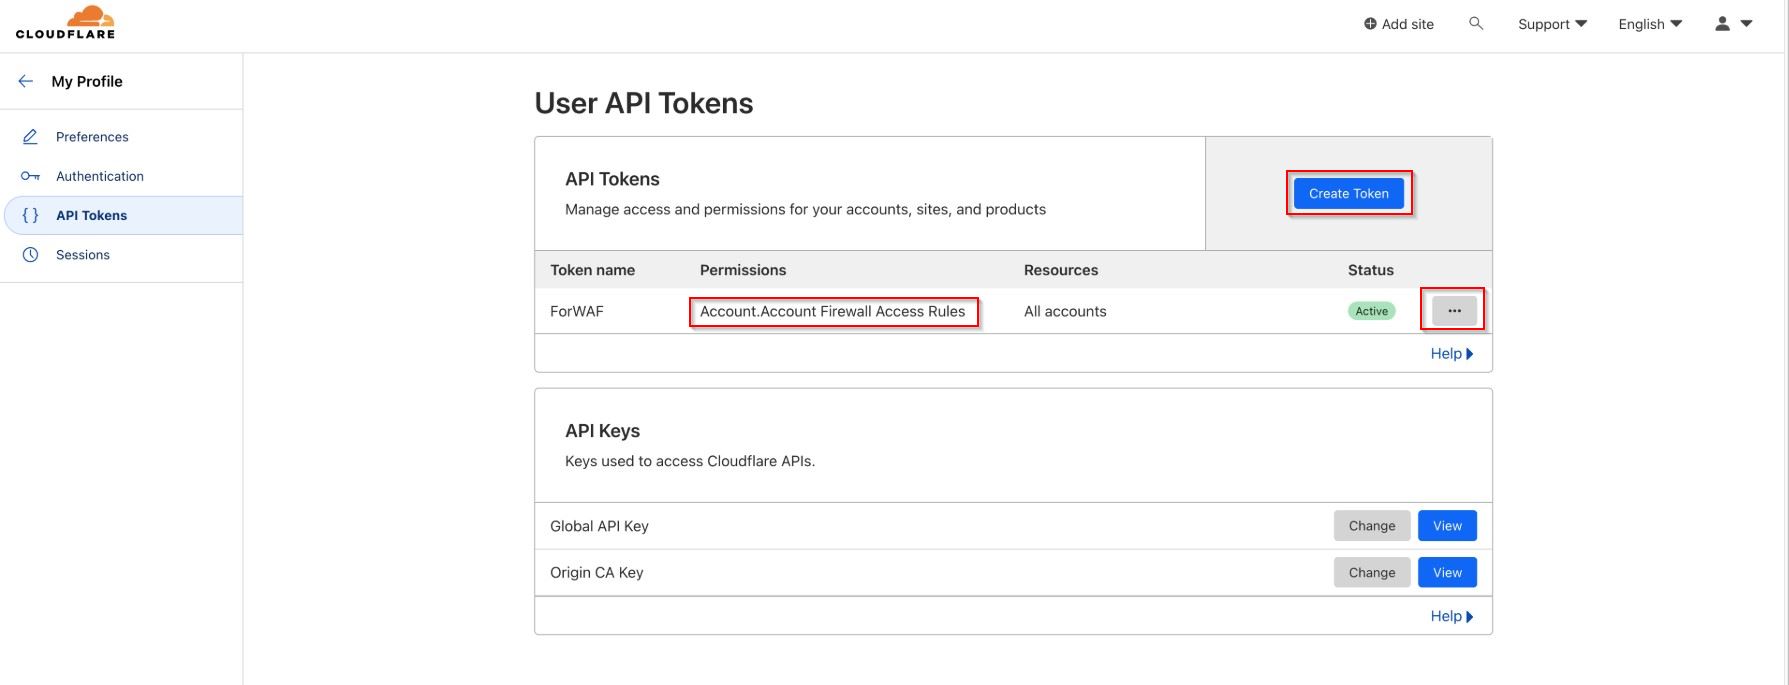
Click Create Token.
-
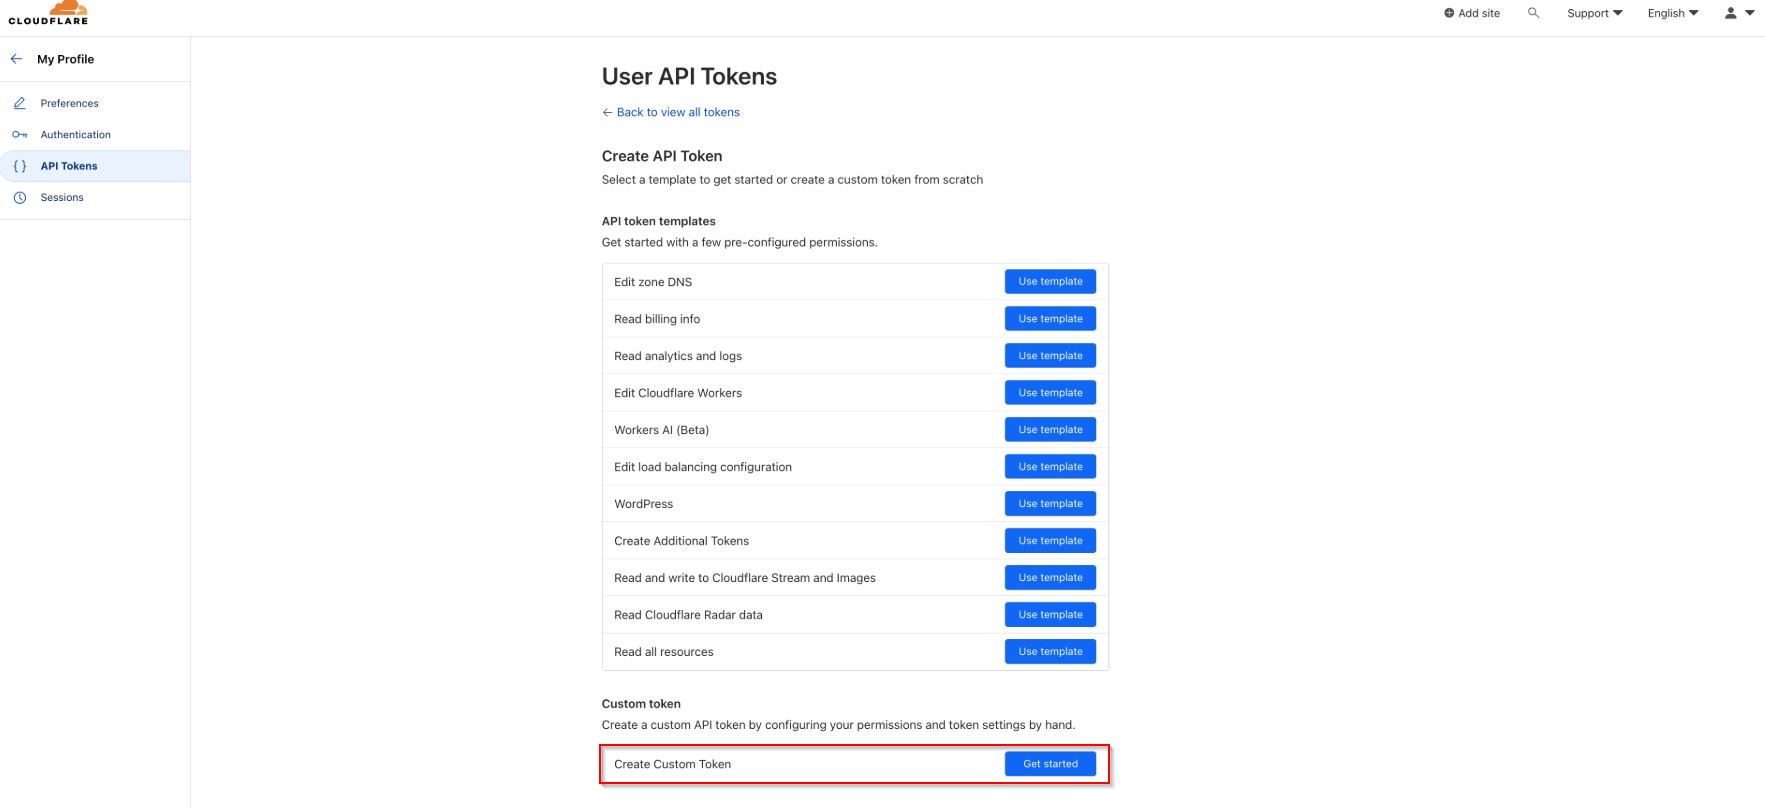
Scroll down to the Create Custom Token field, and click Get Started.
-
Enter a name for the token.
-
Configure the permissions as follows:
-
IoC - Account Firewall Access Rules > Edit
-
IPS - Zone WAF > Edit
-
DNS – Read
-
Analytics – Read
-
-
-
Click Continue to Summary and create the token.
Copy the generated API Token for later use.
Step 2: Configuring the TEM Portal
-
Log in to the TEM portal.
-
Navigate to Settings > Integrations > Catalog > Cloudflare WAF.

-
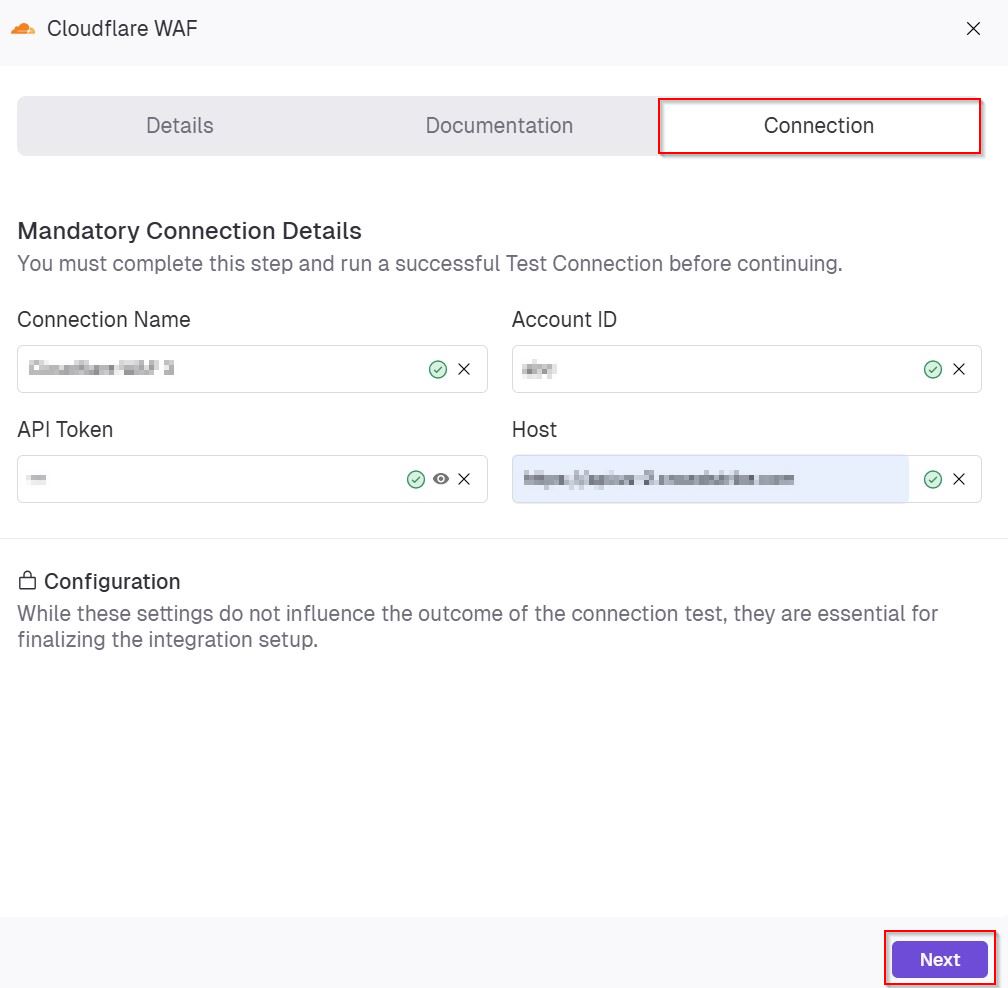
In the Cloudflare WAF pop-up that appears, navigate to the Connection tab and enter the following details.
-
In the Connection Name field, enter a name for the integration connection.
-
In the Account ID field, paste the Account ID copied from Cloudflare WAF.
-
In the API Token field, enter the API token copied from the Cloudflare WAF platform.
-
In the Host field, enter the Cloudflare WAF API endpoint.
-
-
Click Next.
-
(Optional) In the Configuration section, enable Backfill Indicators to import existing indicators into the integration.

-
Click Connect to establish a connection.
Limitations
-
Each Cloudflare account supports a maximum of 50,000 security rules.
-
Cloudflare enforces a global API rate limit of 1,200 requests per five minutes.