Microsoft Entra ID (formerly Azure Active Directory) (SCIM)
High-Level Procedure
Part 1: Configure Entra ID
Step 1 - Creating an application in Entra ID
-
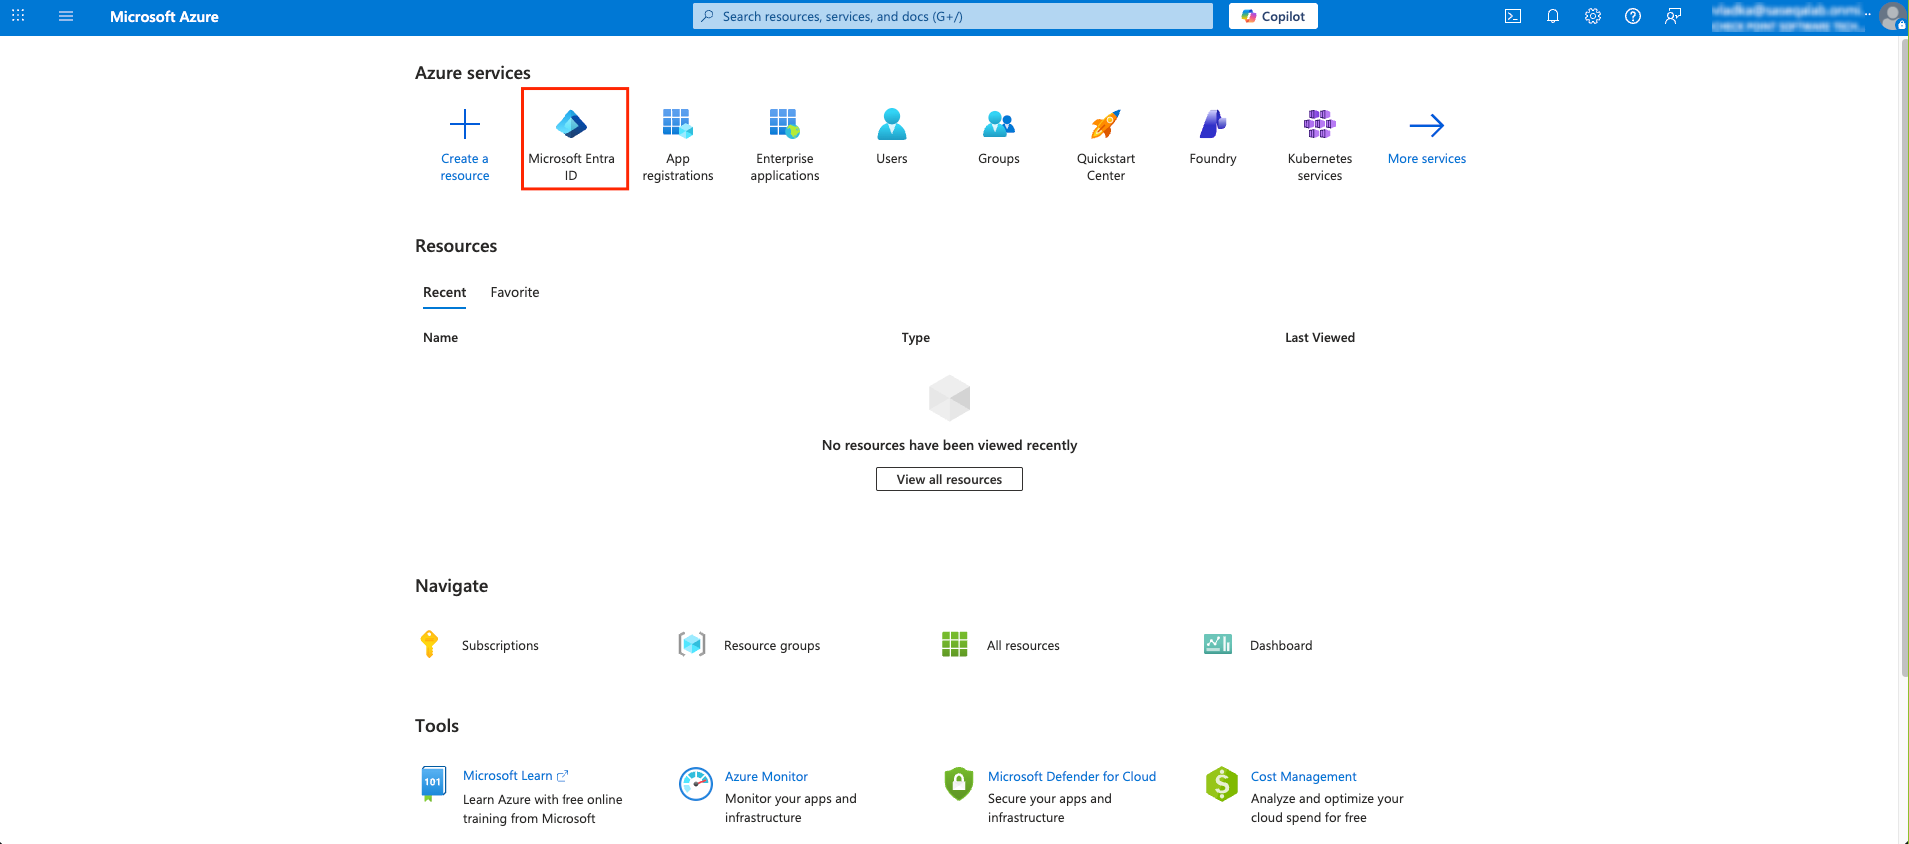
Access the Microsoft Azure Portal using administrator credentials.
-
From Azure services, click Microsoft Entra ID.
-
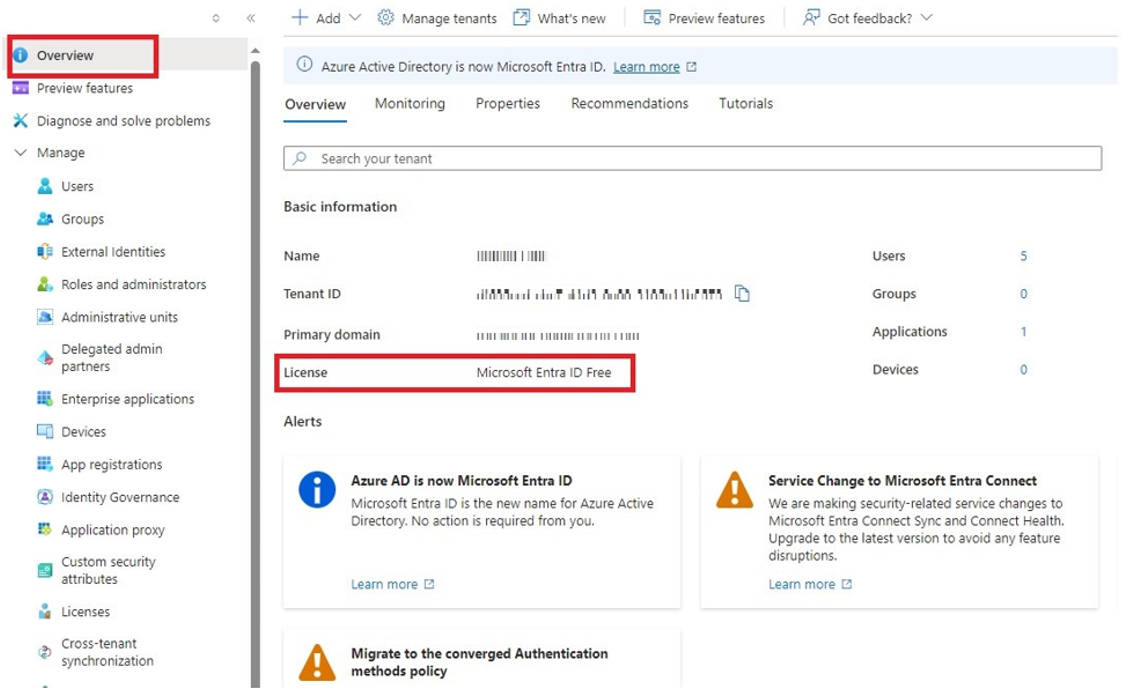
Click Overview.
-
From the Basic information section, make a note of the License.
-
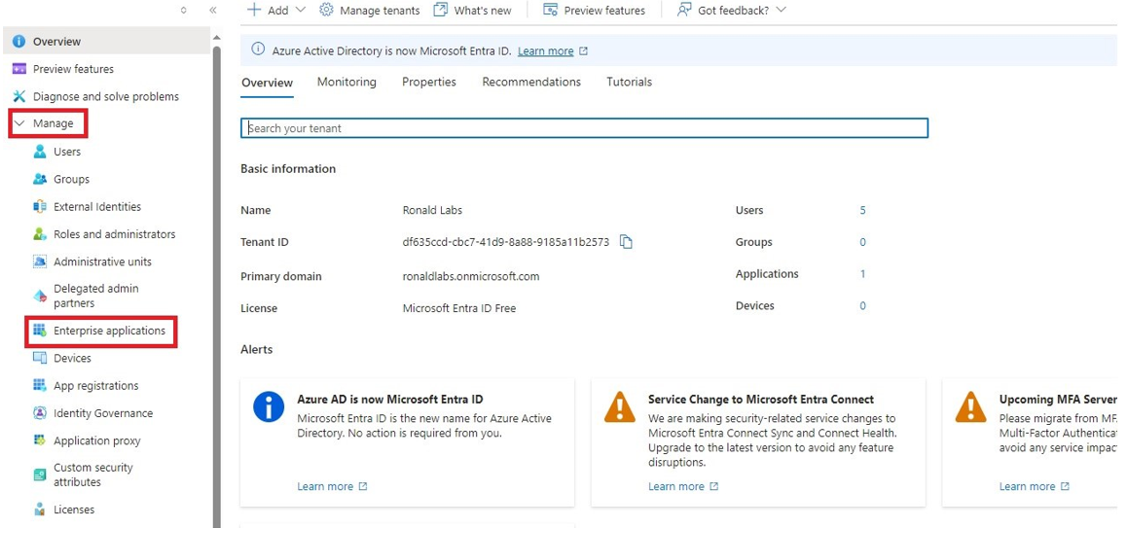
Go to Manage > Enterprise applications.
-
Go to All applications.
-
Click New application.

-
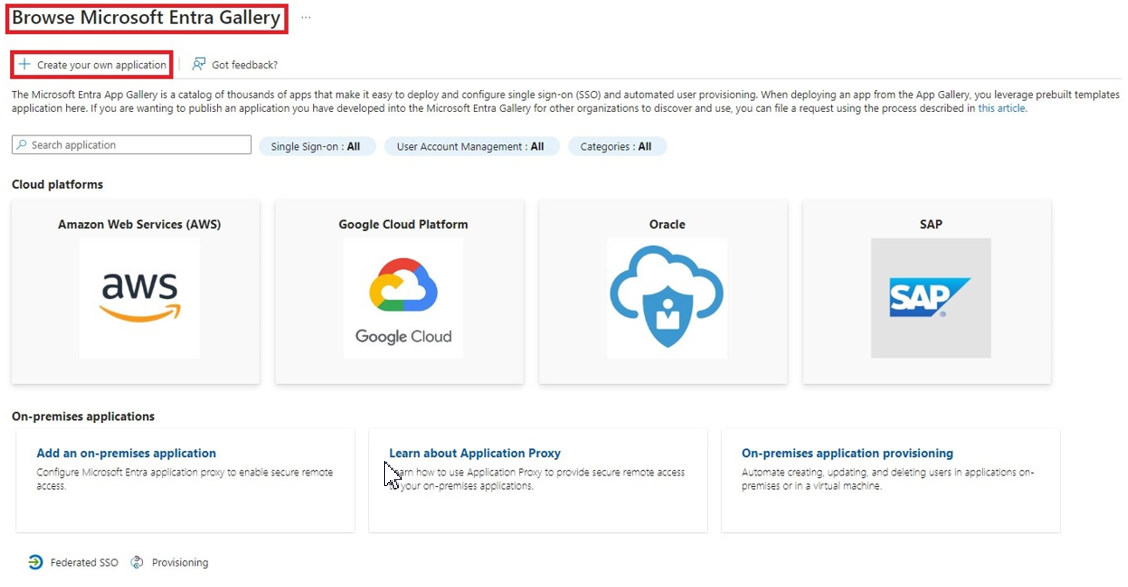
In the Browse Microsoft Entra Gallery page, click Create your own application.
-
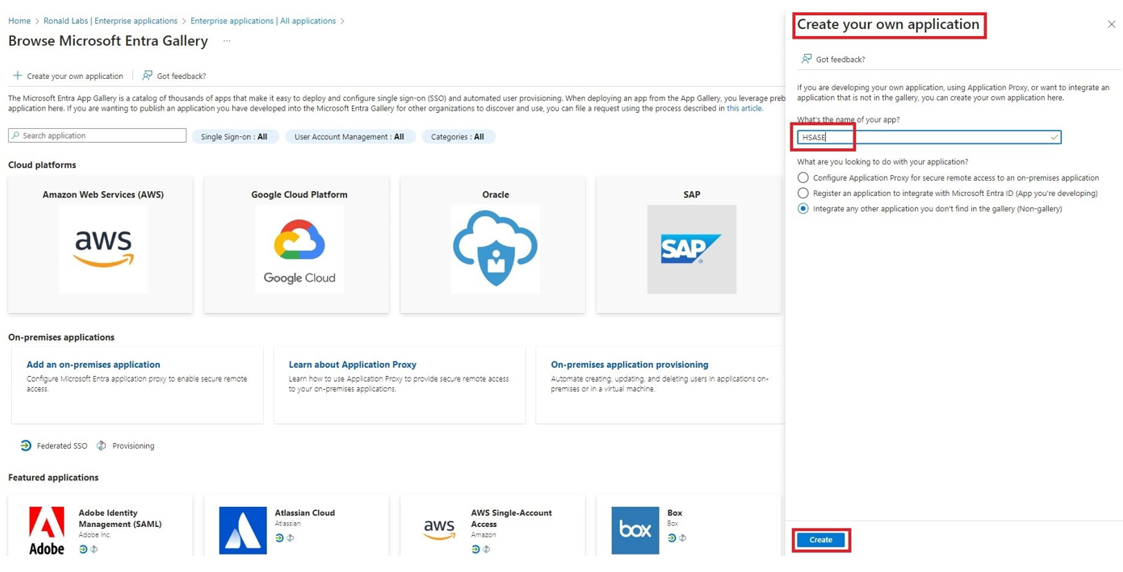
In the Create your own application panel that appears on the right, enter the application name (for example, SASE) and click Create.
Once the application is created, the Overview page appears.
-
Click the
 icon next to Application ID to copy it.
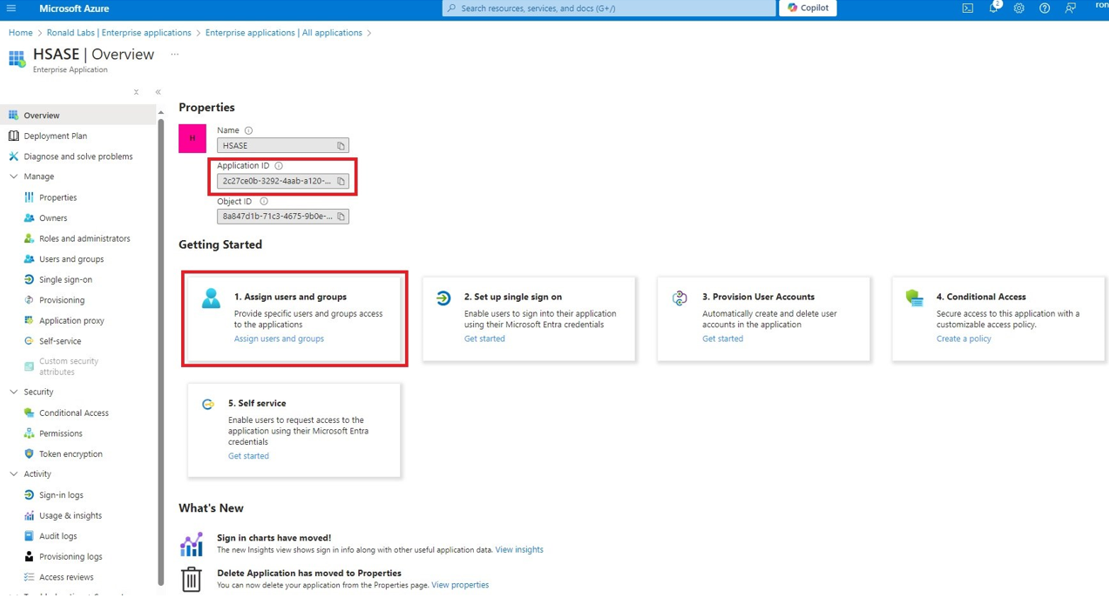
-
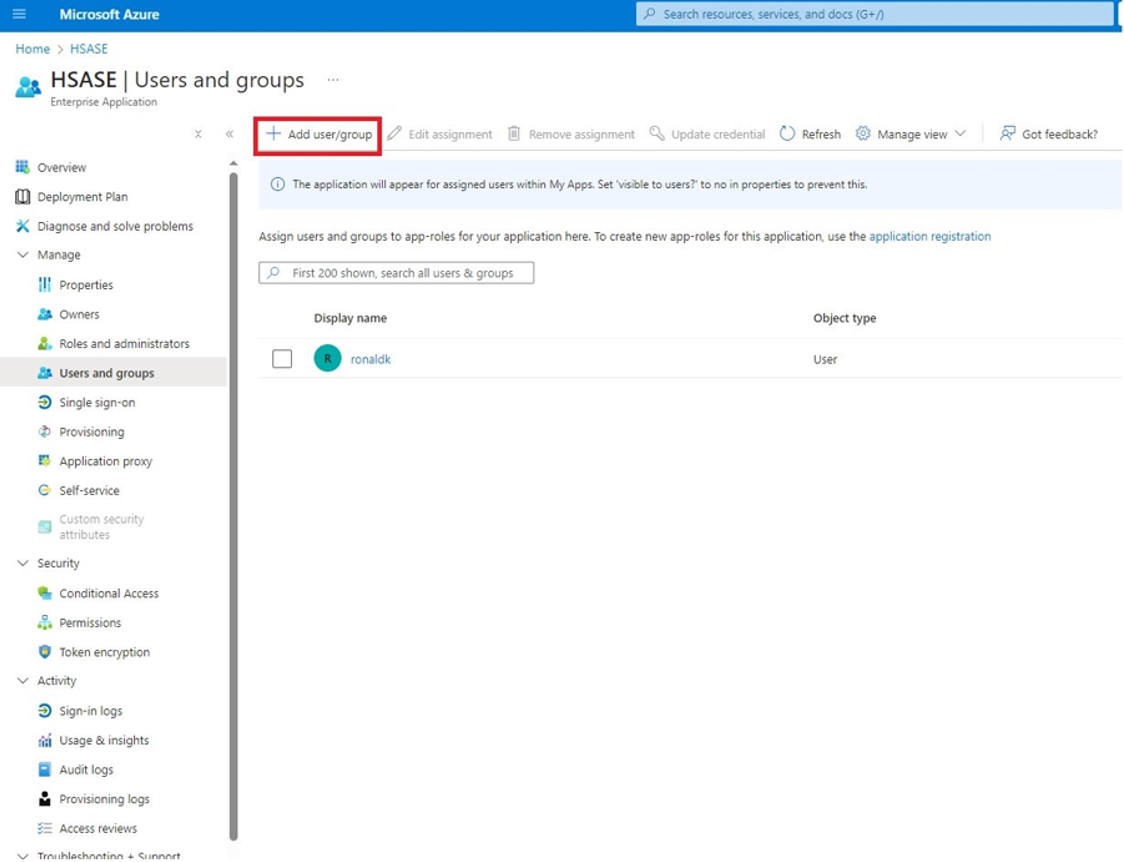
Click Assign users and groups and then click Add user/group.
-
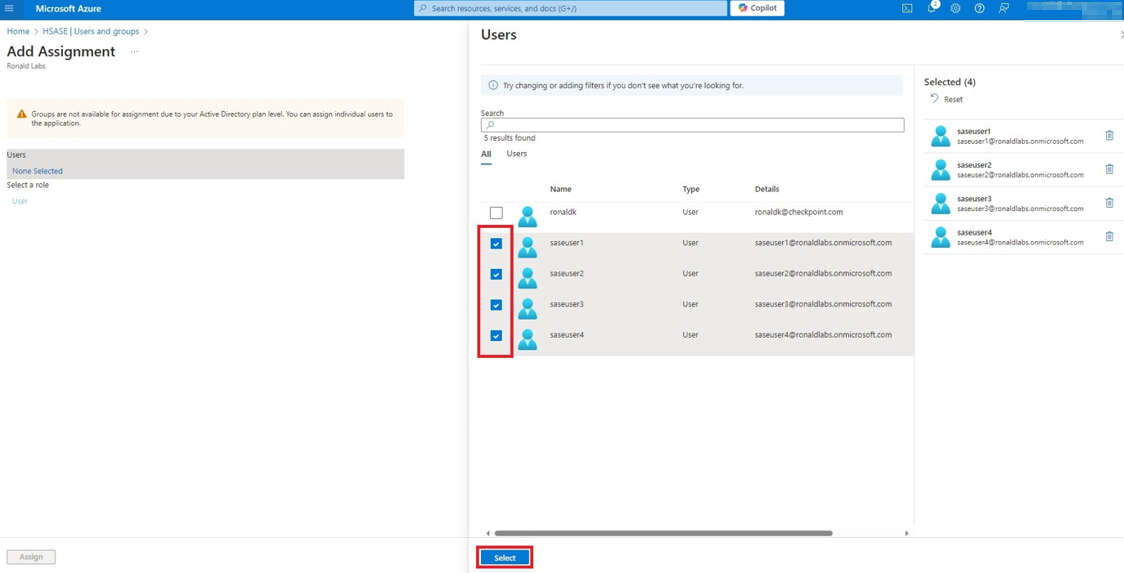
In the Users section, click None Selected.
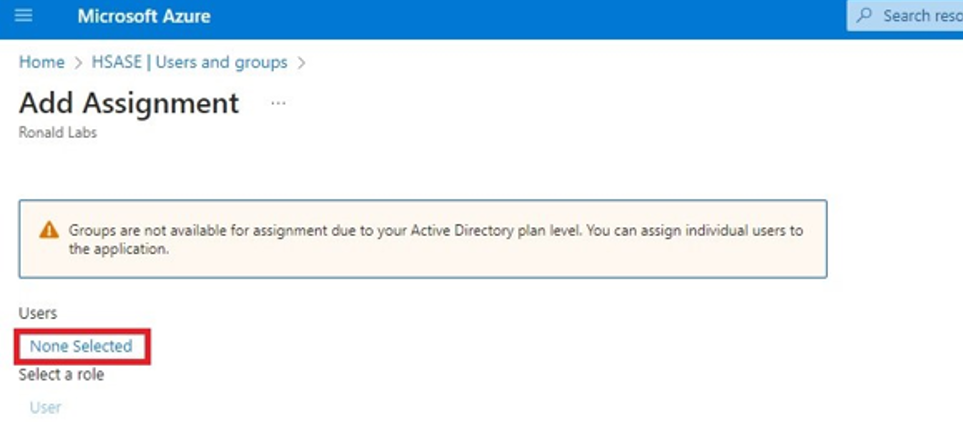
-
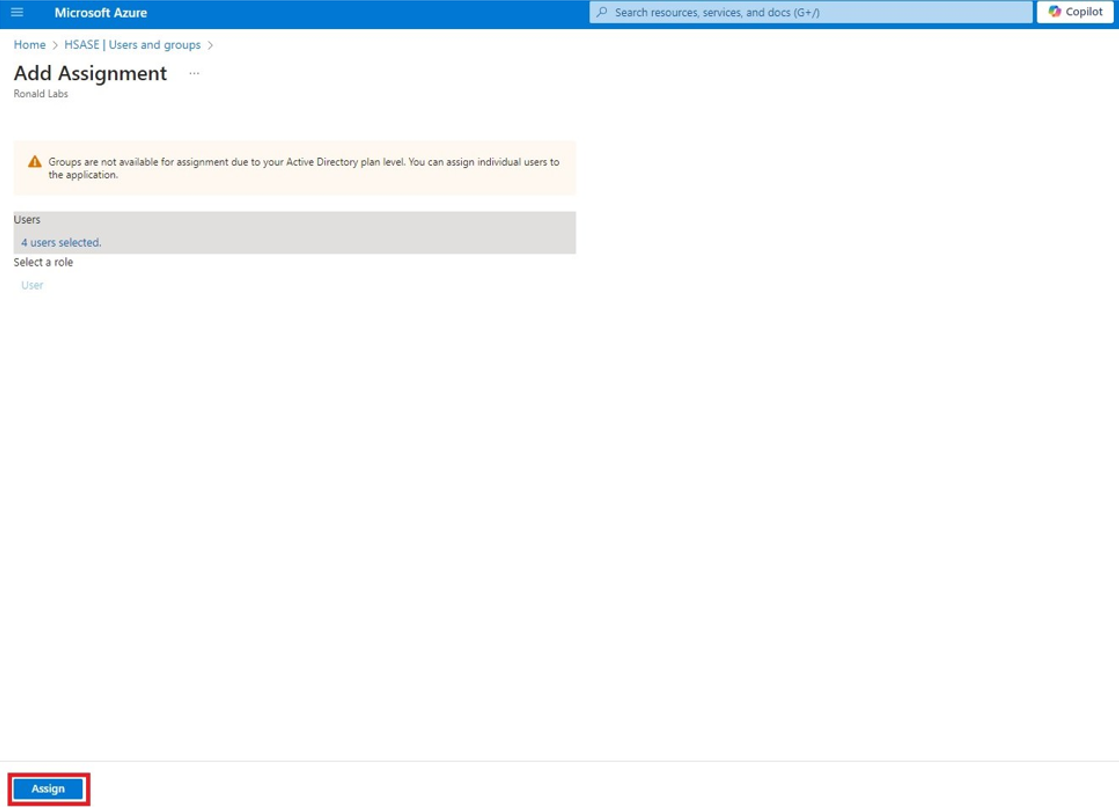
Select the users and groups you want to add to the application and click Select.
-
Click Assign.
Once assigned, the Home page appears. -
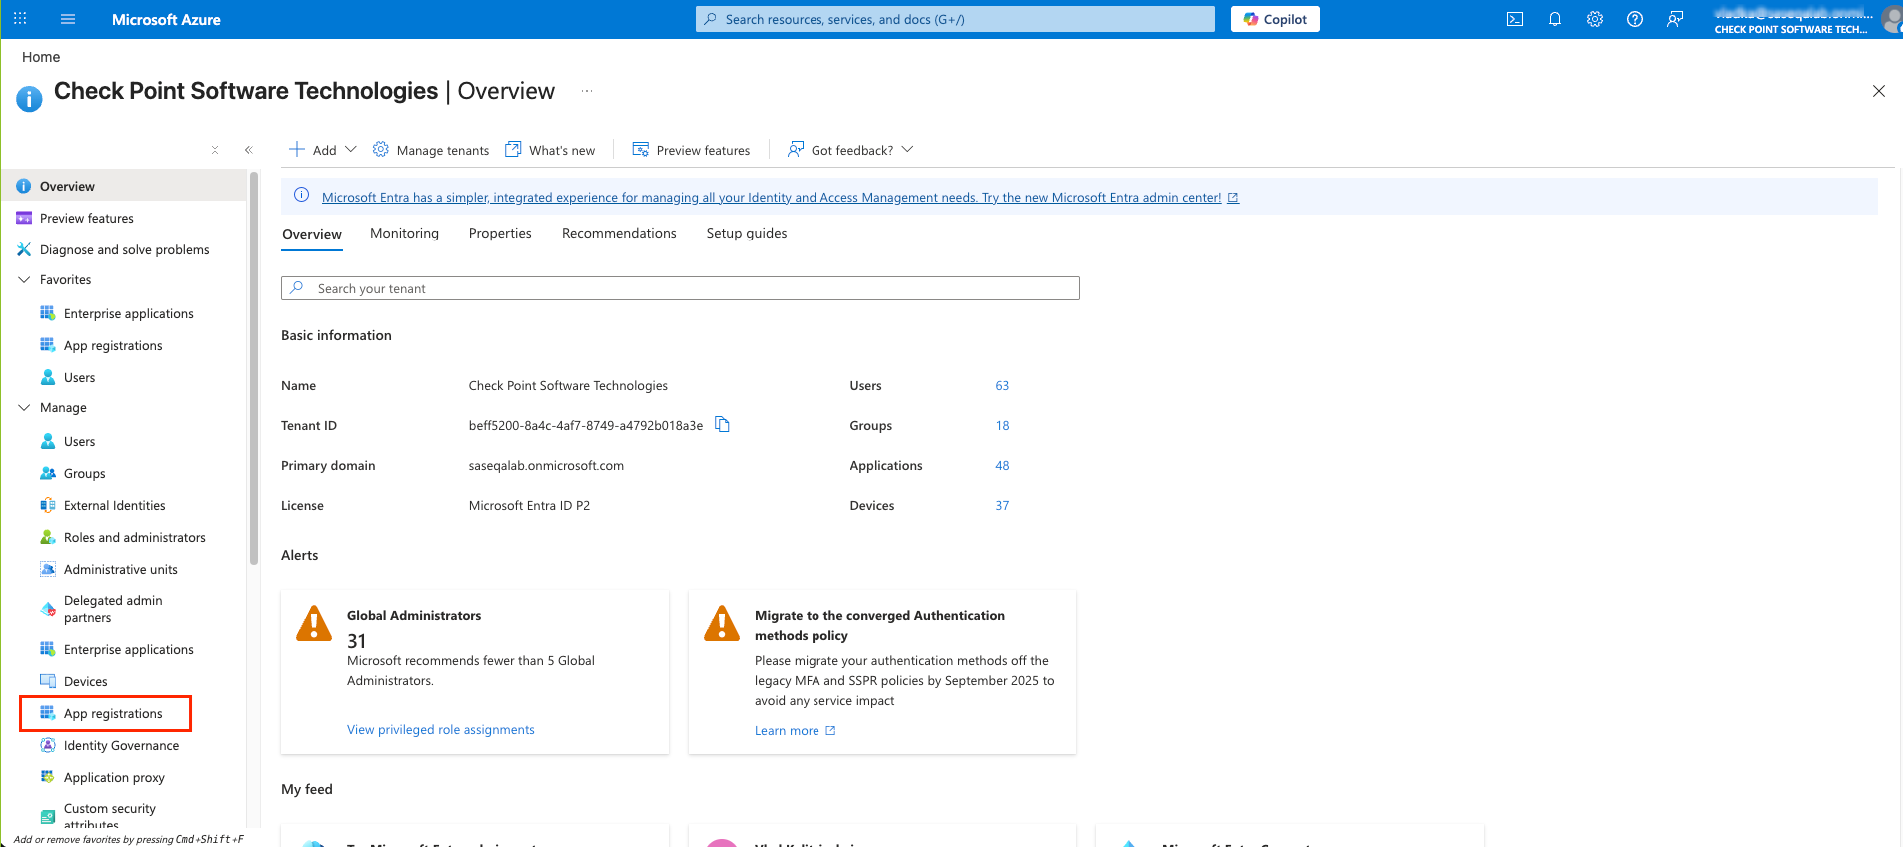
Click Microsoft Entra ID.
-
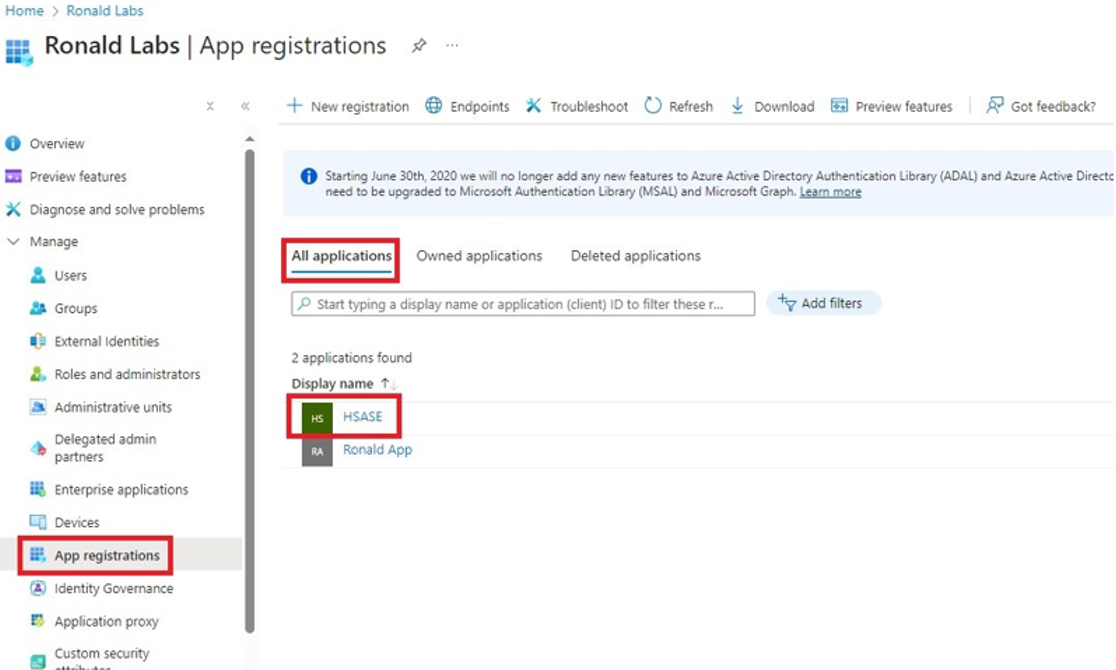
From the left panel, click App registrations.
-
In the All applications tab, click the application you created.
-
Go to Manage > Authentication (Preview) and click Add Redirect URI.
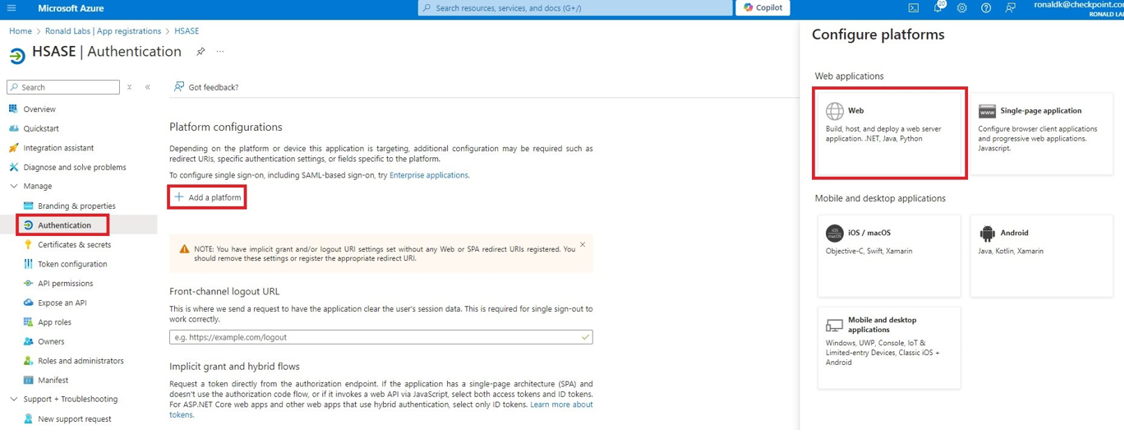
-
In the Select a platform to add redirect URI panel that appears on the right, select Web.
-
In the Redirect URIs field, enter your workspace name and click Configure:
-
For EU based platform -
https://workspace.eu.sase.checkpoint.com -
For US based platform -
https://workspace.perimeter81.com -
For AU based platform -
https://workspace.au.sase.checkpoint.com -
For IN based platform -
https://workspace.in.sase.checkpoint.com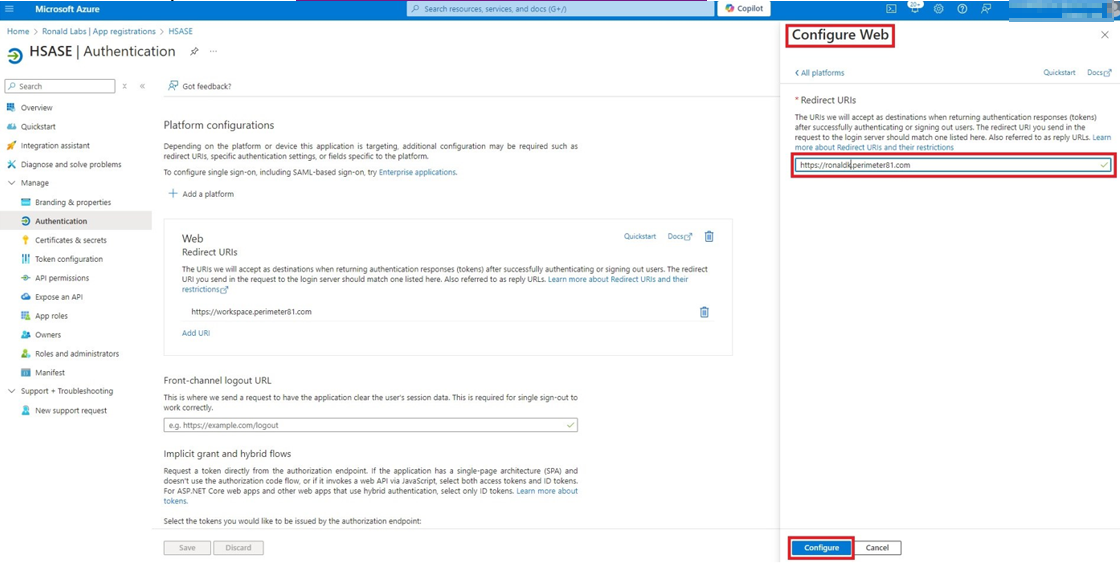
-
-
In the Redirect URIs section, click Add URI and add these:
-
For EU based platform -
https://auth.eu.sase.checkpoint.com/login/callback -
For US based platform -
https://auth.perimeter81.com/login/callback -
For AU based platform -
https://auth.au.sase.checkpoint.com/login/callback -
For IN based platform -
https://auth.in.sase.checkpoint.com/login/callback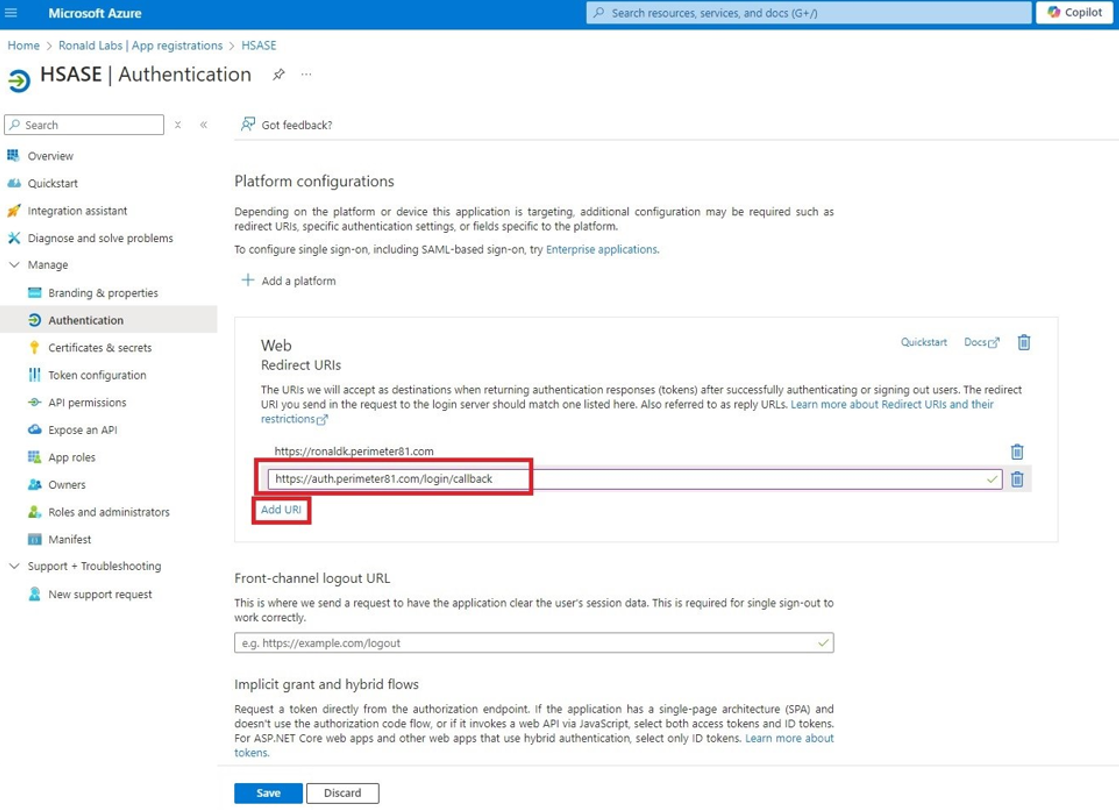
-
-
Click Configure
-
Click Settings. In the Front-channel logout URL section, enter your workspace name:
-
For EU based platform -
https://workspace.eu.sase.checkpoint.com -
For US based platform -
https://workspace.perimeter81.com -
For AU based platform -
https://workspace.au.sase.checkpoint.com -
For IN based platform -
https://workspace.in.sase.checkpoint.com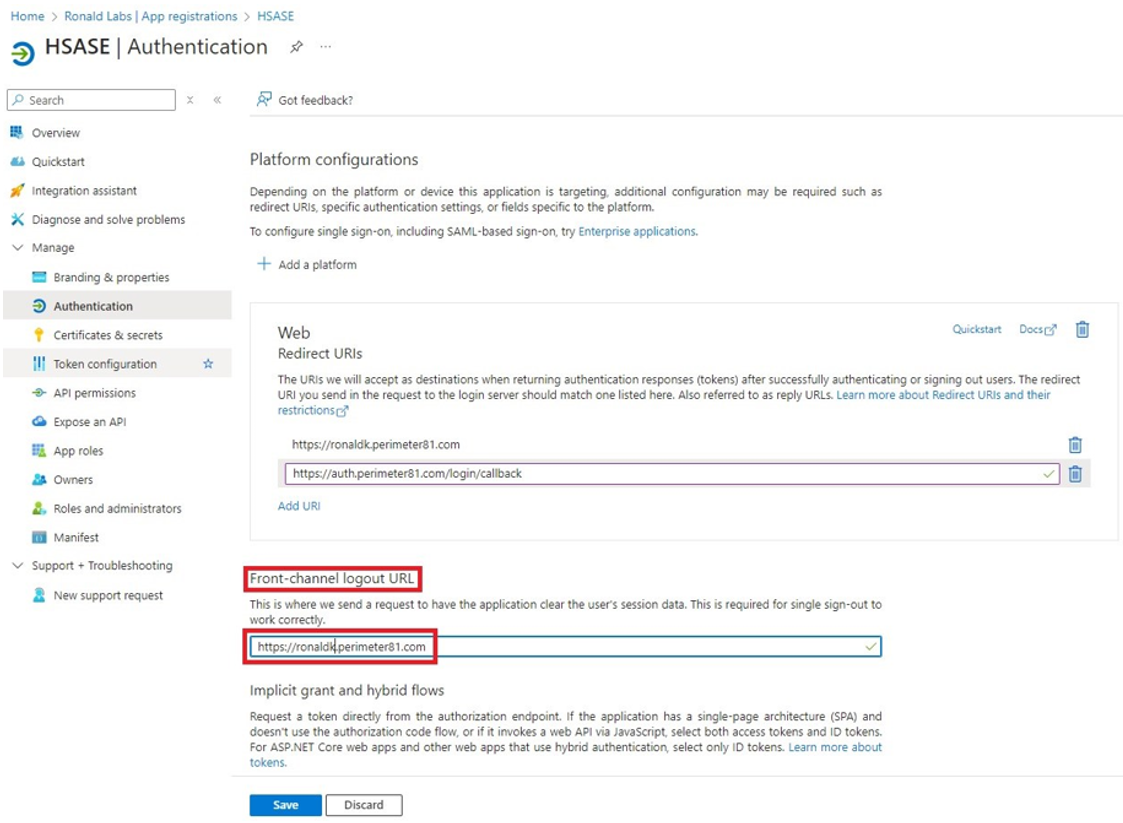
-
-
In the Supported account types section, select the applicable option for supported account types and click Save.
Step 2 - Configuring API Permissions
-
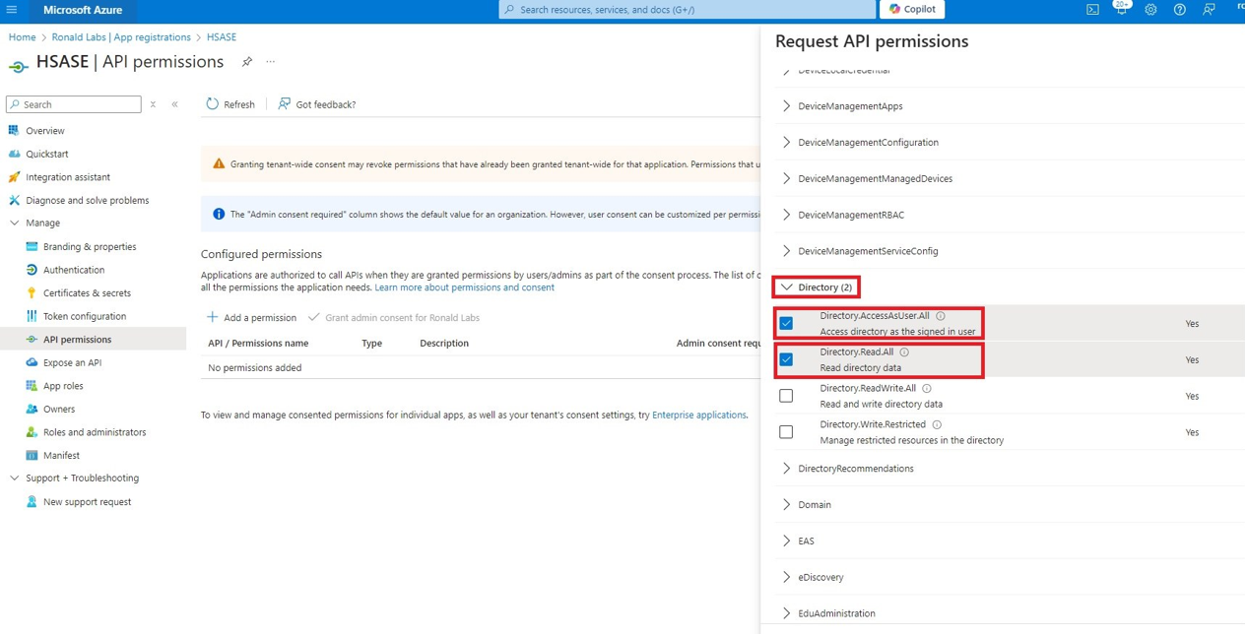
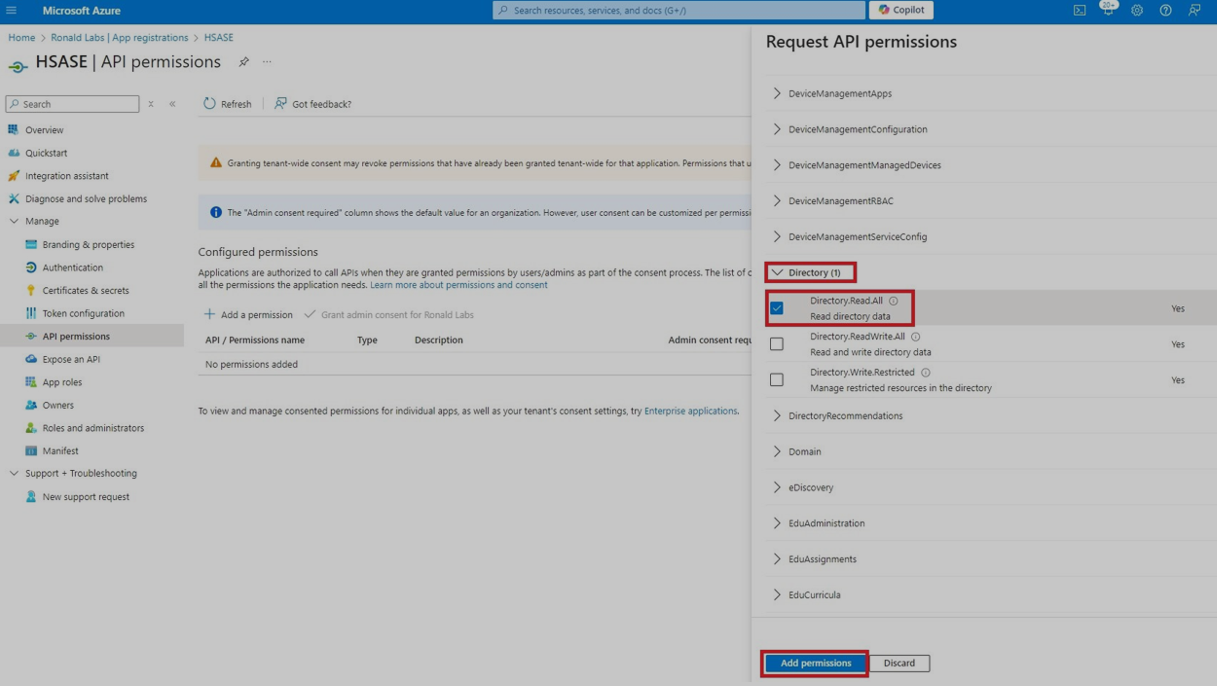
From the left panel, click Manage > API permissions and then click Add a permission.

The Request API permissions panel appears to the right.
-
Select Microsoft APIs tab and then select Microsoft Graph.
-
Click Delegated permissions.

-
Click Directory to view the permissions and then select Directory.Read.All.
-
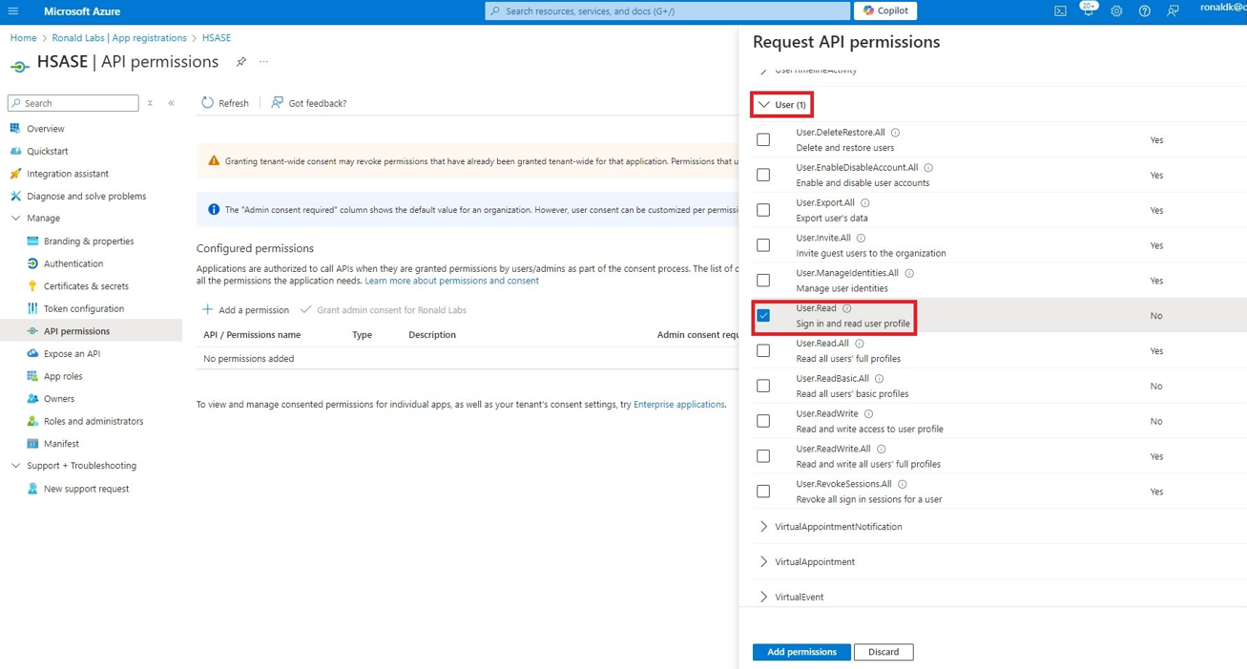
Click User to view the permissions and then select User.Read.
-
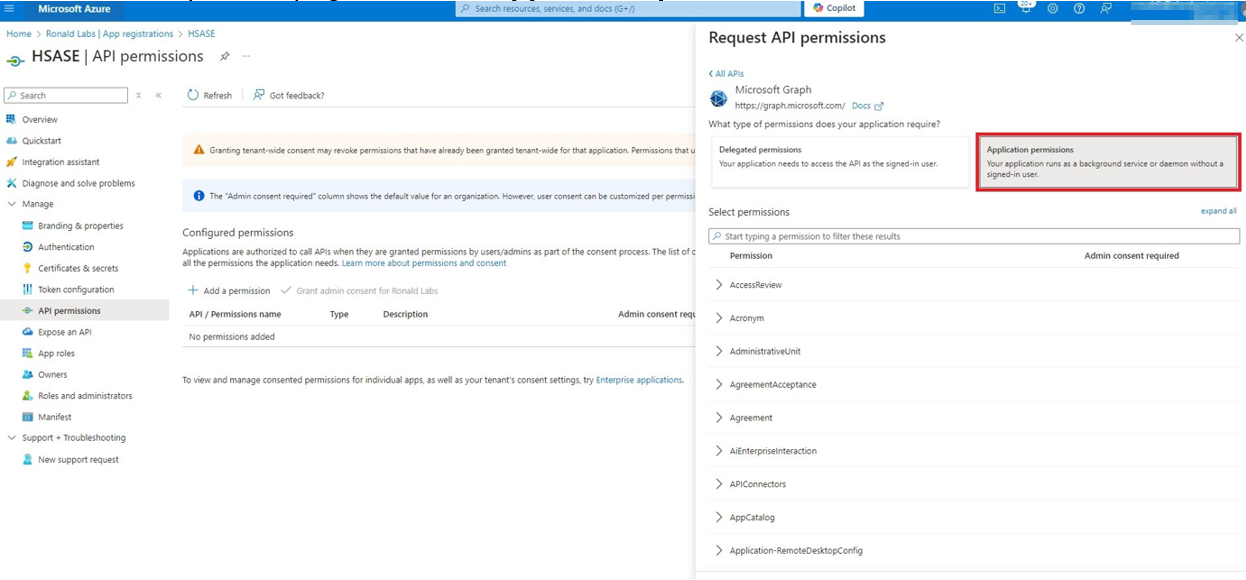
Scroll to the top of the page and click Application permissions.
-
Click Directory to view the permissions and then select Directory.Read.All.
-
Click Add permissions.
-
Click Grant admin.
The Grant admin consent confirmation window appears.
-
Click Yes.

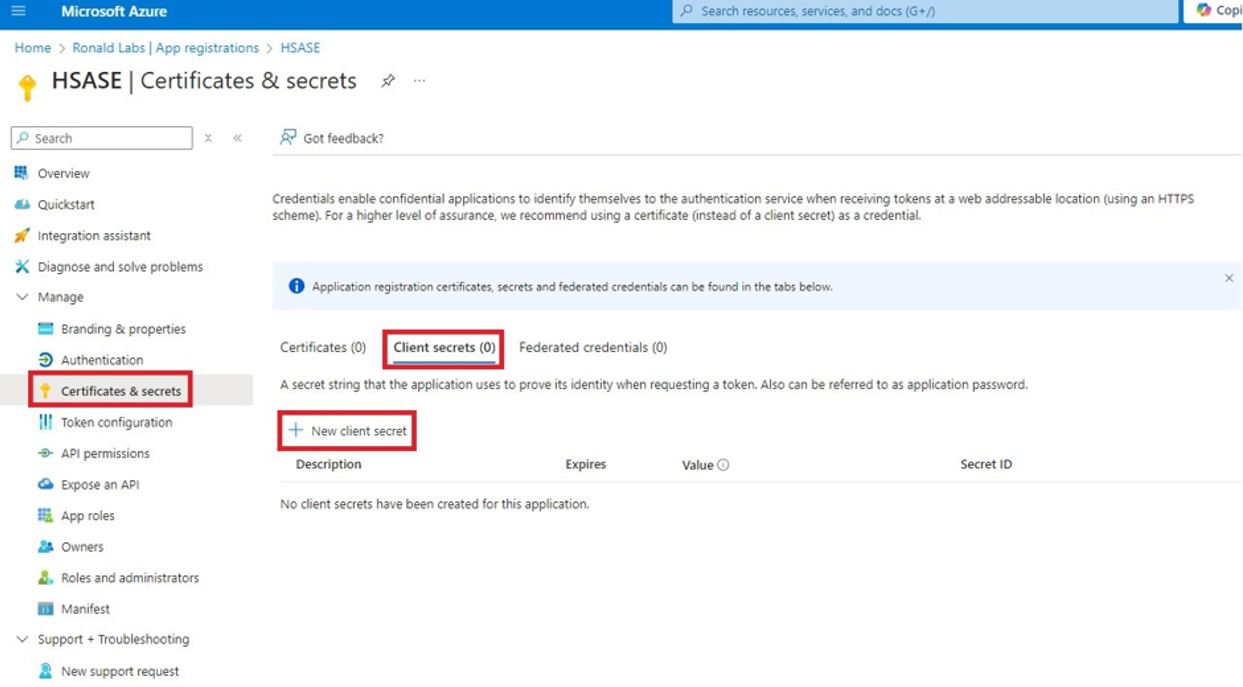
Step 3 - Configuring Secret Key for the Application
-
From the left panel, select Certificates & secrets and click the Client secrets tab.
-
Click New client secret.

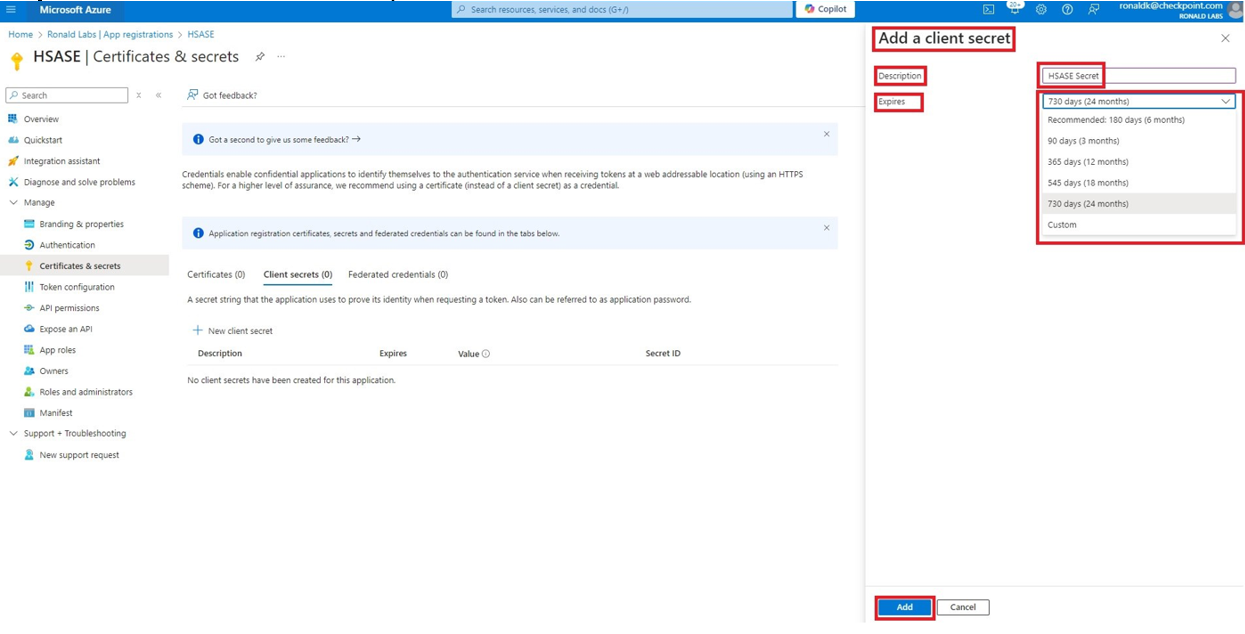
Note - You must use this client secret (password) as the Client Secret when connecting with the SASE IdP.
-
In the Add a client secret panel that appears on the right, specify these:
-
Description - Enter a description.
-
Expires - Select the secret expiration from the list.
-
-
Click Add.
-
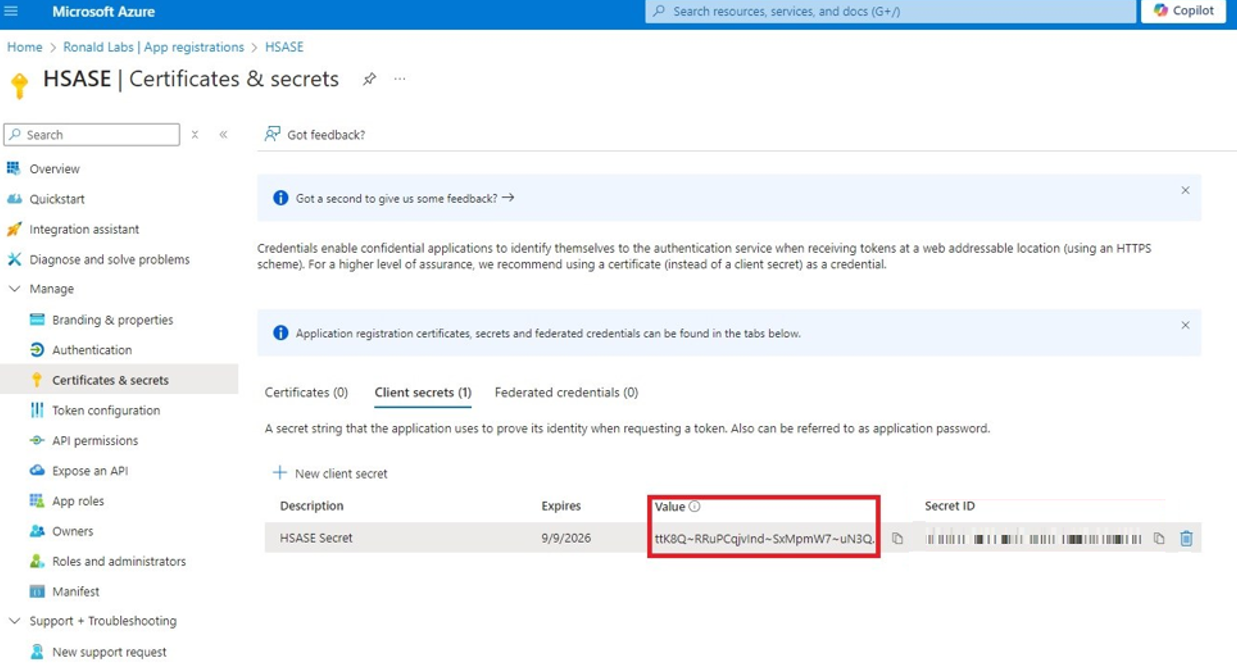
To copy the secret value, in the Value field, click
.
Part 2: Configuring SASE IDP
-
Access the SASE Administrator Portal.
-
Go to Settings > Identity Providers.
-
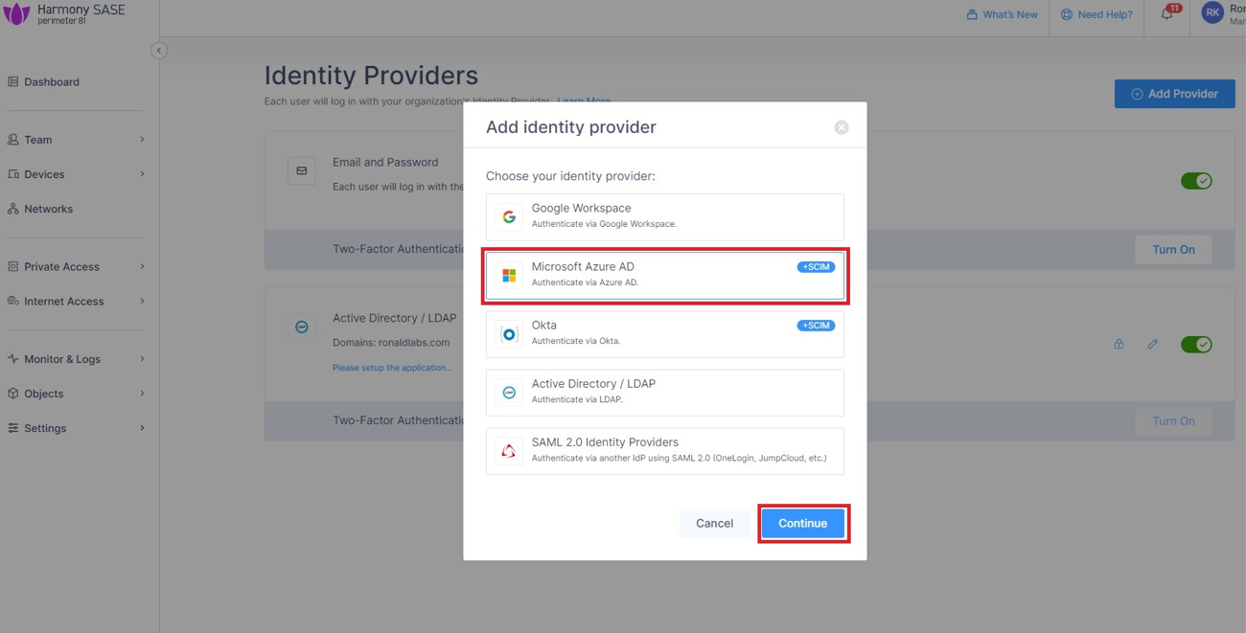
Click Add Provider.
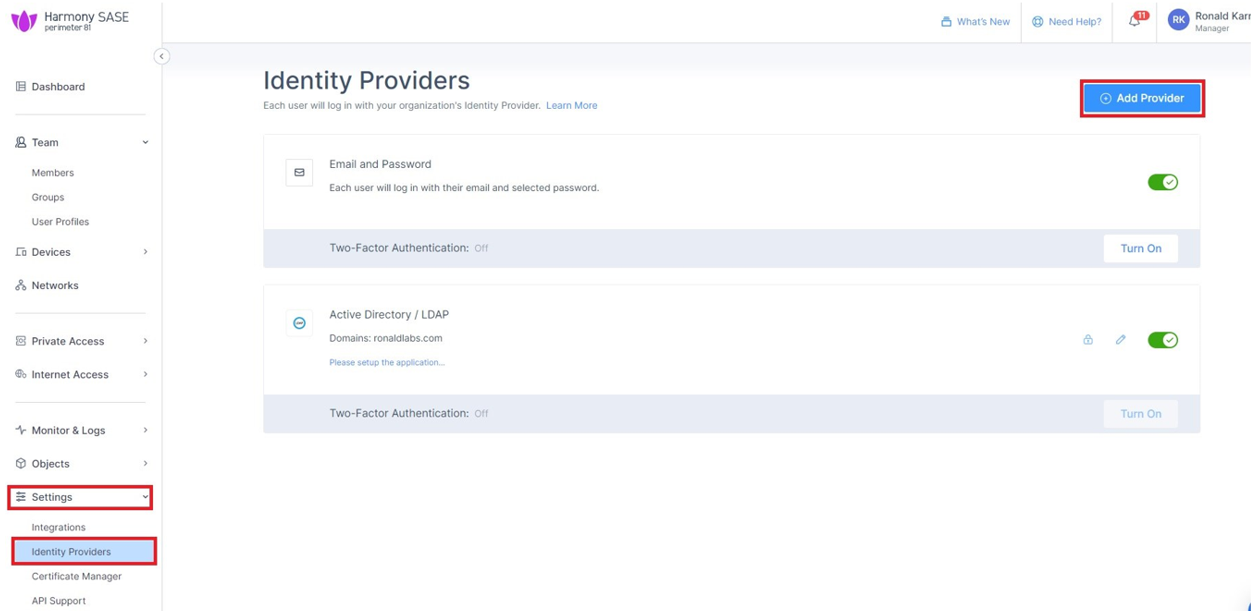
The Add identity provider window appears.
-
Select Microsoft Azure AD and click Continue.
-
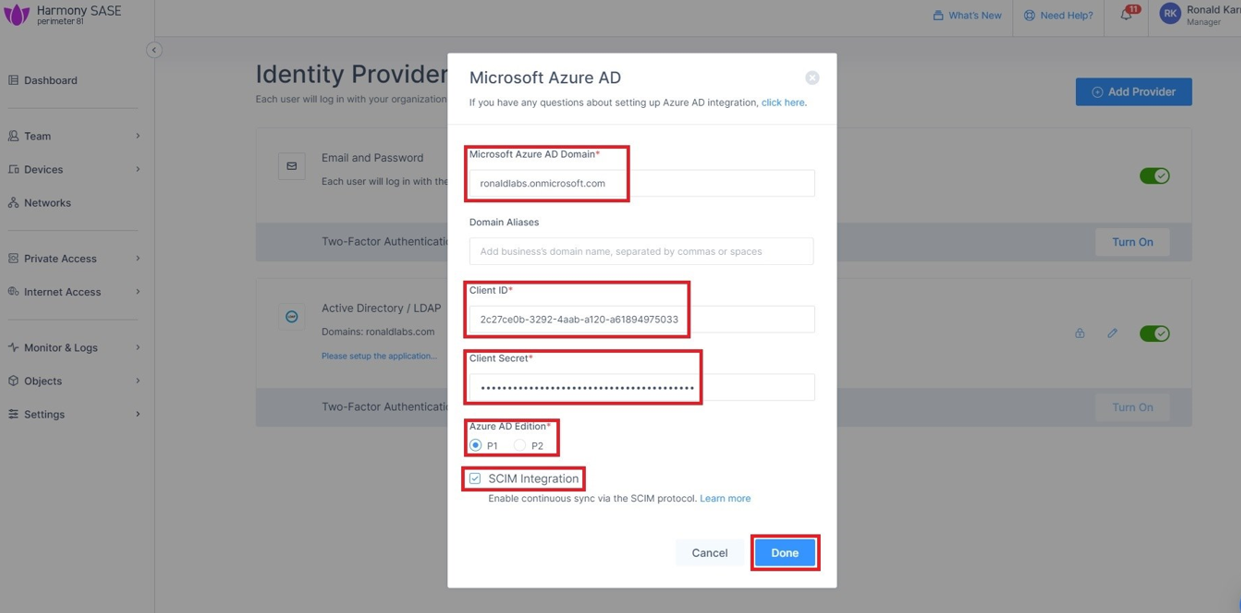
Enter these details:
-
Microsoft Azure AD Domain
-
(Optional) Domain Aliases
-
Client ID
-
Client Secret (you copied while configuring the key)
-
-
Select the SCIM Integration checkbox.
-
Click Done.
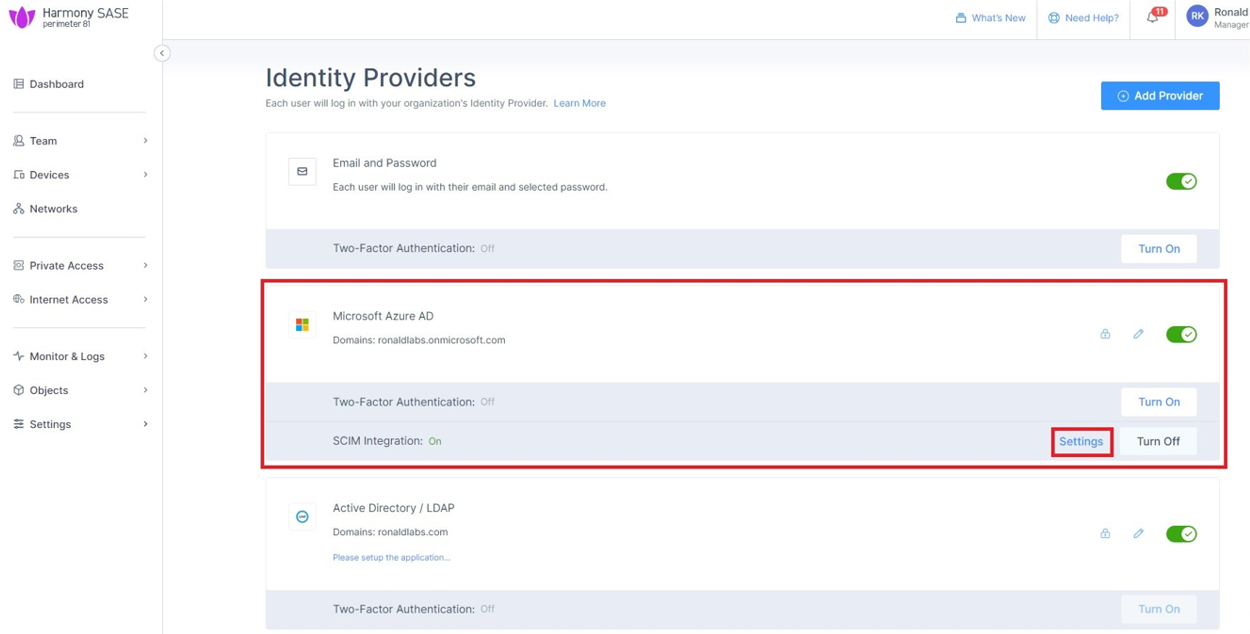
The Azure AD gets created successfully.
-
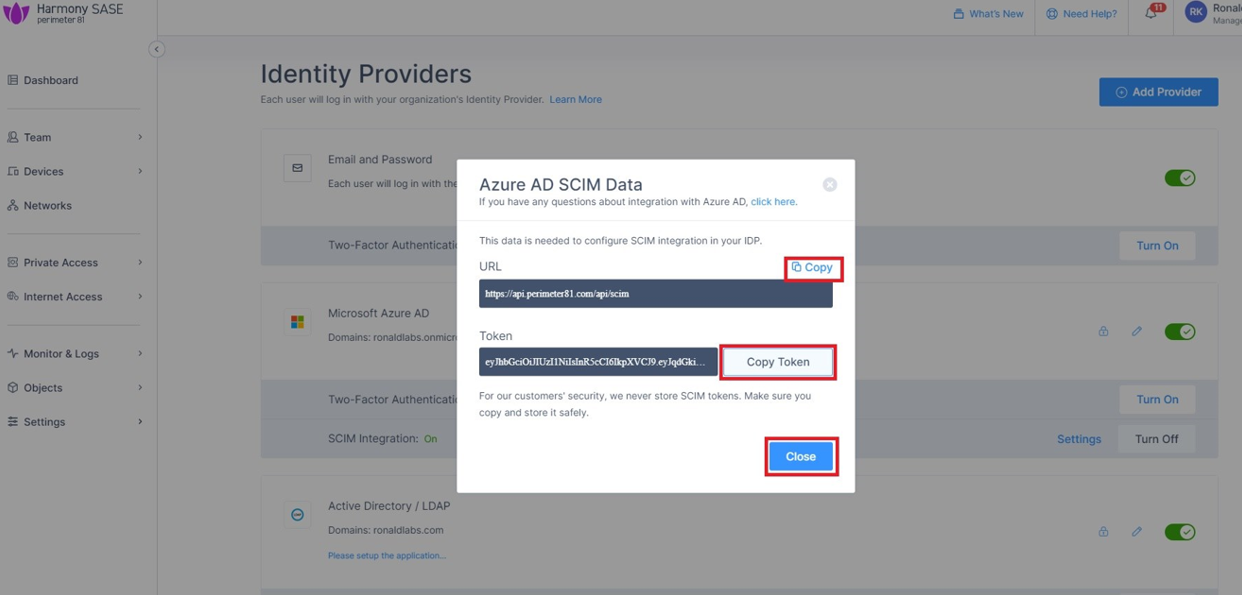
In the Microsoft Azure AD section, click Settings.
-
Click Generate Token.
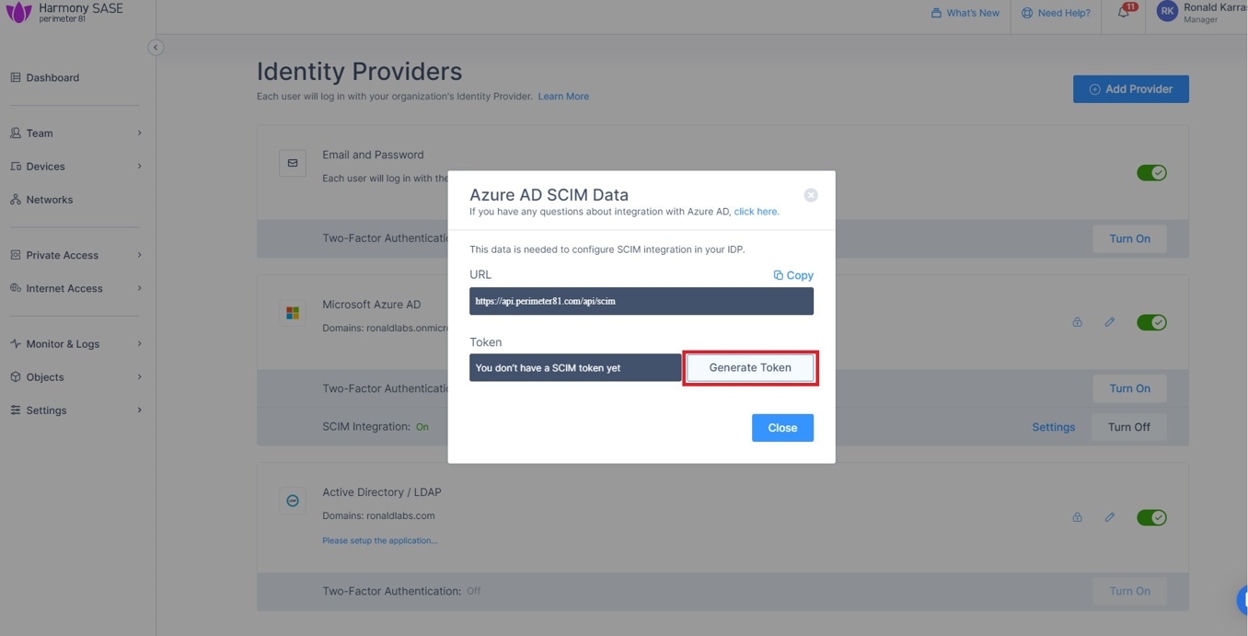
The Azure AD SCIM Data window appears.
-
Copy the URL and Token and then click Close.
Part 3: Configuring SCIM
-
Access the Microsoft Azure Portal using administrator credentials.
-
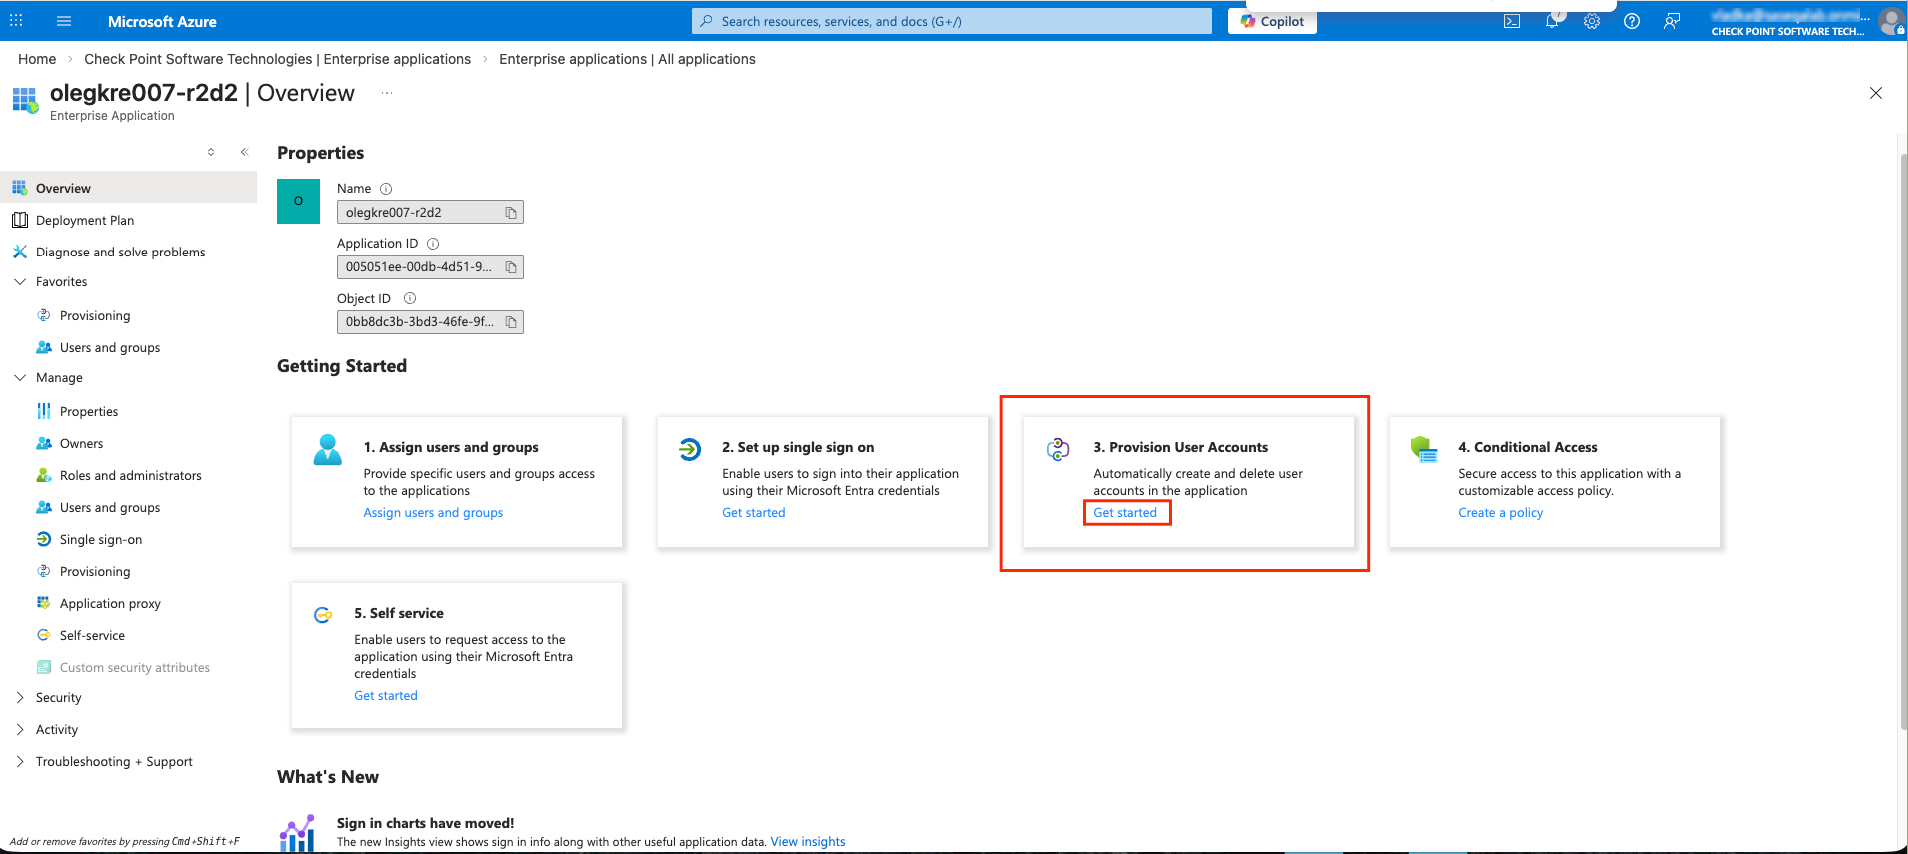
Go to Microsoft Entra ID > Enterprise Applications and locate the application previously created in Step 1 - Creating an application in Entra ID.
-
Click the application name to open the configuration.
-
Click Get Started in the Provision User Accounts tile.
-
Click Provisioning.
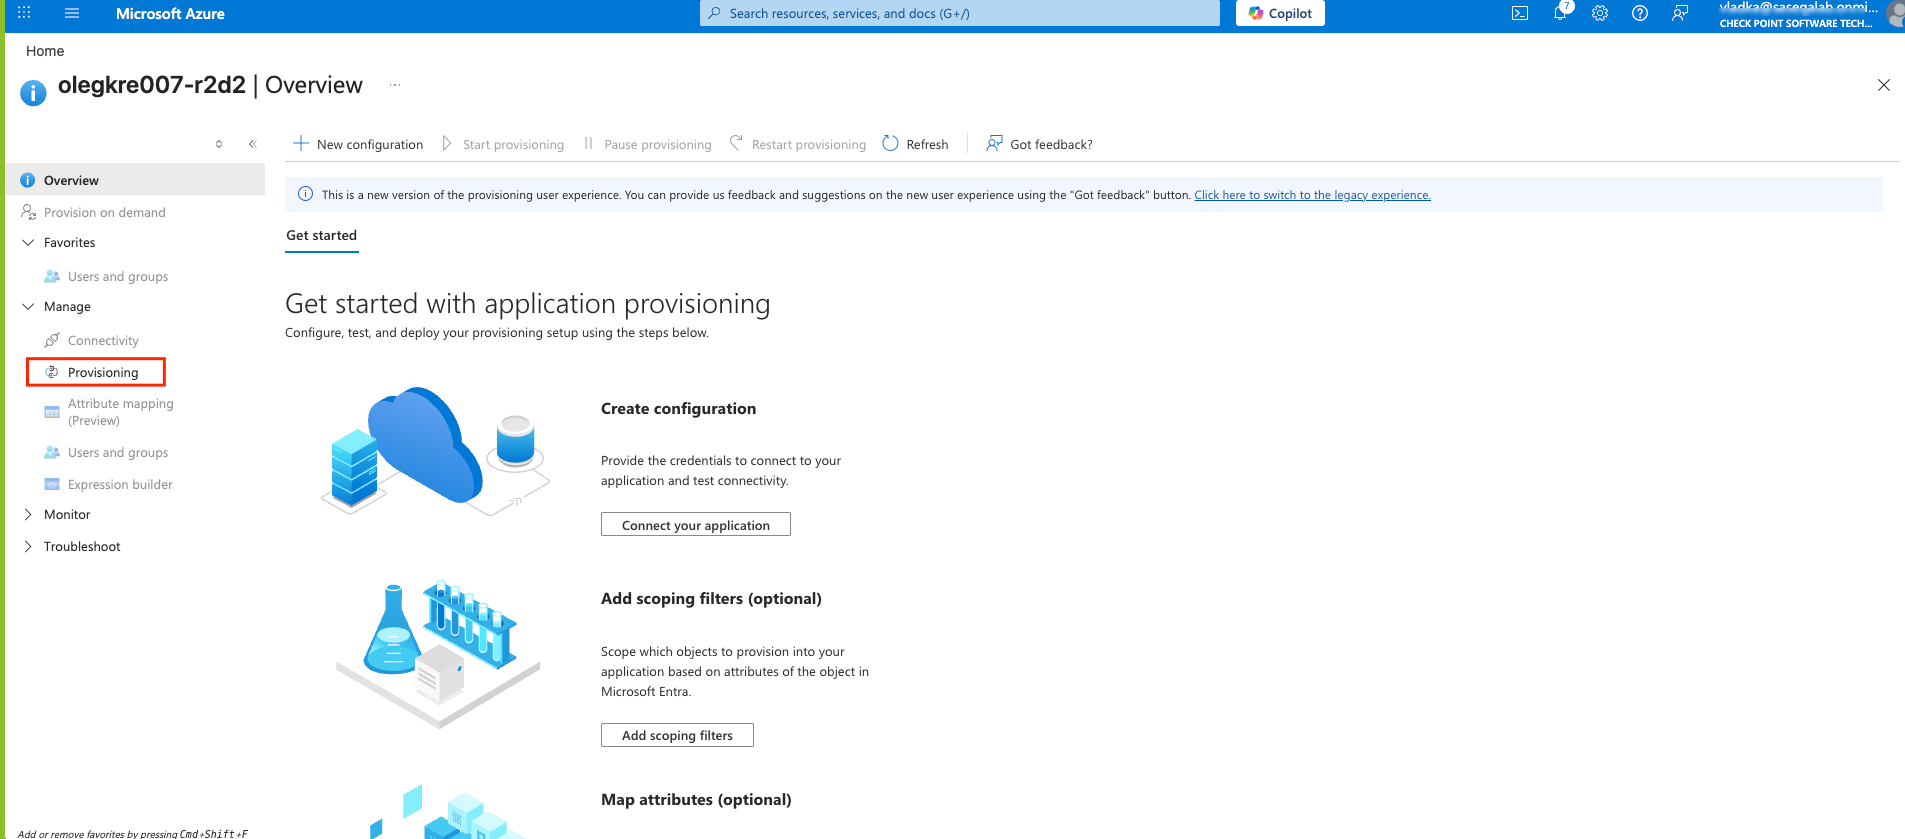
-
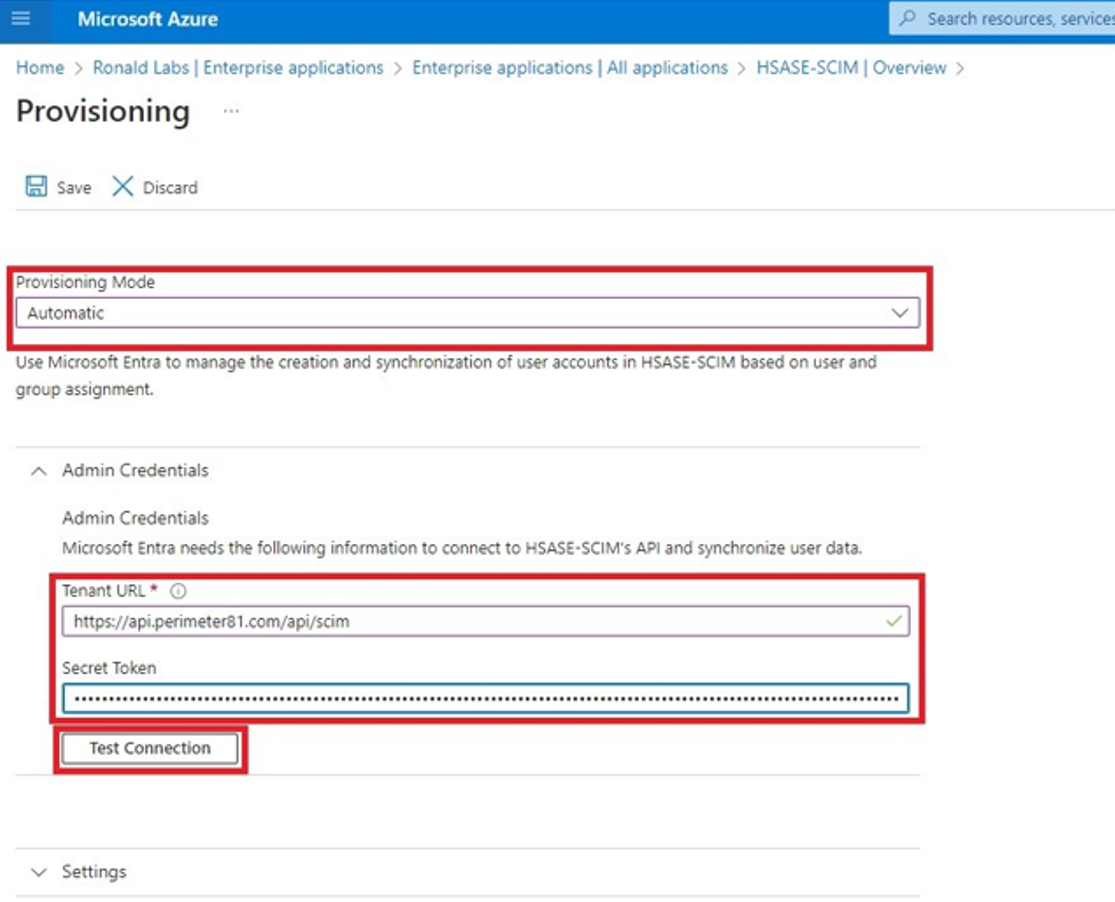
From the Provisioning Mode list, select Automatic.
-
Expand Admin Credentials.
-
In the Tenant URL field, enter the SCIM URL.
-
For US based platform - https://api.perimeter81.com/api/scim
-
For EU based platform - https://api.eu.sase.checkpoint.com/api/scim
-
For AU based platform - https://api.au.sase.checkpoint.com/api/scim
-
For IN based platform - https://api.in.sase.checkpoint.com/api/scim
-
In the Secret Token field, paste the token you copied in Part 2: Configuring SASE IDP section step 11.
-
Click Test Connection.
-
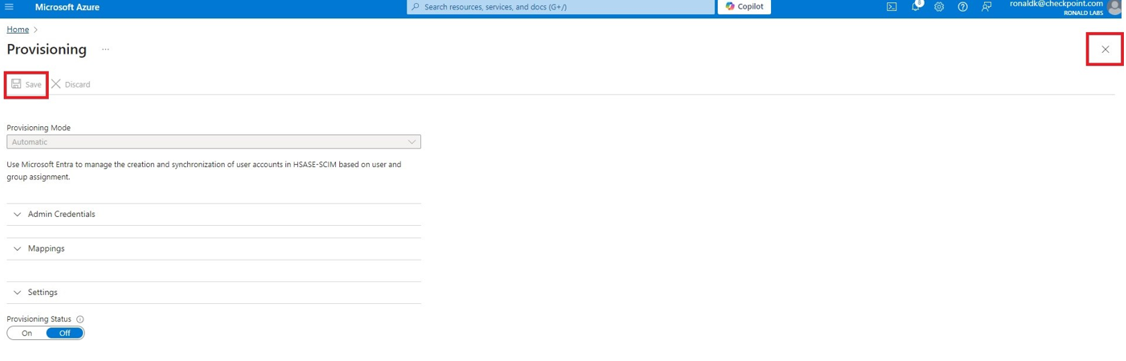
Click Save at the top left corner.
-
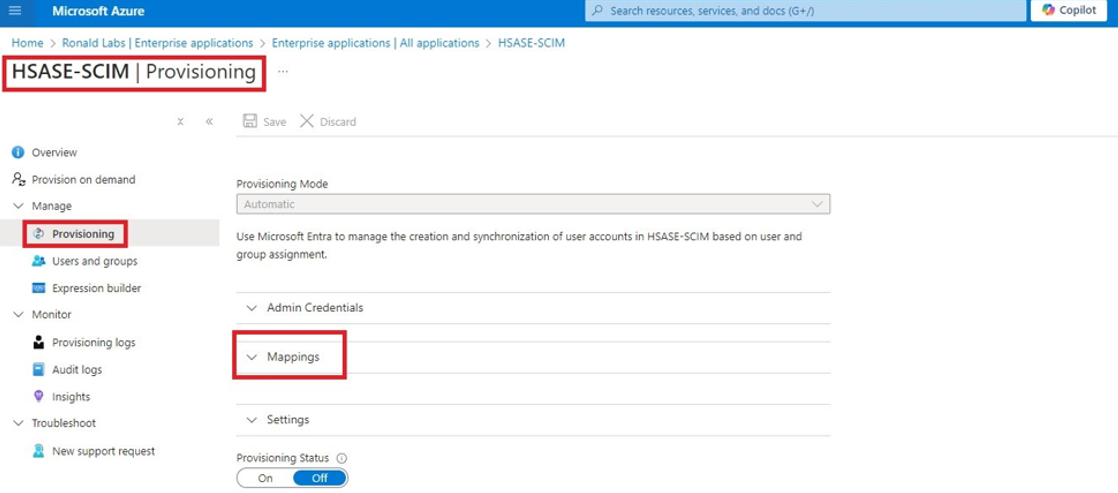
Expand Mappings.
-
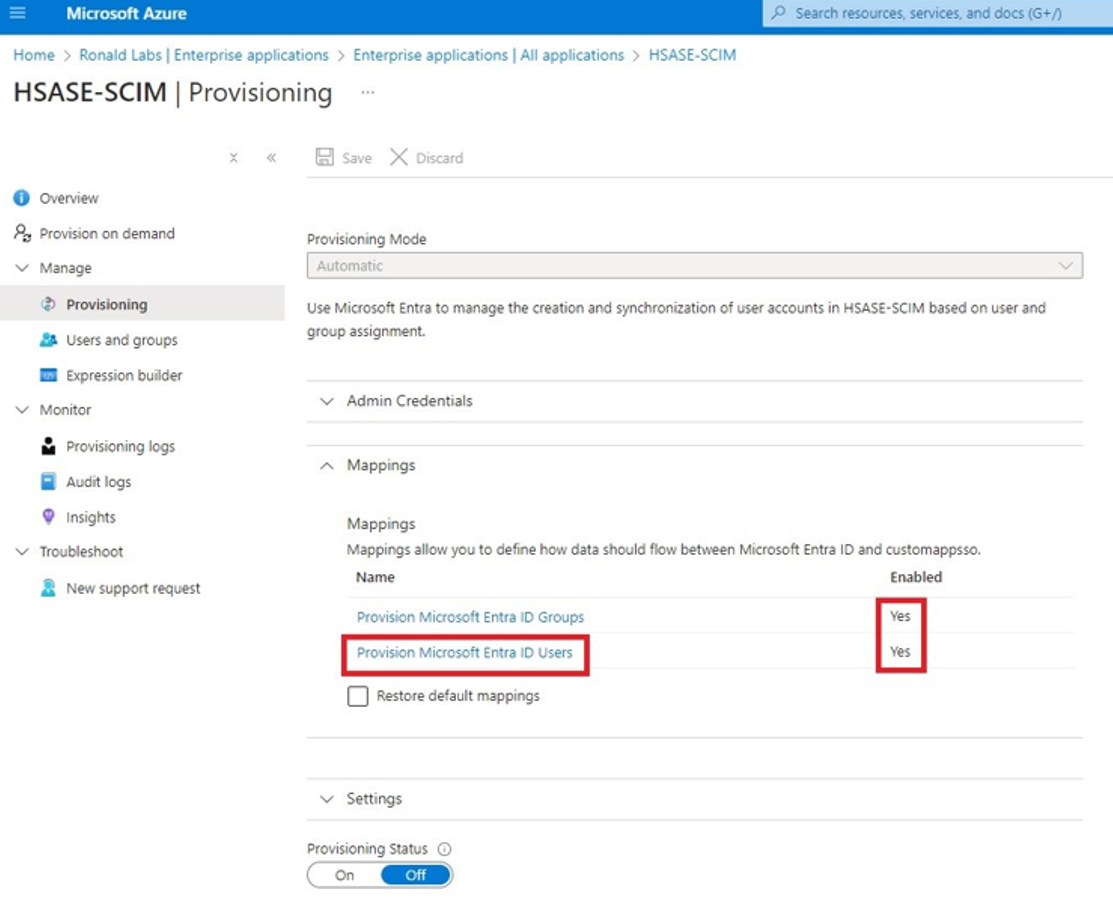
Make sure that these options are enabled:
-
Provision Microsoft Entra ID Groups
-
Provision Microsoft Entra ID Users
-
-
Click Provision Microsoft Entra ID Users.
-
In the Attribute Mappings section, for userName, click Edit.

-
From the Source attribute list, select mail.
-
From the Match precedence list, select 2.
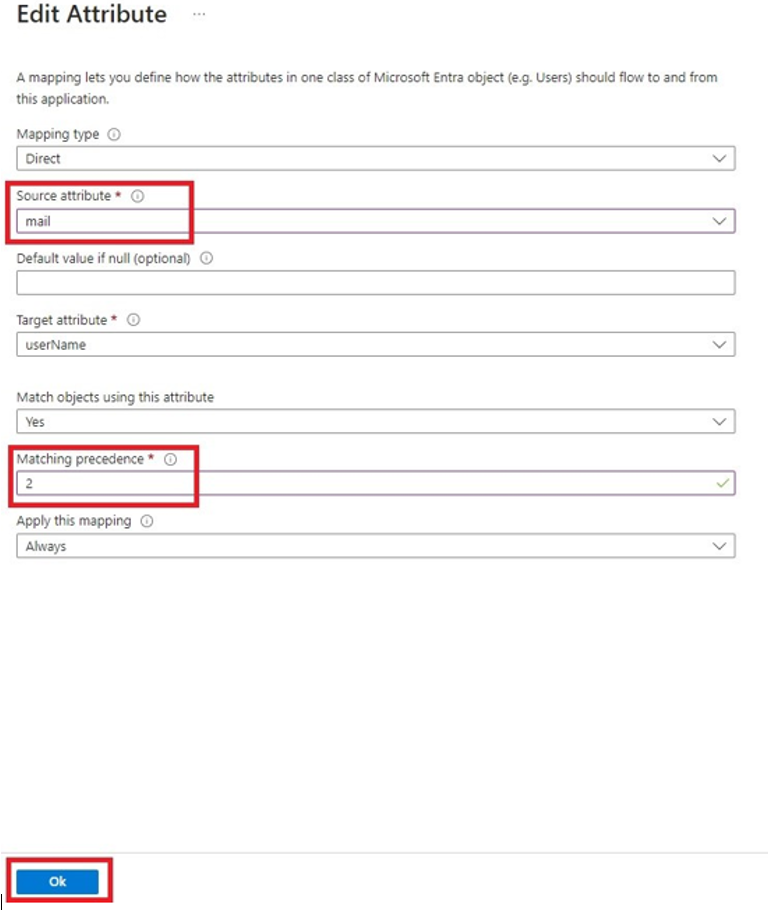
-
Click OK.
-
Locate the
emails[type eq “work”].valueattribute and click Edit. -
From the Source attribute list, select userPrincipalName.
-
From the Match objects using this attribute list, select Yes.
-
From the Matching precedence list, select 3.
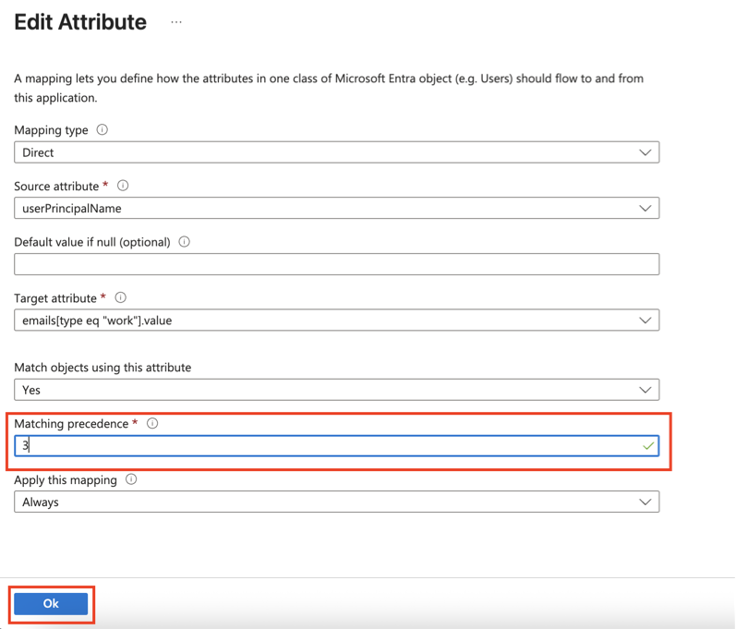
-
Click OK.
-
Go back to Attribute Mappings section and click Add New Mapping.
-
From the Source attribute list, select objectId.
-
From the Target attribute list, select nickName.
-
From the Match objects using this attribute list, select Yes.
-
From Matching precedence list, select 1.
-
From the Apply this mapping list, select Only during object creation.

-
Click OK.
-
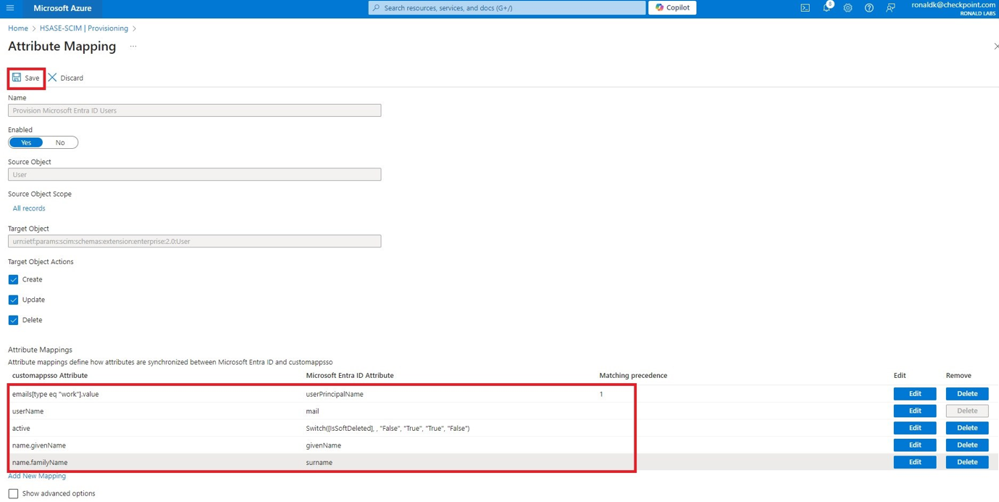
Retain these attributes and delete other attributes:
-
nickName -
emails[type eq “work”].value -
userNamemail -
active -
name.givenName -
name.familyNamesurname
-
-
Click Save.
-
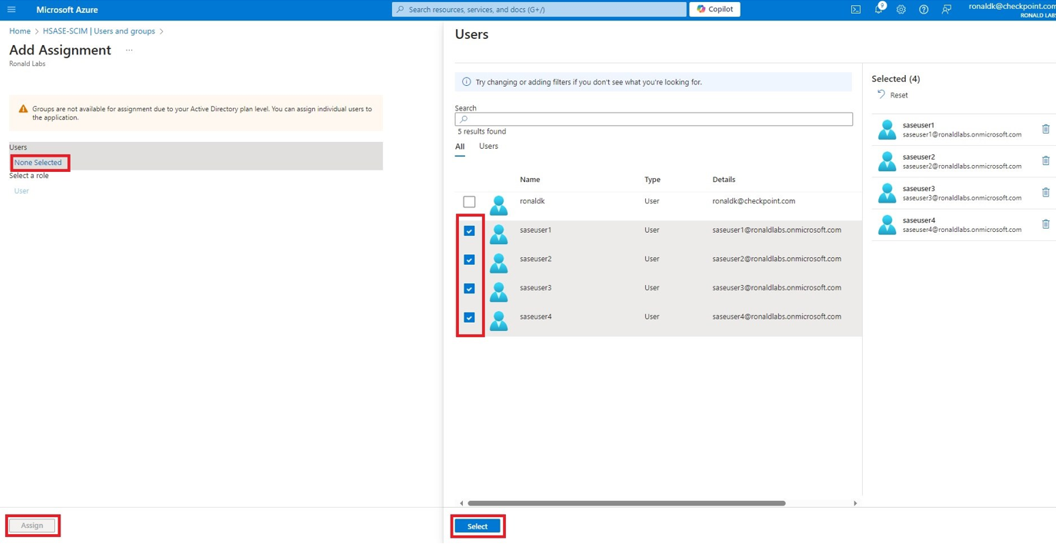
Go to SCIM Application and select Users and groups.
-
Click Add users/group.
-
In the Users section, click None Selected.
-
Select the user(s).
-
Click Select and then click Assign.
-
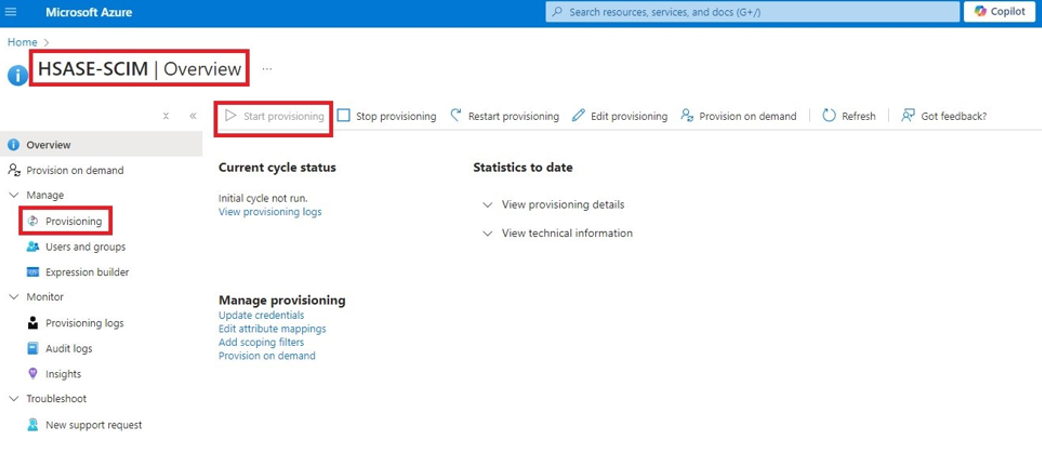
Go to the SCIM application.
-
Go to Overview.
-
Click Start provisioning.