Keycloak
SASE can authenticate users through Keycloak, ensuring a secure and efficient login process by utilizing the Security Assertion Markup Language (SAML) protocol.
Prerequisites
-
Administrator access to the Check Point SASE Administrator Portal.
-
Administrator account with the Identity Provider Management Portal.
Integration Procedure
To configure Keycloak as an Identity Provider:
-
Log in to your Keycloak Administrator Console:
-
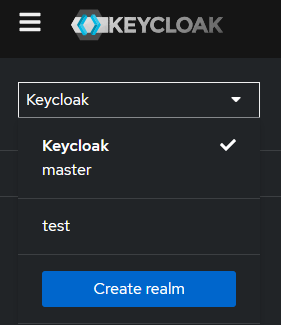
Select the realm you want to configure.
-
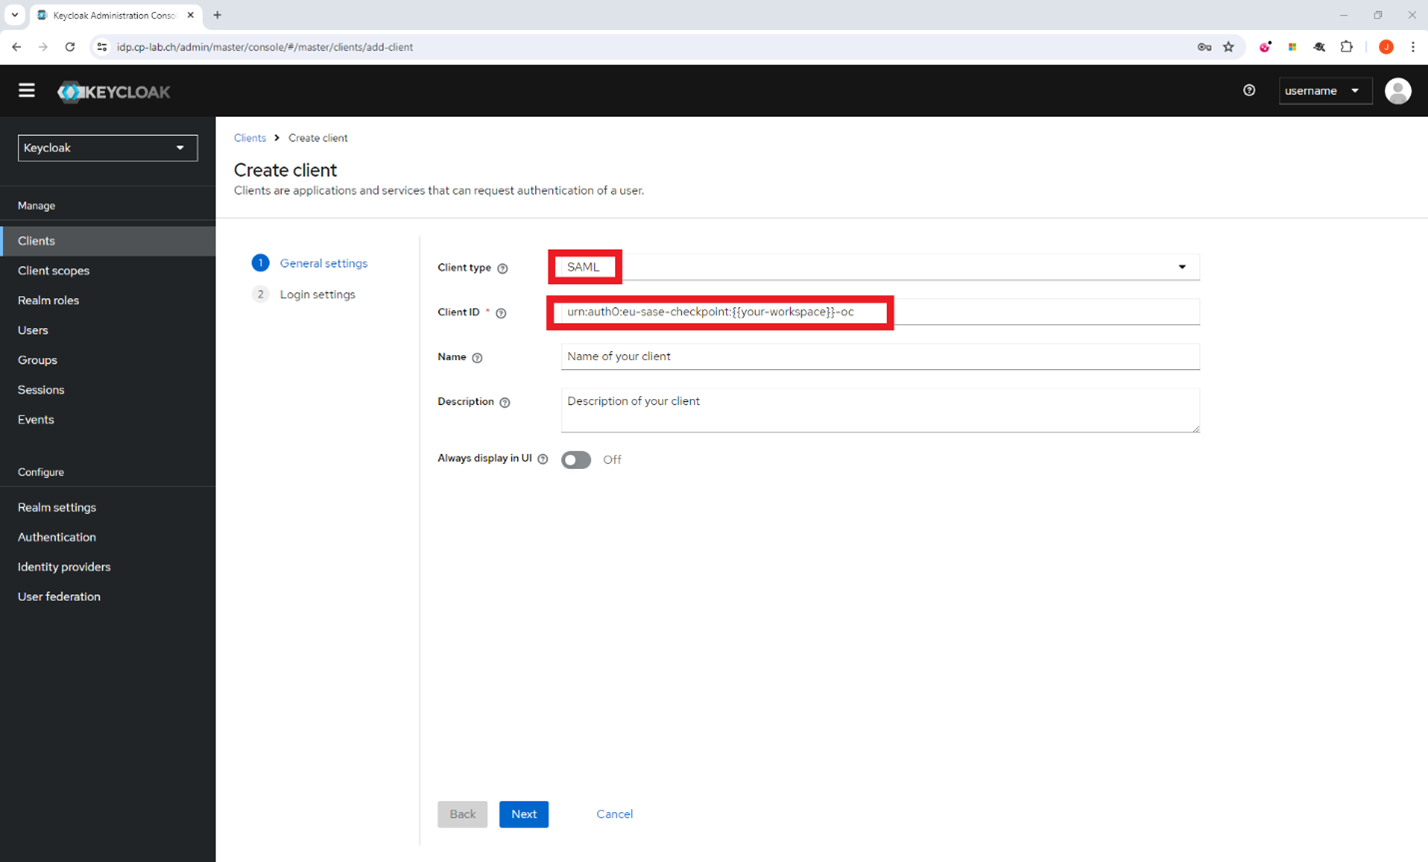
Go to Clients and click Create client.
The Create client page appears.
-
From the Client type list, select SAML.
-
In the Client ID field, enter the audience URI (SP Entity ID) of your SASE workspace:
-
For US based platform -
urn:auth0:perimeter81:{{WORKSPACE}}-oc -
For EU based platform -
urn:auth0:eu-sase-checkpoint:{{WORKSPACE}}-ocFor example - acme.perimeter81.com workspace should translate to
urn:auth0:perimeter81:acme-oc
-
-
Click Next.
-
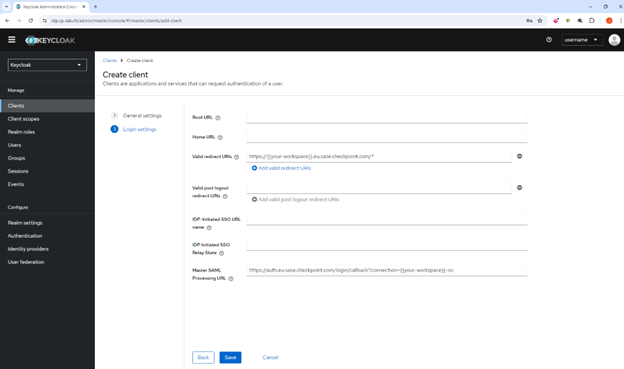
In the Valid redirect URIs field, enter your workspace URL:
-
For US based platform -
https://{{your-workspace}}.perimeter81.com/* -
For EU based platform -
https://{{your-workspace}}.eu.sase.checkpoint.com/* -
In the Master SAML Processing URL field, enter your Single sign-on URL:
-
For US based platform -
https://auth.perimeter81.com/login/callback?connection={{WORKSPACE}}-oc -
For EU based platform -
https://auth.eu.sase.checkpoint.com/login/callback?connection={{WORKSPACE}}-oc
-
-
Click Save.
-
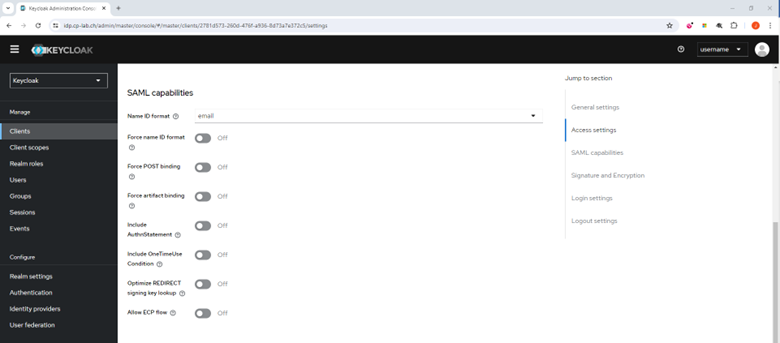
Go to Access capabilities and do these in the SAML capabilities section.
-
From the Name ID format list, select your email address.
-
Turn off the Force POST billing toggle button.
-
Turn off the Include AuthnStatement toggle button.
-
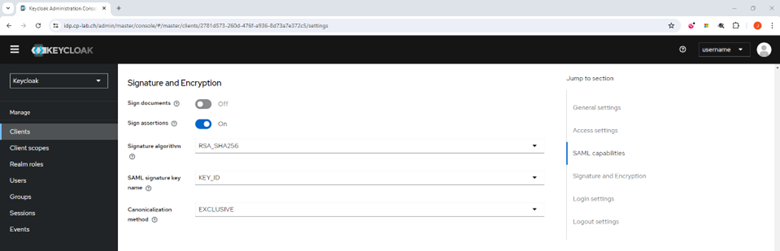
Go to the Signature and Encryption section.
-
Turn off the Sign documents toggle button.
-
Turn off the Sign assertion toggle button.
-
From the Signature algorithm list, select RSA_SHA256.
-
From the SAML signature key name list, select KEY_ID.
-
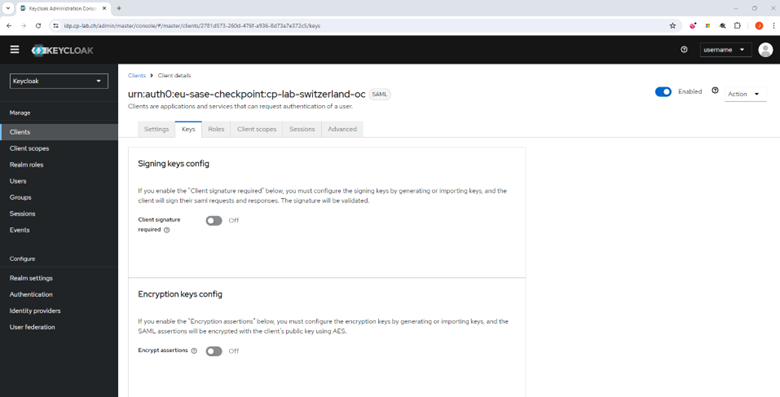
Click the Keys tab.
-
Turn off the Client signature required toggle button.
-
Turn off the Encrypt assertions toggle button.
-
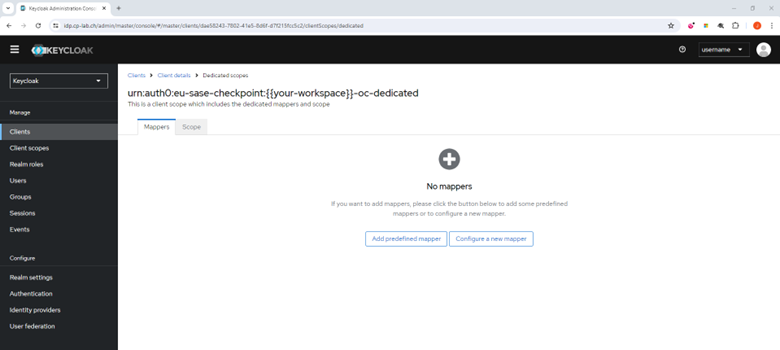
Click the Client scopes tab.

-
Select the assigned client scope named as your audience URI (SP Entity ID), for example, the name starts with
urn:auth0. -
Click the Mappers tab.
-
Click Add predefined mapper.
-
Select these checkboxes:
-
X500 email
-
X500 givenName
-
X500 surname
This configuration permits to pass through the SAML response the Users given name and surname.
-
-
-
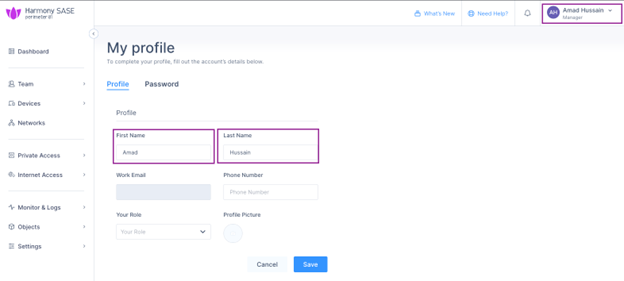
To map the user profile, log in to the SASE Administrator Portal, click your profile icon at the top right corner and enter these:
-
First Name
-
Last Name

Note - The groups in Keycloak must match the groups in SASE to be able to add the users into the corresponding groups in SASE.
-
-
Log in to your Keycloak Administration Console:
-
(Optional) Select Add mapper, then By configuration and select Group list to pass Group membership to SASE.
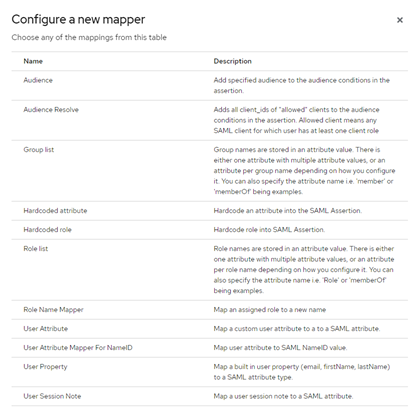
-
In the Name field, enter Group Mapper.
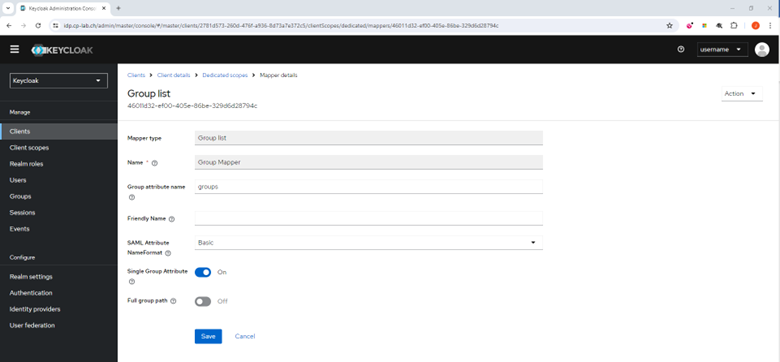
-
In the Group attribute name field, enter groups.
-
From the SAML Attribute NameFormat list, select Basic.
-
Turn on the Single Group Attribute toggle button.
-
Turn off the Full group path toggle button.
-
Click Save.
-
Go to Clients and then click Create client.
-
Click the Advanced tab.
-
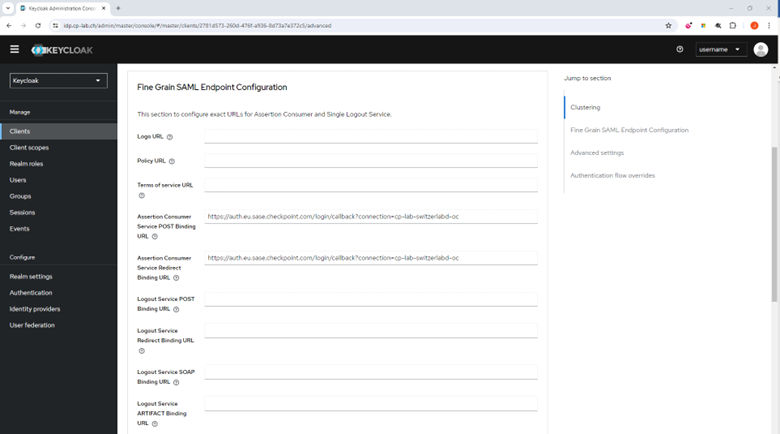
Click Fine Grain SAML Endpoint Configuration.
-
In the Assertion Consumer Service POST Binding URL field, enter your Single sign-on URL:
-
For US based platform -
https://auth.perimeter81.com/login/callback?connection={{WORKSPACE}}-oc -
For EU based platform -
https://auth.eu.sase.checkpoint.com/login/callback?connection={{WORKSPACE}}-oc
-
-
In the Assertion Consumer Service Redirect Binding URL field, enter your Single sign-on URL:
-
For US based platform - https://auth.perimeter81.com/login/callback?connection={{WORKSPACE}}-oc
-
For EU based platform - https://auth.eu.sase.checkpoint.com/login/callback?connection={{WORKSPACE}}-oc
-
-
Click Save.
-
To collect Sign-in URL and X509 Signing Certificate of your realm to configure the Identity Providers configuration in SASE:
-
Go to Realm settings.
-
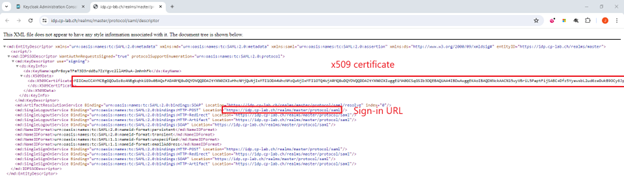
Click the General tab and click SAML 2.0 Identity Provider Metadata under Endpoints.
-
Copy the Sign-in URL and the X509 Signing Certificate.
-
-
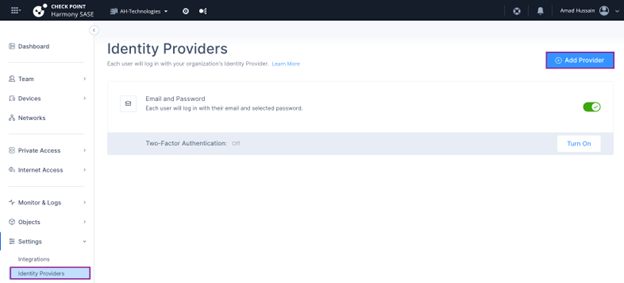
To configure SASE, log in to the SASE Administrator Portal:
-
Go to Settings > Identity Providers.
-
Click Add Provider.
-
Select SAML 2.0 Identity Providers.
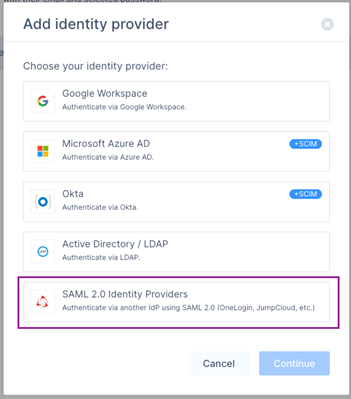
-
Click Continue.
The SAML 2.0 Identity Providers window appears.
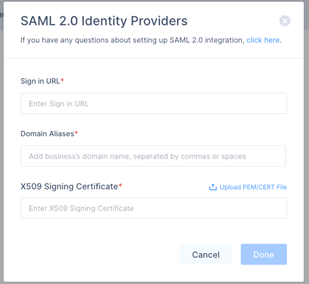
-
In the Sign in URL field, enter the sign-in url copied in step 3.i.i.
-
In the Domain Aliases field, enter your organization domain.
-
In the X509 Signing Certificate field, enter the certificate copied in step 3.i.i.
-
Click Done.
-