Active Directory Federation Services (AD FS)
Prerequisites
-
Administrator access to the Check Point SASE Administrator Portal.
-
Administrator account with the Identity Provider Management Portal.
High-Level Procedure
Step 1 - Configure the AD FS Management Portal
Create a Relying Party Trust
-
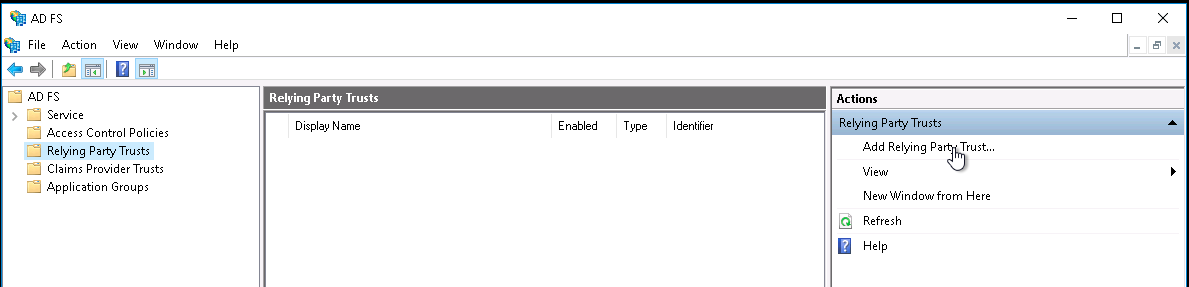
In the Server Manager, click Tools, and then select AD FS Management.
-
Under Actions, click Add Relying Party Trust.
-
On the Welcome page, choose Claims aware and click Start.

-
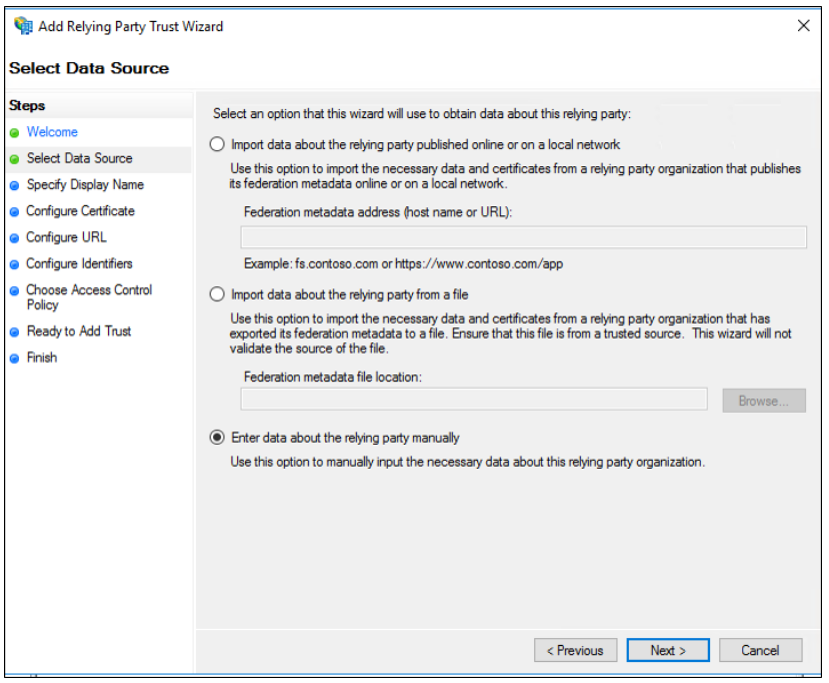
On the Select Data Source page, click Enter data about the relying party manually, and then click Next.
-
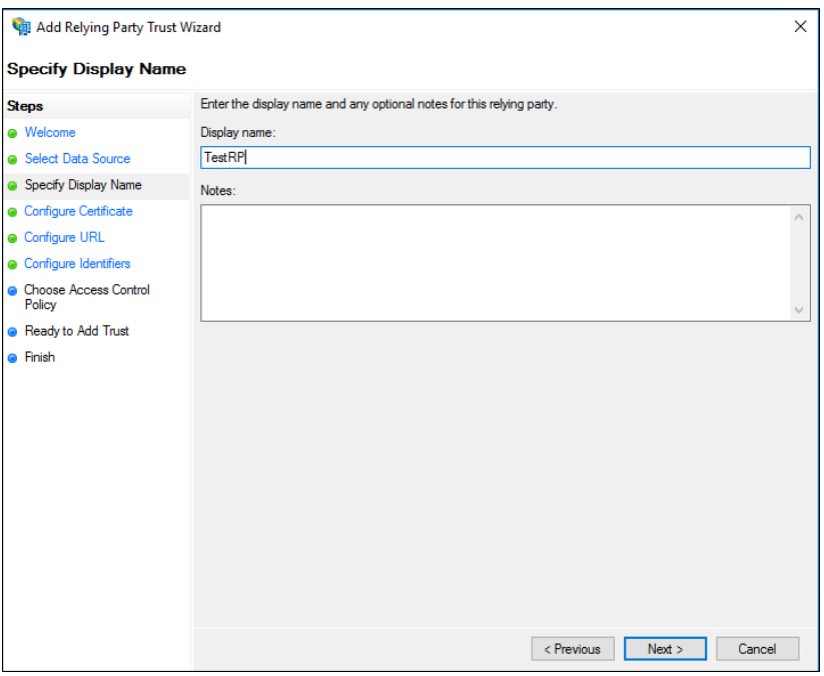
On the Specify Display Name page, type a name in Display name, under Notes type a description for this relying party trust, and then click Next.
-
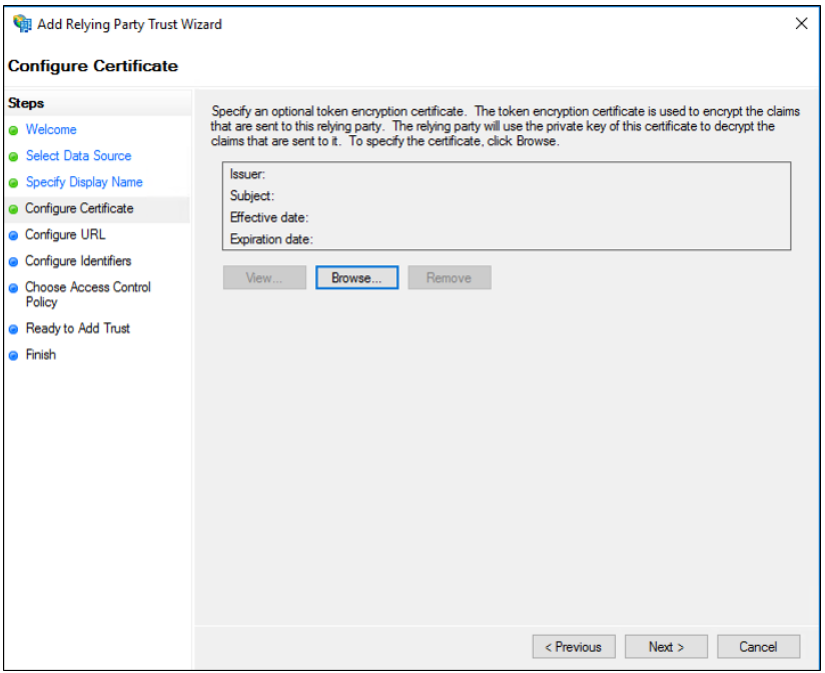
On the Configure Certificate page, click Next.
-
On the Configure URL page:
-
Select the Enable support for the SAML 2.0 WebSSO protocol checkbox.
-
Under Relying party SAML 2.0 SSO service URL, enter US-based platform:
https://auth.perimeter81.com/login/callback?connection={{WORKSPACE}}-ocEU-based platform:https://auth.eu.sase.checkpoint.com/login/callback?connection={{WORKSPACE}}-ocAU-based platform:https://auth.au.sase.checkpoint.com/login/callback?connection={{WORKSPACE}}-ocIN-based platform:https://auth.in.sase.checkpoint.com/login/callback?connection={{WORKSPACE}}-oc -
Click Next.
-
-
On the Configure Identifiers page:
-
Enter the Relying party trust identifier as US-based platform:
urn:auth0:perimeter81:{{WORKSPACE}}-ocEU-based platform:urn:auth0:eu-sase-checkpoint:{{WORKSPACE}}-ocAU-based platform:urn:auth0:au-sase-checkpoint:{{WORKSPACE}}-ocIN-based platform:urn:auth0:in-sase-checkpoint:{{WORKSPACE}}-ocFor example:acme.perimeter81.comworkspace should translate tourn:auth0:perimeter81:acme-oc -
Click Add to add it to the list, and then click Next.
-
-
On the Choose Access Control Policy page, select Permit everyone and then click Next.
-
On the Ready to Add Trust page, review the settings, and then click Next to save your relying party trust information.
-
On the Finish page, make sure that the Configure claims issuance policy for this application checkbox is selected, and then click Close.
This action automatically shows the Edit Claim Issuance Policy dialog box.
Edit Claim Issuance Policy
After you have created the Relying Party Trust, the Edit Claim Issuance Policy dialog box appears.
-
Click Add Rule to launch the wizard.
-
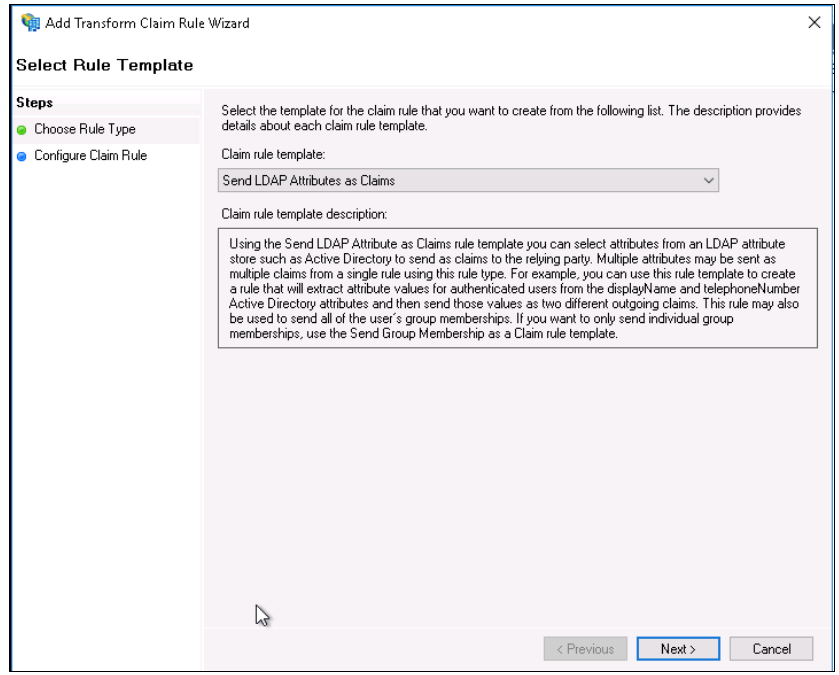
In the Claim rule template drop-down, select Send LDAP Attributes as Claims and click Next.
-
Enter a value for the Claim rule name, such as LDAP Attributes.
-
Choose Active Directory as your Attribute Store.
-
Map the LDAP attributes to these outgoing claim types:
LDAP Attribute
Claim Type
E-mail Addresses
email
Given-Name
given_name
Surname
family_name
Token-Groups Unqualified-Names
groups
User-Principal-Name
user_id
-
Click Finish.
-
In the Edit Claim Issuance Policy window, click Apply.
Export the Signing Certificate
-
From the left navigation pane, click AD FS > Service > Certificates.
-
Right-click Token-signing and then select View Certificate.
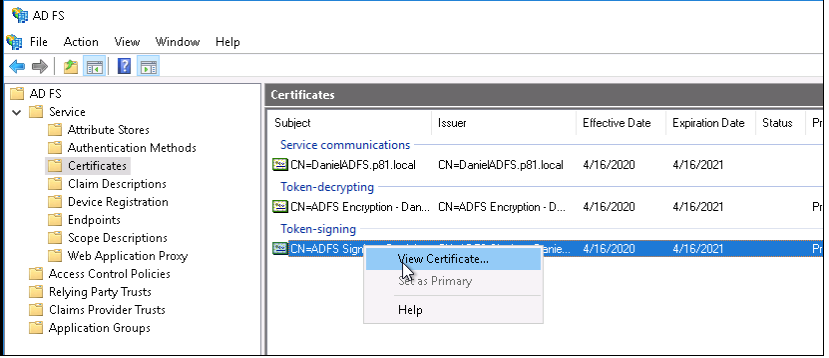
The Certificate pop-up appears.
-
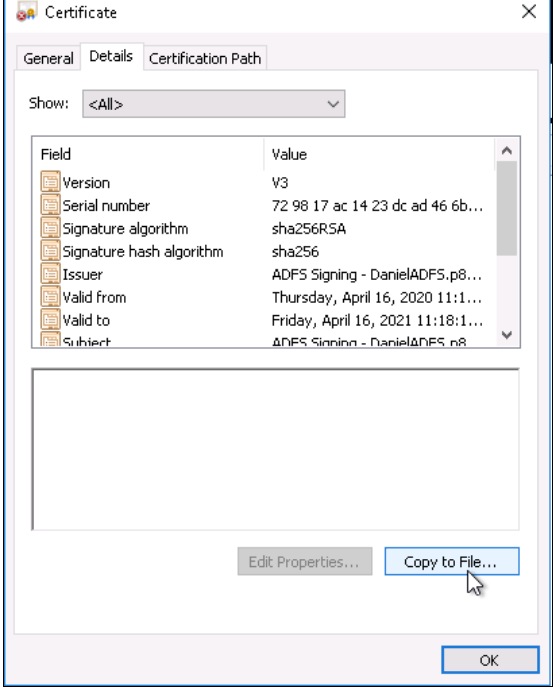
Go to the Details tab, and click Copy to File.
-
In the Certificate Export Wizard, click Next.
-
Select the file format as Base-64 encoded X.509 (.CER) and then click Next.

-
Select the location where you want to export the certificate and click Next.
-
Click Finish.
Step 2 - Configure the Check Point SASE Administrator Portal
-
Log in to the SASE Administrator Portal with a administrator account.
-
Go to Settings > Identity Providers.
-
Click Add Provider.
The Add identity provider pop-up appears.
-
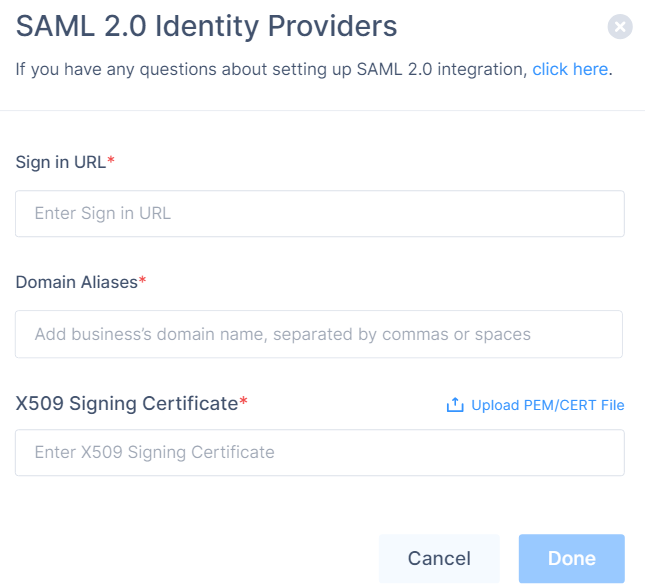
Select SAML 2.0 Identity Providers and click Continue.
-
In the Sign in URL field, enter the Identity Provider Sign-in URL from your SAML Identity Provider.
Identity Provider
Sign in URL
Generic SAML
Identity Provider Sign in URL
Active Directory Federation Services (AD FS)
https://{{Your ADFS Domain}}/adfs/lsAuth0
Auth0 login URL
OneLogin
SAML 2.0 Endpoint (HTTP) value
PingOne
https://sso.connect.pingidentity.com/sso/idp/SSO.saml2?idpid={{idpid}}PingFederate
https://sso.{{Your PingFederate Domain}}.com/idp/SSO.saml2Rippling
Rippling IdP Sign-in URL.
JumpCloud
JumpCloud IDP URL
Okta
Okta Sign on URL
Google Applications
SSO URL
-
In the Domain Aliases field, enter the business domain names separated by commas or space.
-
In the X509 Signing Certificate field, enter the X.509 signing certificate for the application from the SAML Identity Provider.
If you have the signing certificate as PEM/CERT file, click Upload PEM/CERT File and select the file.
-
Click Done.
|
|
Note - After the first successful authentication of a member with SAML, Check Point SASE does this:
|
