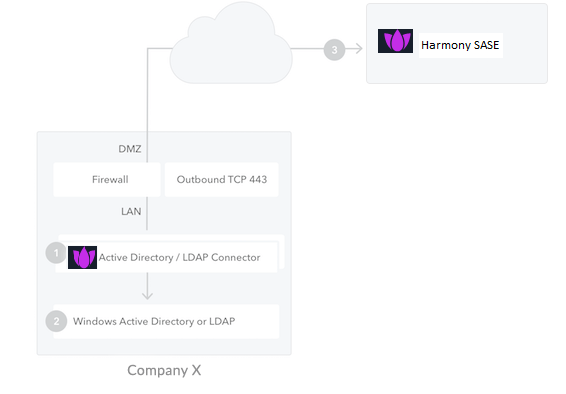
On-Premises Active Directory
You can integrate SASE with Active Directory/LDAP through the Active Directory/LDAP connector installed on your network. The connector serves as a bridge between Active Directory and the SASE service.
|
|
Note - For high availability and load balancing, install multiple connector instances. All connections are outbound to SASE, so firewall changes are generally unnecessary. |
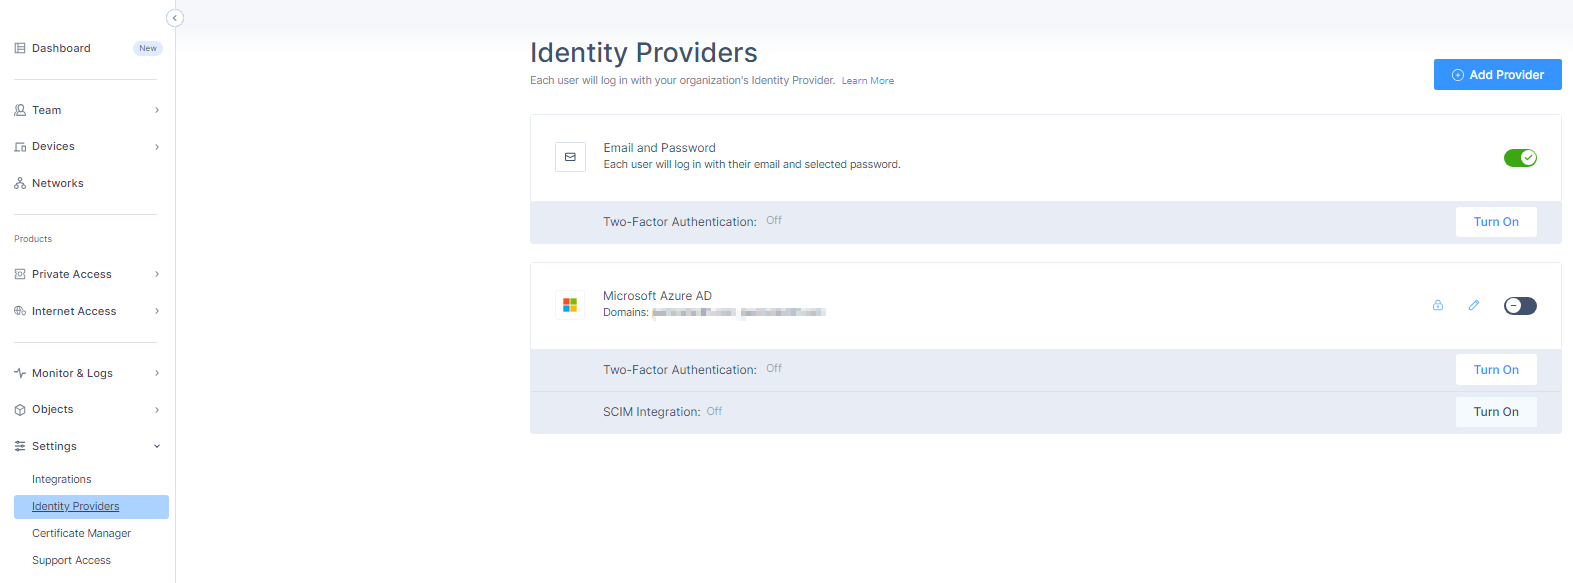
Enabling Active Directory/LDAP Connection
-
Access the SASE Administrator Portal and click Settings > Identity Providers.
The Identity Providers page opens.
-
Click Add Provider.
-
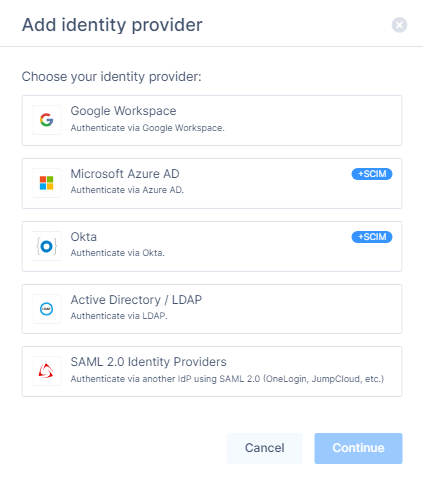
Select Active Directory / LDAP.
-
Click Continue.
-
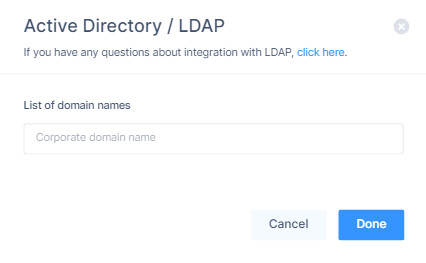
In the List of domain names field, enter the domain name to allow log in to the Active Directory/LDAP connection. For example,
quantumsase.com. -
To find your domain name:
-
Open Control Panel on your computer.
-
Go to System and Security > System > Advanced system settings.
The System Properties window appears.
-
Go to the Computer Name tab to find your domain name.
-
-
Click Done.
The Edit Active Directory / LDAP connection window appears.

-
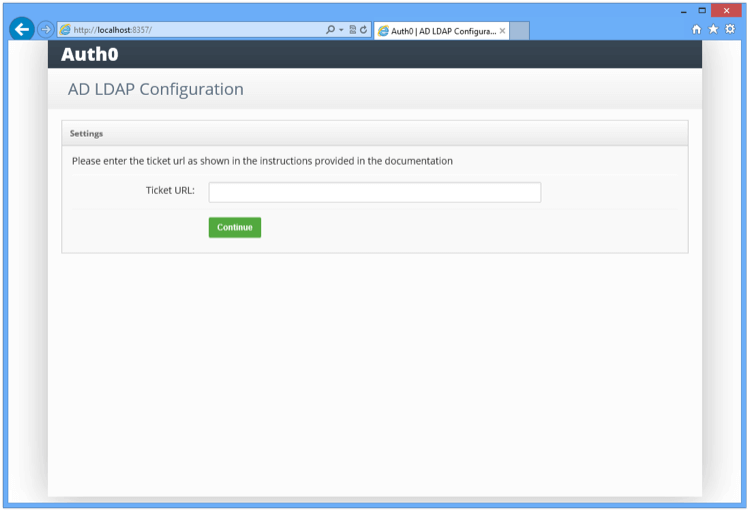
To copy the Ticket URL, click Copy Link.
This Ticket URL is required when you are linking to SASE.
-
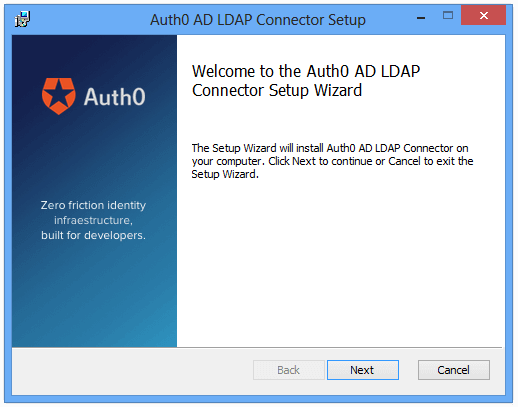
Click Install Windows Agent and follow the instruction to download the Auth0 Active Directory/LDAP Connector for Windows file, see Download the Installer.
The MSI file downloads.
-
Locate the downloaded MSI file, run the installer, and follow the instructions.

Note - The connector can be installed on an existing server, even a Domain Controller. However, more often it is installed on virtual machines provisioned just for the connector.
The AD/LDAP connector is installed as a Windows Service.

The Auth0 window appears once the installation is complete.
Link to SASE and LDAP
-
To link SASE:
-
In the Ticket URL field, enter the URL. See step 8 in Enabling Active Directory/LDAP Connection.
-
Click Continue.
Note - If you receive an Unable to get local issuer certificate error message, set an environment variable
NODE_TLS_REJECT_UNAUTHORIZEDwith value0in your Windows system, and then restart the two Auth0 services. For more information, see Creating and Modifying Environment Variable in Windows. -
-
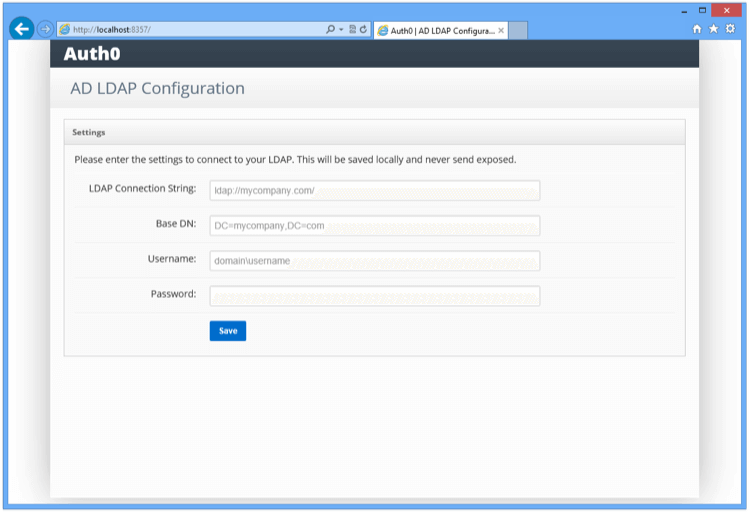
To link LDAP, enter these:
-
LDAP Connection String - Domain name or IP address of your LDAP server. For example,
Idap://<my company>.com/
Note - Your LDAP server is the local domain controller where Active Directory is installed. The protocol can be either LDAP or LDAPS. To use LDAPS, make sure that the certificate is valid in the current server.
-
Base DN - Base container for all the queries performed by the connector. For example,
dc=<my company>,dc=com -
Username - Full name of the user with administrator rights to perform queries. For example,
cn=<domain name>,dc=<my company>,dc=com -
Password - Password of the user.
-
-
Click Save.
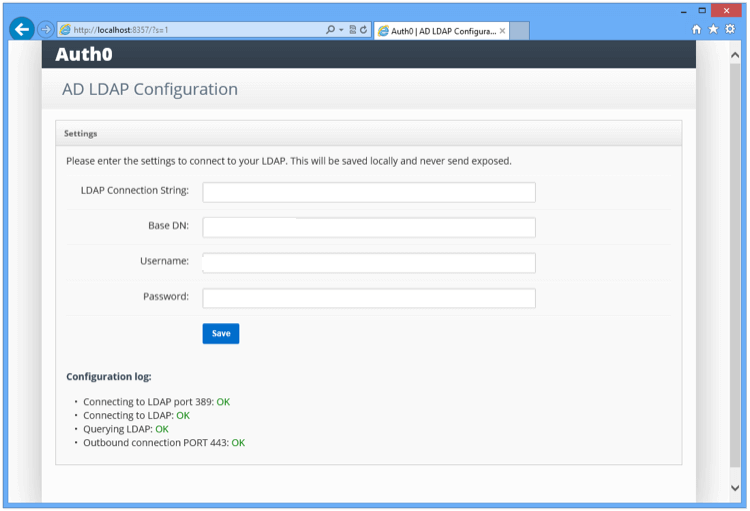
The connector performs a series of tests. Make sure all tests result appear as OK.
-
Find the AD/LDAP connector's config.json file in this location:
C:\Program Files (x86)\Auth0\AD LDAP Connector
-
Open the config.json file in a text editor and add this after the second line:
"LDAP_USER_BY_NAME": "(mail={0})",
-
Go to File and then click Save to save the config.json file.
-
Go to Properties > General.
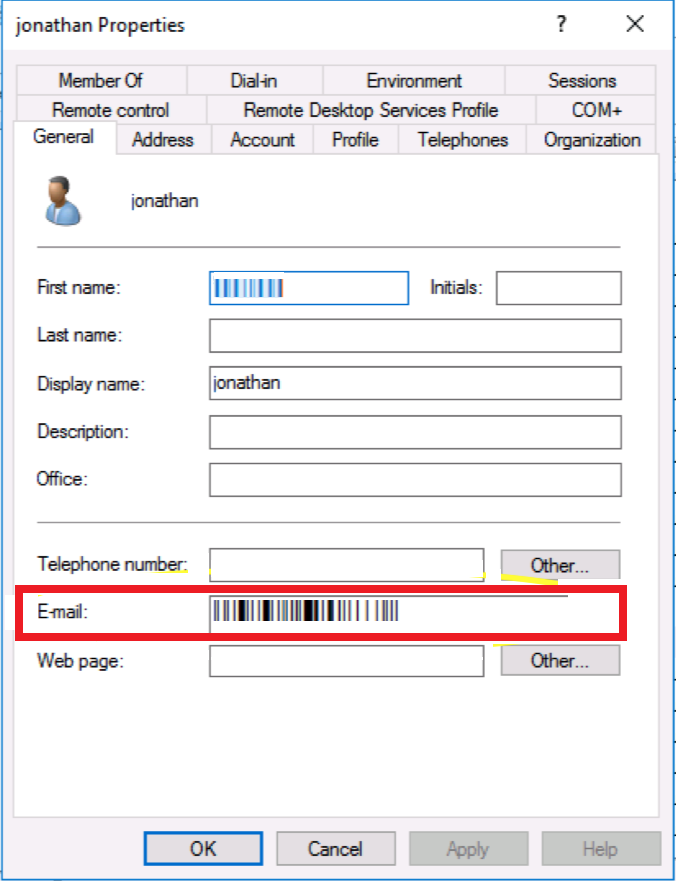
-
In the First name field, enter the user name.
-
In the E-mail field, enter the email id of the user.
-
Click OK.
-
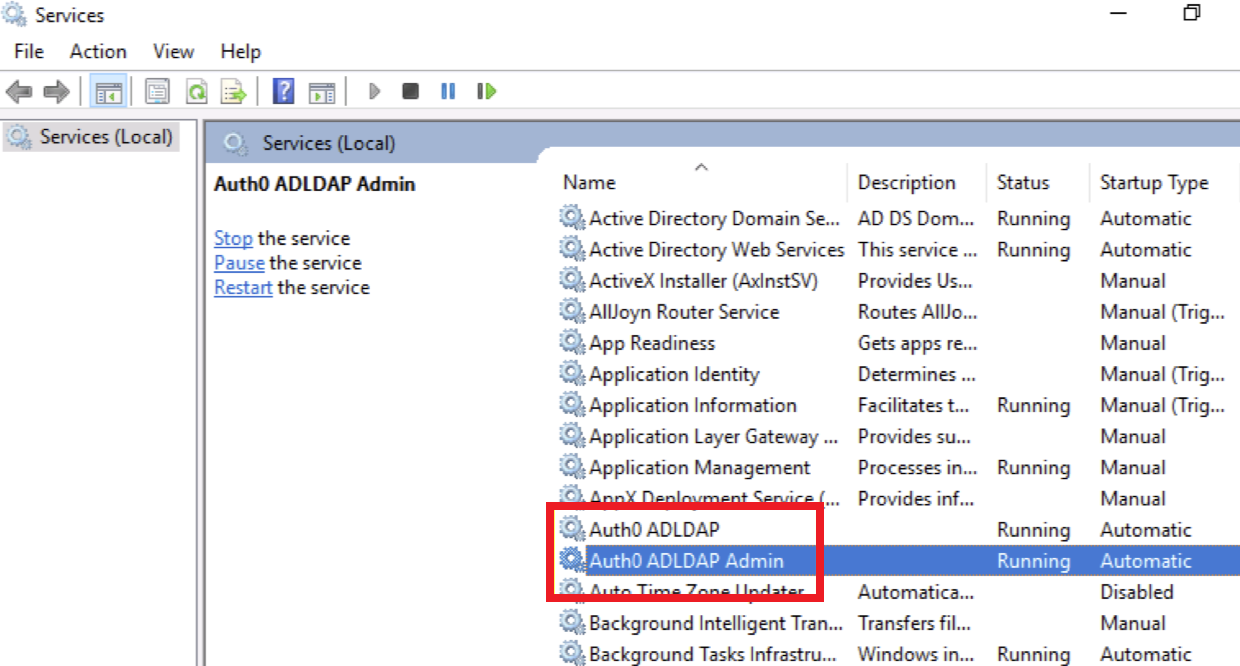
Restart the AD/LDAP Connector service.
-
To prevent unauthenticated LDAP bind requests (unauthorized access to directory information and protecting sensitive data from potential exploitation):
-
Open ADSI Edit (press
Win + R, typeadsiedit.msc, and press Enter). -
In ADSI Edit, right-click on ADSI Edit at the top of the left navigation pane and select Connect to.
-
Under Select a well known Naming Context, select Configuration, and click OK.
-
In the left navigation pane, expand Configuration > Services > Windows NT.
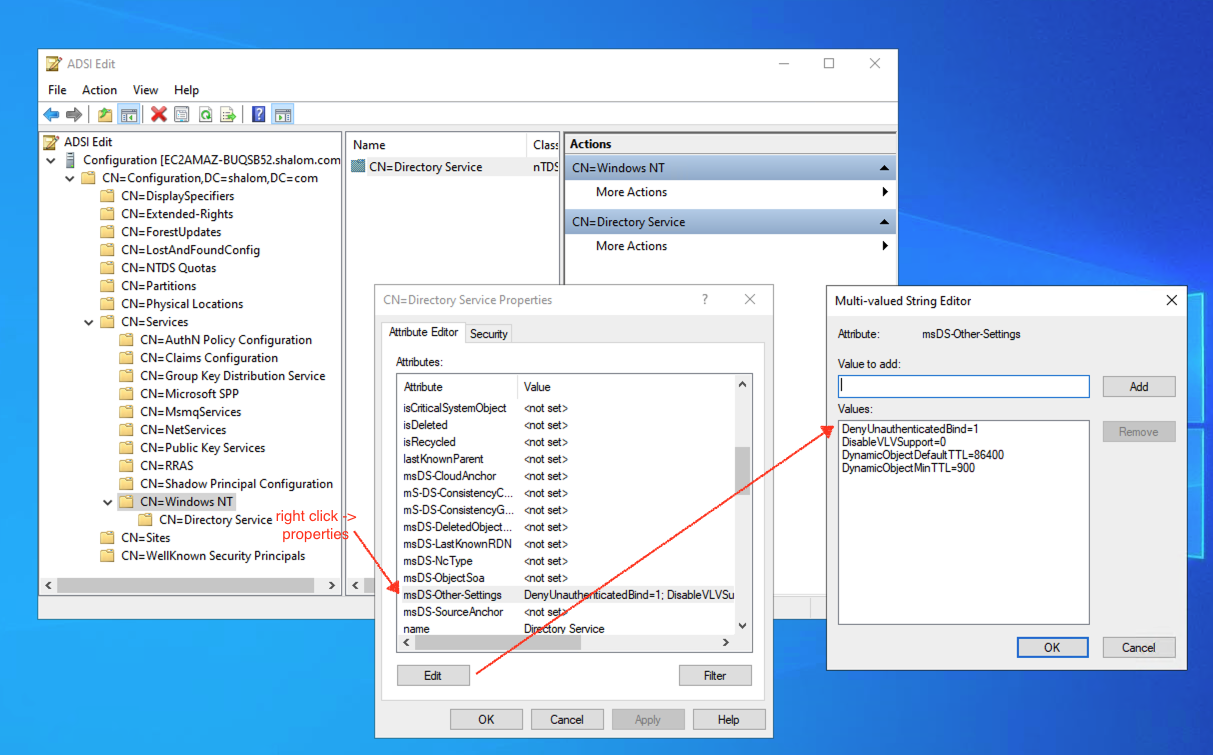
-
Right-click CN=Directory Service and select Properties.
-
In the Attributes Editor list, scroll down and locate msDS-Other-Settings, and double-click it.
-
In the Value to add field, enter DenyUnauthenticatedBind=1 and click Add.
-
Click OK to save your changes, then click Apply and OK to close Properties.
-