Microsoft Entra ID (formerly Azure AD) (SAML 2.0)
Check Point SASE allows you to authenticate securely by integrating Microsoft Entra ID (formerly Azure AD) with SAML 2.0.
Configure Microsoft Azure Portal
-
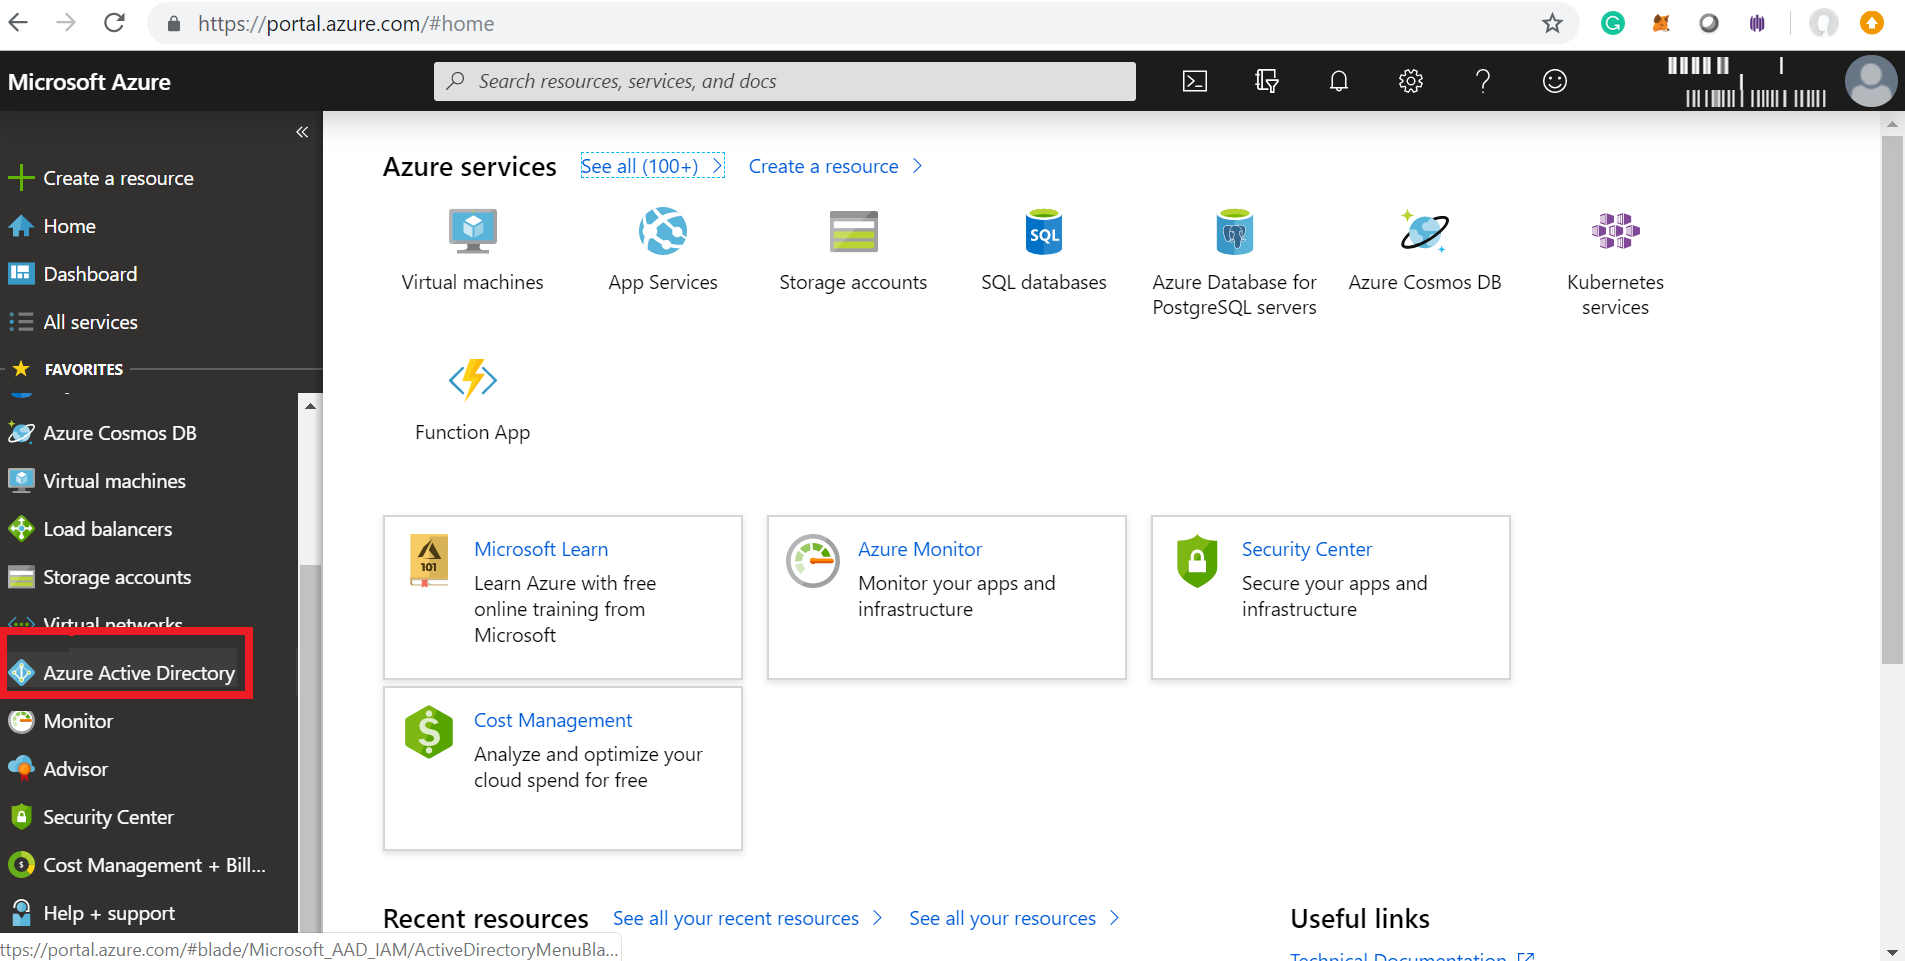
Log in to your Microsoft Azure Portal.
-
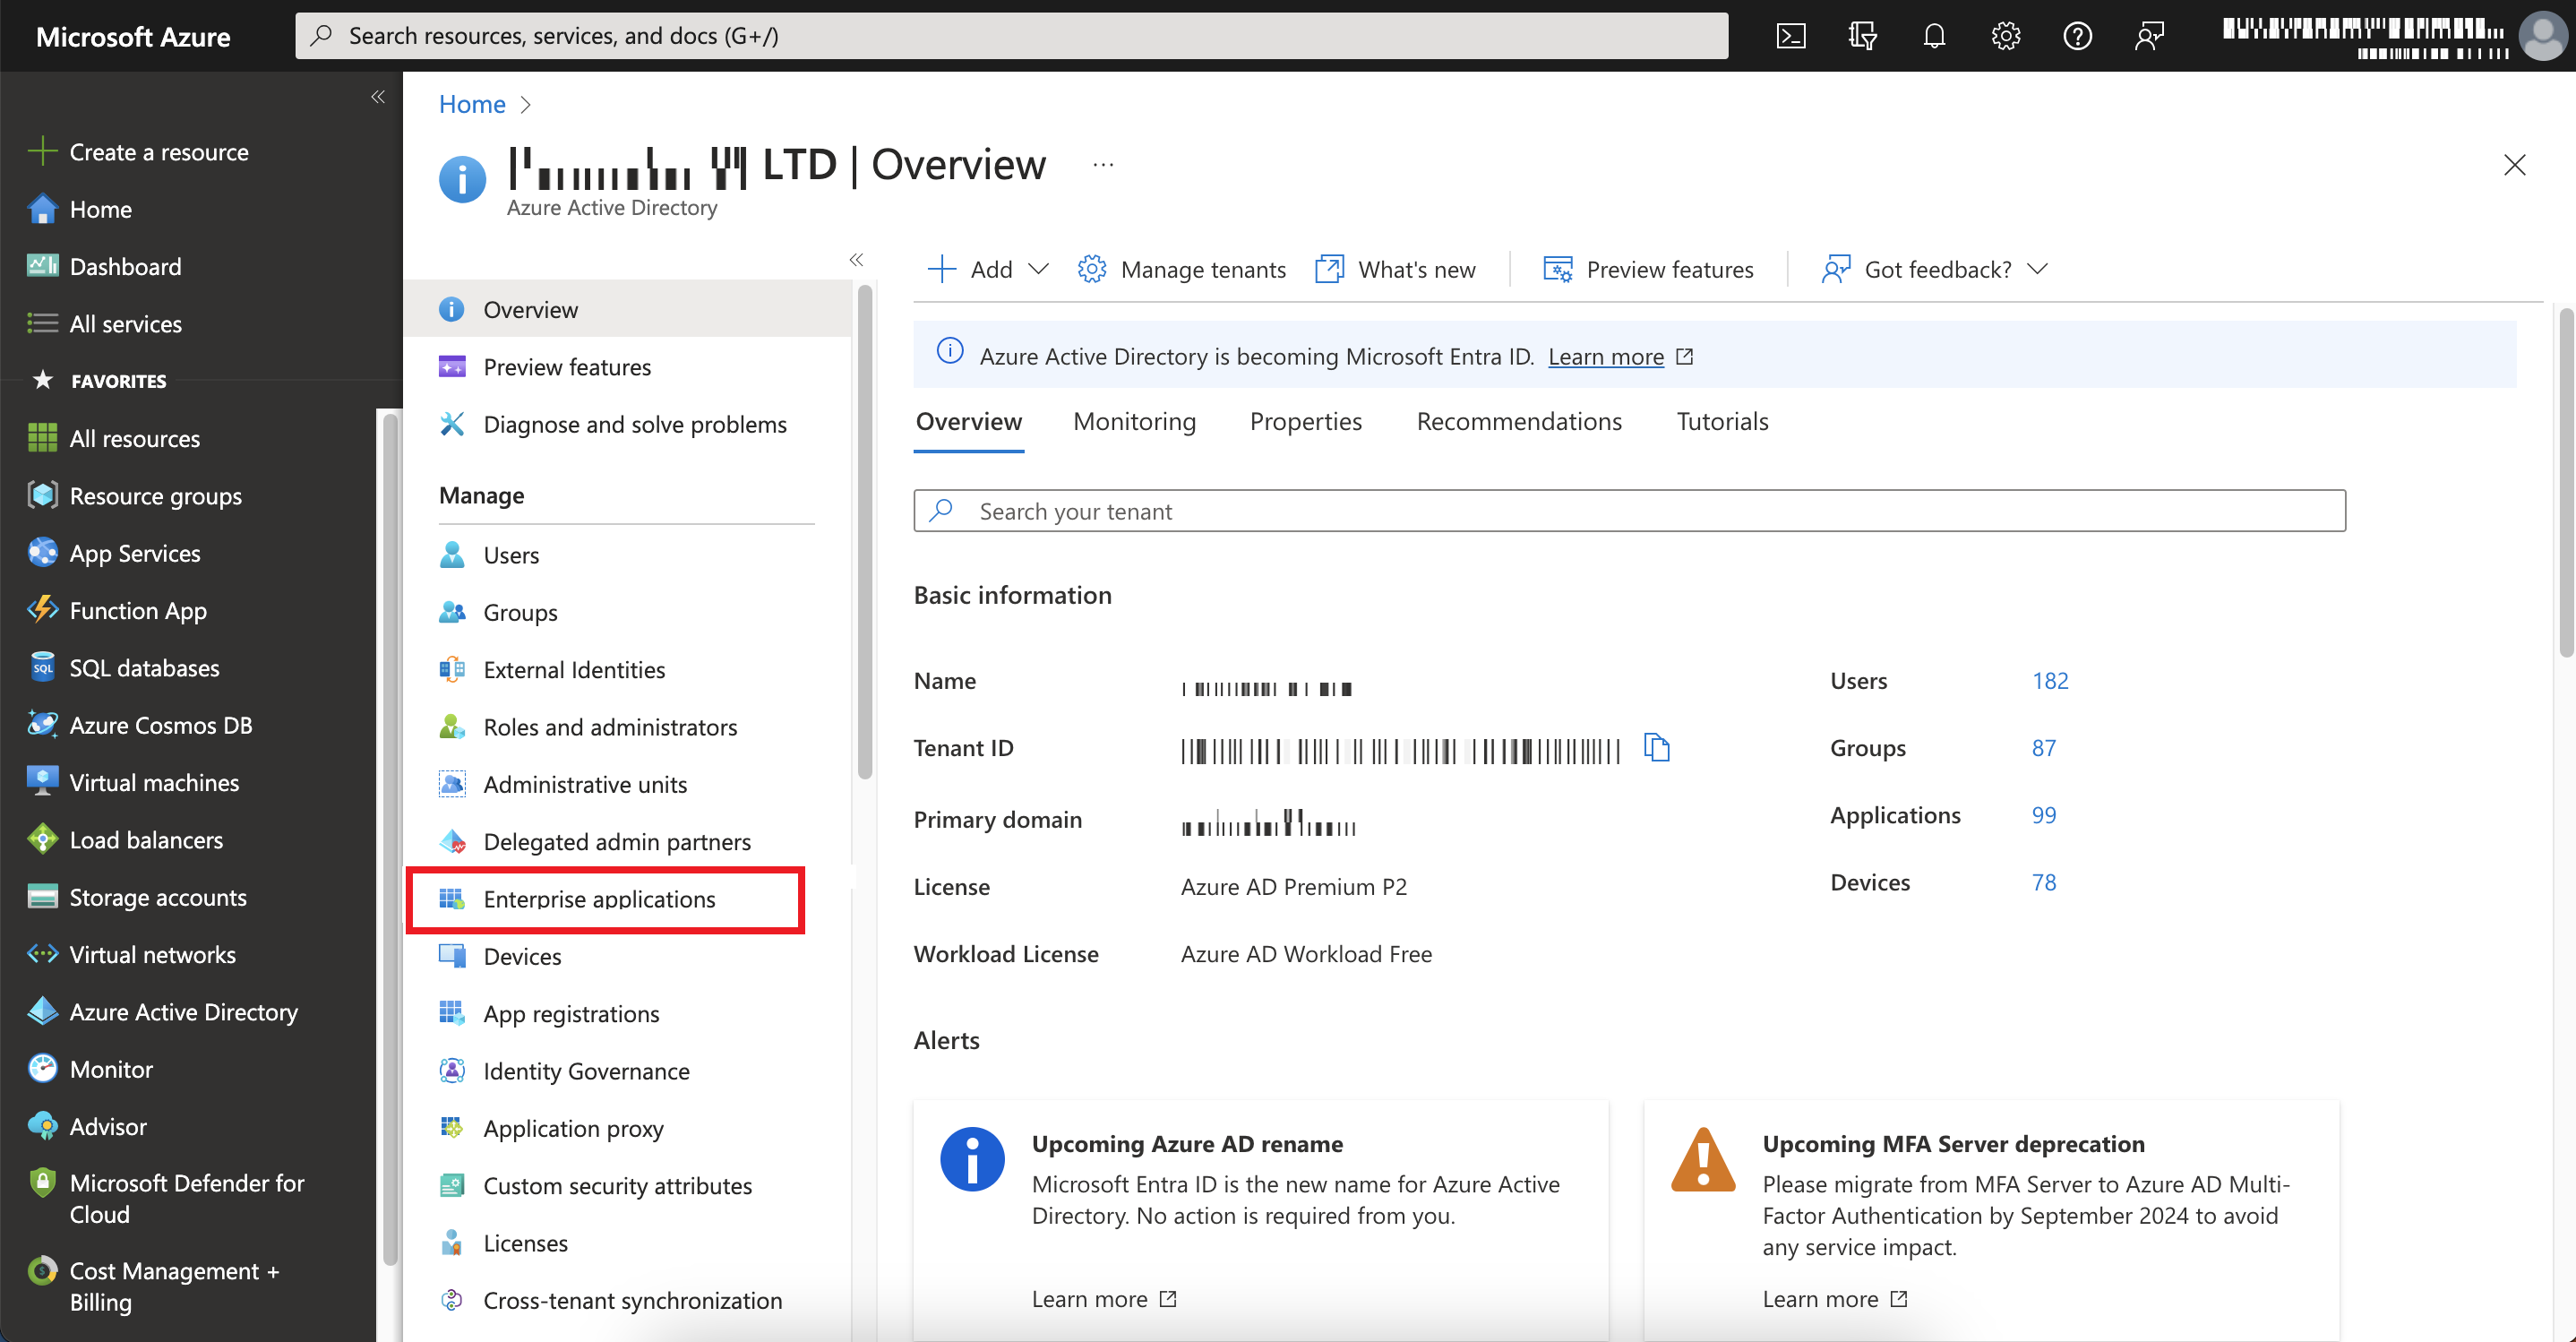
Navigate to Azure Active Directory in the left pane.
-
Go to Manage > Enterprise applications.
-
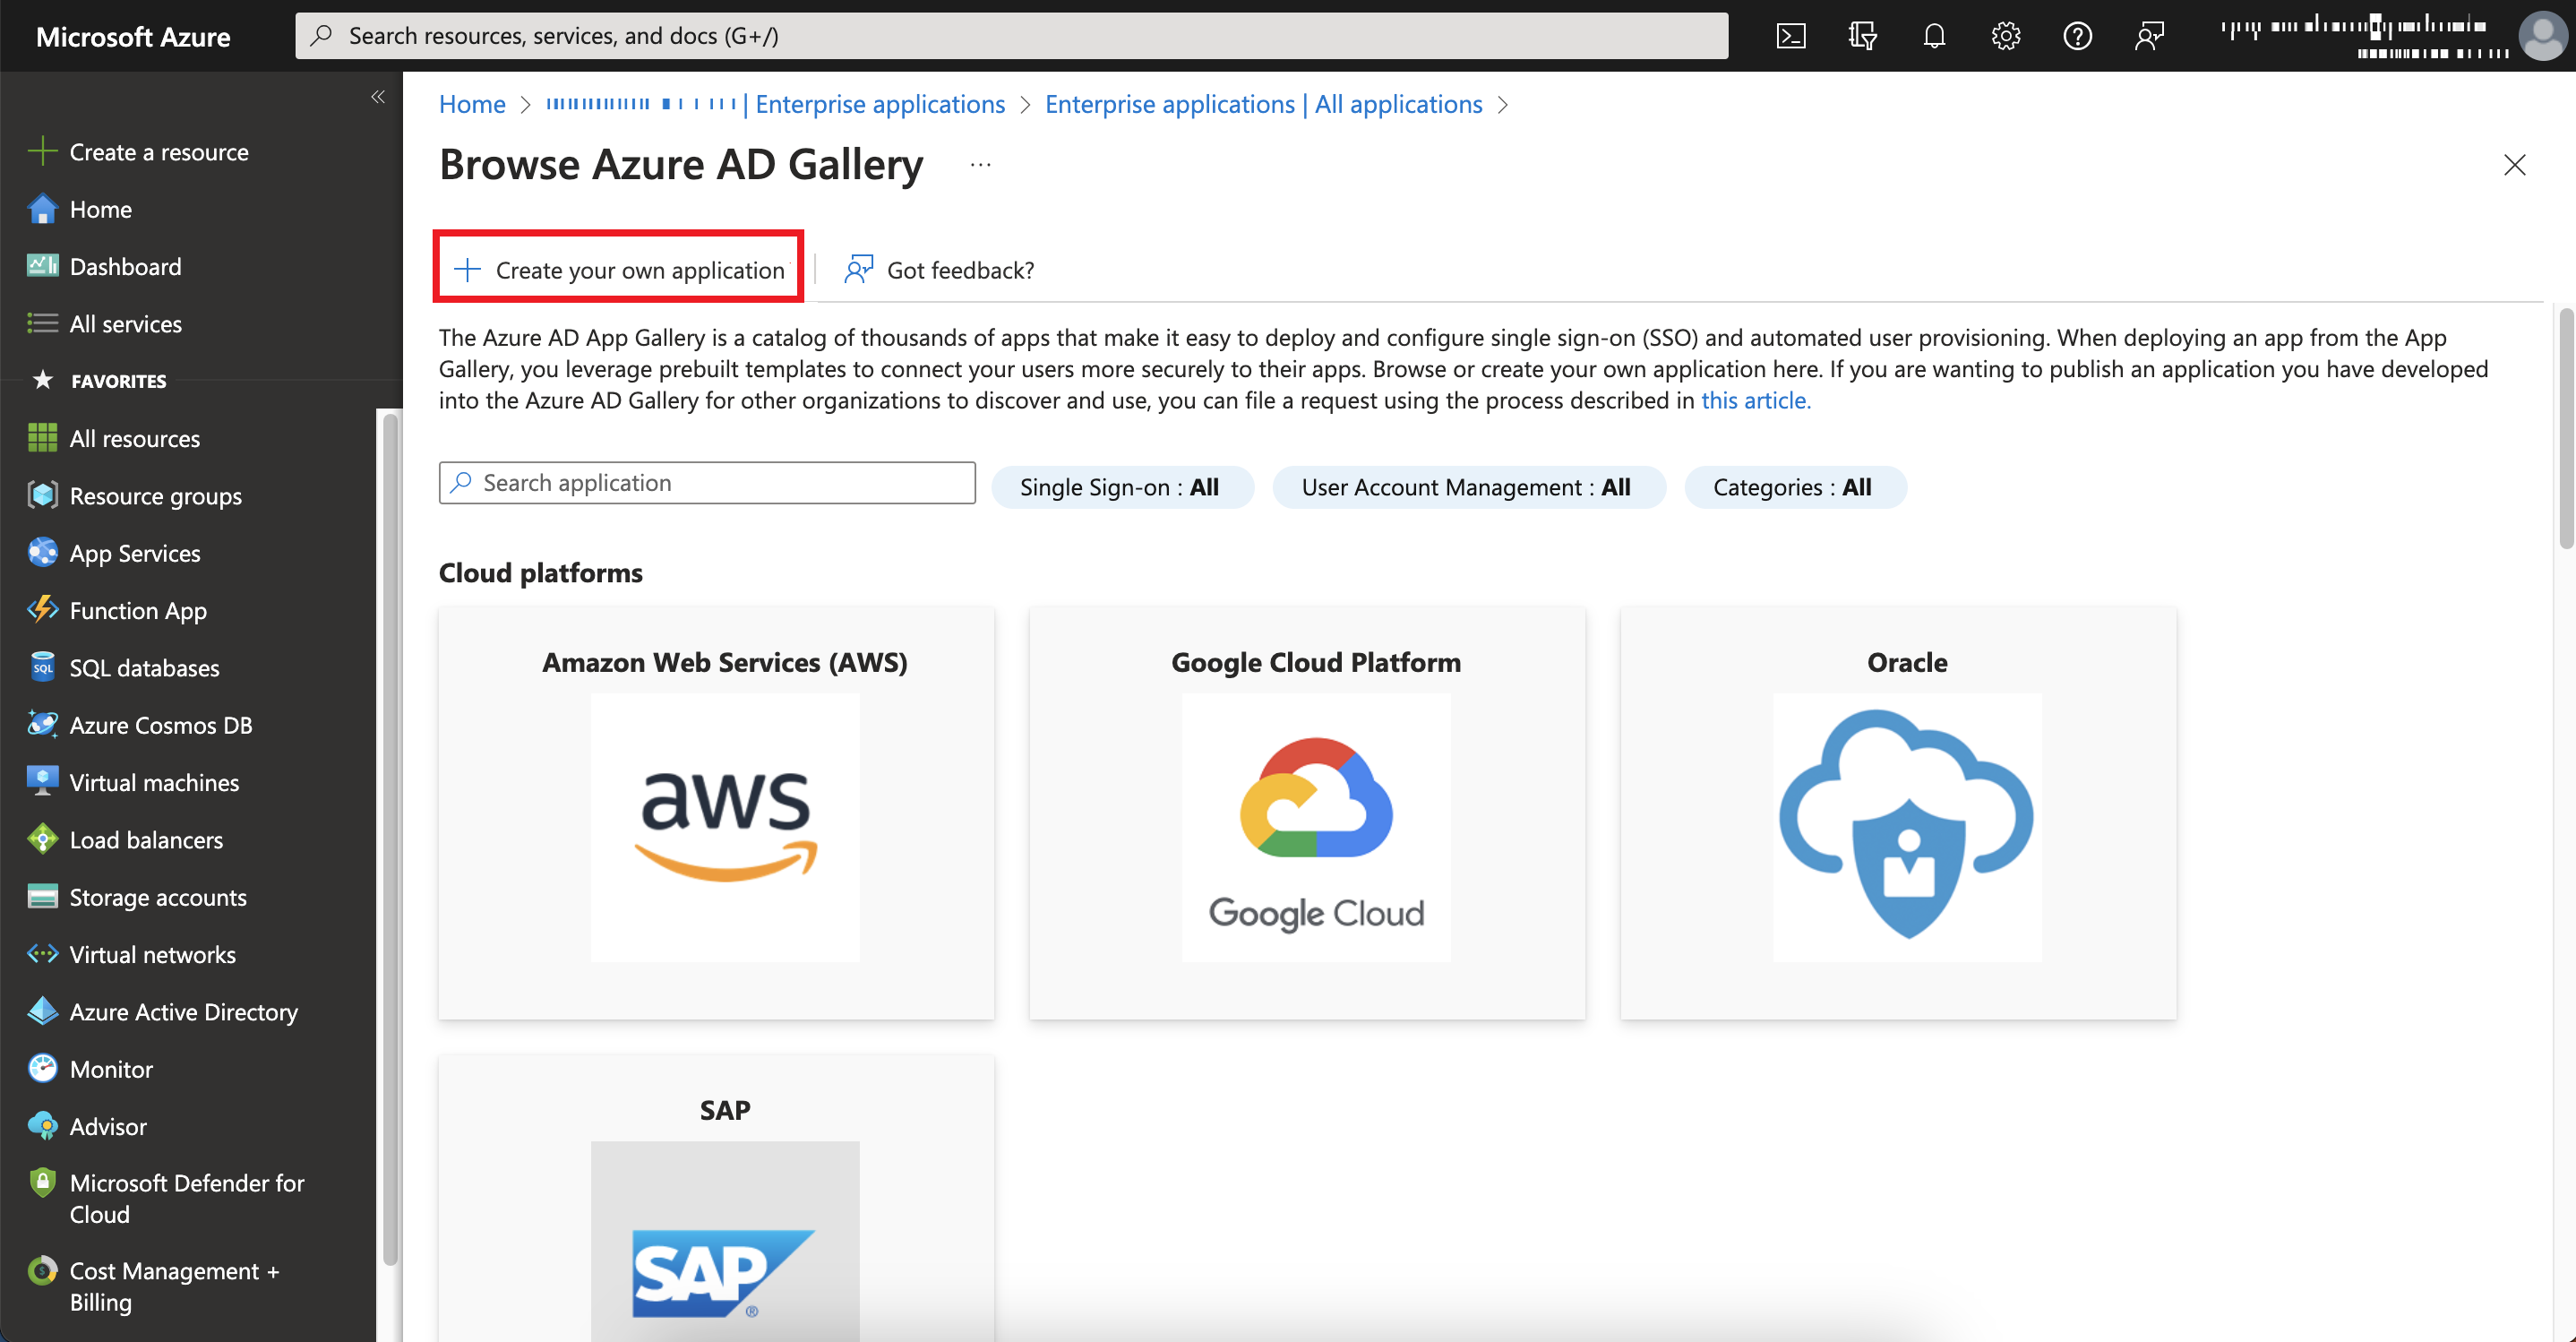
Click New application.

-
Click Create your own application.
-
In the What's the name of your app filed, enter a name for your application.
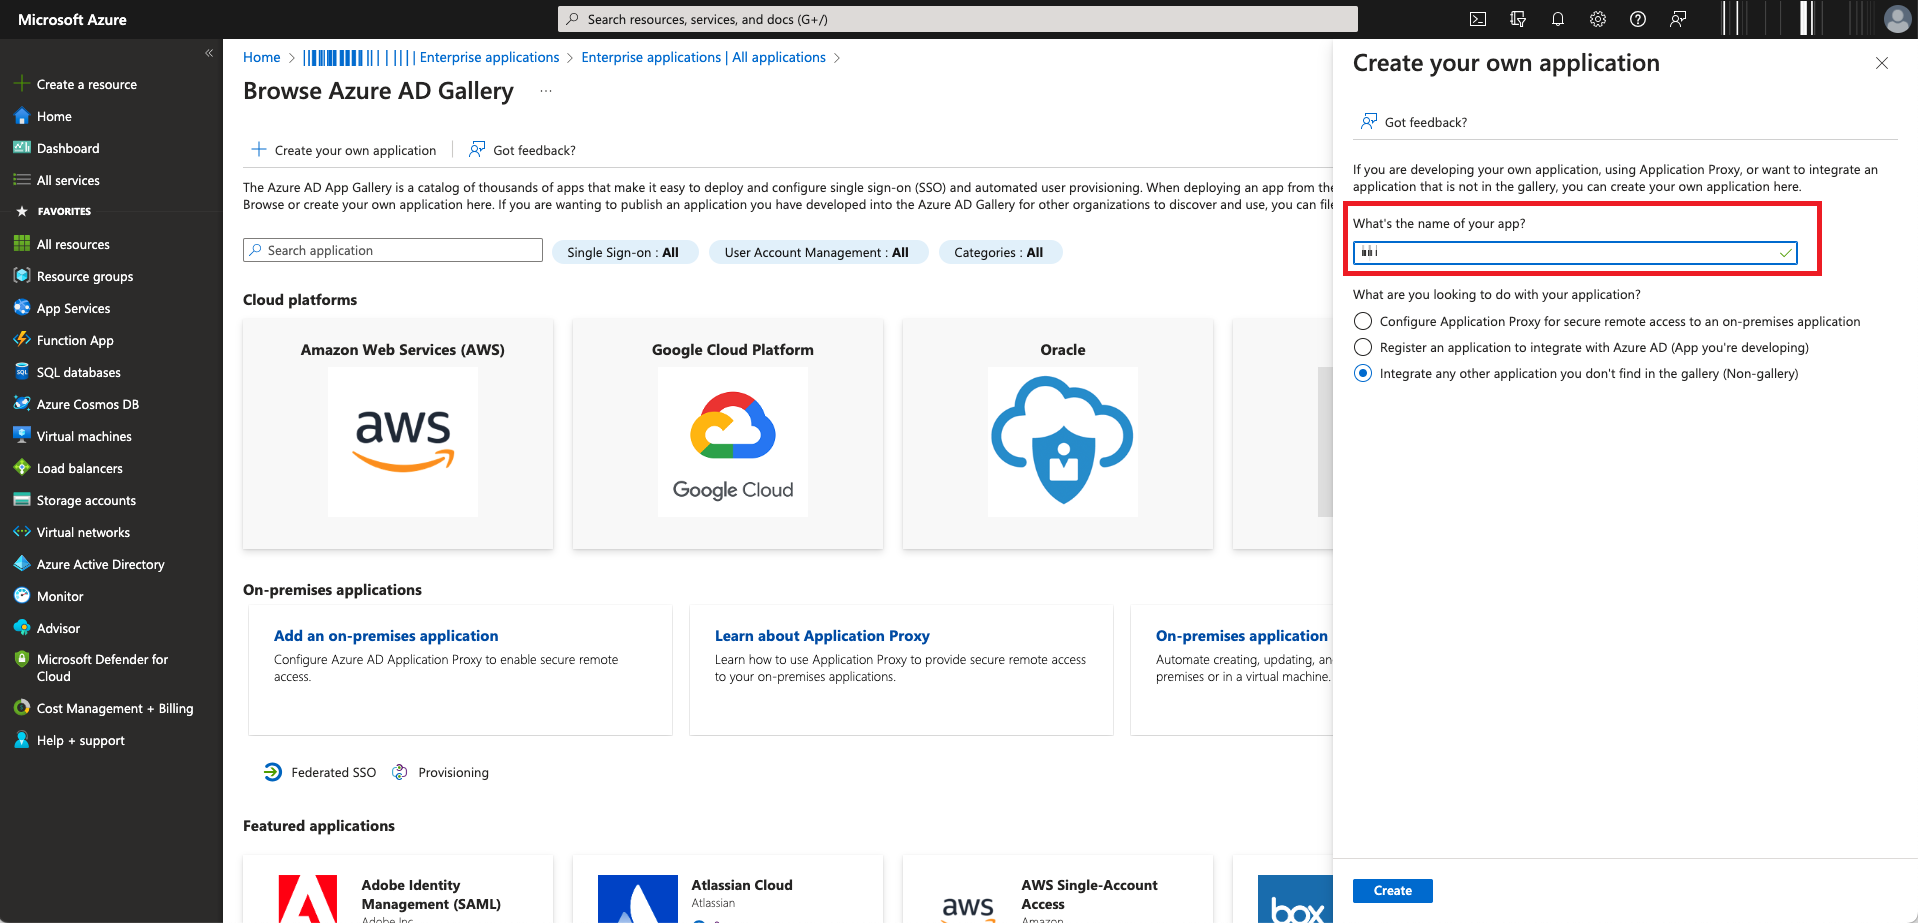

Note - Do not change the default setting.
-
Click Create.
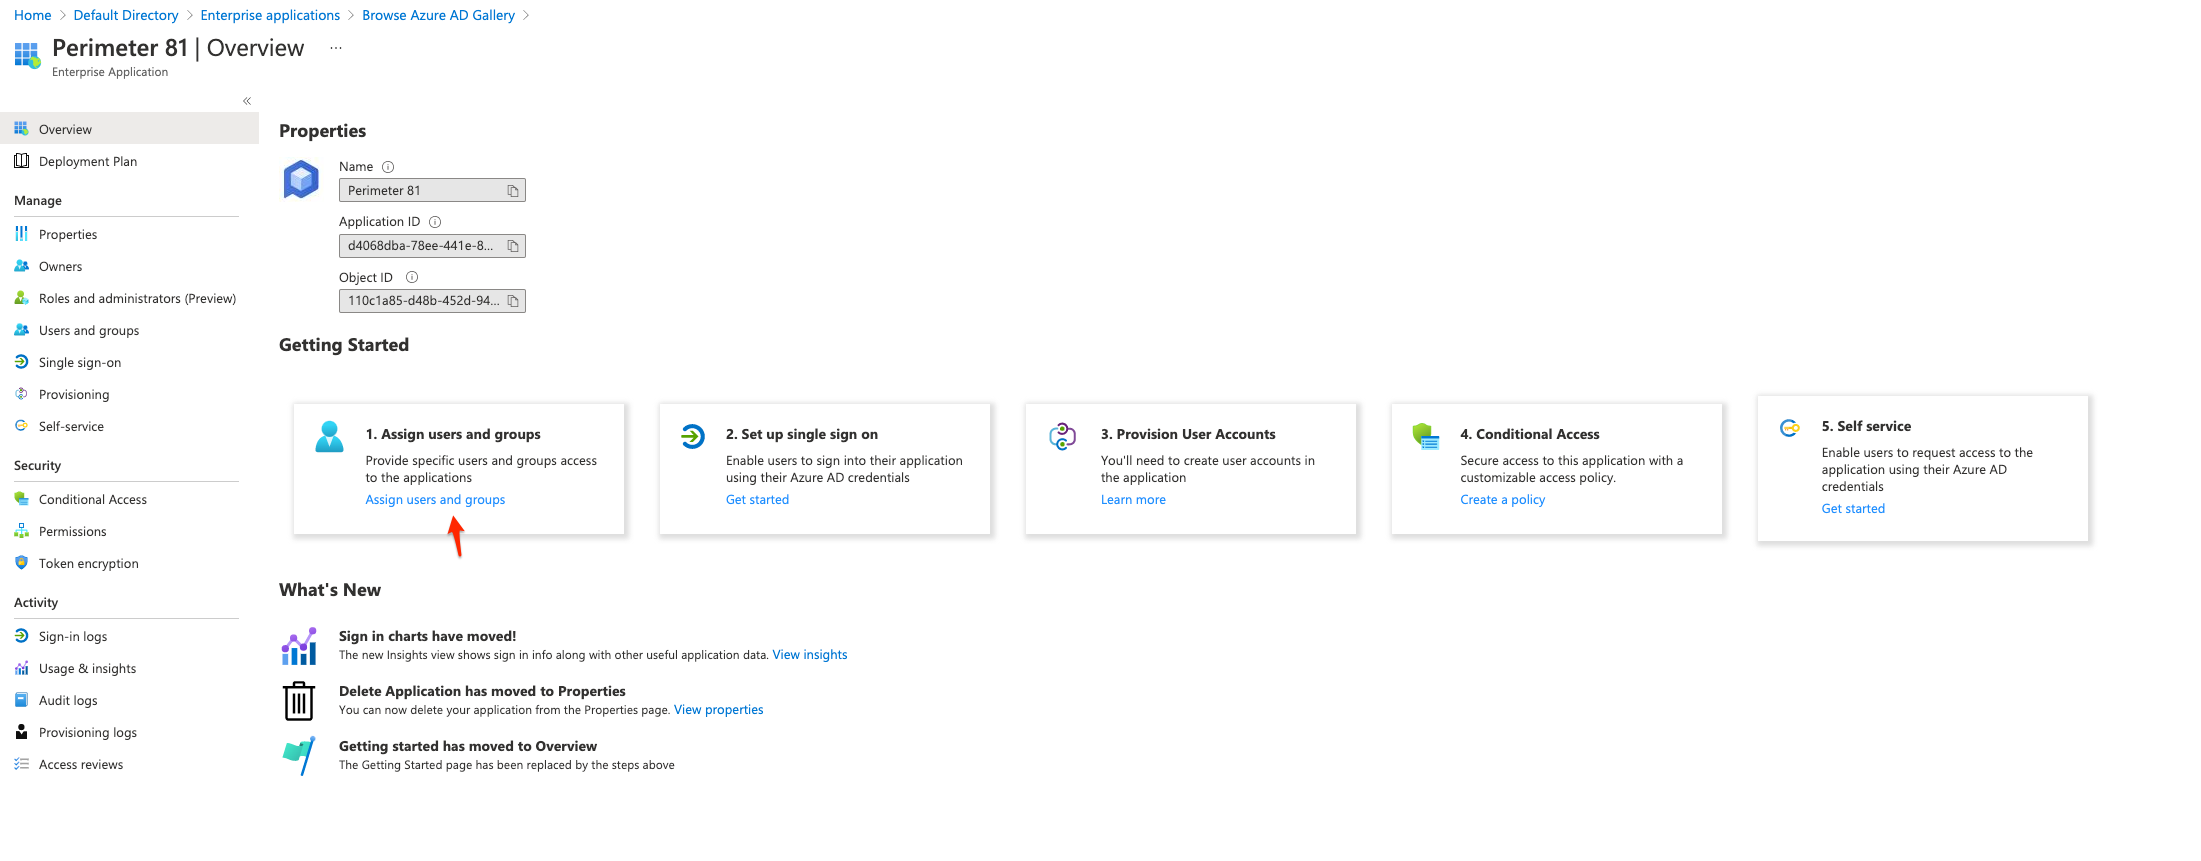
The Microsoft Azure application is created.
-
Click Assign users and groups tile in the Getting Started section.
-
Search for and select the user and group that you want to assign to the application. If you are using Azure AD Free edition, you cannot add groups, add individual users instead.
-
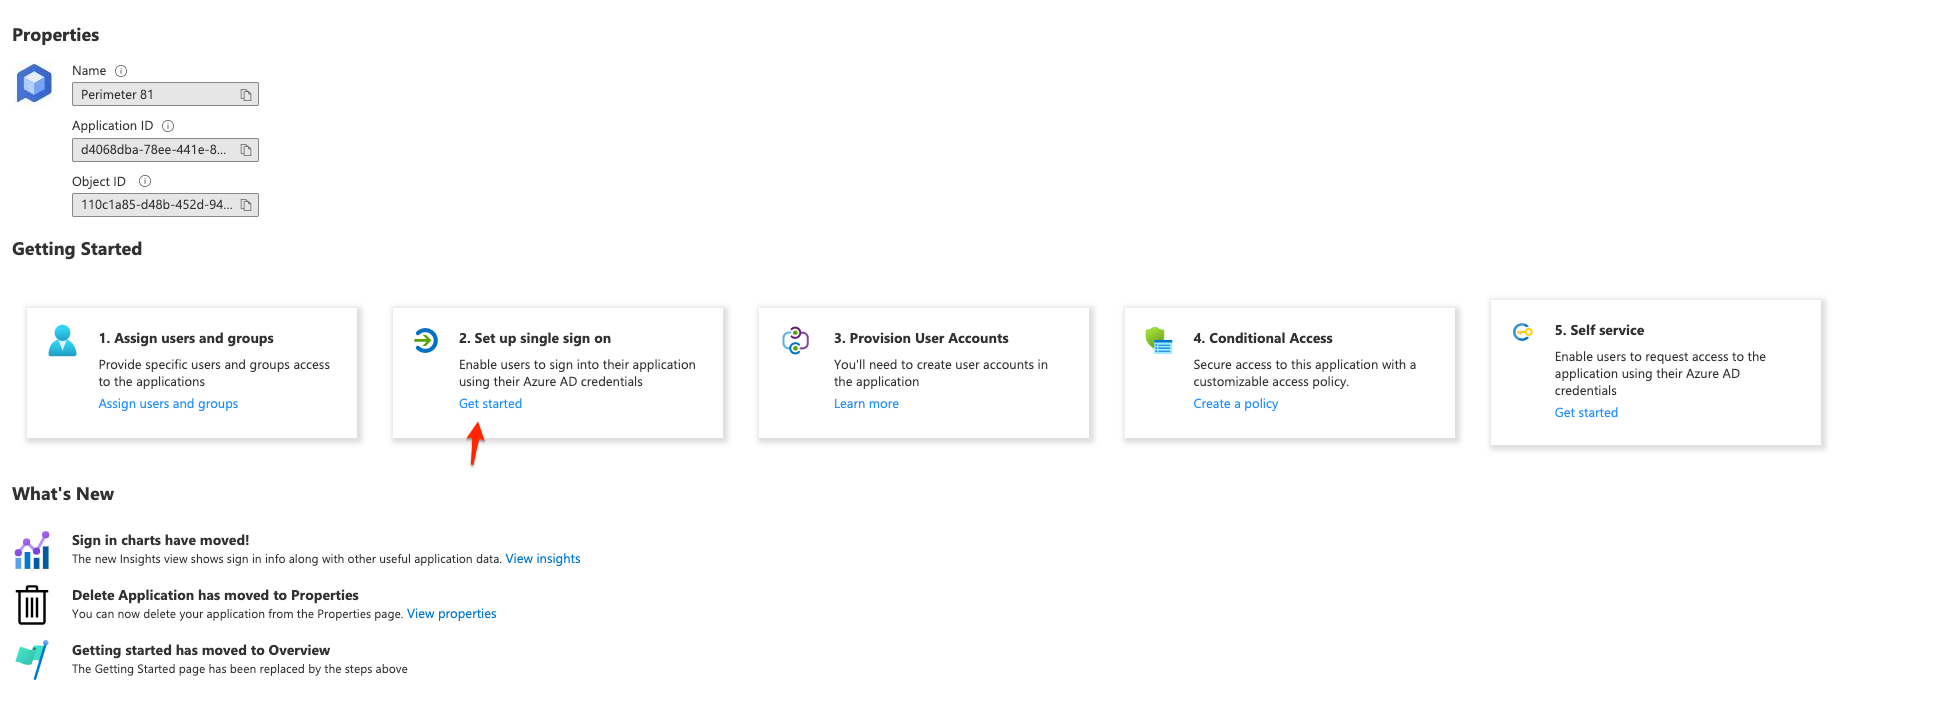
Click Set up single sign on to enable and configure single sign-on for your application.
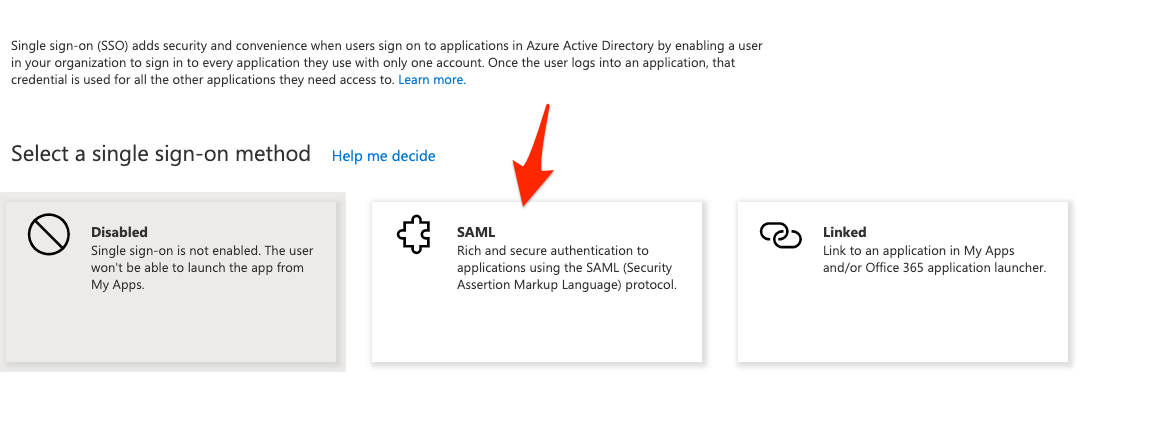
The Select a single sign-on method window appears.
-
Click SAML.
-
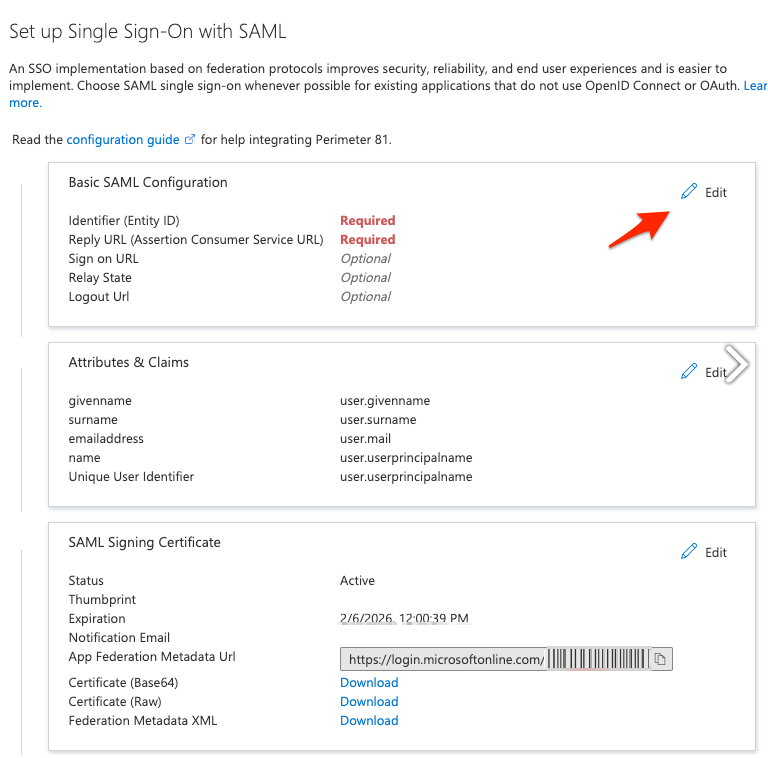
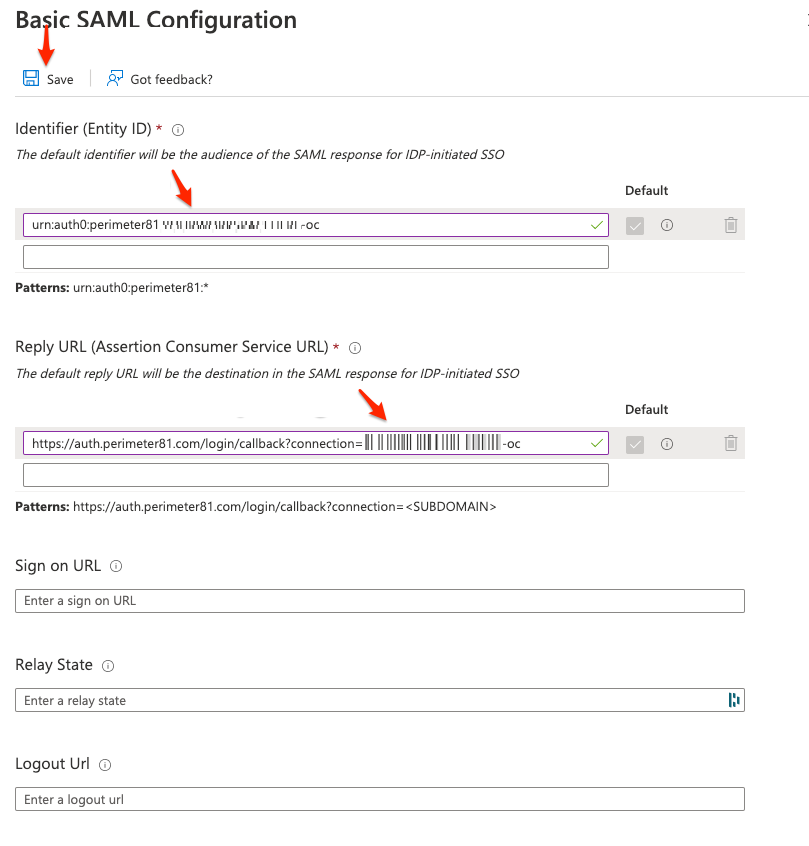
Click Edit in the Basic SAML Configuration tile.
-
Enter these:
-
Identifier:
-
For US data residency - US-based platform:
urn:auth0:perimeter81:{{WORKSPACE}}-ocEU-based platform:urn:auth0:eu-sase-checkpoint:{{WORKSPACE}}-ocAU-based platform:urn:auth0:au-sase-checkpoint:{{WORKSPACE}}-ocIN-based platform:urn:auth0:in-sase-checkpoint:{{WORKSPACE}}-ocFor example:acme.perimeter81.comworkspace should translate tourn:auth0:perimeter81:acme-oc -
For EU data residency -
urn:auth0:eu-sase-checkpoint:{{WORKSPACE}}-oc -
For AU data residency -
urn:auth0:au-sase-checkpoint:{{WORKSPACE}}-oc -
For IN data residency -
urn:auth0:in-sase-checkpoint:{{WORKSPACE}}-oc
where{{WORKSPACE}}refers to your SASE workspace name.
-
-
Reply URL (Assertion Consumer Service URL):
-
For US data residency -
https://auth.perimeter81.com/login/callback?connection={{WORKSPACE}}-oc -
For EU data residency -
https://auth.eu.sase.checkpoint.com/login/callback?connection={{WORKSPACE}}-oc -
For AU data residency -
https://auth.au.sase.checkpoint.com/login/callback?connection={{WORKSPACE}}-oc -
For IN data residency -
https://auth.in.sase.checkpoint.com/login/callback?connection={{WORKSPACE}}-oc
where{{WORKSPACE}}refers to your SASE workspace name.
-
-
-
Click Save.
-
Back on the SAML Signing Certificate tile, go to the Certificate (Base64) file and click Download.
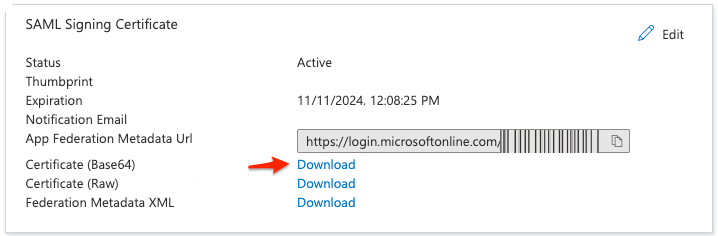
The Certificate (Base64) is downloaded. This certificate will be used for configuring the SAML settings for the application.
-
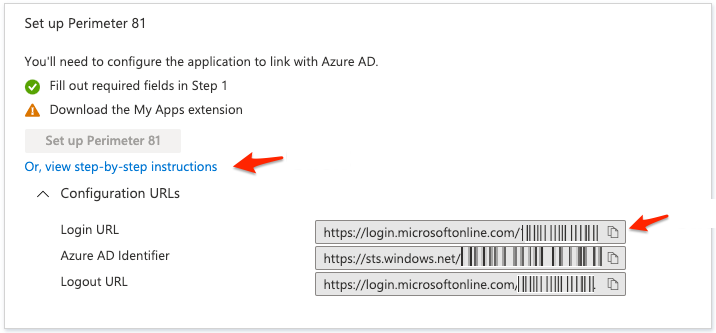
To copy your Login URL, go to the Set up Check Point SASE tile, expand Or, view step-by-step instructions and click
 .
.
Configure the Check Point SASE Administrator Portal
-
Log in to the SASE Administrator Portal with a administrator account.
-
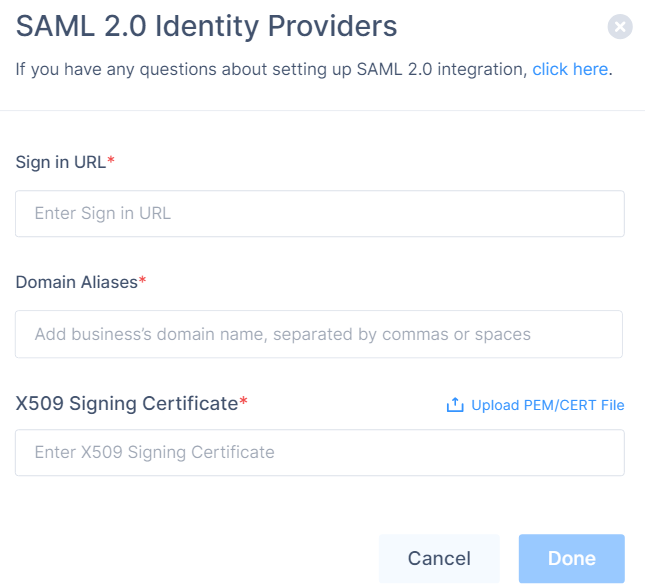
Go to Settings > Identity Providers.
-
Click Add Provider.
The Add identity provider pop-up appears.
-
Select SAML 2.0 Identity Providers and click Continue.
-
In the Sign in URL field, enter the Identity Provider Sign-in URL from your SAML Identity Provider.
Identity Provider
Sign in URL
Generic SAML
Identity Provider Sign in URL
Active Directory Federation Services (AD FS)
https://{{Your ADFS Domain}}/adfs/lsAuth0
Auth0 login URL
OneLogin
SAML 2.0 Endpoint (HTTP) value
PingOne
https://sso.connect.pingidentity.com/sso/idp/SSO.saml2?idpid={{idpid}}PingFederate
https://sso.{{Your PingFederate Domain}}.com/idp/SSO.saml2Rippling
Rippling IdP Sign-in URL.
JumpCloud
JumpCloud IDP URL
Okta
Okta Sign on URL
Google Applications
SSO URL
-
In the Domain Aliases field, enter the business domain names separated by commas or space.
-
In the X509 Signing Certificate field, enter the X.509 signing certificate for the application from the SAML Identity Provider.
If you have the signing certificate as PEM/CERT file, click Upload PEM/CERT File and select the file.
-
Click Done.
|
|
Note - After the first successful authentication of a member with SAML, Check Point SASE does this:
|
Preventing User Duplication in Microsoft Entra ID
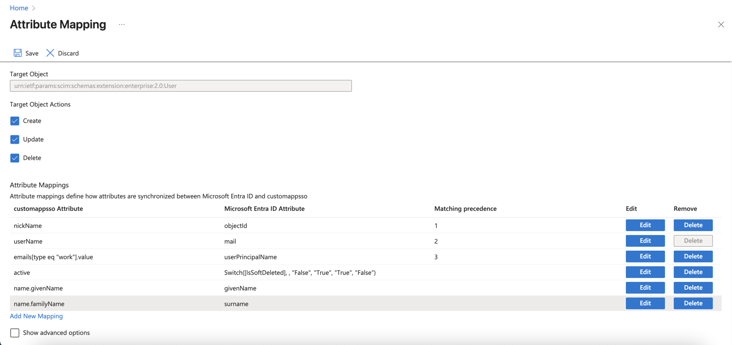
To avoid duplicate user accounts when integrating Microsoft Entra ID with SASE, configure SCIM attribute mappings:
-
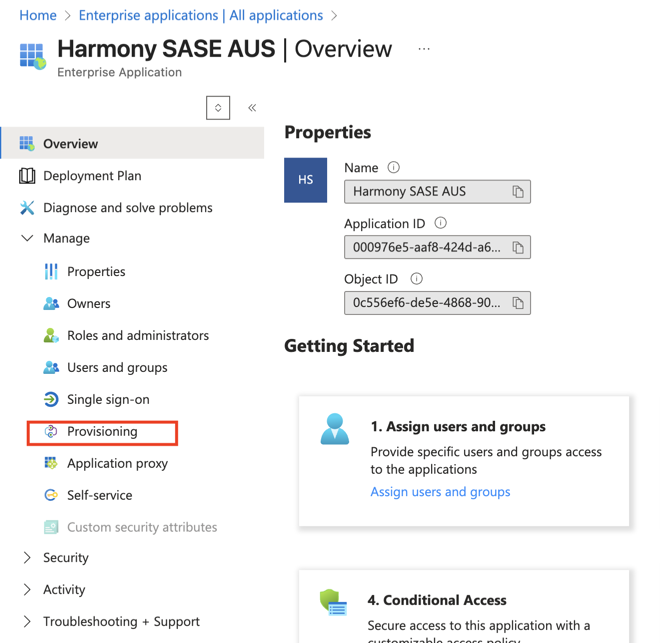
Go to Entra ID > Enterprise Applications and select your Check Point SASE application.
-
Select the application name to open the configuration.
-
Click Provisioning.
-
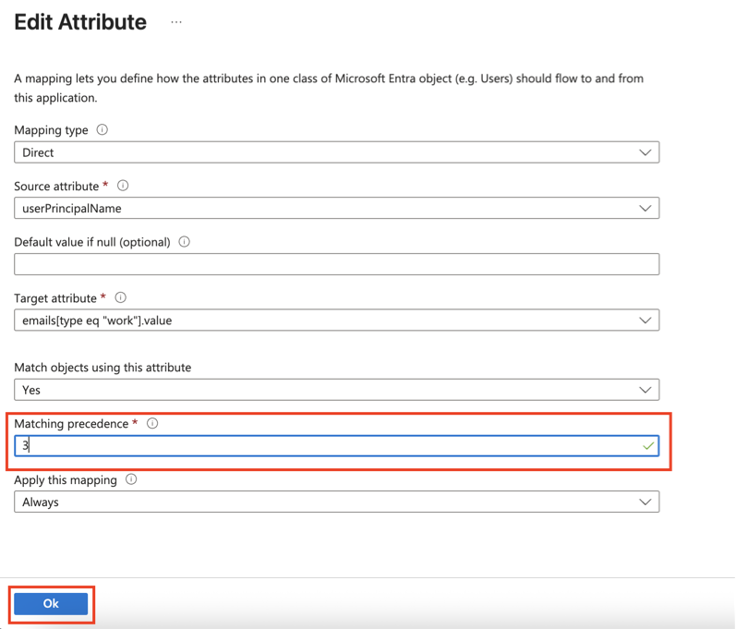
Under Attribute mapping, select Provision Microsoft Entra ID Users.

-
Locate the emails[type eq “work”].value attribute and click Edit.
-
From Matching precedence list, select 3.
-
Click OK.
-
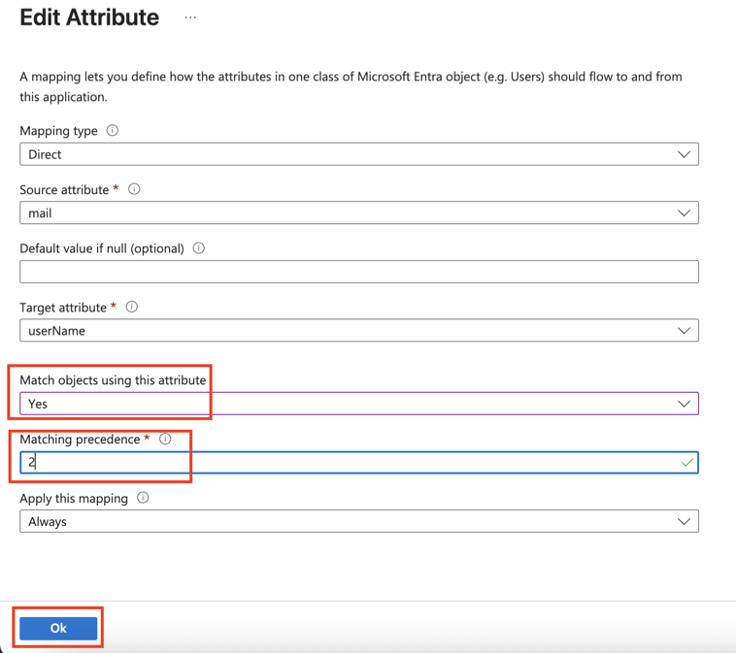
Go back to Attribute Mappings section and for userName, click Edit.
-
From the Match objects using this attribute list, select Yes.
-
From Matching precedence list, select 2.
-
Click OK.
-
Go back to Attribute Mappings section and click Add New Mapping.
-
From the Source attribute list, select objectId.
-
From the Target attribute list, select nickName.
-
From the Match objects using this attribute list, select Yes.
-
From Matching precedence list, select 1.
-
From the Apply this mapping list, select Always.

-
Click Ok and then click Save.