Azure Virtual WAN Redundant Tunnels
Prerequisites
-
An active Check Point SASE Administrator Portal account and network.
-
Make sure you have installed the Check Point SASE Agent on your devices.
-
Administrator account in the Firewall/ Router/ Cloud Management Portal.
-
Your Check Point SASE network must have at least two different gateways in the same network.

Notes -
-
You can deploy the gateways in two separate regions for comprehensive ISP redundancy.
-
You can scale up the network. Adding another region does not affect the connection.
-
Azure Redundant Tunnels - Virtual WAN
Prerequisites
-
An active Check Point SASE Administrator Portal account and network.
-
Make sure you have installed the Check Point SASE Agent on your devices.
-
Administrator account in the Firewall/ Router/ Cloud Management Portal.
-
Your Check Point SASE network must have at least two different gateways in the same network.
Notes -
-
You can deploy the gateways in two separate regions for comprehensive ISP redundancy.
-
You can scale up the network. Adding another region does not affect the connection.
-
Step 1 - Configurations in the Azure Management Portal
-
Access the Azure Management Portal and go to Virtual WANs and click +Create.
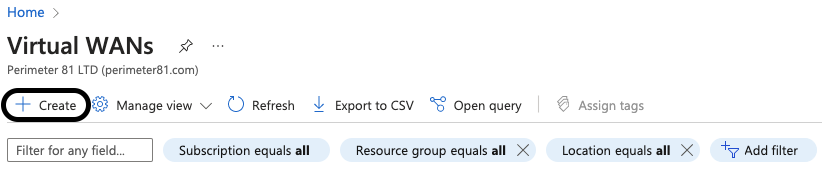
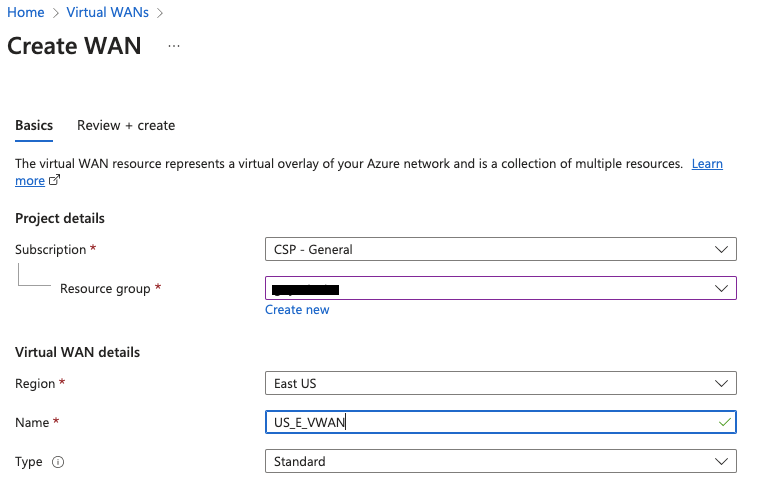
The Create WAN window appears.
-
In the Basics tab, enter these:
Item
Value
Subscription Select the relevant subscription and resource group. Region Region where your resources are located. Name Name of the virtual WAN. Type Standard -
Click Review+create.
-
Click Create.
Creating a Virtual Hub
|
|
Note - If you already have a virtual hub in your Azure region, skip this step. |
-
Access the Azure Management Portal and go to the Virtual WAN you created and from the left pane, click Hubs > +New Hub.
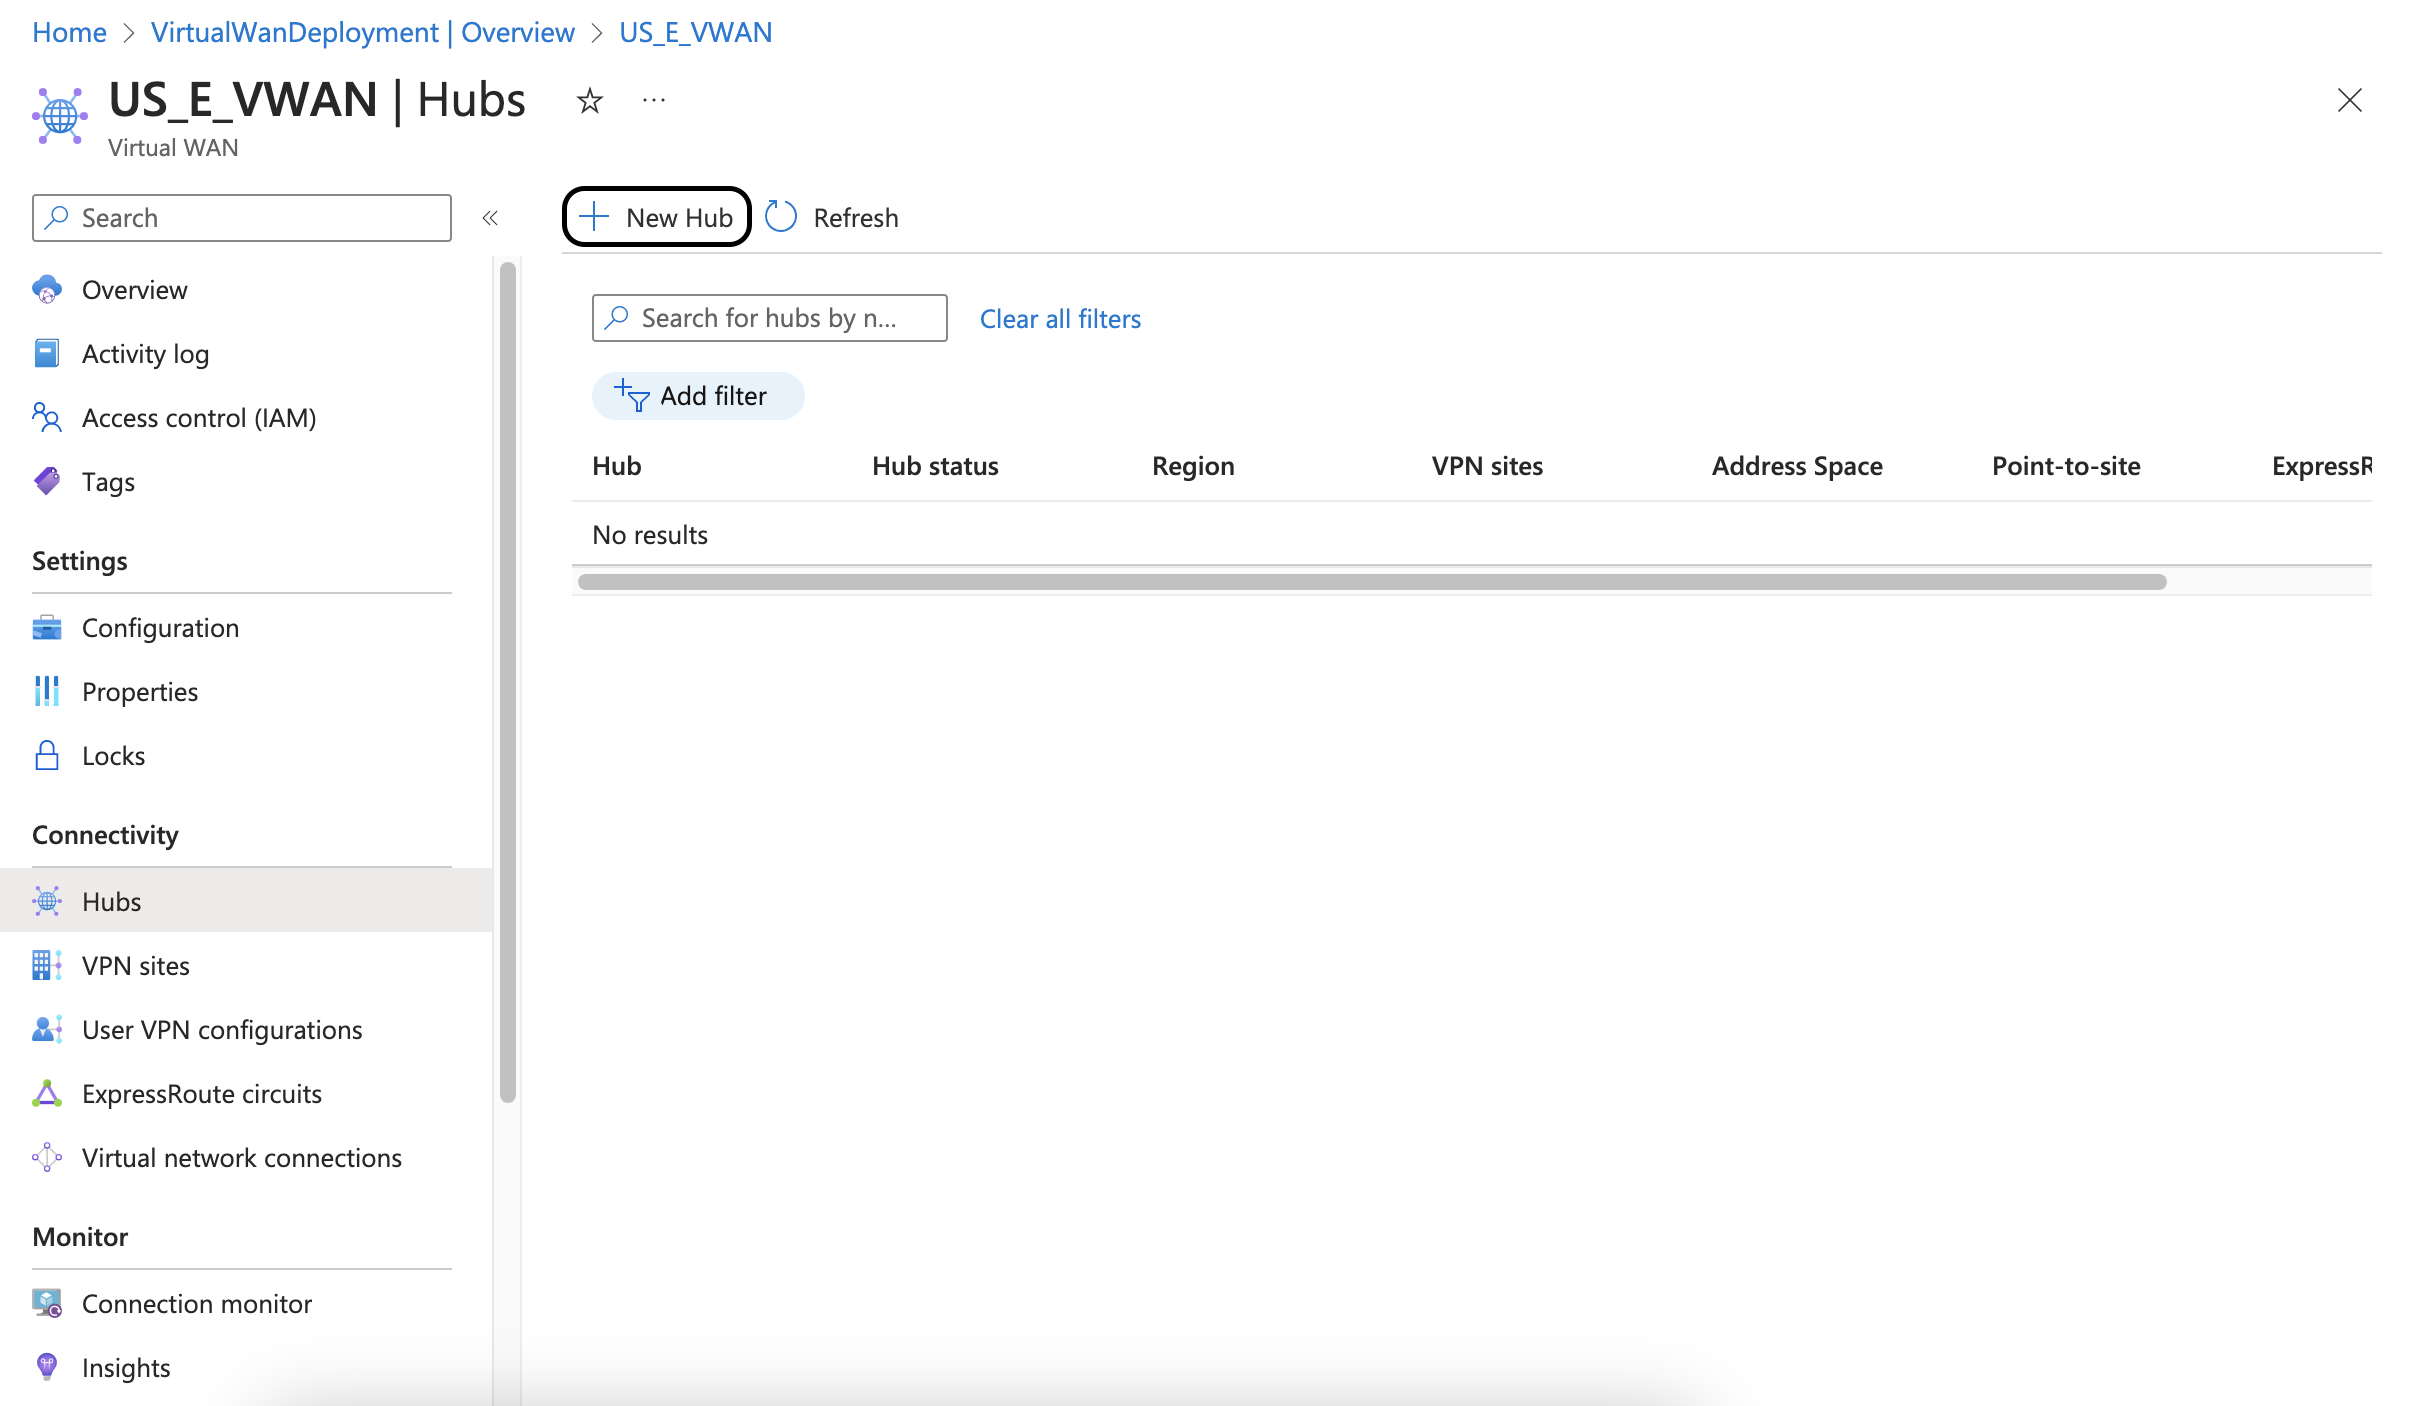
The Create virtual hub window appears.

-
In the Basics tab, enter these:
Item
Value
Region Region where your resources are located. Name Name of the virtual hub. Endpoint
IP Address
Hub private address space Select a CIDR range that does not overlap with any existing CIDR (/24 range is the minimal one). Address Space
Subnet value of the network in the Check Point SASEAdministrator Portal.
Virtual hub capacity
Select a value according to the maximum number of VMs to be connected through this hub.
-
In the Site to site tab, enter these:
Item
Value
Create a Site to site (VPN gateway) Yes Gateway scale units Select the required value from the list. Routing preference Microsoft network 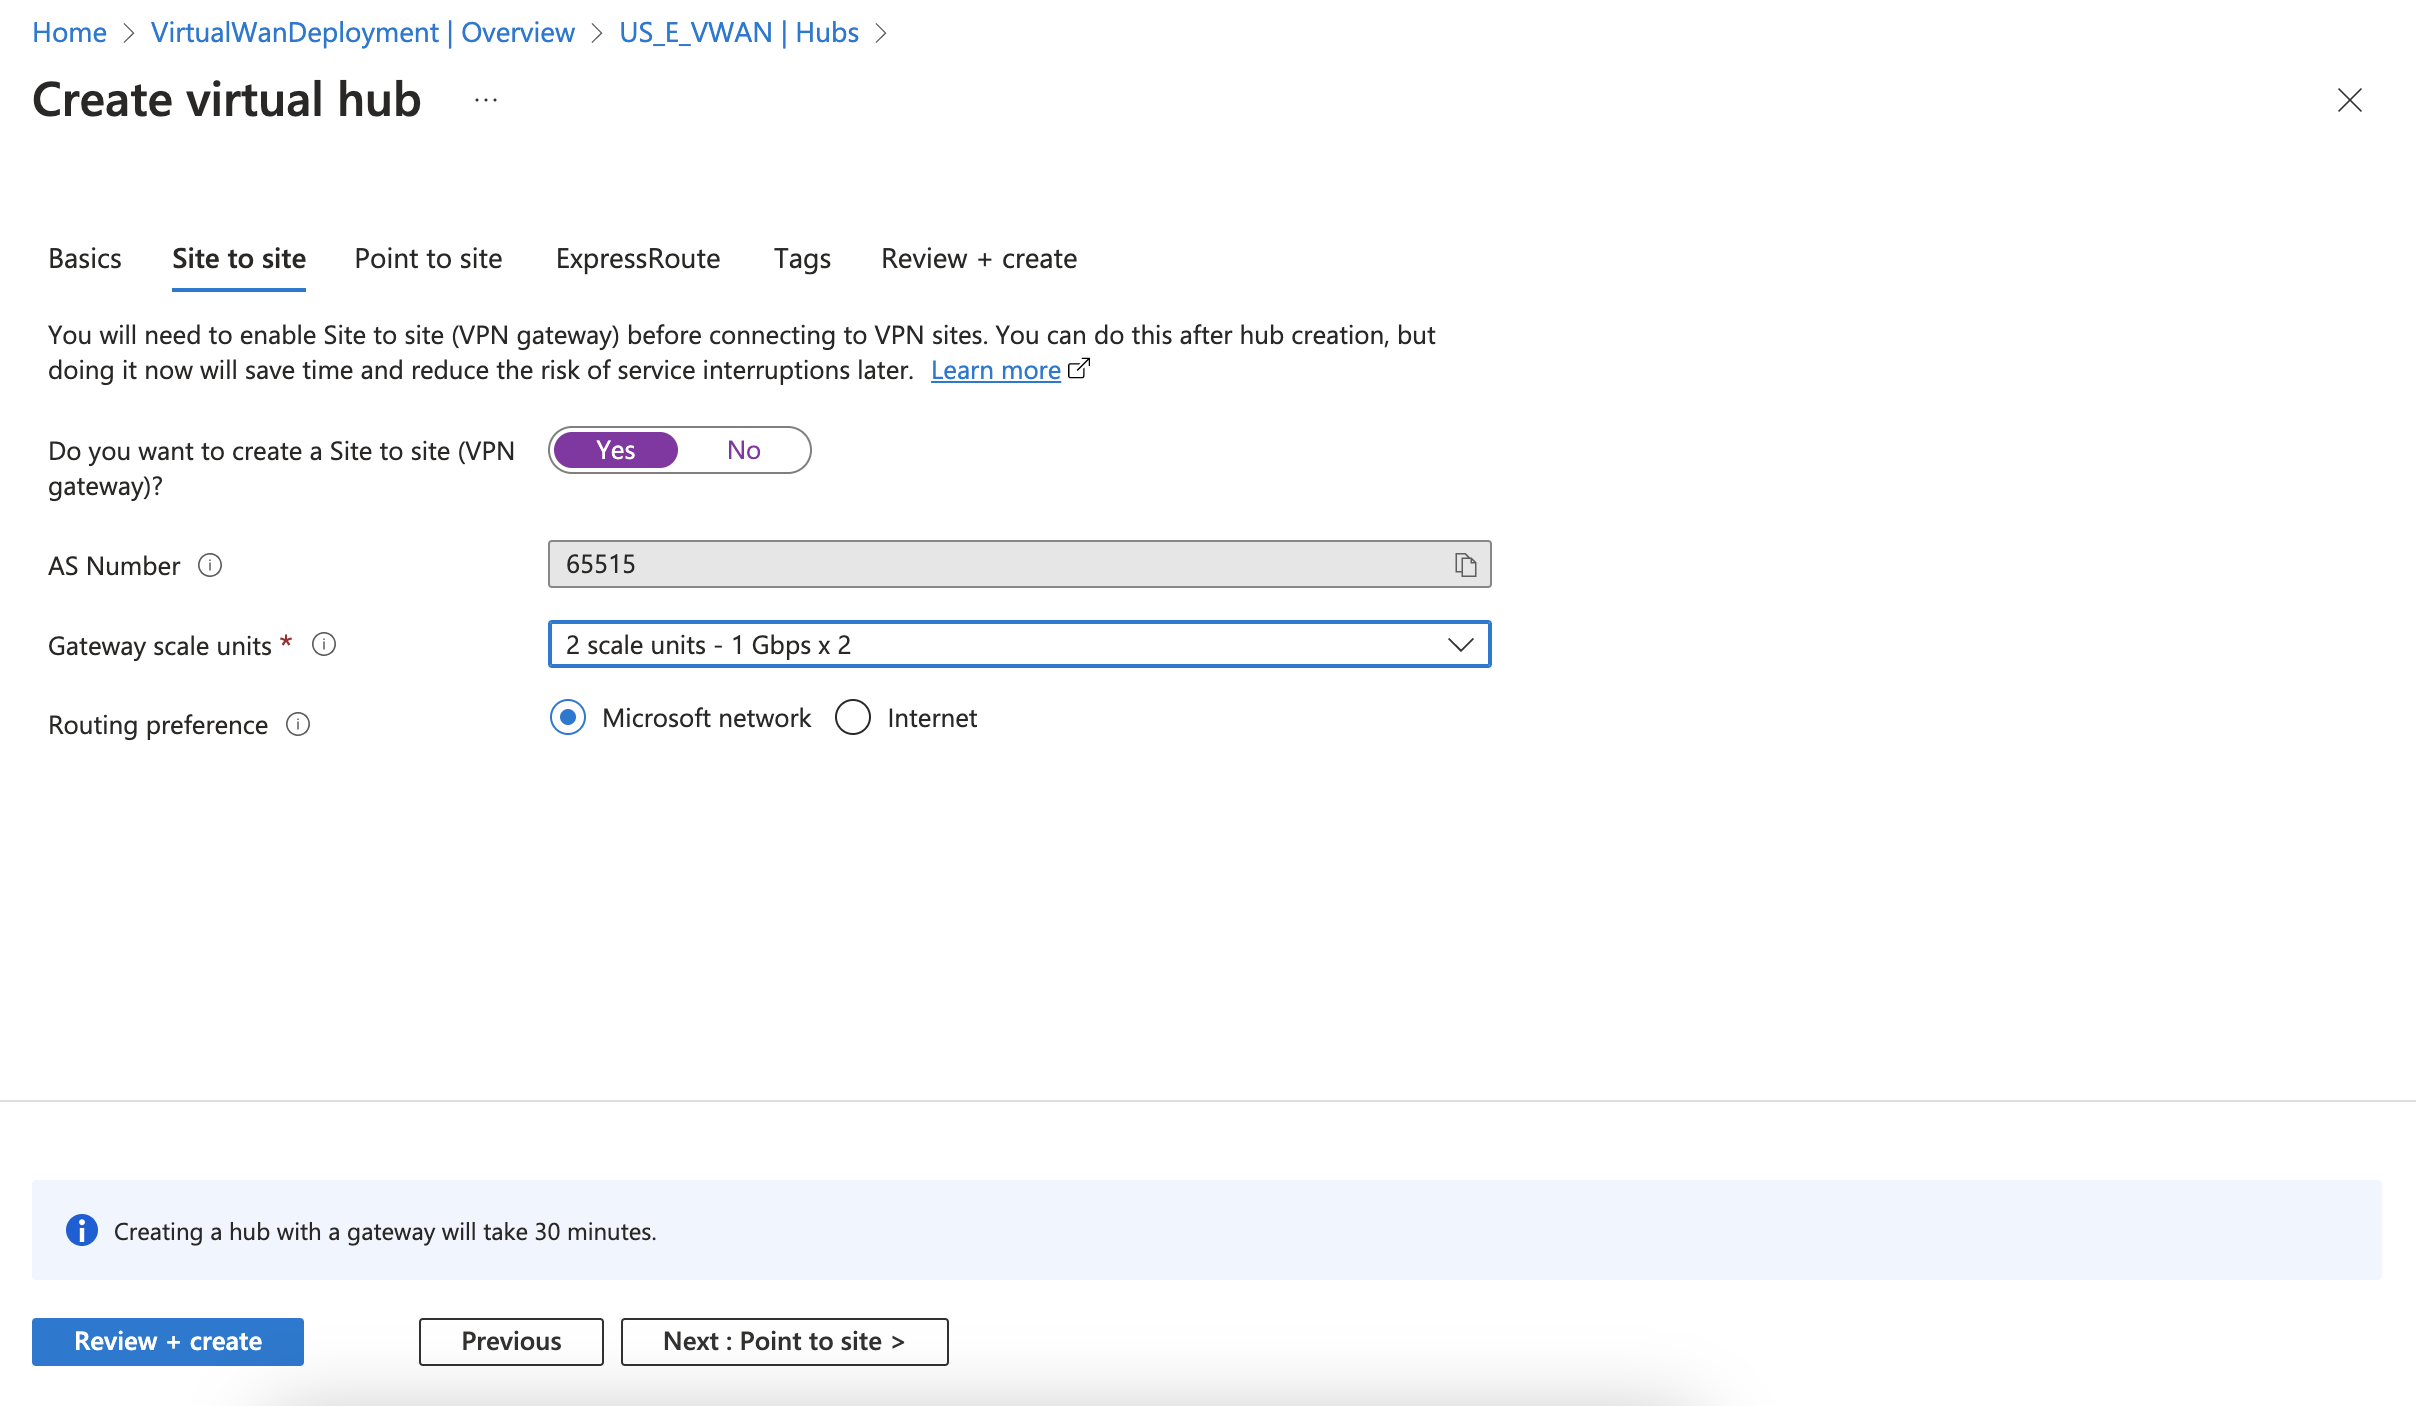
-
Click Review+create.
-
Click Create.
Creating a Site
-
Access the Azure Management Portal and go to the Virtual WAN you created, and from the left pane, select VPN sites.
-
Click +Create site.
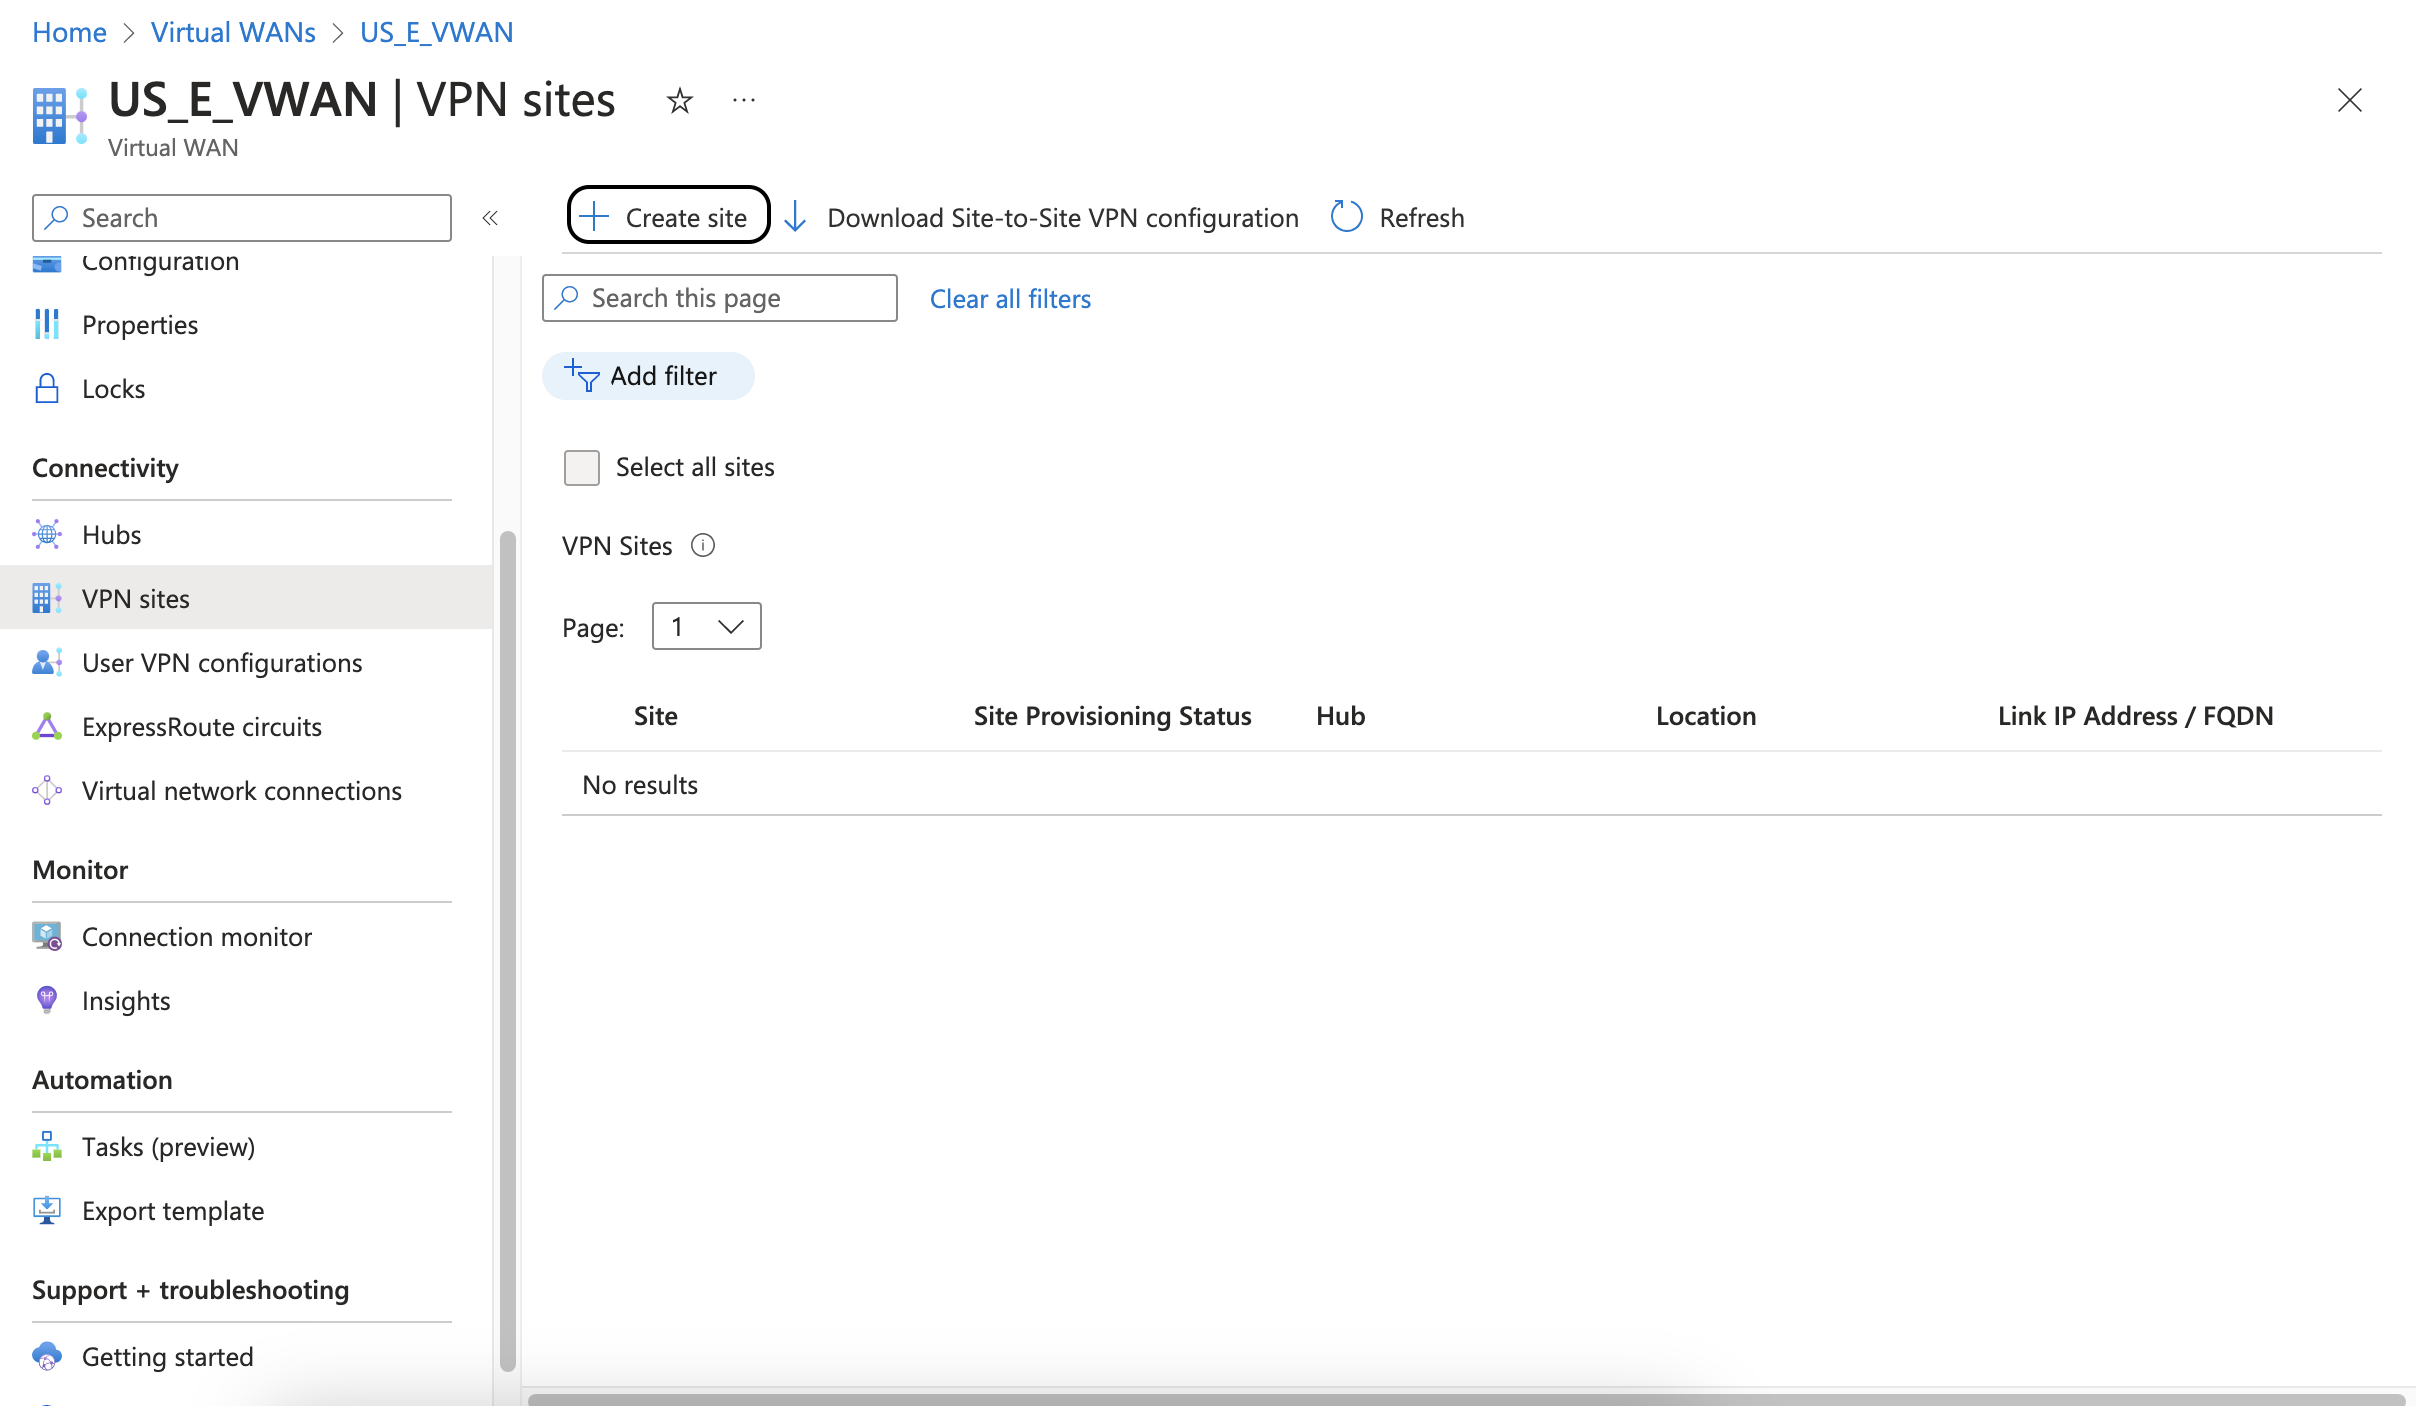
The Create VPN site window appears.
-
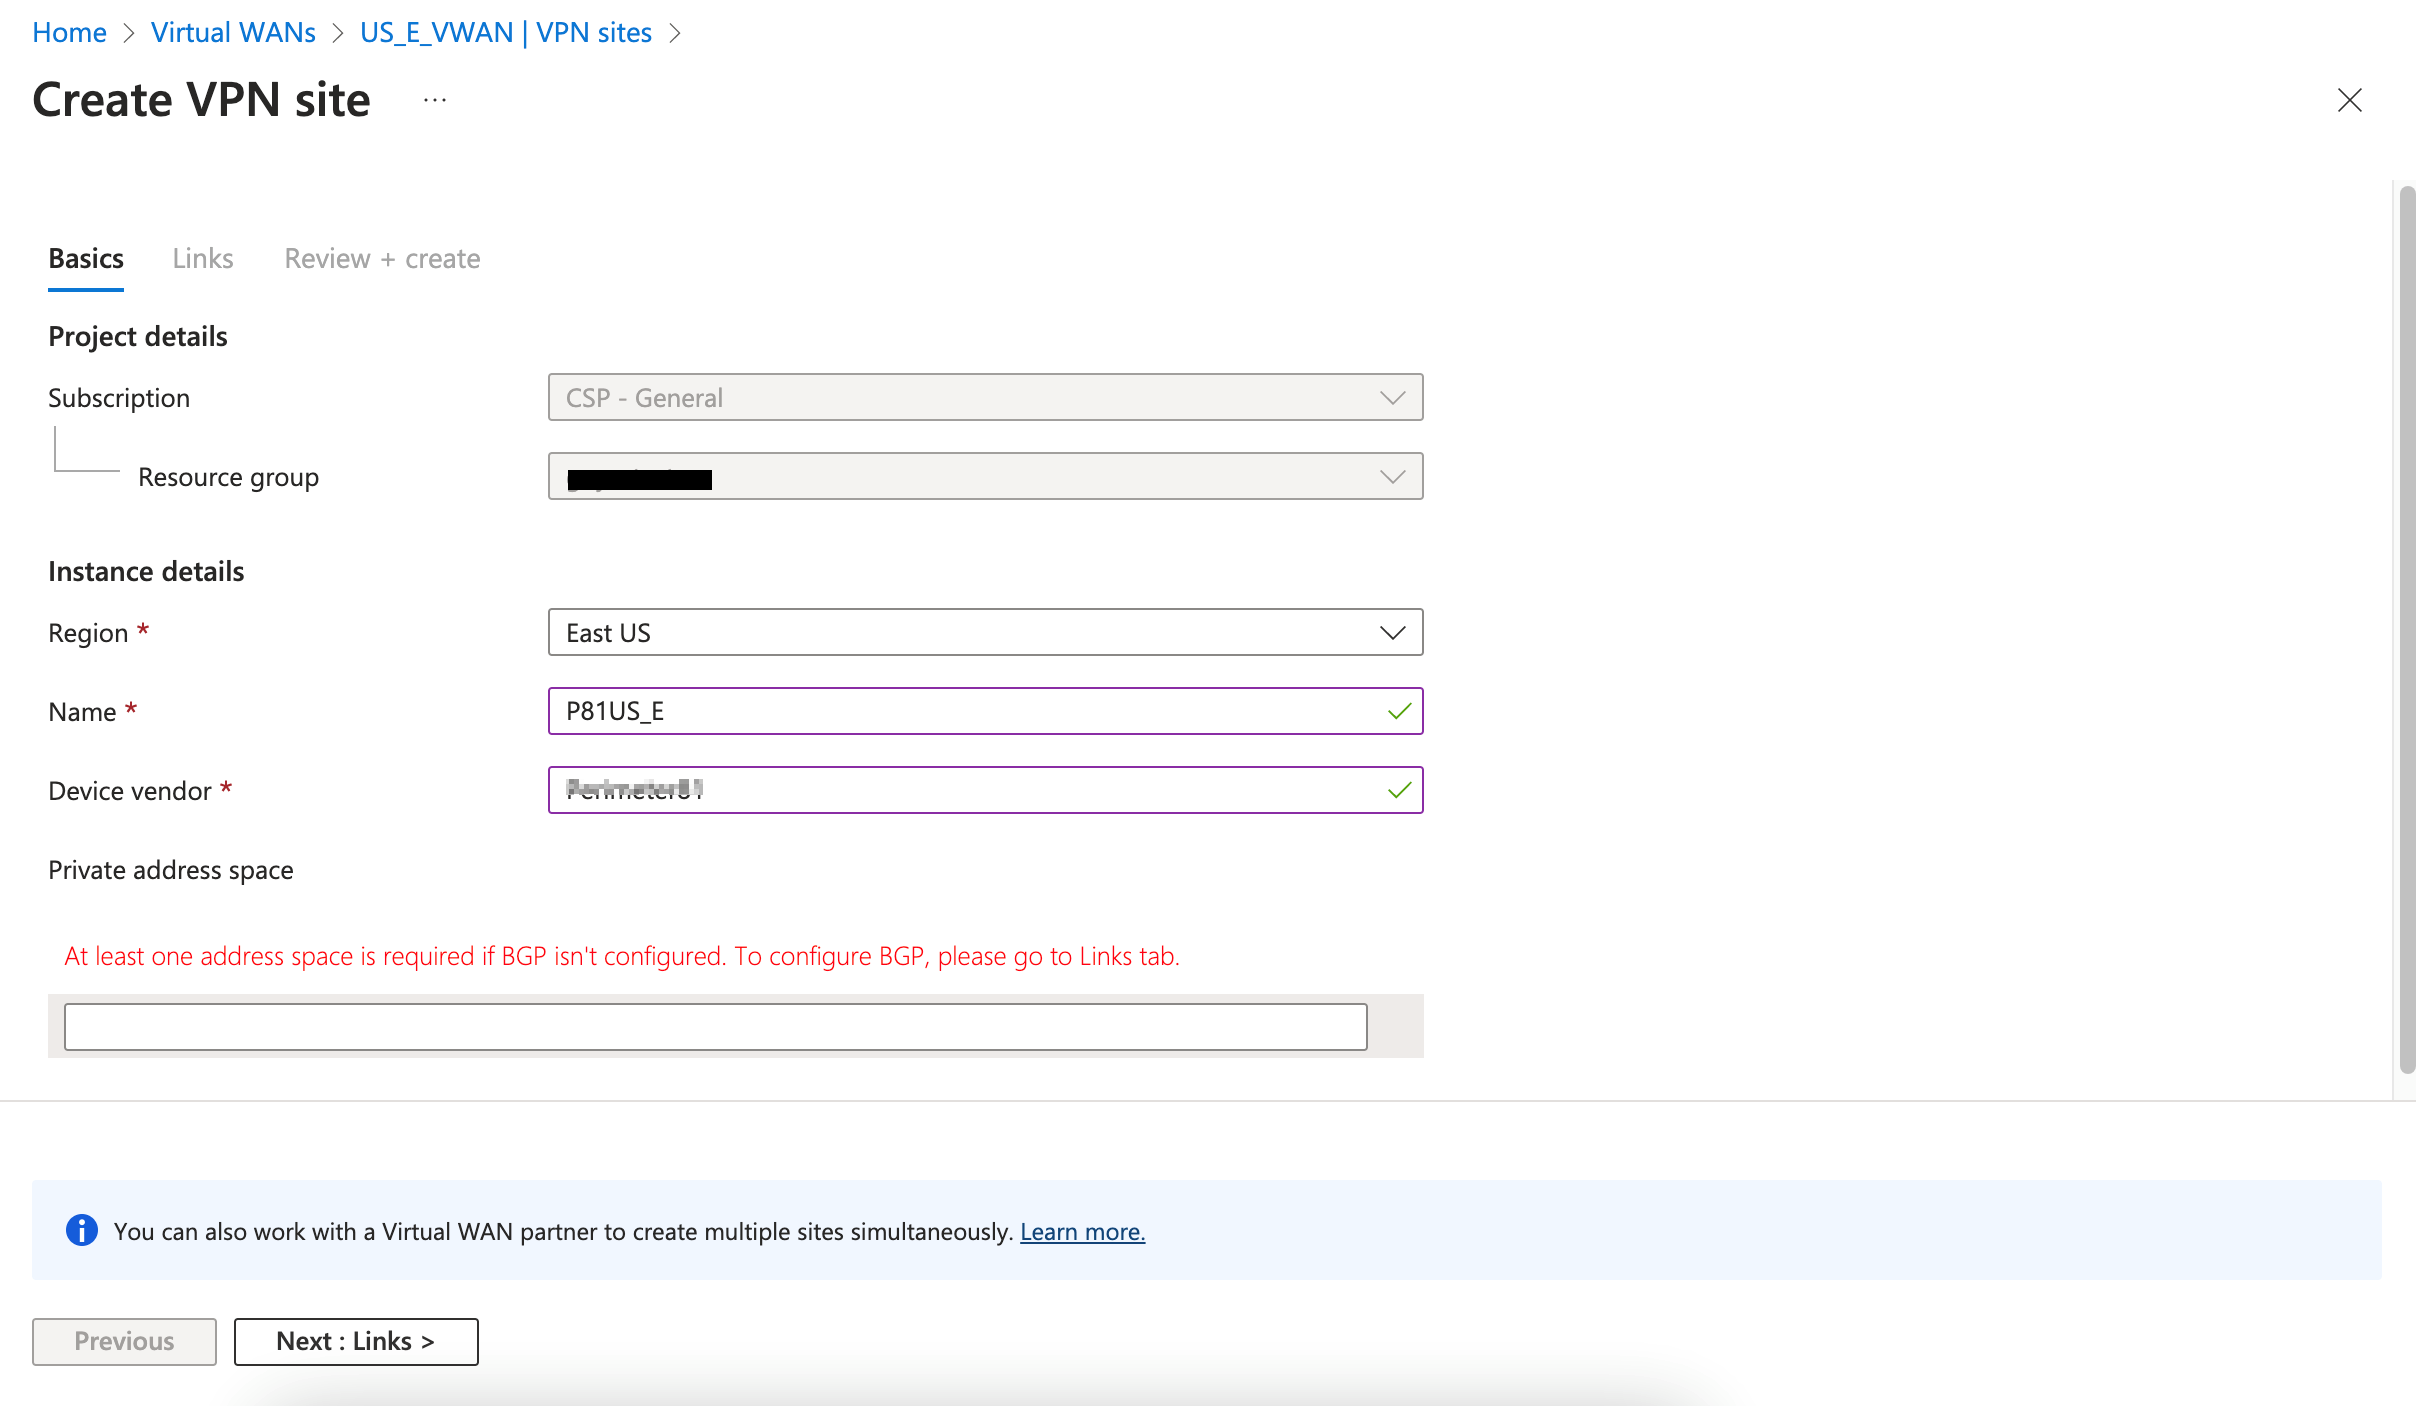
In the Basics tab, enter these:
Item
Value
Region
Region where your resources are located.
Name
Name of the VPN site.
Device vendor
Check Point SASE
Private address space
Leave as empty.
-
Click Next:Links.
The Links tab appears.
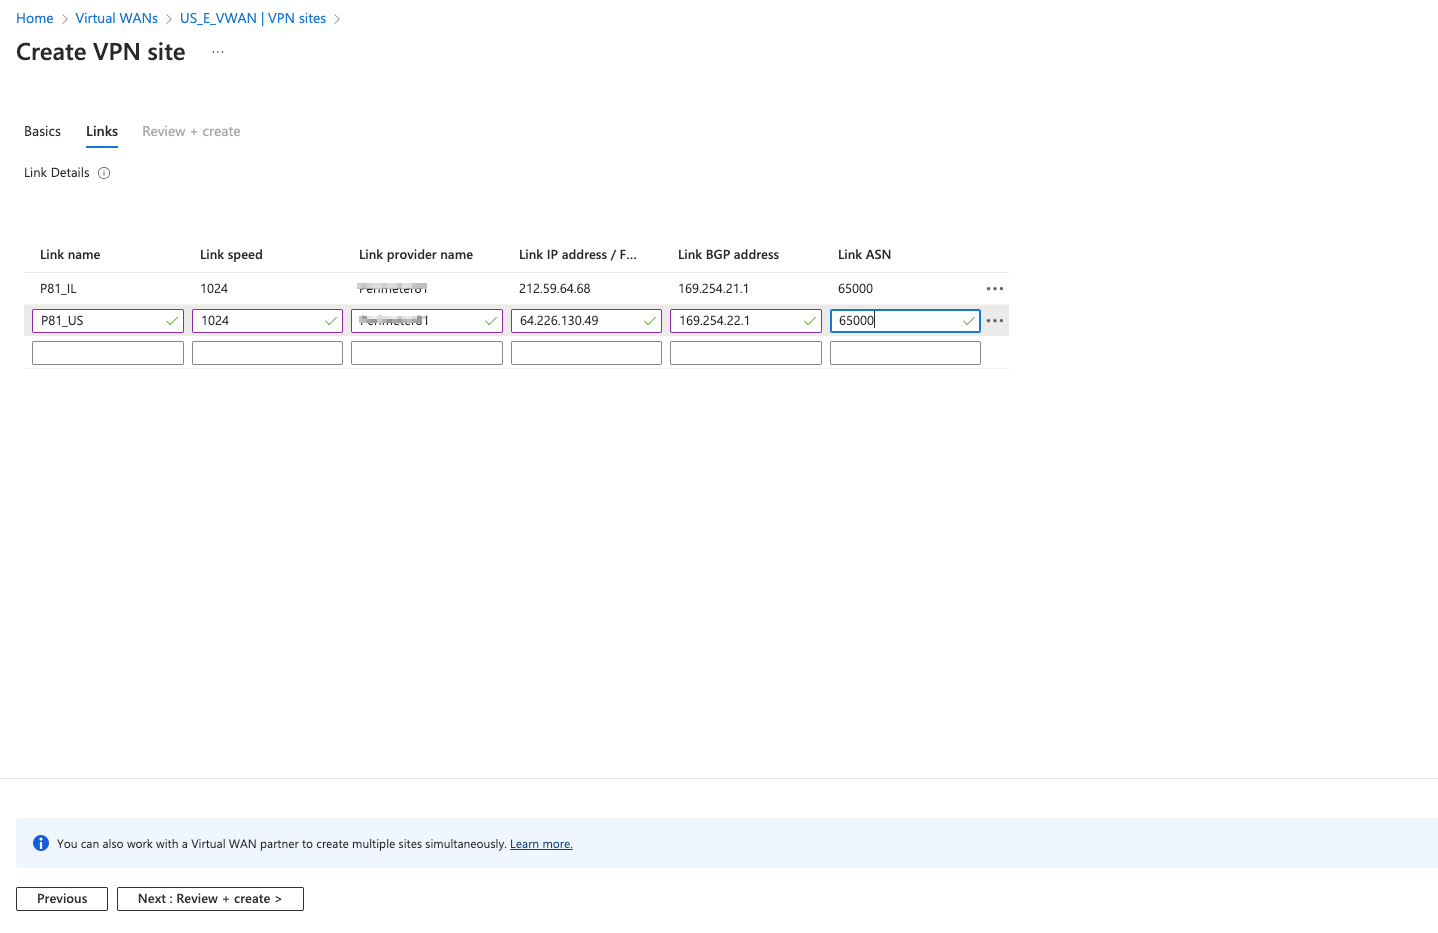
-
Enter these:
Item
Value
Link name Name of the link that connects to the first Check Point SASE gateway. Link speed 1024 Link provider name Check Point SASE Link IP address IP address of the first Check Point SASE gateway. Link BGP address
Any address in the permitted range.
Link ASN
ASN for your Check Point SASE network.
-
Repeat the above step to link the second Check Point SASE gateway.

-
Click Review+create.
-
Click Create.
Connecting the Site to your Virtual Hub
-
Access the Azure Management Portal and go to the Virtual WAN you created, and from the left pane, click Hubs.
-
Click the virtual hub you created.
The Hub page appears.
-
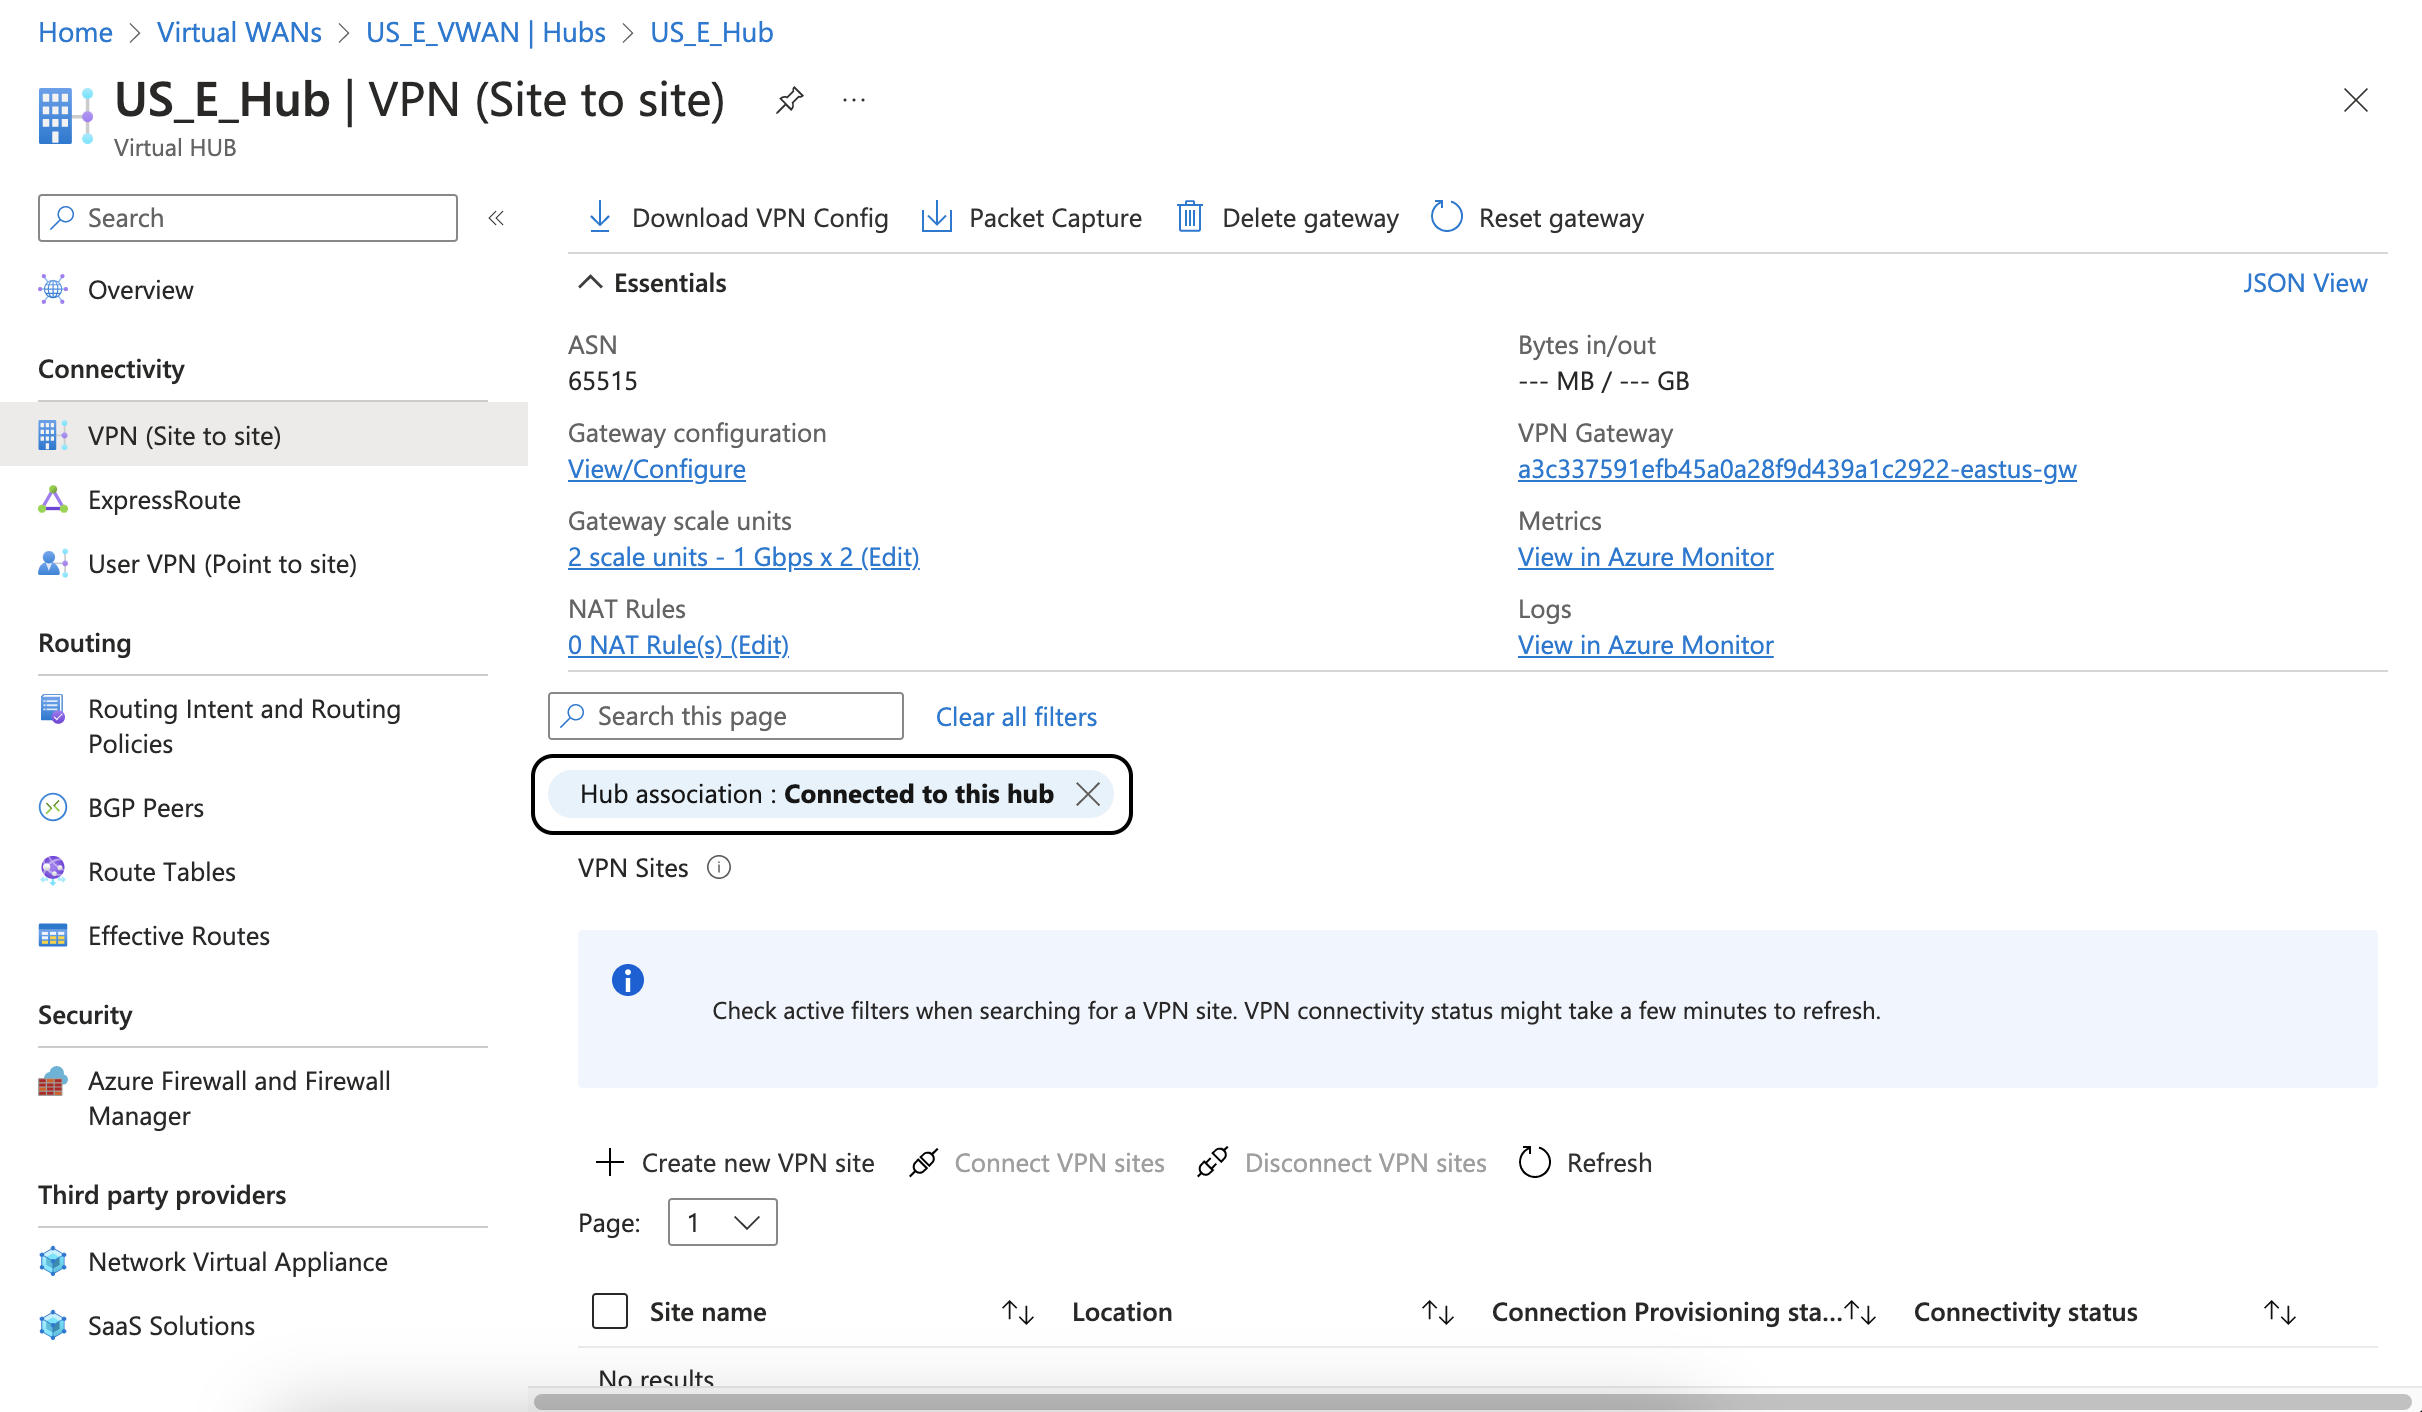
From the left pane, in the Connectivity section, click VPN (Site to site).
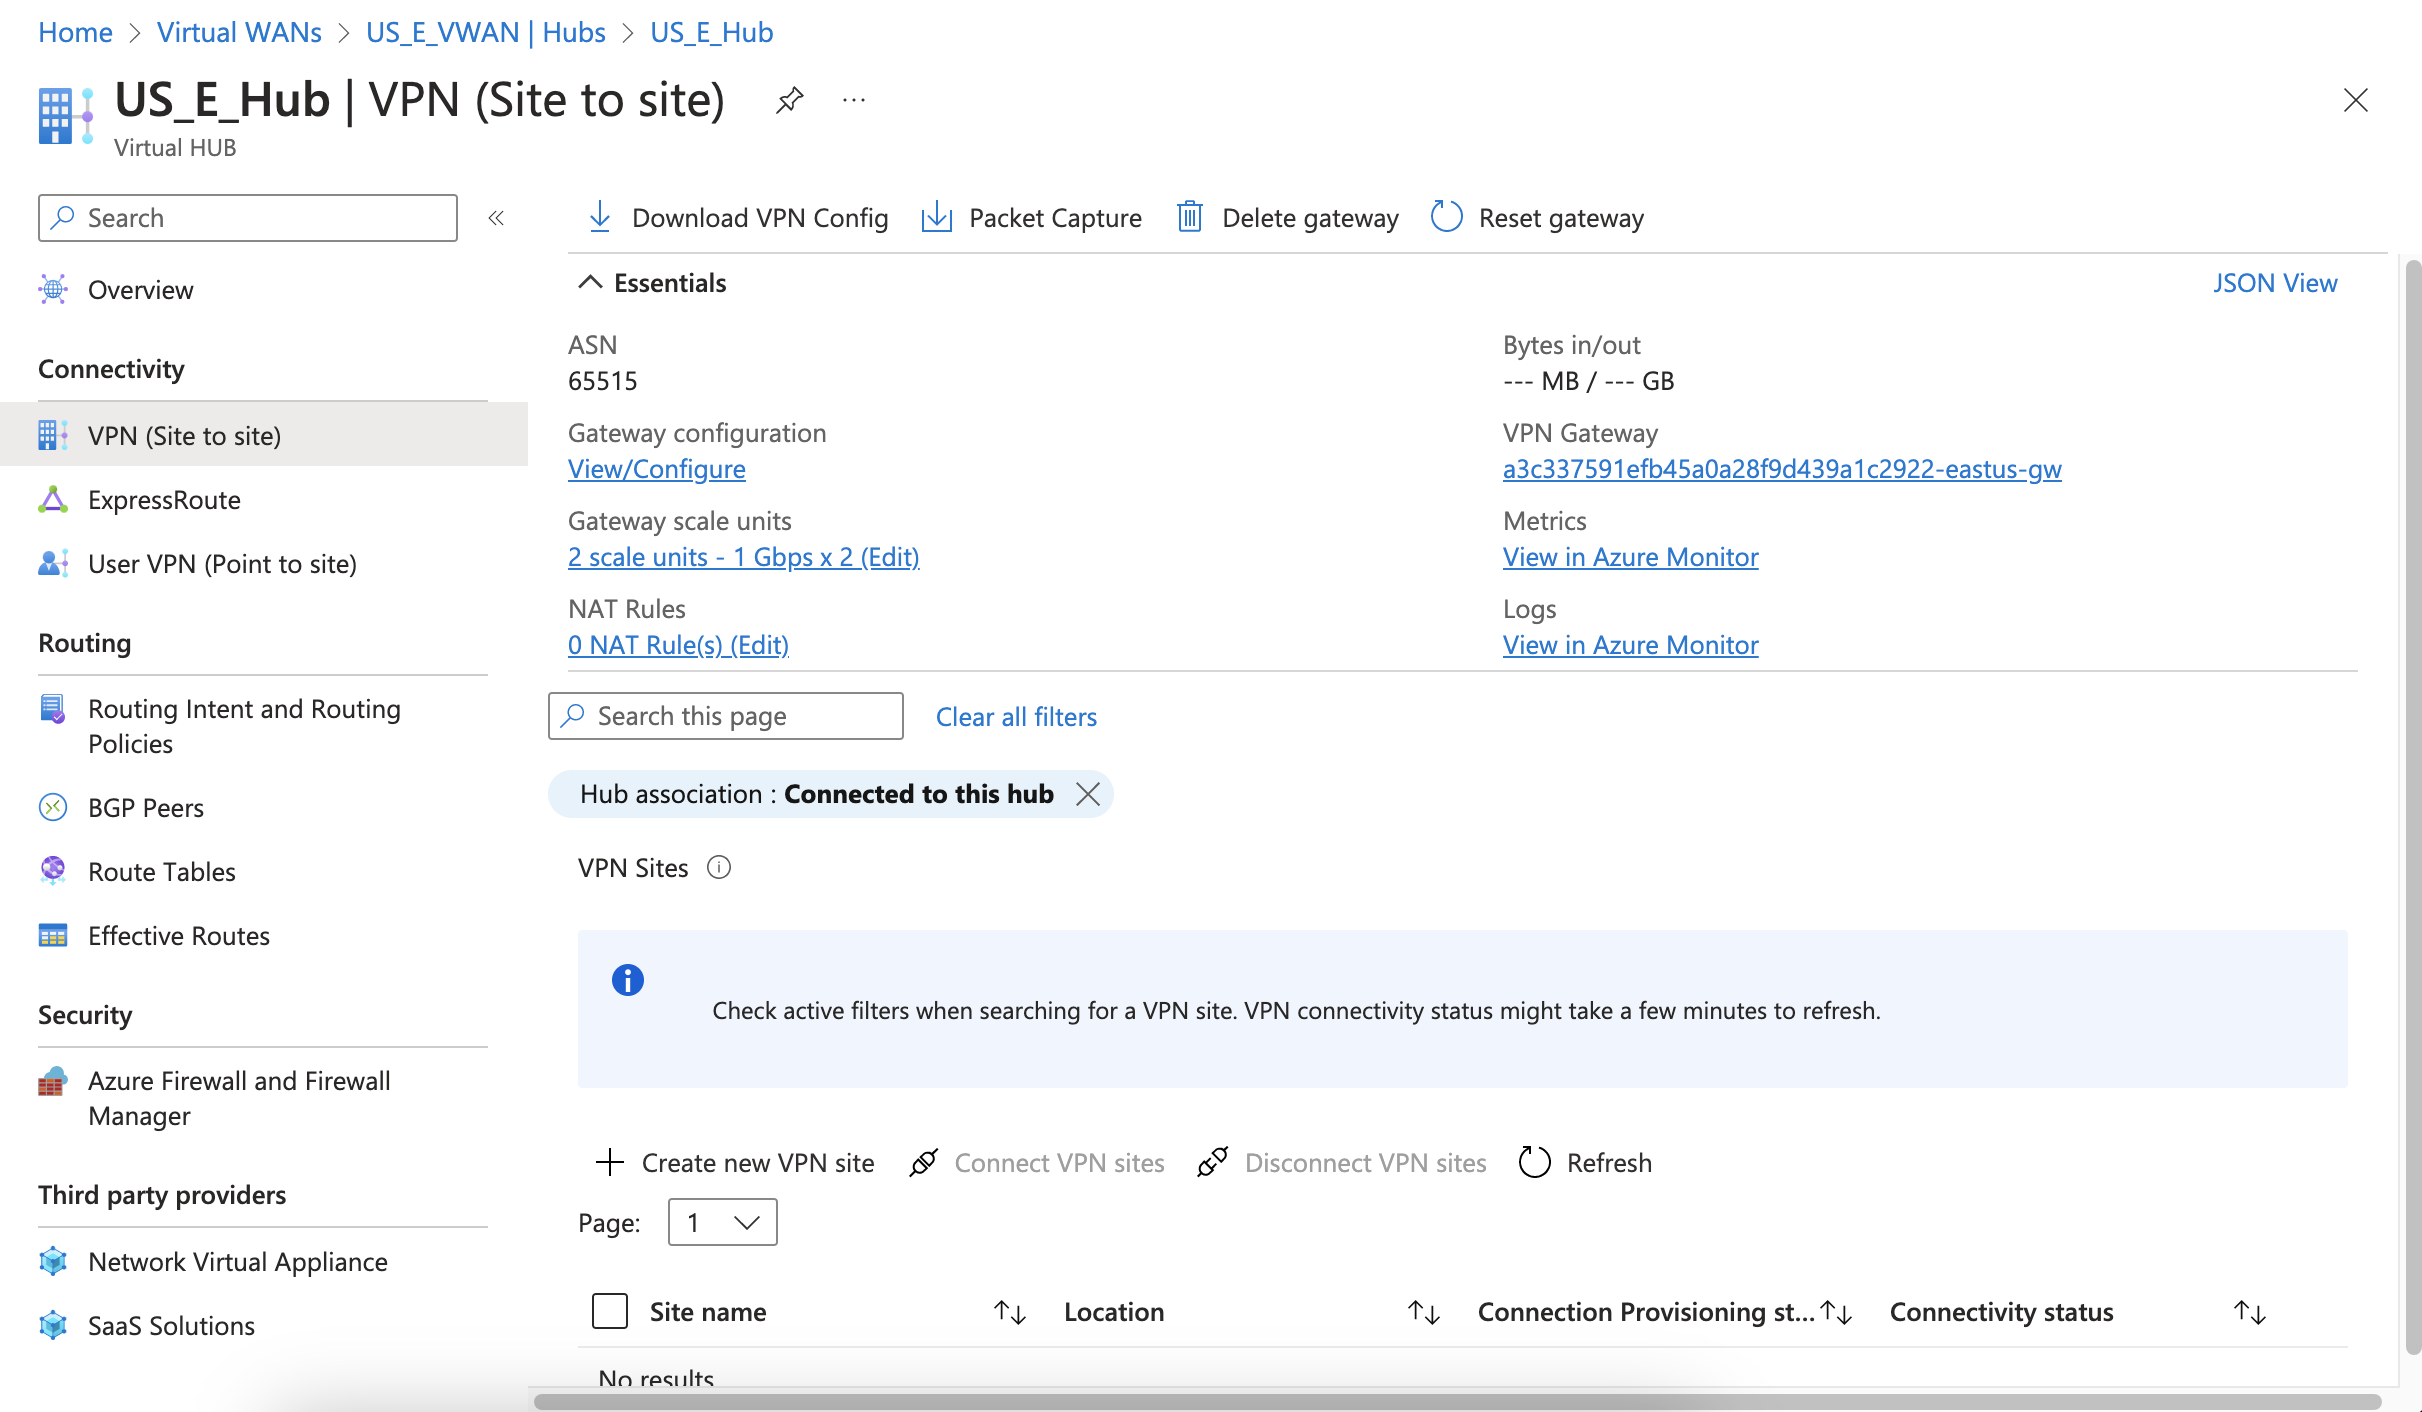
The VPN (Site to site) page appears.
-
Clear the filter to view your site in the list.
-
Select the checkbox next to the created site and click Connect VPN Sites.
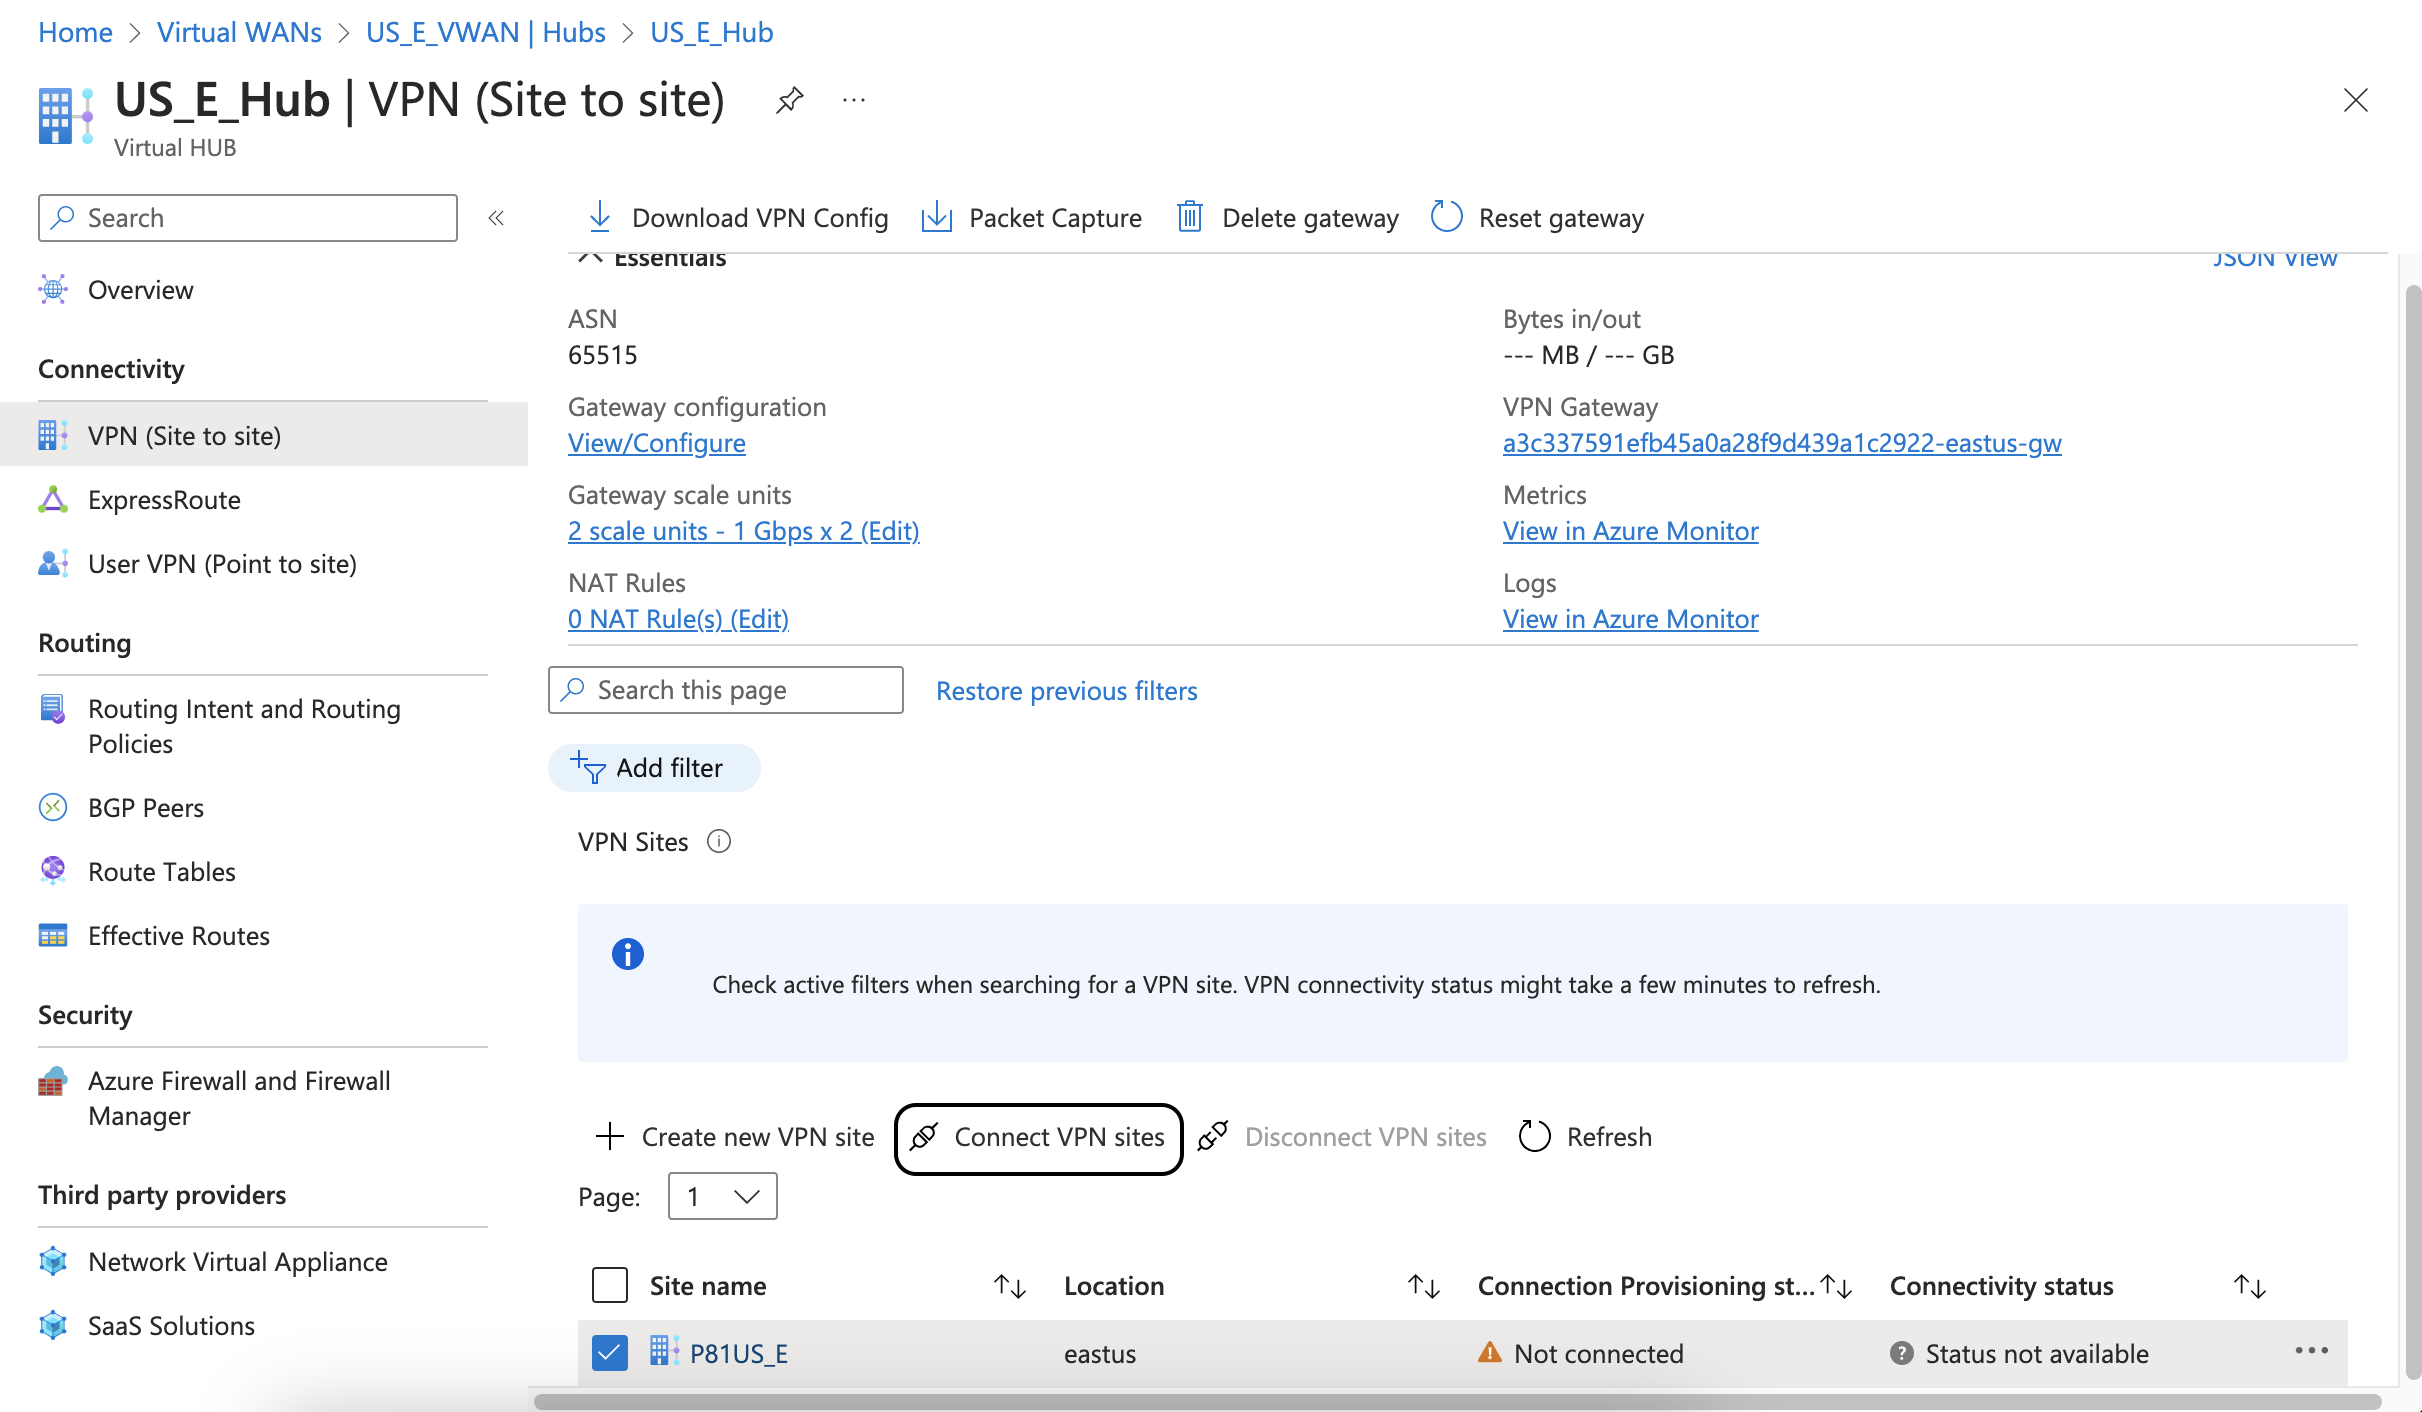
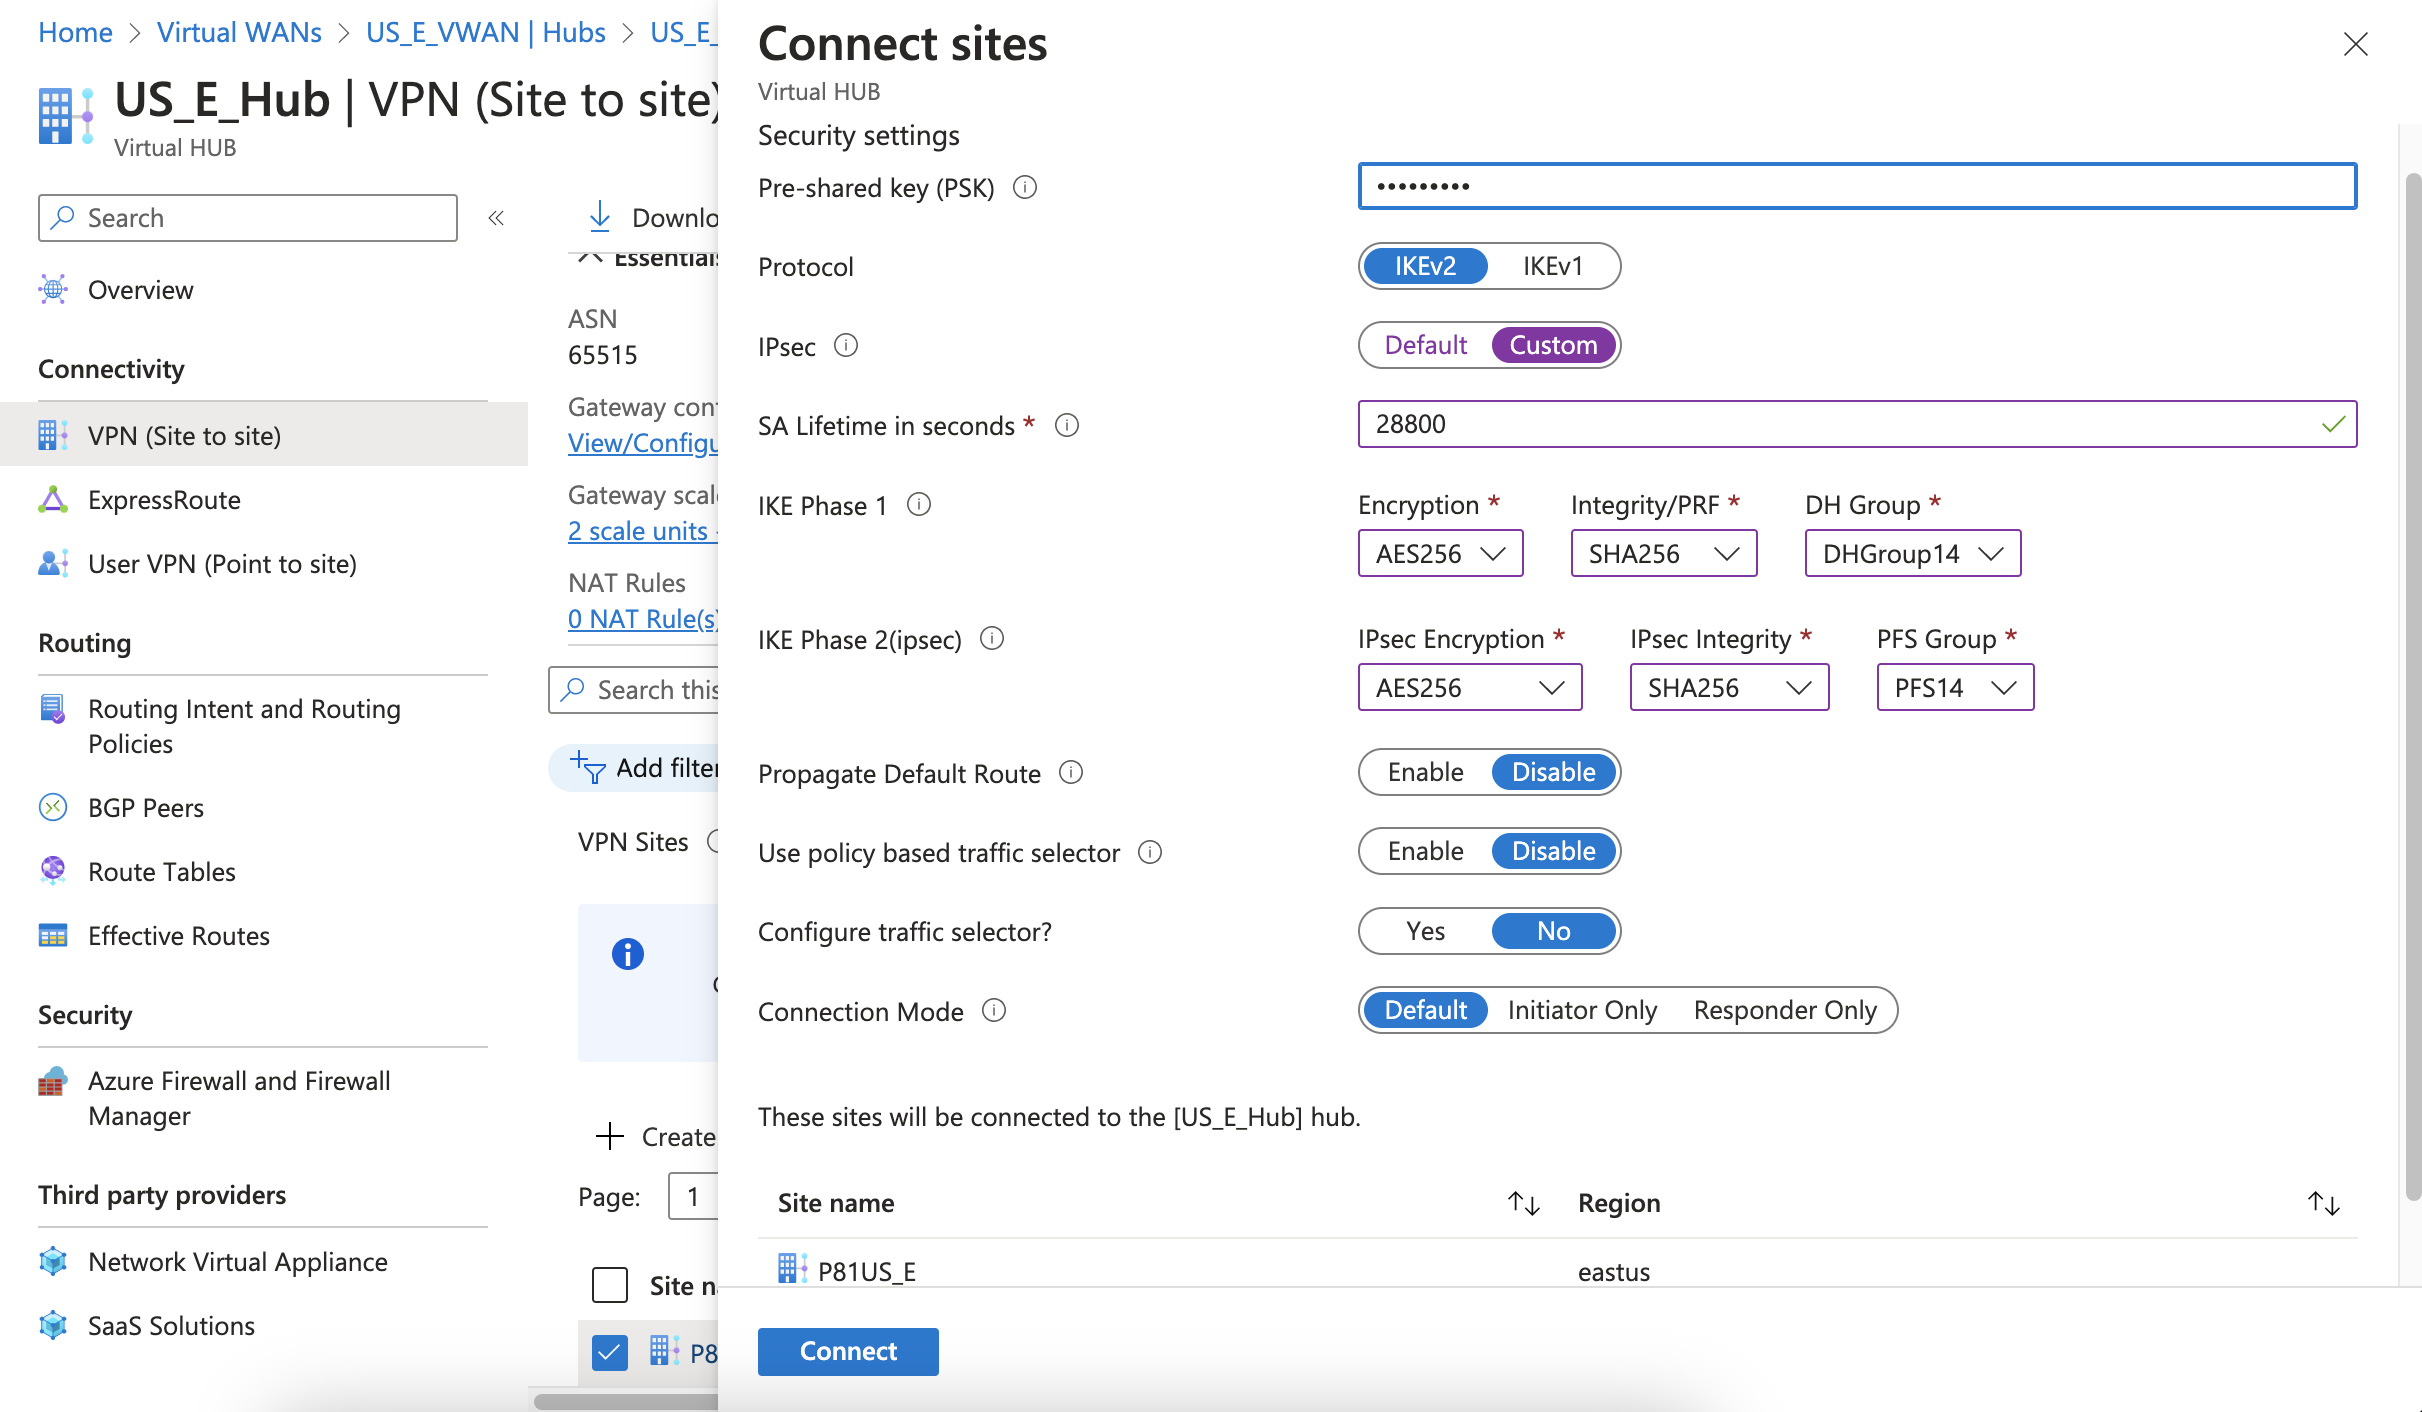
The Connect sites window appears.
-
Enter these:
Item
Value
Pre-shared key (PSK) Pre-shared key for this connection. Protocol IKEv2 IPsec Custom SA Lifetime in seconds 28800 IKE Phase 1 Encryption AES256 Integrity/PRF
SHA256
DH Group
DHGroup14
IKE Phase 2(ipsec)
IPsecEncryption
AES256
IPsec Integrity
SHA256
PFS Group
PFS14
Propagate Default Route
Disable
Use policy based traffic selector
Disable
Configure traffic selector
No
Connection Mode
Default
-
Go to the VPN (Site to site) window and click View/Configure to configure the gateway.
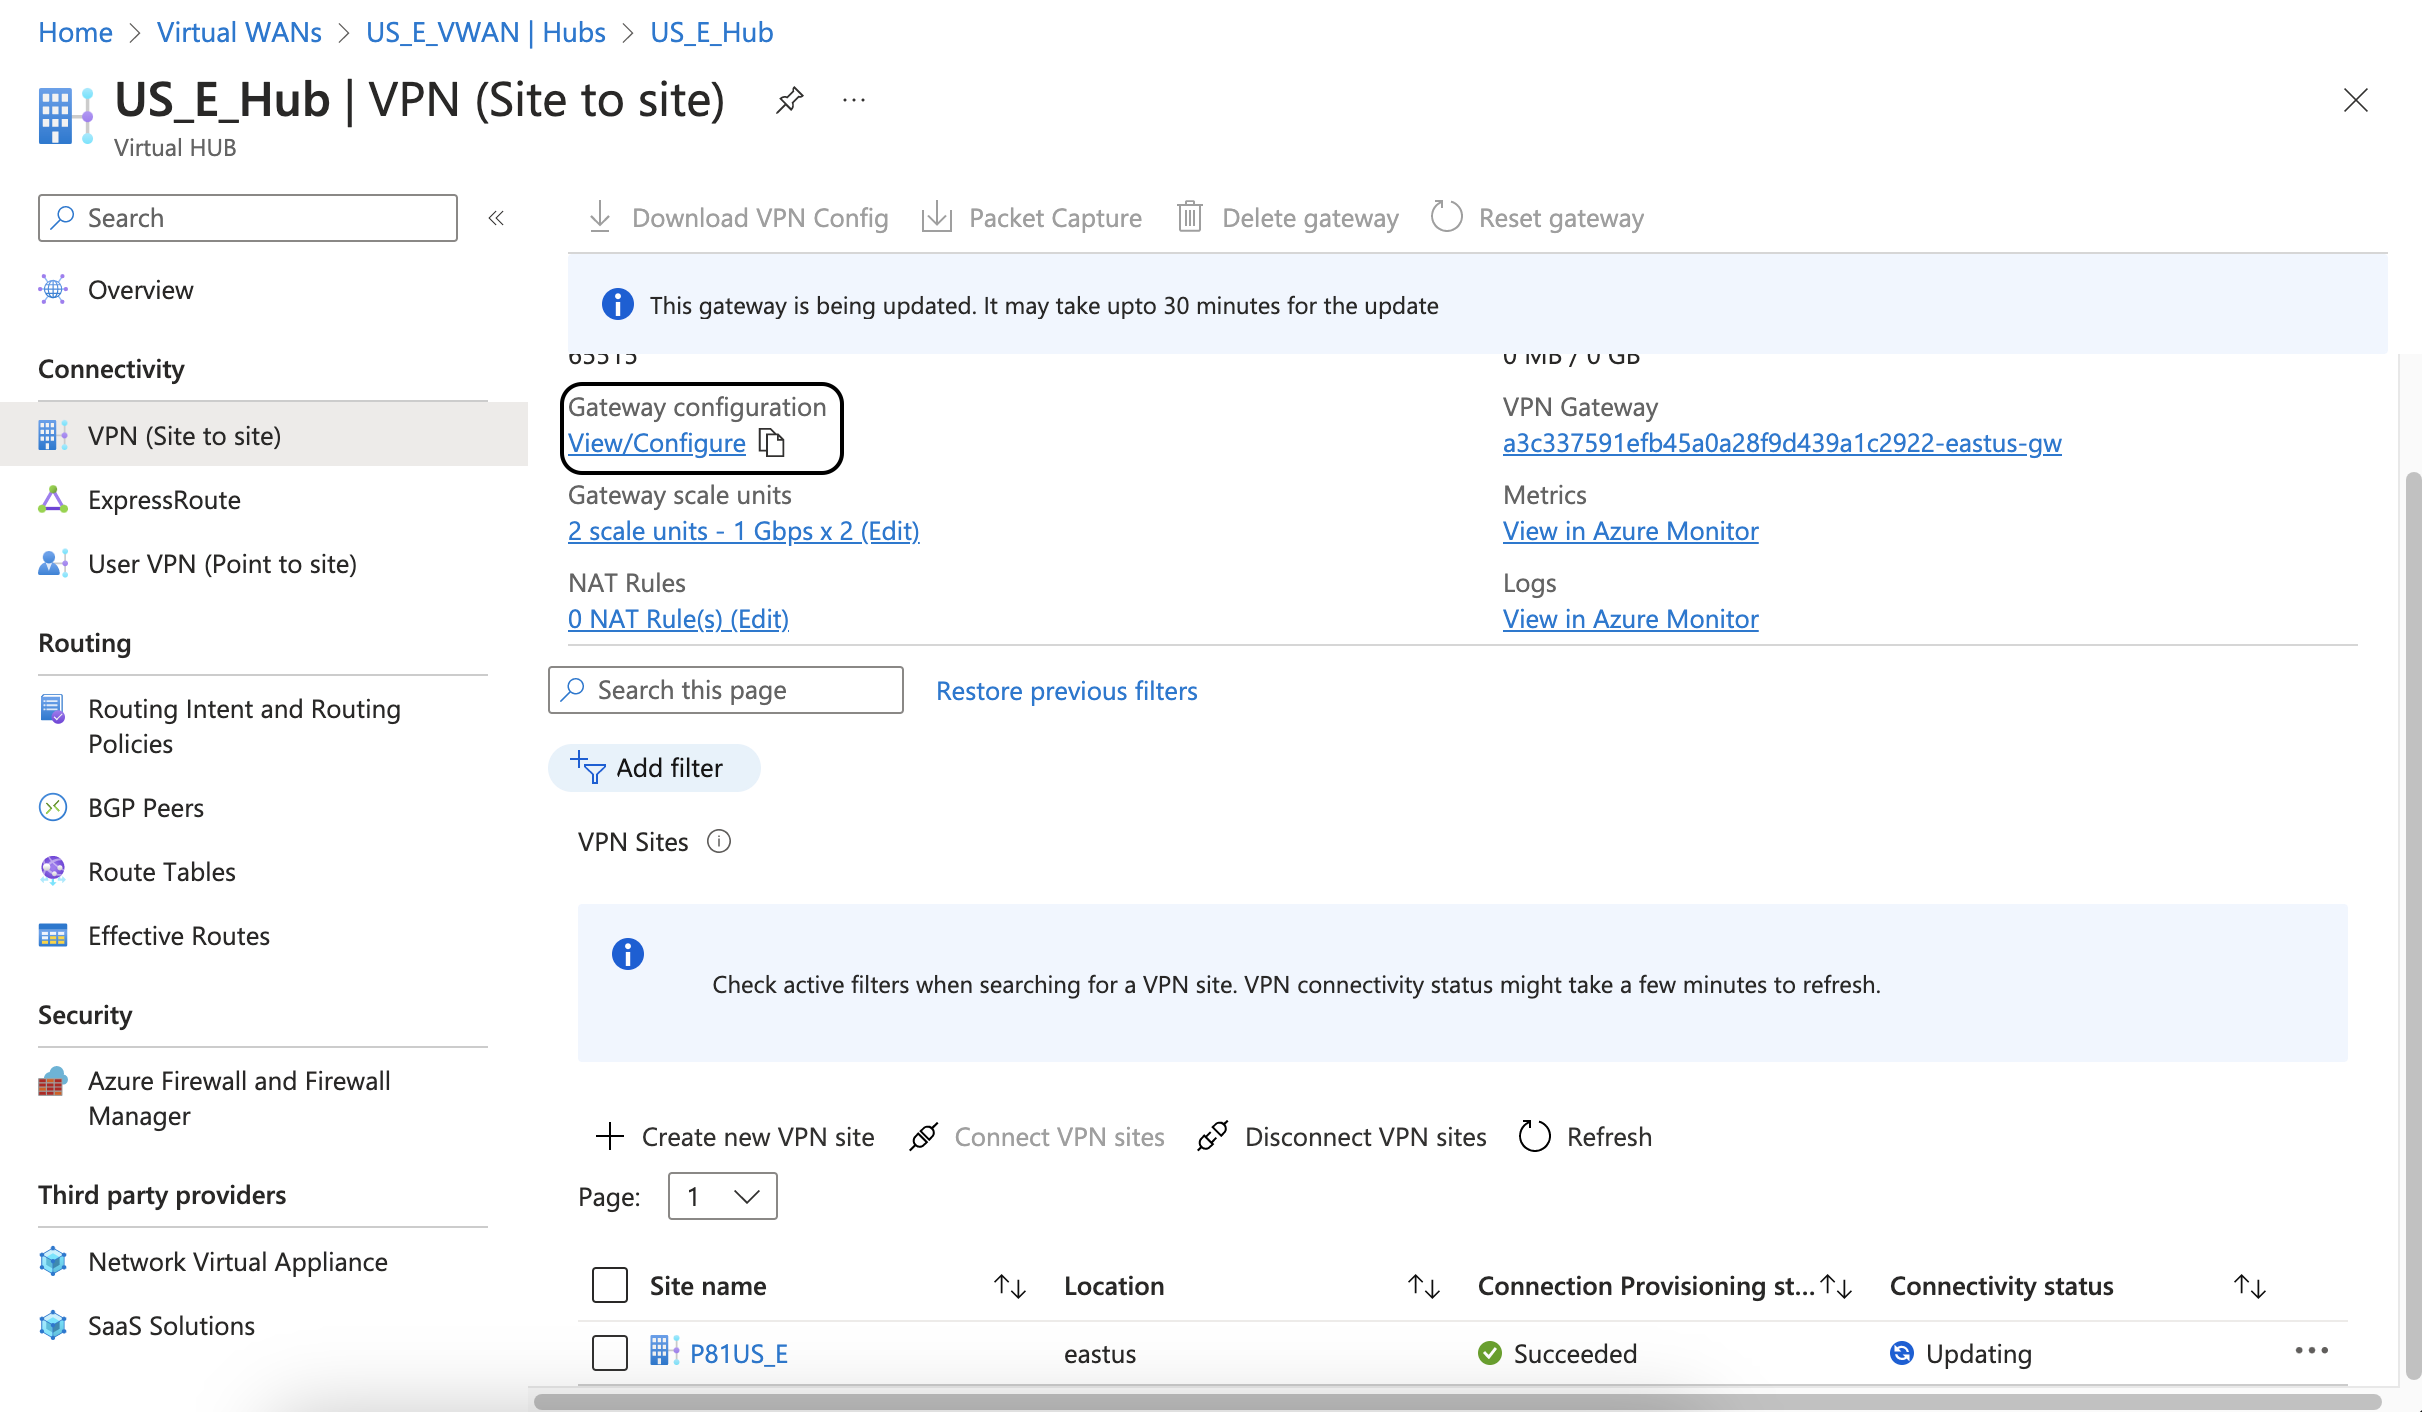
The Edit VPN Gateway window appears.

-
In the VPN Gateway Instance 0 section, set the Custom BGP IP Address to the same network range as the BGP address for the first link.
-
In the VPN Gateway Instance 1 section, set the Custom BGP IP Address to the same network range as the BGP address for the second link.
-
Click Edit and then Confirm.
-
Go to the VPN (Site to site) window and click Download VPN Config to download the configuration.
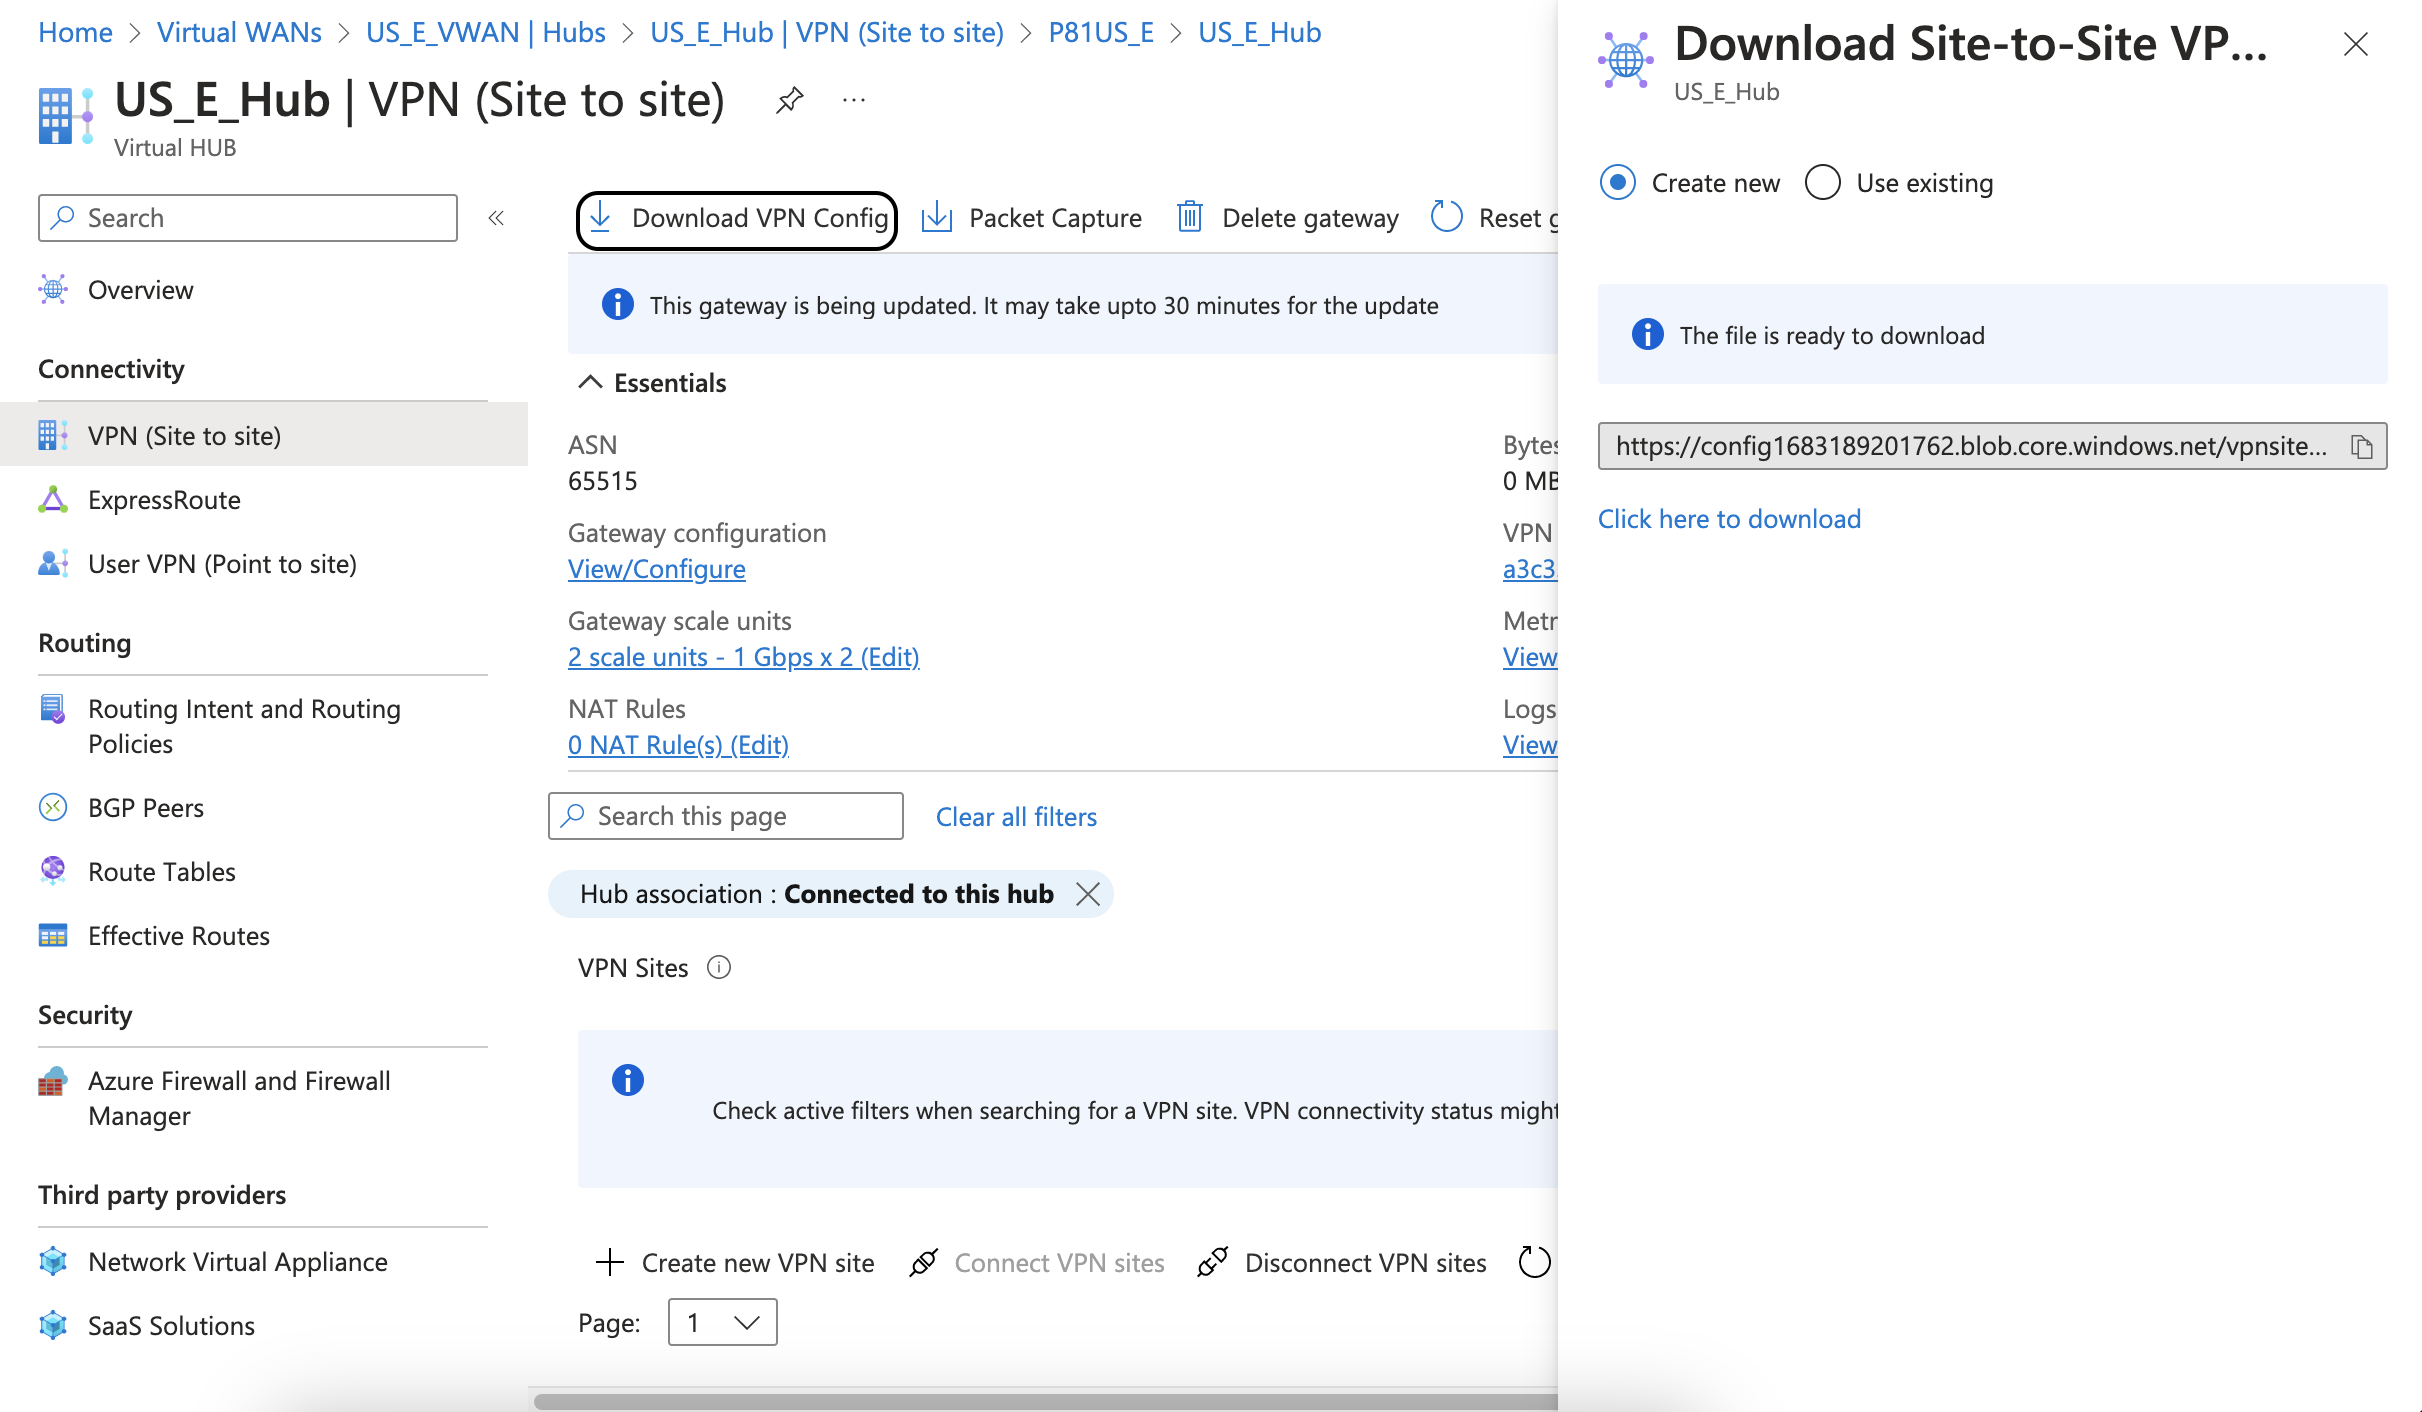
-
Click the download link.
The system downloads the configuration file.
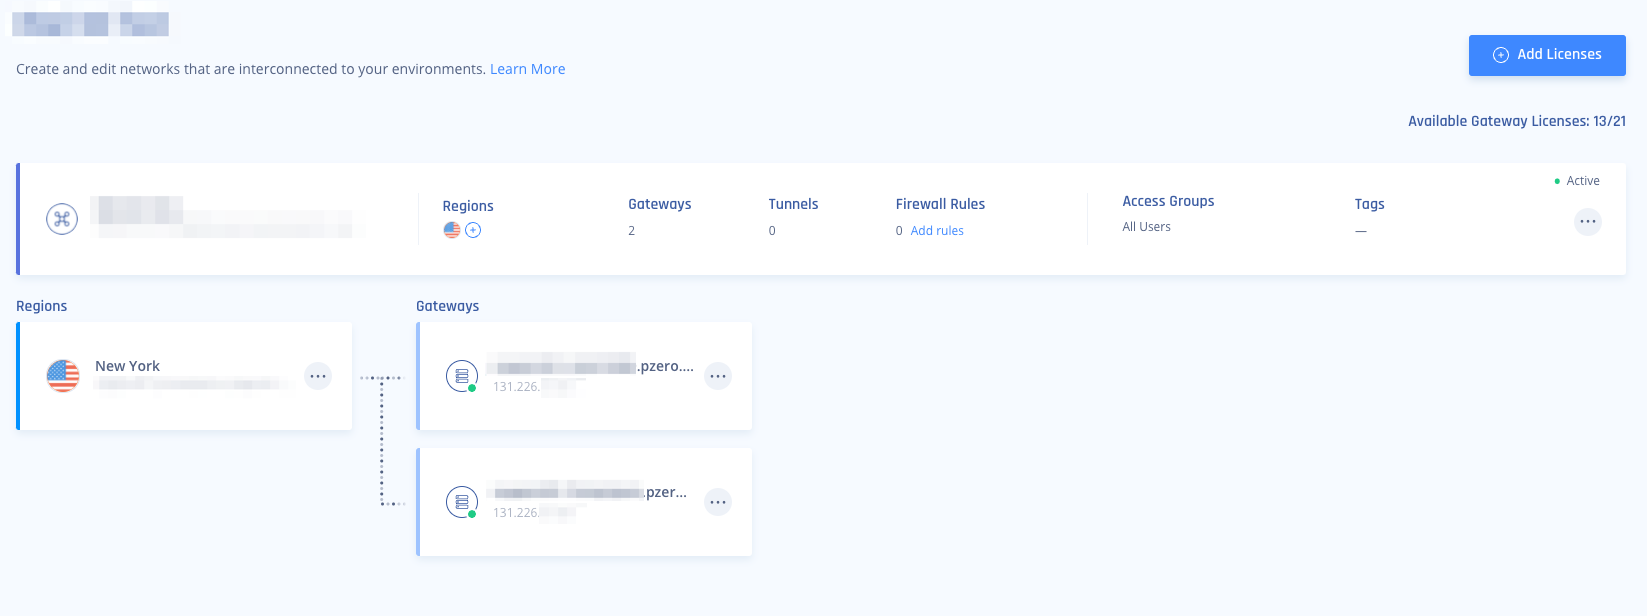
Step 2 - Creating the Tunnels in the Check Point SASE Administrator Portal
-
Access the Check Point SASEAdministrator Portal and click Networks.
-
Click the network where you want to create the tunnel.
-
In one of the gateways, click
 > Add Tunnel.
 -
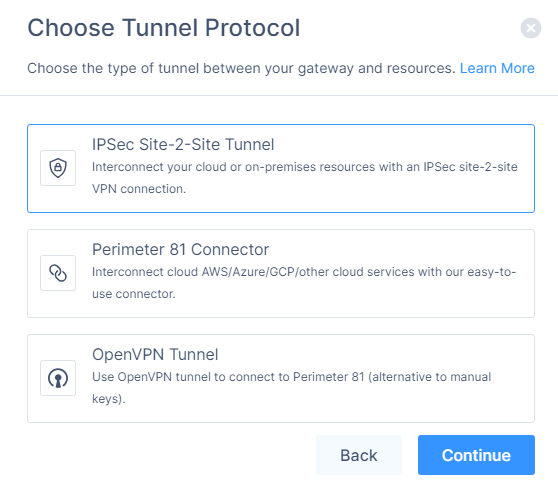
Click IPSec Site-2-Site Tunnel and click Continue.
-
Select Redundant Tunnels and click Continue.
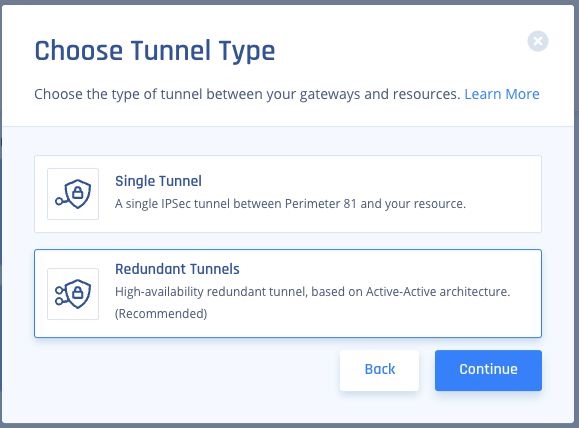
The Redundant IPSec Tunnels window appears.
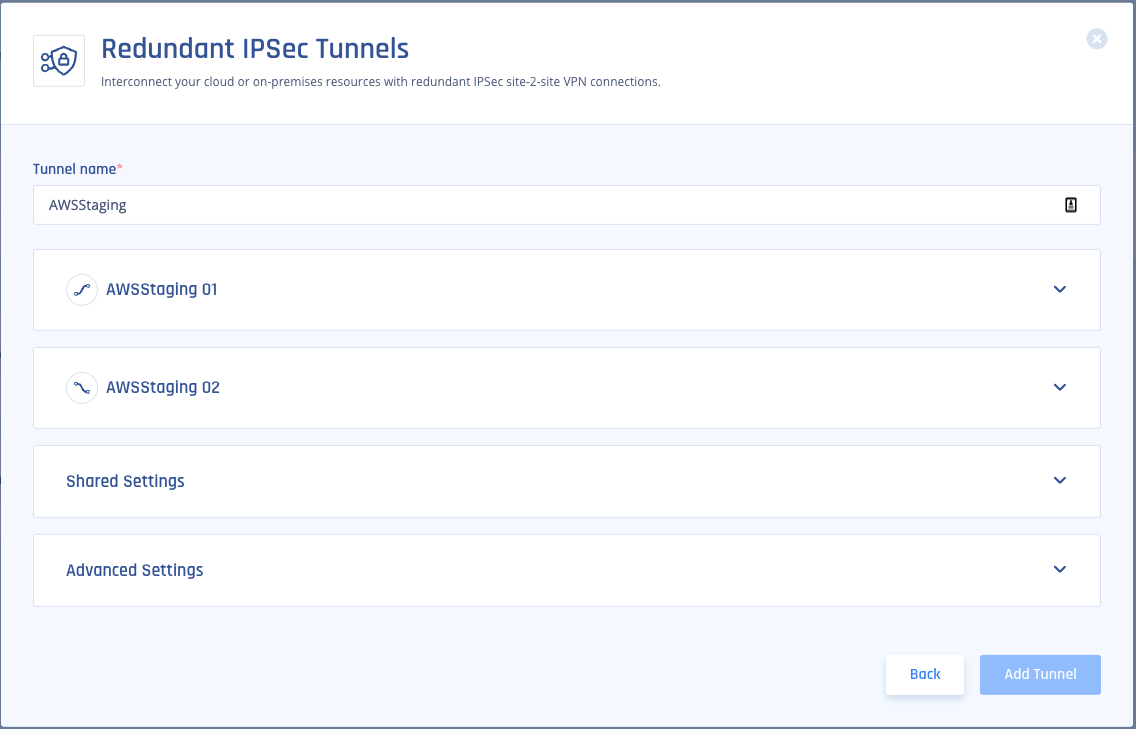
-
Copy the values for the first tunnel from the downloaded configuration file:
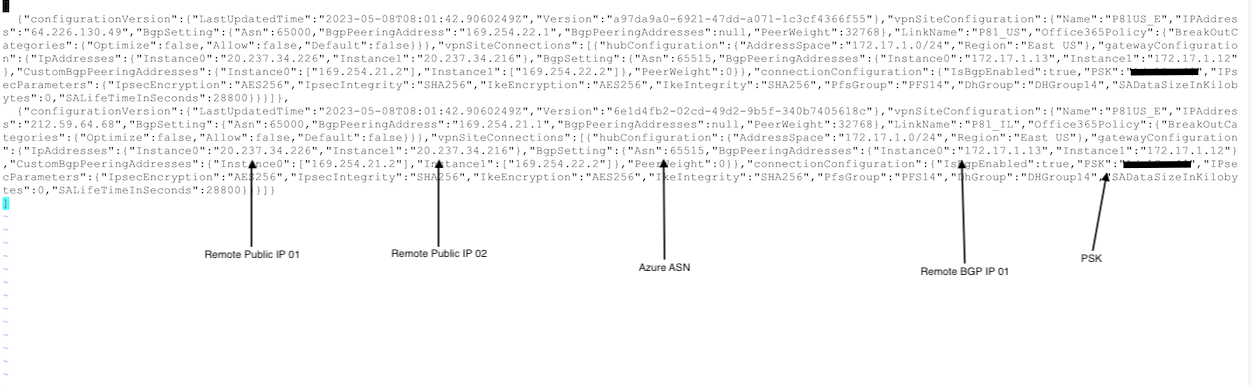
Item
Value
Shared Secret PSK Check Point SASE gateway Internal IP Inside IP Addresses of Customer Gateway Remote Public IP & Remote ID Public IP Addresses of VPN Gateway Instance 0. Remote Gateway internal IP BGPPeeringAddress of VPN Gateway Instance 0 Remote Gateway ASN Azure ASN In the Check Point SASE Administrator Portal, enter the values for Tunnel 1 as:
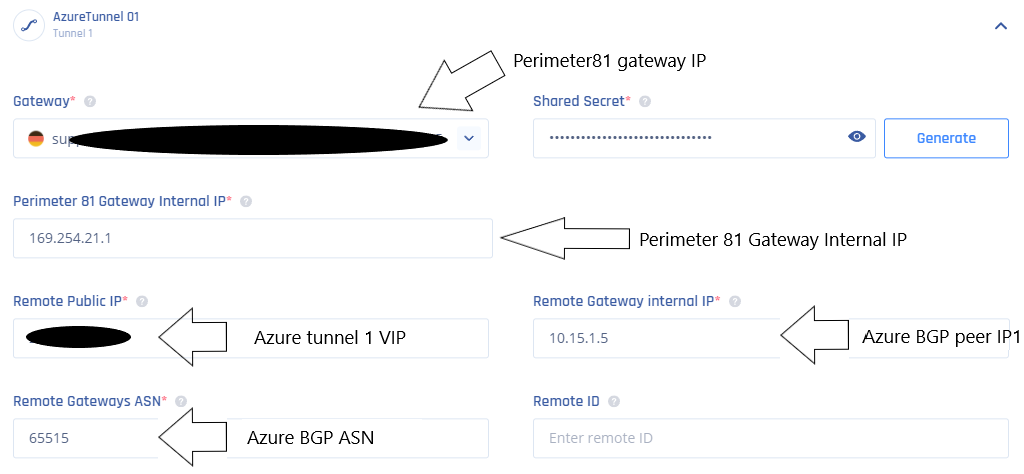
-
Repeat step 6 for the second tunnel.
-
In the Shared Settings section:
-
In Proposal Subnets, select Any(0.0.0.0/0) for both sides.
-
ASN number must be the same for the Check Point SASE side.
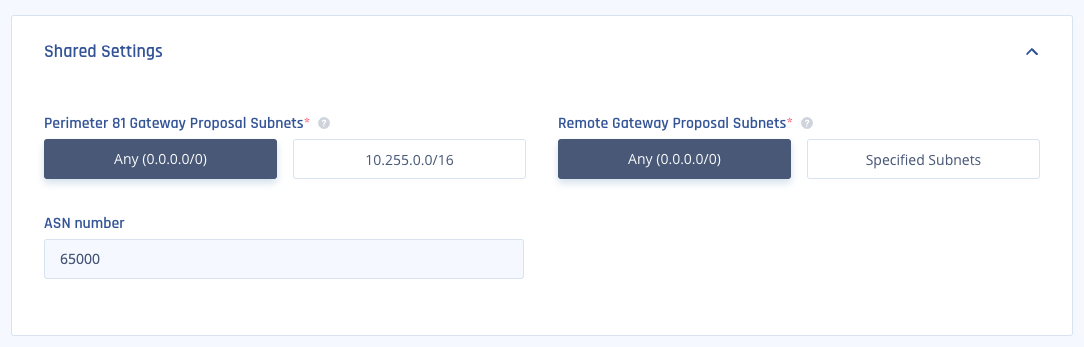
-
-
In the Advanced Settings section, enter the information for your tunnel type (unless you have configured customer settings on the Azure side):
Field
IKE Version
IKE Lifetime
Tunnel Lifetime
Dead Peer Detection Delay
Dead Peer Detection Timeout
Encryption (Phase 1)
Encryption (Phase 2)
Integrity (Phase 1)
Integrity (Phase 2)
Diffie Hellman Groups (Phase 1)
Diffie Hellman Groups (Phase 2)
Cloud Vendor
Amazon AWS
Single Tunnel - AWS Virtual Gateway V2 8h 1h 10s 30s aes256 aes256 sha512 sha512 ecp521 ecp521 Single Tunnel - AWS Transit Gateway V2 8h 1h 10s 30s aes256 aes256 sha512 sha512 ecp521 ecp521 Redundant Tunnels - AWS Virtual Private Gateway V2 8h 1h 10s 30s aes256 aes256 sha512 sha512 ecp521 ecp521 Redundant Tunnels - AWS Transit Gateway V2 8h 1h 10s 30s aes256 aes256 sha512 sha512 ecp521 ecp521 Google Cloud Platform
Single Tunnel 1 V2 8h 1h 10s 30s aes256 aes256 sha512 sha512 ecp521 ecp521 Redundant Tunnels
V2 8h 1h 10s 30s aes256 aes256 sha512 sha512 ecp521 ecp521 Microsoft Azure Single Tunnel -
Azure Virtual Network Gateway
V2
3600s
27000s
10s
45s
aes256 aes256 sha1 sha1 modp1024 modp1024 Redundant Tunnels - Virtual Network Gateway
V2
9h
9h
10s 30s aes256 aes256 sha1 sha1 modp1024 modp1024 Redundant Tunnels - Virtual WAN
V2
8h
1h 10s 30s aes256 aes256 sha256
sha256
modp2048 modp2048 Other tunnel types
Alibaba Cloud V1 8h 1h 10s 30s aes256 aes256 sha1 sha1 modp1024 modp1024 IBM Cloud
V1
8h 1h 10s 30s aes256 aes256 sha256
sha256
ecp521 ecp521 1 Suggested values. For other supported ciphers, see this Google article.
-
Click Add Tunnel.