Google Cloud Platform (GCP) Redundant Tunnels
Prerequisites
-
An active Check Point SASE Administrator Portal account and network.
-
Make sure you have installed the Check Point SASE Agent on your devices.
-
Administrator account in the Firewall/ Router/ Cloud Management Portal.
-
Your Check Point SASE network must have at least two different gateways in the same network.

Notes -
-
You can deploy the gateways in two separate regions for comprehensive ISP redundancy.
-
You can scale up the network. Adding another region does not affect the connection.
-
Step 1 - Configurations in the GCP Console
Creating a VPN Gateway
-
Access the GCP console and in the Network Connectivity section, click VPN.
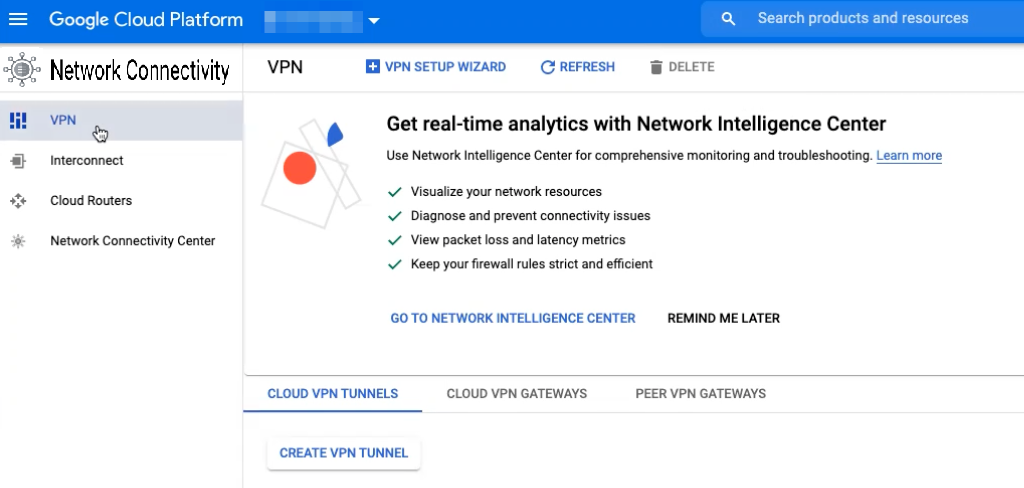
-
Click Cloud VPN Gateways > Create VPN Gateway.

-
Enter these:
-
Name - Name of the gateway.
-
Network - GCP network you want to access through Check Point SASE.
-
Region - Region where your resources are located.
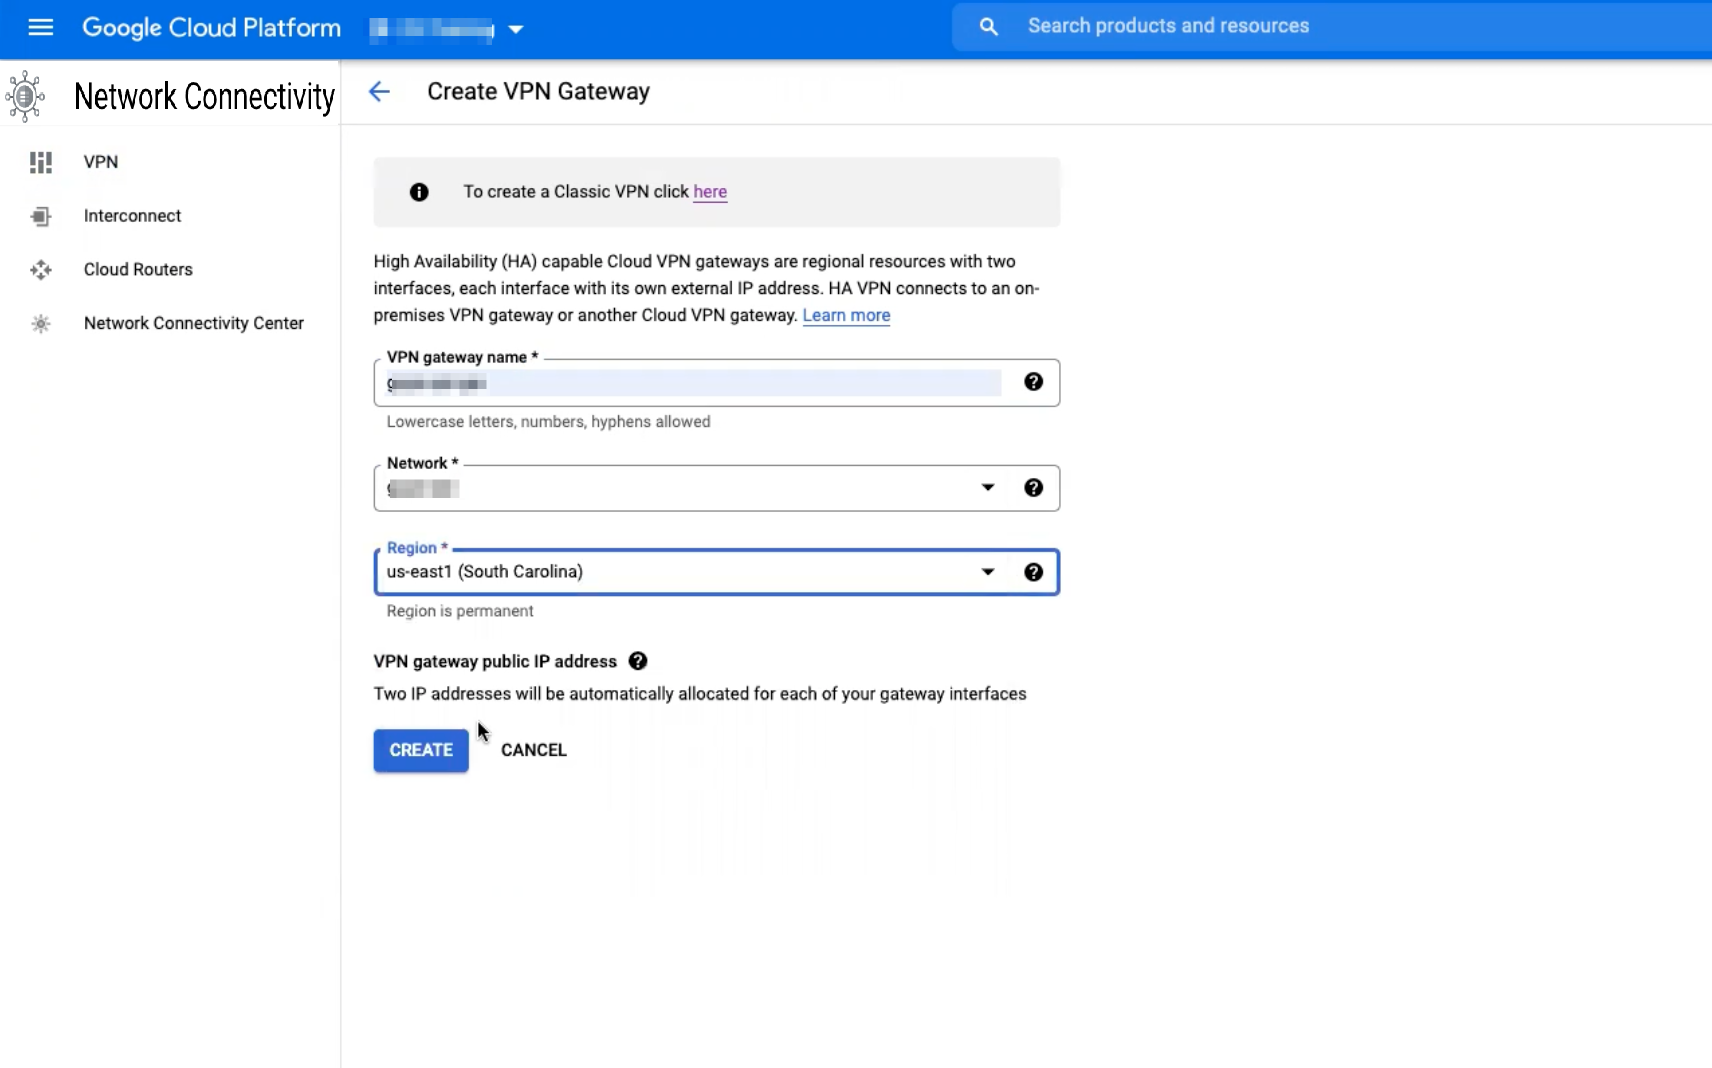
-
-
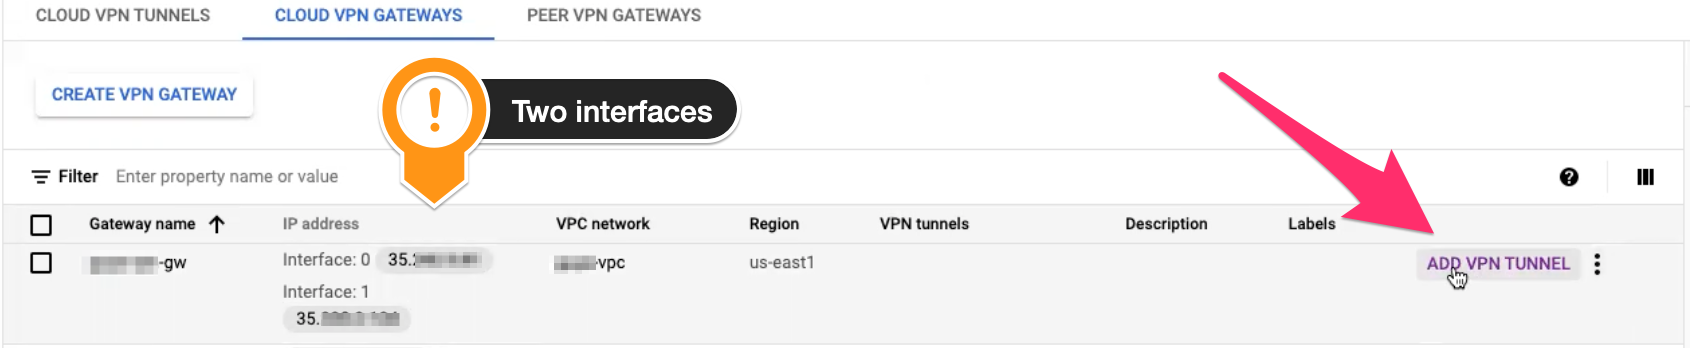
Click Create.
The system creates two interfaces, Interface 0 and Interface 1.
Adding a Redundant VPN Tunnel
-
Access the GCP console and go to the VPN gateway you created and click Add VPN Tunnel.
-
Enter these:
-
Peer VPN gateway - On-prem or Non-Google Cloud.
-
Click the drop-down menu in Peer VPN gateway name and select Create new peer VPN gateway.
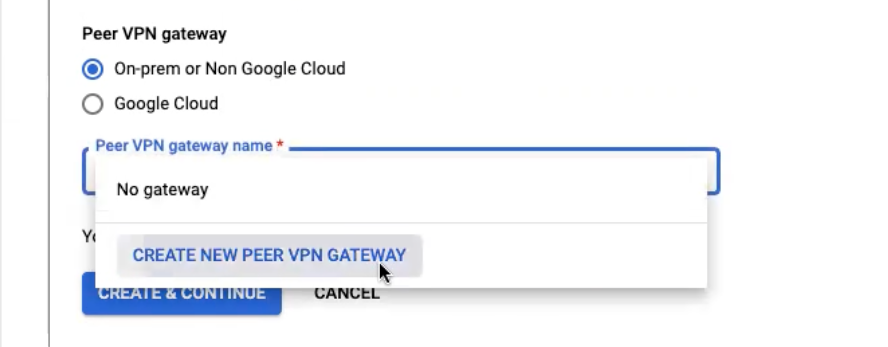
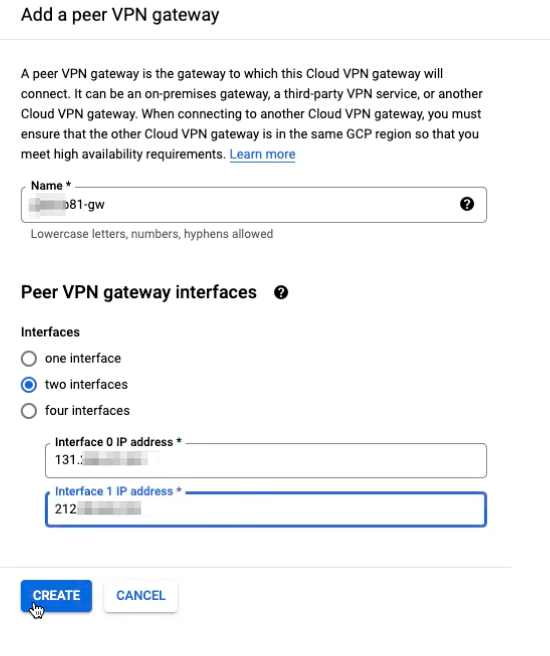
The Add a peer VPN gateway window appears.
-
In the Name field, enter the name of the peer VPN gateway that represents the setup at the Check Point SASE side.
-
In the Peer VPN gateway interfaces section, select two interfaces.
-
In theInterface 0 IP address field, enter the IP address of the first Check Point SASE gateway.
-
In theInterface 1 IP address field, enter the IP address of the second Check Point SASE gateway.
-
Click Create.
-
In the High availability section, select Create a pair of VPN tunnels.
-
In the Routing options section, click the Cloud Router drop-down menu, and select Create a new router.
The Cloud router in GCP manages your BGP ASN routes.
-
Name your Cloud router.
-
Set Google ASN to 65511 (This can be any value. Note this value as it is required to configure the tunnel in the Check Point SASE Administrator Portal).
Following steps are optional. Perform them only if you have a peered VPC to reach through the tunnel:
-
In Advertised routes, select Create custom routes.
-
Select Advertise all subnets visible to the Cloud Router.
-
In Custom ranges, click Add Custom Route.
-
In New custom route, enter the network CIDR for the peered VPC and click Done.
-
Repeat the last two steps for each range you need to route through the tunnel.
-
-
Click Create.
-
-
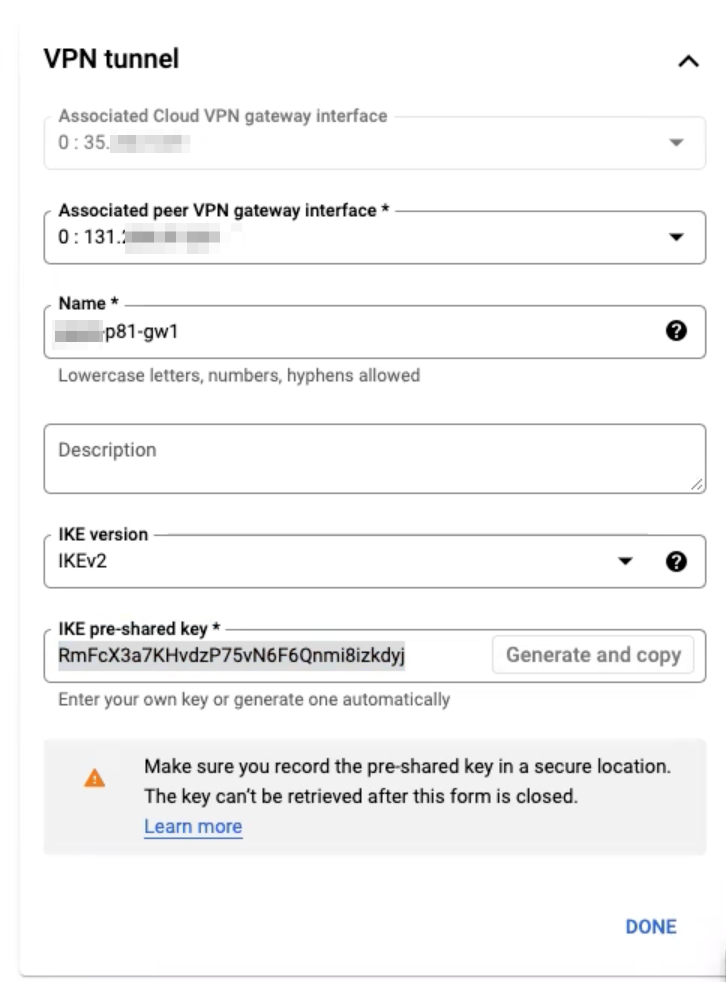
In the VPN tunnel section, select the first VPN tunnel and name it according to the gateway you created in Check Point SASE.
-
In the IKE pre-shared key field, click Generate and copy.
Special characters except dot (.) and underscore (_) are not allowed.
-
-
Select the second VPN tunnel and name it according to the gateway you created in Check Point SASE.
-
In the IKE pre-shared key field, paste the IKE pre-shared key you copied in the previous step.
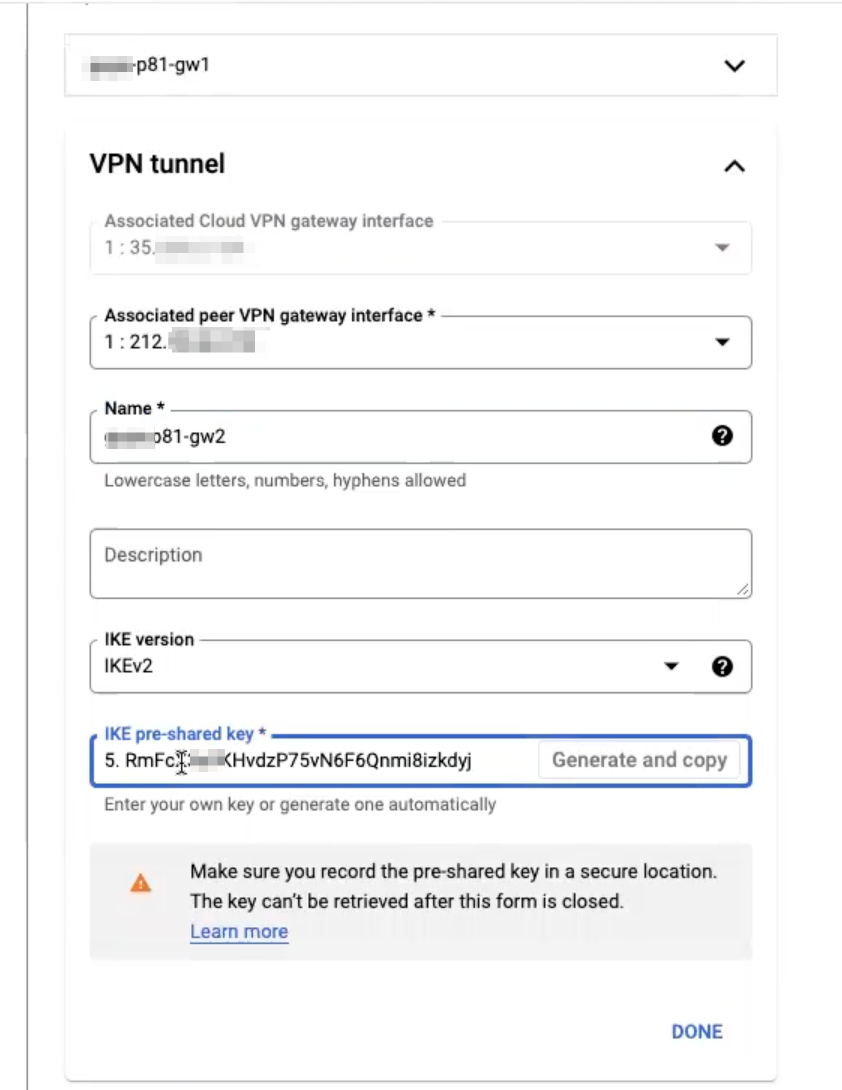
Note - This IKE Pre-shared key is used later to establish a handshake between the sites.
-
Click Done.
-
-
Click Create and continue.
-
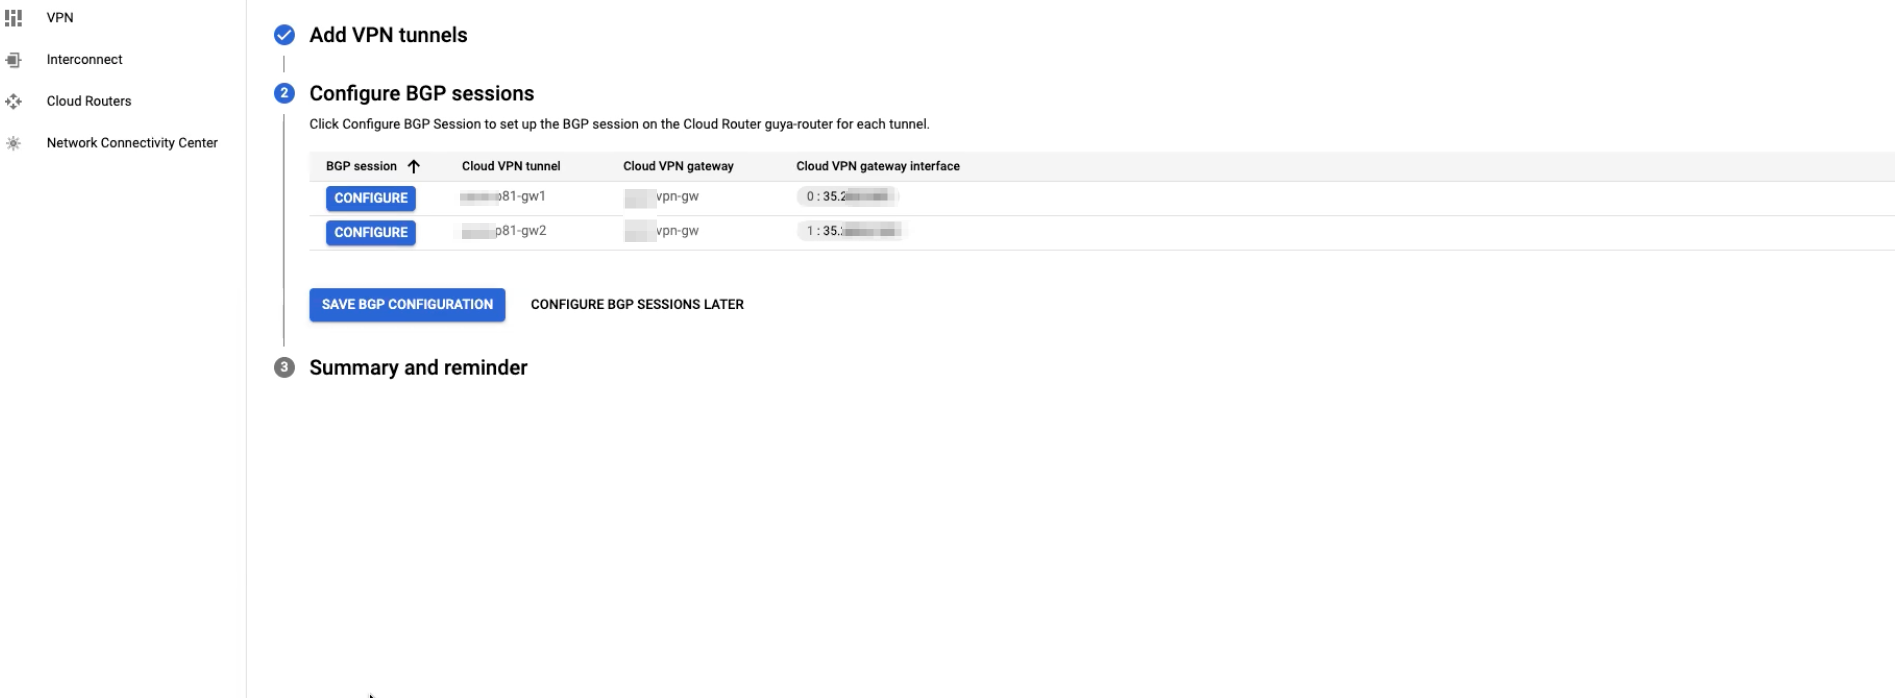
Configuring Border Gateway Protocol (BGP) Routes
-
Access the GCP console and go to the tunnel where you want to configure the route and click Configure.
-
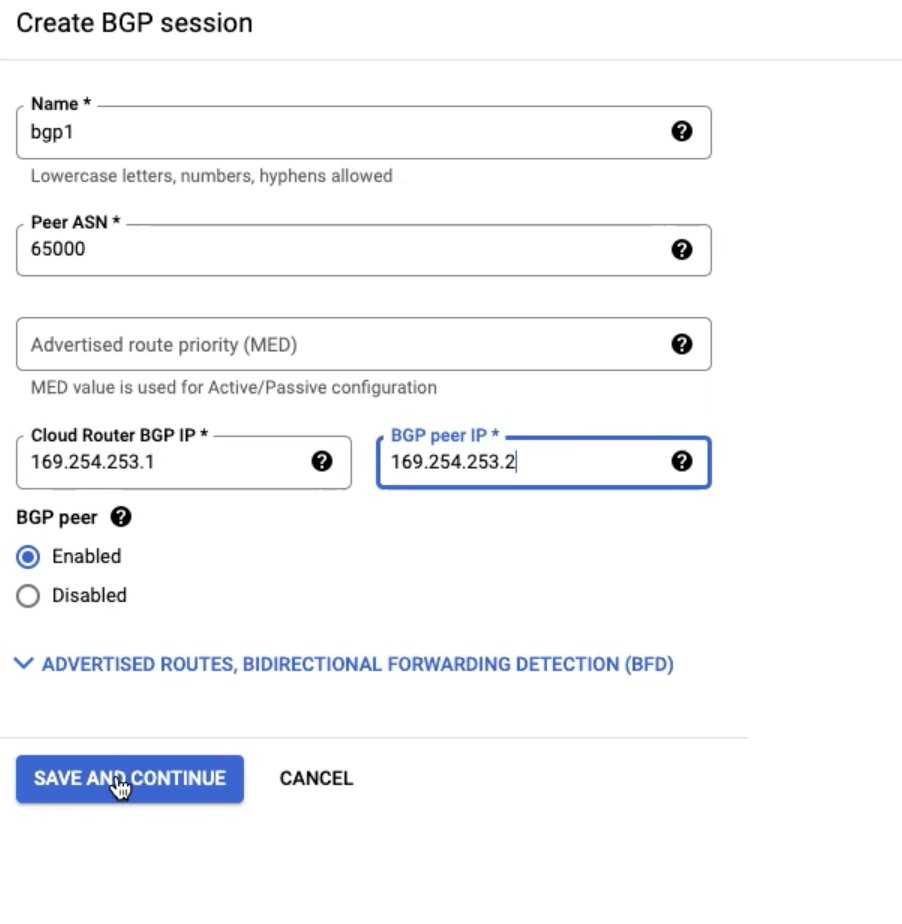
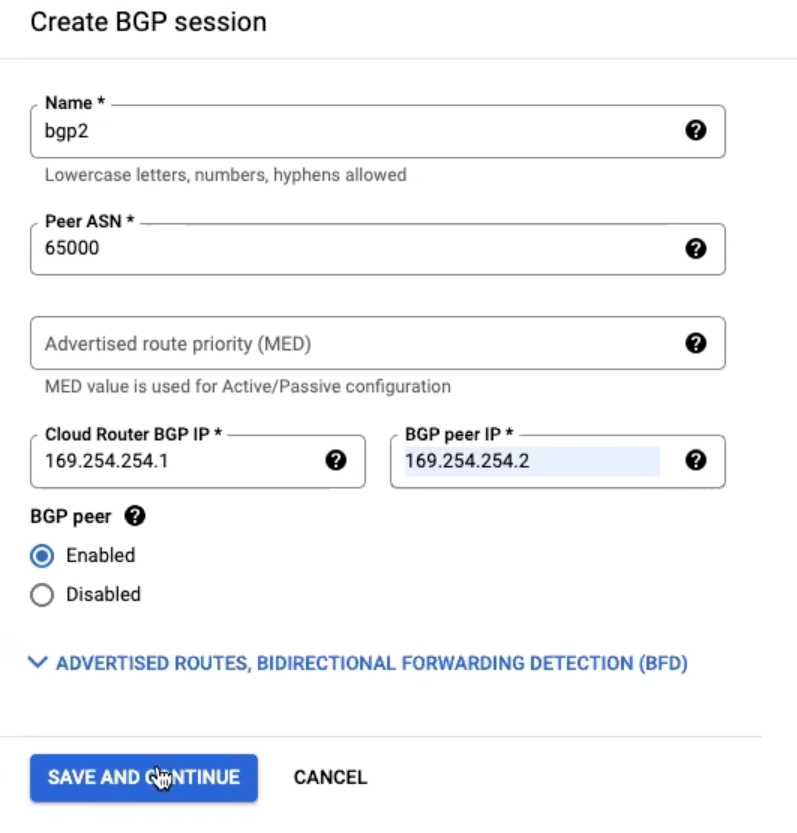
For Tunnel 1, set the BGP routes according to this image.
-
In the Peer ASN field, set the value as 64512. It represents the BGP route for Check Point SASE.
-
For Cloud Router BGP IP and BGP peer IP fields, select a unique Link-local address.
-
-
Click Save and Continue.
-
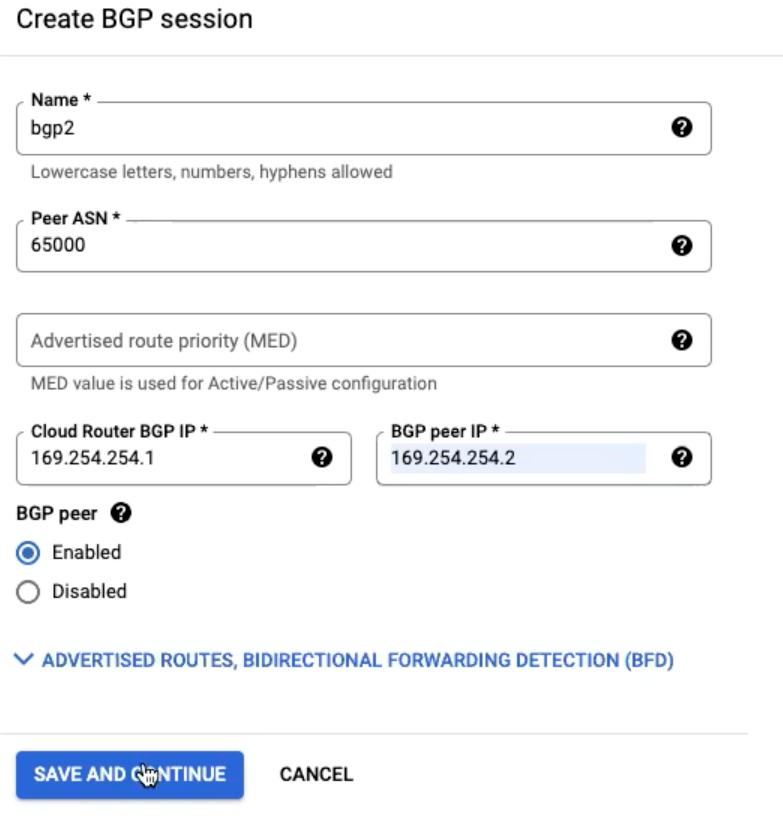
For Tunnel 2, set the BGP routes according to this image.
-
In the Peer ASN field, set the value as 64512. It represents the BGP route for Check Point SASE.
-
For Cloud Router BGP IP and BGP peer IP fields, select a unique Link-local address.
-
-
Click Save and Continue.
-
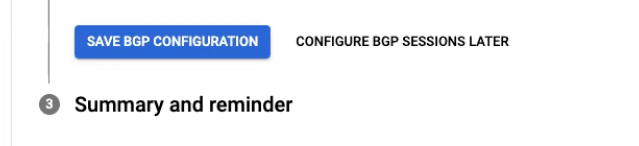
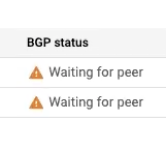
Click Save BGP Configuration.
When the tunnel setup is complete, the BGP status is displayed as Waiting for peer until the tunnels are setup in Check Point SASE.
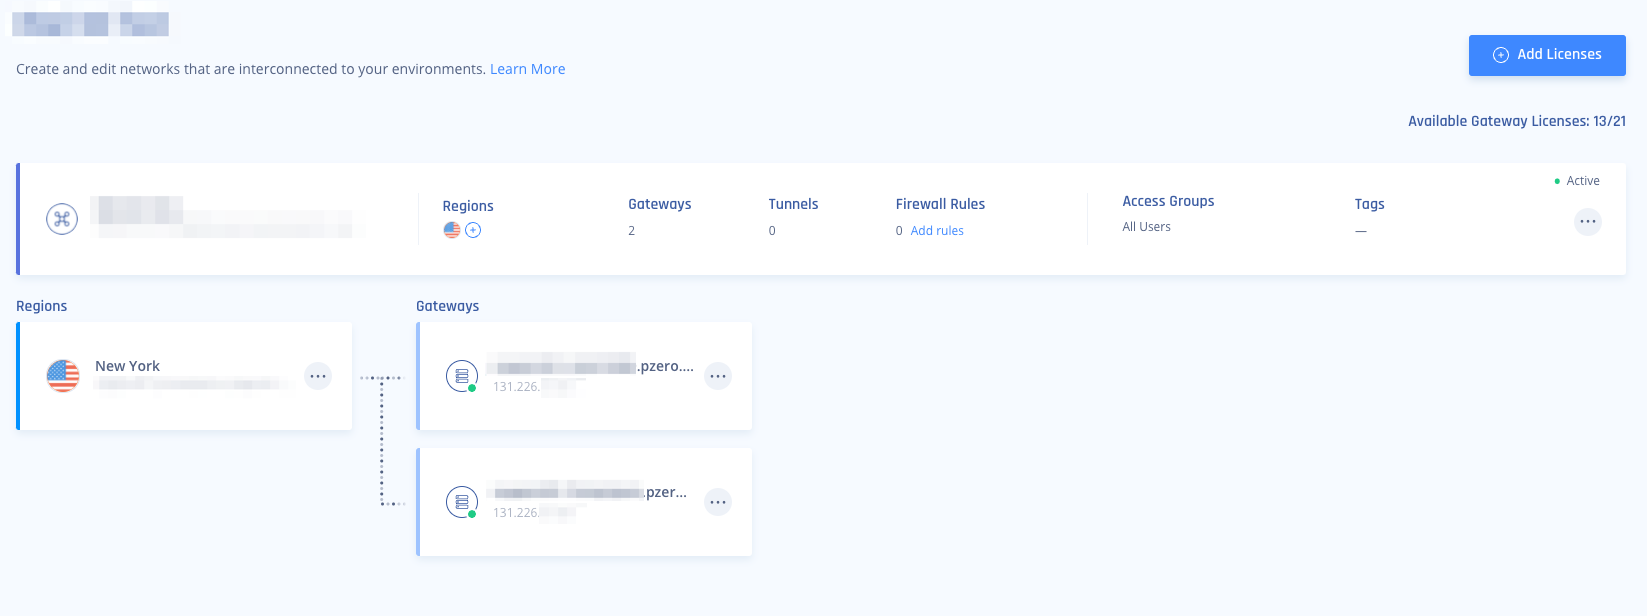
Step 2 - Creating the Tunnels in the Check Point SASE Administrator Portal
-
Access the Check Point SASEAdministrator Portal and click Networks.
-
Click the network where you want to create the tunnel.
-
In one of the gateways, click
 > Add Tunnel.
 -
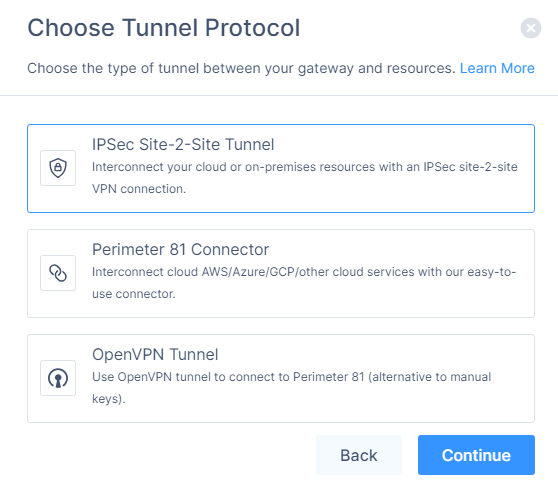
Click IPSec Site-2-Site Tunnel and click Continue.
-
Select Redundant Tunnels and click Continue.
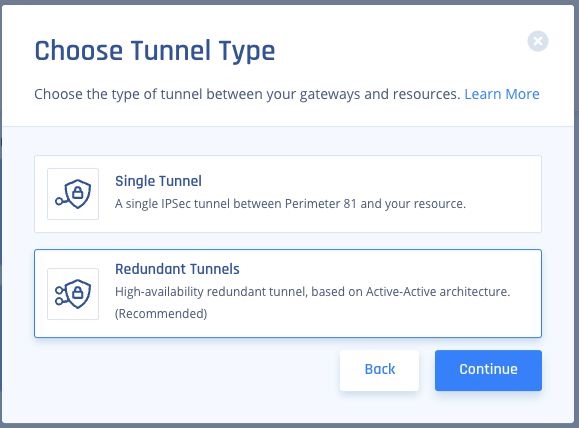
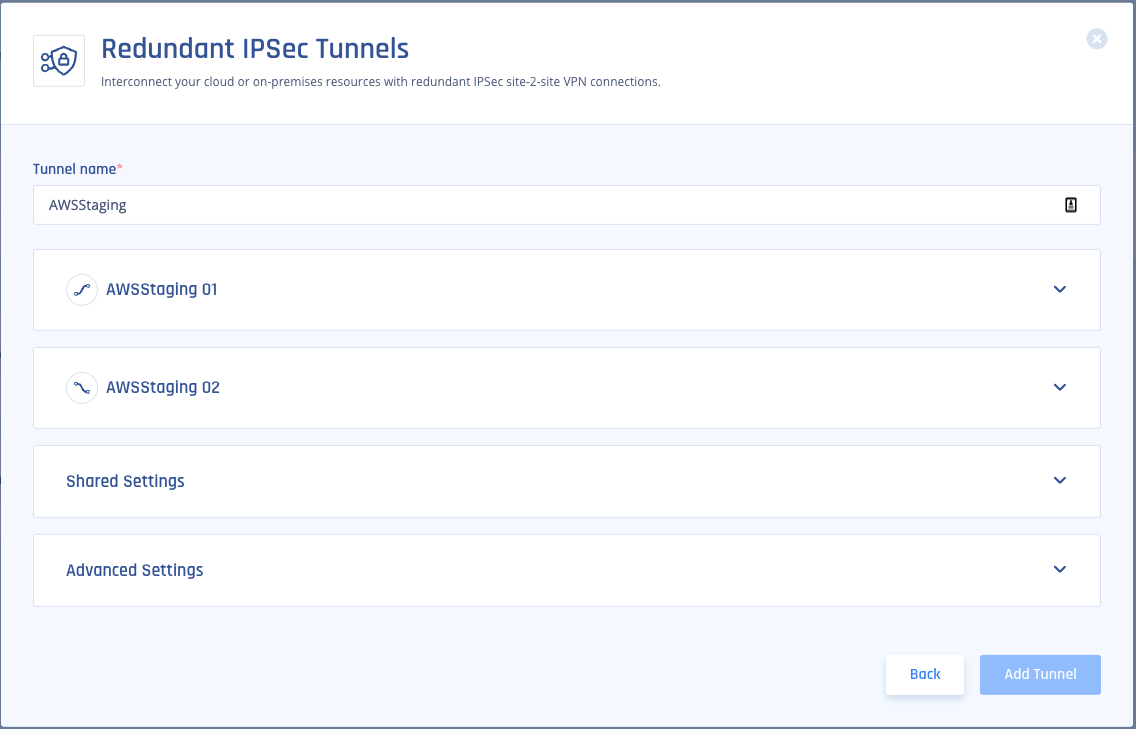
The Redundant IPSec Tunnels window appears.
-
In the General Settings section:
-
In the Name field, enter a name for your tunnel.
-
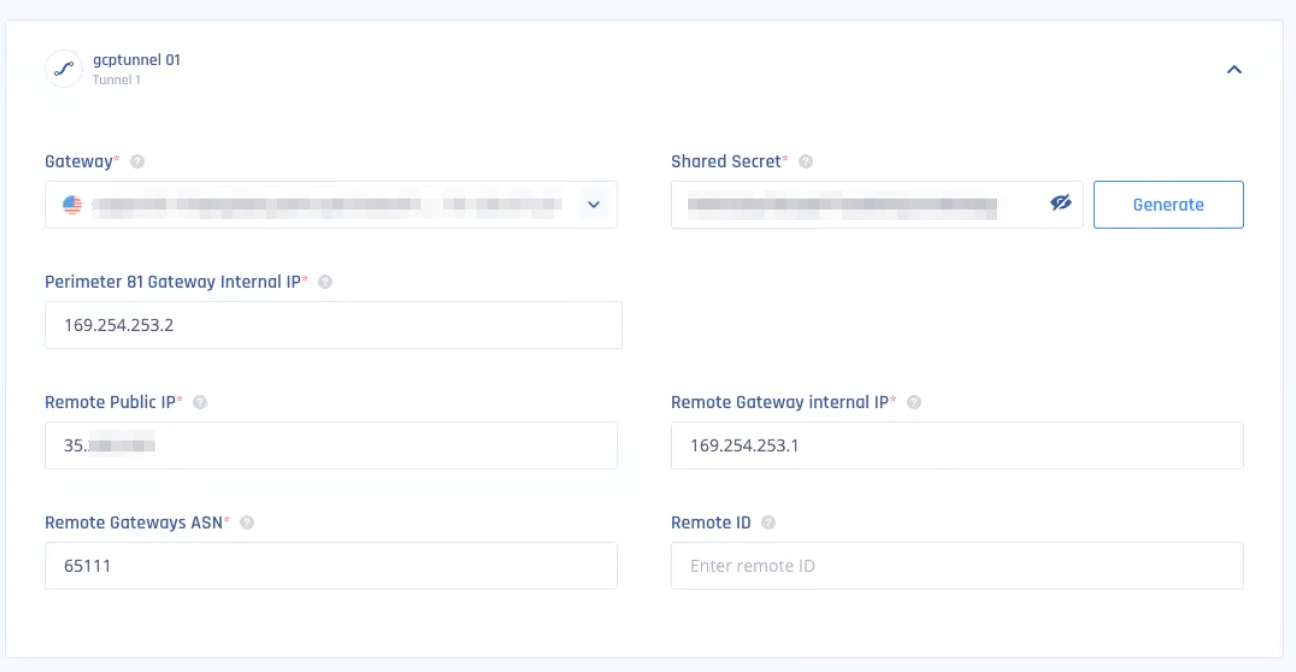
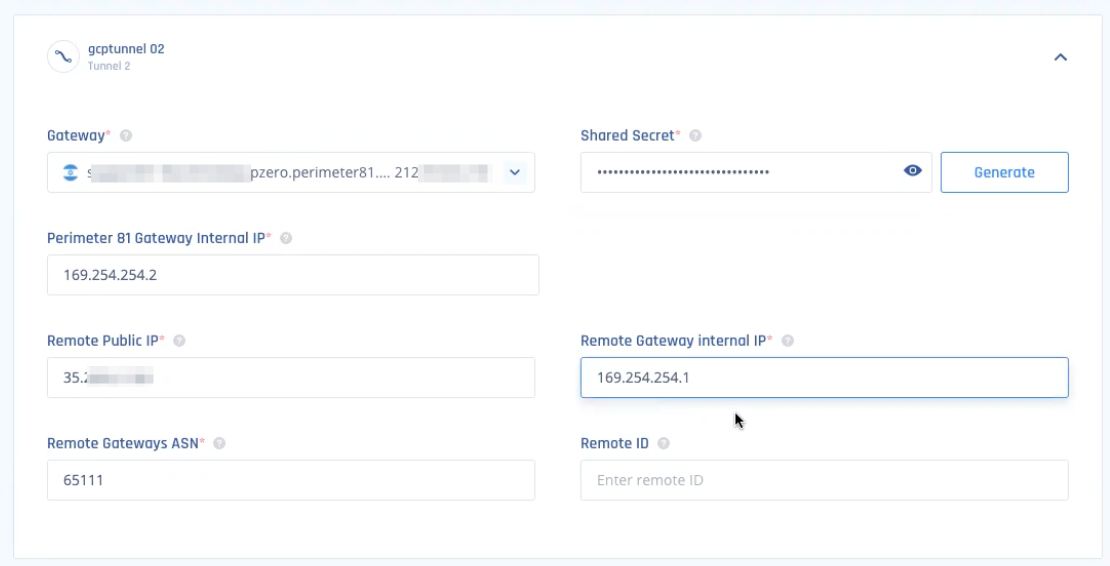
In your GCP console, in Network Connectivity > VPN, copy and paste the values for Tunnel 1 and Tunnel 2 according to the image below.
Enter ASN value as 65511 for both tunnels.

Example - Tunnel 1
Example - Tunnel 2
-
-
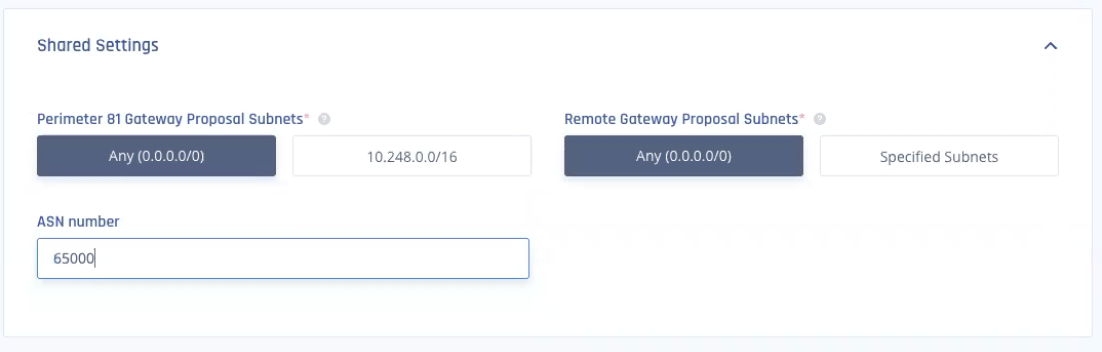
In the Shared Settings section:
-
In Proposal Subnets, select Any(0.0.0.0/0) for both sides.
-
Set ASN as 64512.

Warning - You cannot edit the ASN in Check Point SASE after you create the tunnel.
-
-
In the Advanced Settings section, enter the information for your tunnel type:
Field
IKE Version
IKE Lifetime
Tunnel Lifetime
Dead Peer Detection Delay
Dead Peer Detection Timeout
Encryption (Phase 1)
Encryption (Phase 2)
Integrity (Phase 1)
Integrity (Phase 2)
Diffie Hellman Groups (Phase 1)
Diffie Hellman Groups (Phase 2)
Cloud Vendor
Amazon AWS
Single Tunnel - AWS Virtual Gateway V2 8h 1h 10s 30s aes256 aes256 sha512 sha512 ecp521 ecp521 Single Tunnel - AWS Transit Gateway V2 8h 1h 10s 30s aes256 aes256 sha512 sha512 ecp521 ecp521 Redundant Tunnels - AWS Virtual Private Gateway V2 8h 1h 10s 30s aes256 aes256 sha512 sha512 ecp521 ecp521 Redundant Tunnels - AWS Transit Gateway V2 8h 1h 10s 30s aes256 aes256 sha512 sha512 ecp521 ecp521 Google Cloud Platform
Single Tunnel 1 V2 8h 1h 10s 30s aes256 aes256 sha512 sha512 ecp521 ecp521 Redundant Tunnels
V2 8h 1h 10s 30s aes256 aes256 sha512 sha512 ecp521 ecp521 Microsoft Azure Single Tunnel -
Azure Virtual Network Gateway
V2
3600s
27000s
10s
45s
aes256 aes256 sha1 sha1 modp1024 modp1024 Redundant Tunnels - Virtual Network Gateway
V2
9h
9h
10s 30s aes256 aes256 sha1 sha1 modp1024 modp1024 Redundant Tunnels - Virtual WAN
V2
8h
1h 10s 30s aes256 aes256 sha256
sha256
modp2048 modp2048 Other tunnel types
Alibaba Cloud V1 8h 1h 10s 30s aes256 aes256 sha1 sha1 modp1024 modp1024 IBM Cloud
V1
8h 1h 10s 30s aes256 aes256 sha256
sha256
ecp521 ecp521 1 Suggested values. For other supported ciphers, see this Google article.
-
Click Add Tunnel.
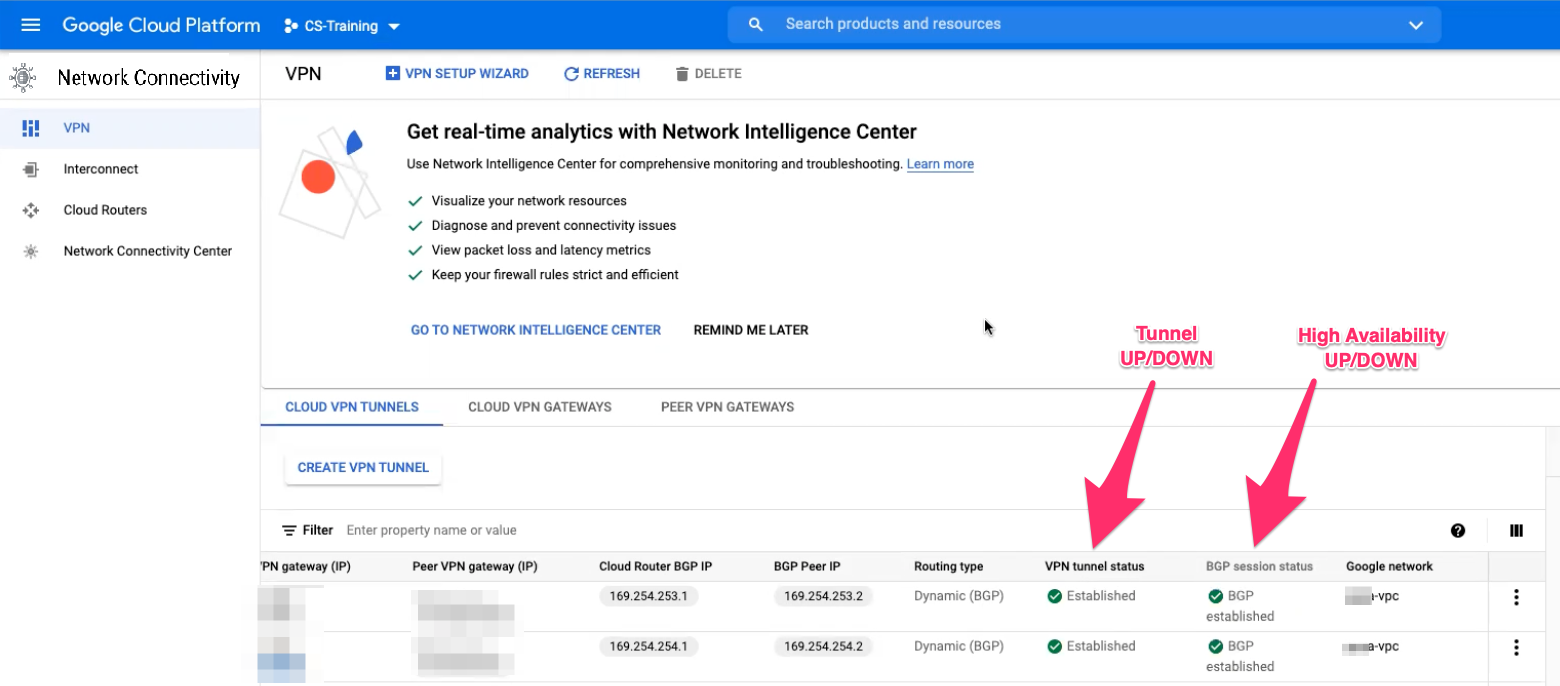
Verifying the Setup in GCP Console
-
Access the GCP console and go to Network Connectivity > VPN.
-
Verify that the VPN tunnel status and BGP session status appears with a green tick mark.