Check Point Identity and Trust Integration with Quantum Security Gateways
This document describes the Check Point Identity and Trust integration with Check Point SASE. Use shared user identities to enforce user-based security policies on Quantum Security Gateways.
Use Check Point Identity and Trust integration to send authenticated user identity information, such as login and logout events, from Check Point SASE to Check Point Identity and Trust. Check Point Identity and Trust then serves as the authoritative source of user identity for Quantum Security Gateways.
Identity information flows in one direction only:
-
Check Point SASE > Check Point Identity and Trust > Quantum Security Gateways.
-
Check Point SASE does not send identity information directly to Quantum Security Gateways.
|
|
Note -
|

Prerequisites
Before you start, make sure you meet these requirements.
Check Point Portal and Identity
-
Tenant has valid IDP and SCIM licenses in Check Point SASE.
-
Check Point SASE and Check PointIdentity and Trust are enabled in the same Check Point Portal account.
-
Check Point Identity and Trust is activated for the tenant.
-
Check Point Identity and Trust is integrated with at least one supported Identity Provider (IdP).
-
The same IdP is configured in both Check Point Identity and Trust and Check Point SASE.
-
Administrator access to the Check Point Portal.
Quantum Security Gateway
-
Quantum Security Gateway version R81.20 GA or later is installed.
-
The Security Gateway operates in User Space Firewall (USFW) mode.
-
Enable the Identity Awareness blade on the Security Gateways that enforce user-based policies.
-
Infinity Services is configured on the Security Management Server.
-
You have Administrator access to the Security Management Server.
Check Point SASE
-
Users connect using the Check Point SASE agent so that user identity and IP information is available.
-
The Quantum Security Gateway protects on-premises resources reachable from Check Point SASE.
-
A network path is configured between Check Point SASE and the Quantum Security Gateway, such as a site-to-site VPN tunnel.
-
You have administrator access to Check Point SASE.
Enabling Check Point Identity and TrustIntegration
Enable the integration in the Check Point Portal so that Check Point SASE can send identity events to Check Point Identity and Trust.
To enable the integration:
-
Access the Check Point Portal.
-
Go to Identity and Trust.
-
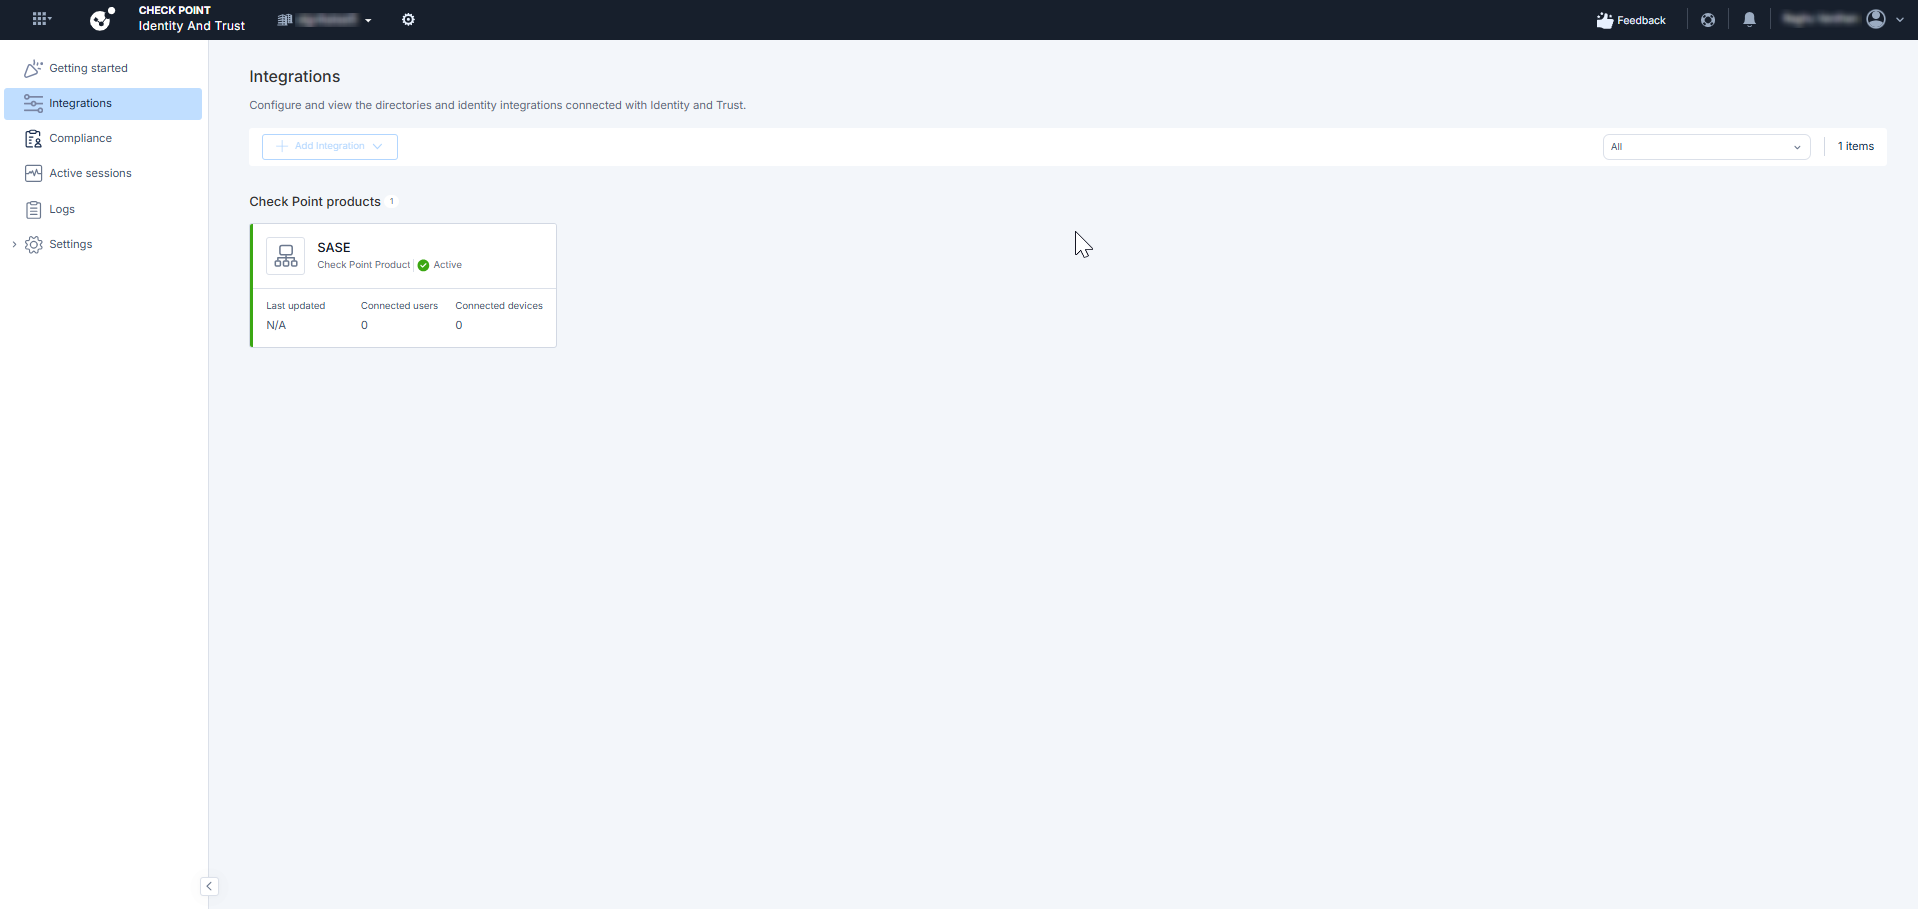
Go to Integrations.
-
Locate the Check Point SASE integration card.
-
Click Connect.
The integration status changes to Active, indicating that Check Point SASE now sends identity events to Check Point Identity and Trust.
Configuring Infinity Services
Configure Infinity Services on the Security Management Server to establish a trusted connection between SmartConsole and the Check Point Portal.
To configure Infinity Services:
-
Log in to the Check Point SmartConsole.
-
Go to Infinity Services.
-
Click Get Started.
An Instructions window appears.
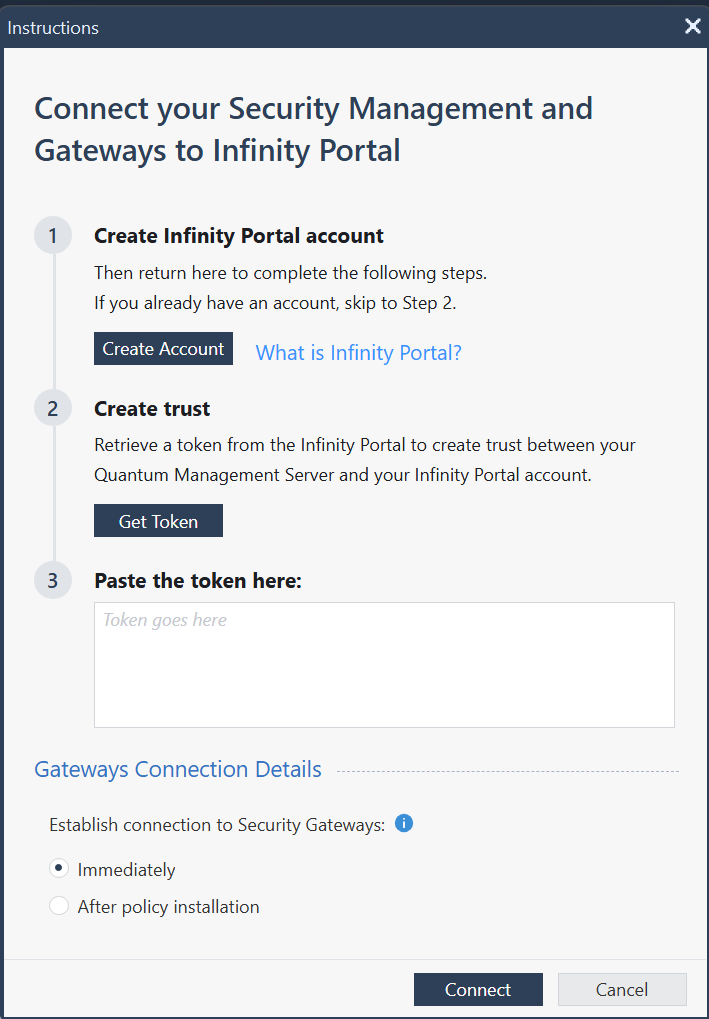
-
Click Get Token.
The Check Point Portal opens.
-
Generate a token and select the relevant Security Gateways.
-
Copy the token.
-
Return to SmartConsole and paste the token.
-
Click Connect.
Configuring Identity Sharing on the Security Gateway
Enable identity sharing on the Security Gateway to receive user identity information from Check Point Identity and Trust.
To configure identity sharing:
-
Log in to the Check Point SmartConsole.
-
Go to Security Policies and open the Security Gateway object.
-
Go to Identity Awareness > Identity Sharing.
-
Select Get identities from Check Point Identity and Trust.
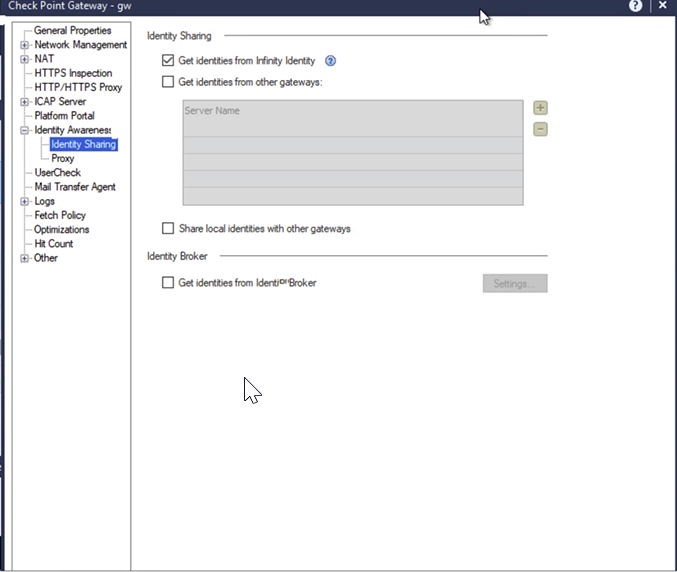
-
Click OK and Install policy.
After the policy is installed, the Security Gateway begins receiving user identity information from Check Point Identity and Trust.
(Optional) Creating an Access Control Rule
Complete this step only if you want to enforce user-based access policies using the identity information shared by Check Point SASE.
To create an Access Control rule:
-
Log in to the Check Point SmartConsole.
-
Go to Security Policies and open the Security Gateway object.
-
Click Access Roles.
-
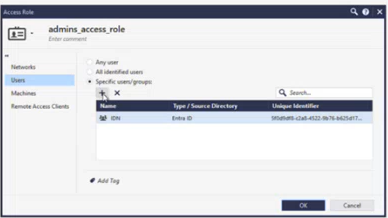
Click + to create a new Access Role, or select an existing one to edit.
-
In the Users section, select specific users or groups.
-
Click Add, then click OK to save the Access Role.
Verifying the Integration in Check Point SASE
Verify that Check Point SASE is actively sending identity events to Check Point Identity and Trust.
To verify the integration:
-
Access the Check Point SASE Administrator Portal.
-
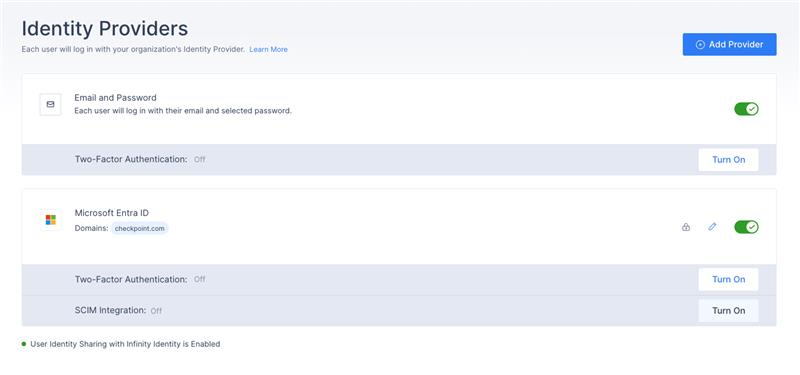
Go to Settings > Identity Providers.
-
Verify that User Identity Sharing with Check Point Identity and Trust is Enabled shows a green indicator.
Validating the End-to-End Integration
After completing the configuration, validate that identity information is shared and enforced correctly in both Check Point Identity and Trust and SmartConsole.
Validating in Check Point Identity and Trust
-
Access the Check Point Portal, go to Check Point Identity and Trust.
-
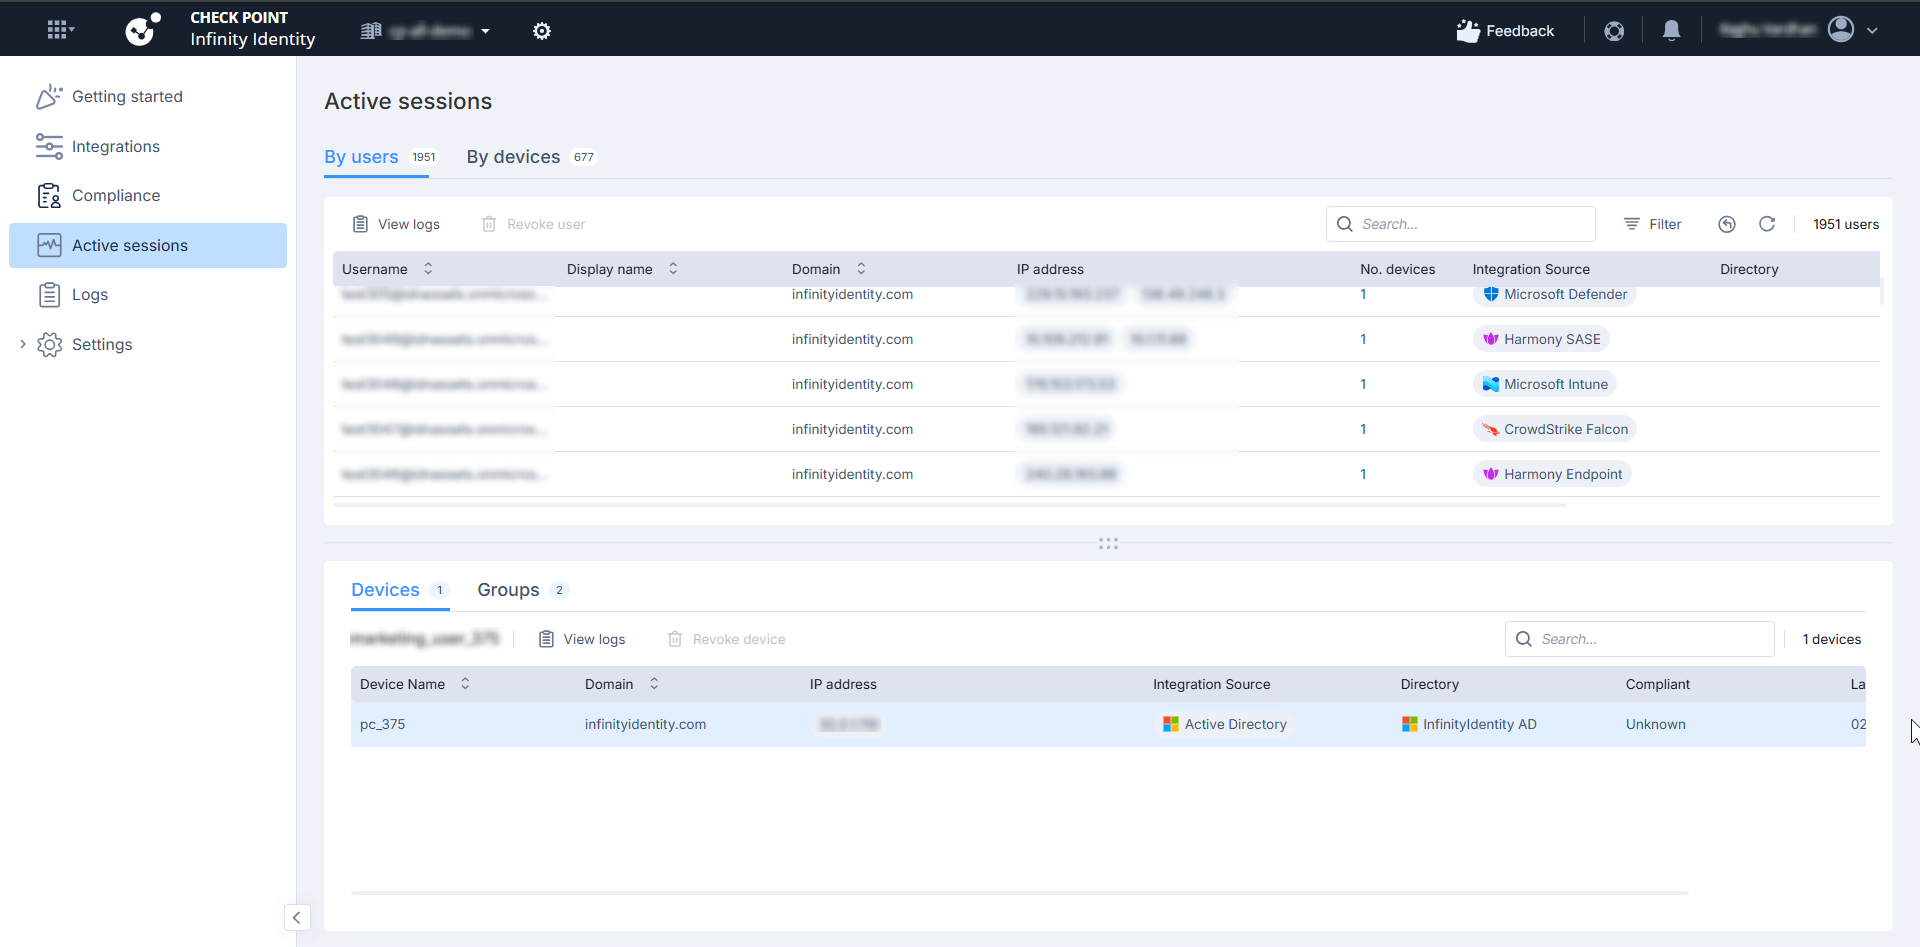
Go to Active sessions.
Verify that user sessions appear in the list.
-
Go to Logs.
Verify that login and logout events are recorded.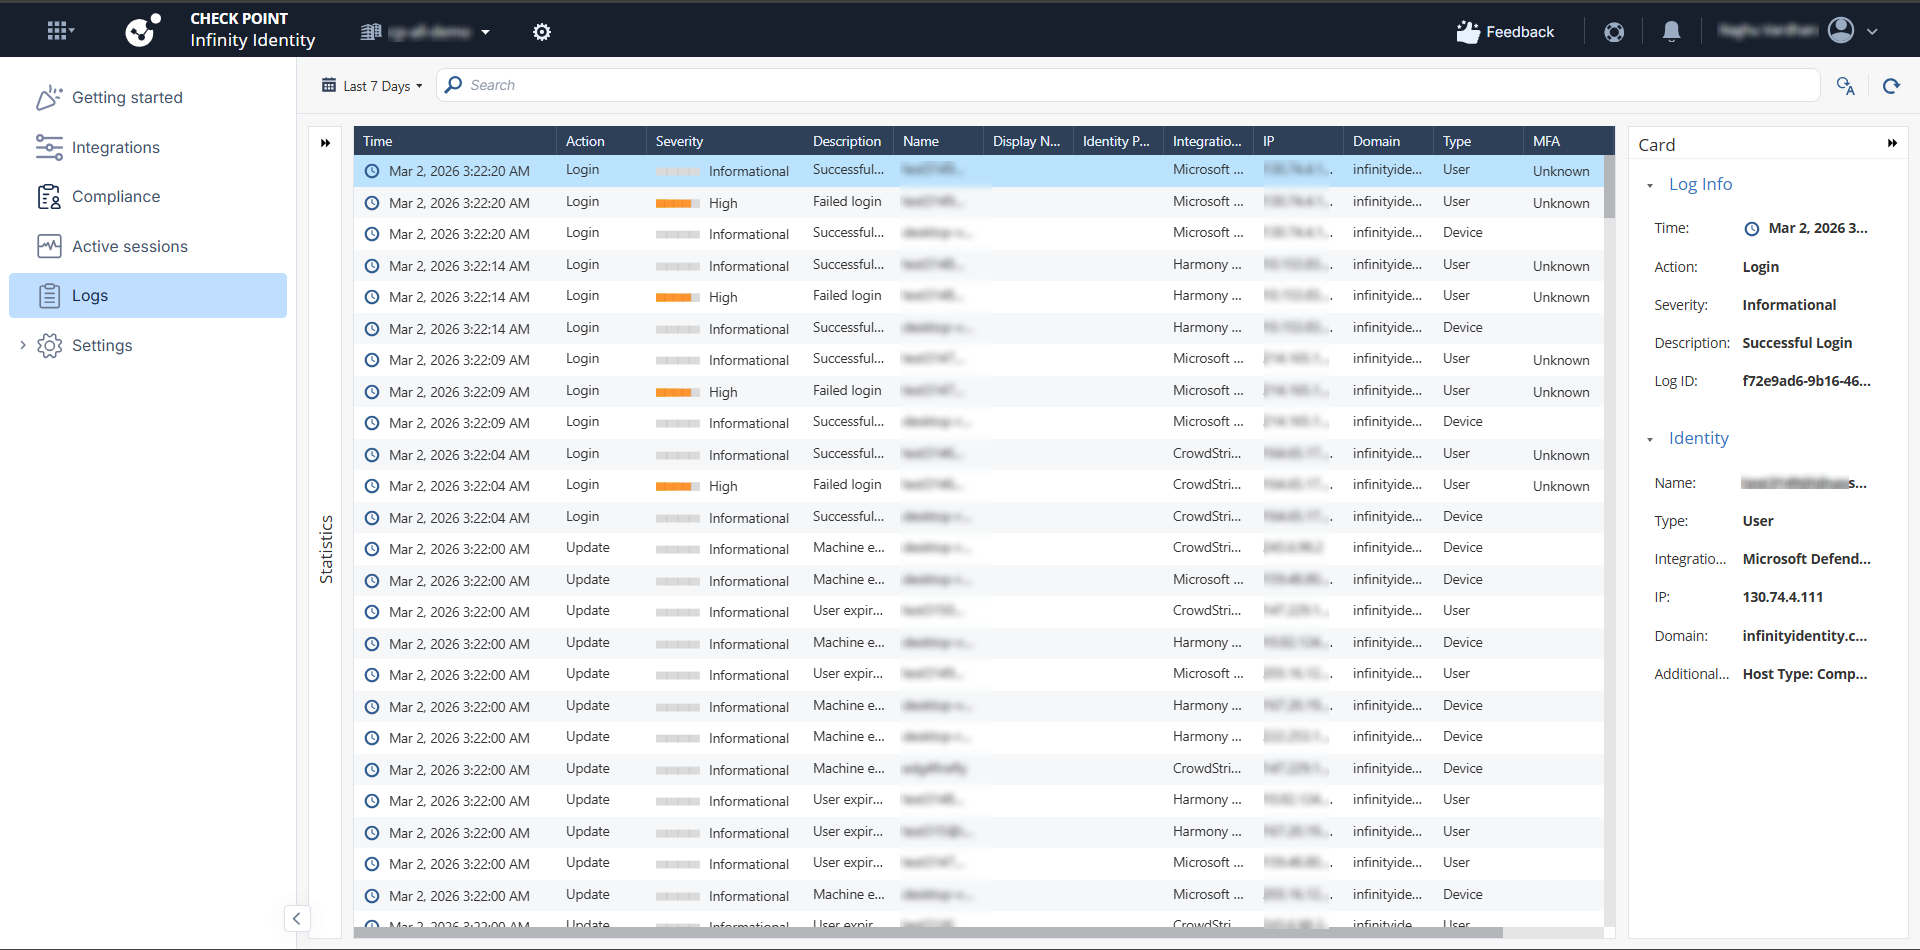
Validating in SmartConsole
-
Log in to the Check Point SmartConsole.
-
Click Logs & Events.
-
Open Logs.
-
Confirm that:
-
The user is identified.
-
The user is associated with an IP address.
-
The correct Access Role is matched.
End User Behavior
User behavior when Check Point Identity and Trust integration is enabled
|
Scenario |
Behavior |
|---|---|
|
User connects with Check Point SASE Agent while integration is enabled |
Check Point SASE sends user identity information to Check Point Identity and Trust. Quantum Security Gateways use this information to enforce user-based Access Control policies for on-premises resources. |
|
User logs off from the Check Point SASE Agent or the session ends |
Check Point SASE sends a logout or session-end event. Check Point Identity and Trust removes or expires the user–IP association. Quantum Security Gateways no longer use this association for new access attempts. |
|
User is connected to Check Point SASE while the integration is disabled |
Check Point SASE does not send identity information to Check Point Identity and Trust. Quantum Security Gateways do not receive user identity information from Check Point SASE. |
|
User connects only to SaaS applications through Check Point SASE |
SaaS application access is not affected. This integration applies only to Quantum-protected on-premises resources. |
Disabling the Integration
Disable the integration in the Check Point Portal to stop Check Point SASE from sending identity events to Check Point Identity and Trust.
To disable the integration:
-
Access the Check Point Portal.
-
Go to Check Point Identity and Trust.
-
Go to Integrations.
-
Locate the SASE card.
-
Click Disconnect.
After the integration is disabled, Check Point SASE stops sending identity events to Check Point Identity and Trust, and Quantum Security Gateways no longer receive user identity updates.